System Quick Overview
Following the instructions below is crucial to a successful installation. We recommend prepping the following items the day before you begin your installation. This will ensure all the parts are at your disposal. There are a couple of steps where it will help to have a buddy help you out. Not necessary but makes it easier. Do NOT start drinking your favorite beverage until recommend below. Plus be sure to keep your mind sharp. By getting the installation done right the first time you will enjoy years of quality sound in your Toyota Tundra. Shortcuts and rushing through the install will cause issues down the road. Take your time enjoy the install.
VIDEO INSTALLATION SERIES BELOW
Prep Time – 1-3 hours
Prepping the day before the install:
- Download test tones and burn to CD. Click here to download test tones.
- Assemble your amp rack, amplifier, distribution block etc. (see video below)
- Watch installation videos to understand the process.
- Get your six pack on ice. DO NOT OPEN until instructed! 🙂
- Go over checklist and ensure all parts are in the package. We have a checklist that we do on EACH system. But we are human so it is possible a part was missed.
Installation: 3 – 5 hours
Preparation
UNPLUG YOUR BATTERY. Remove the NEGATIVE connection from the battery and secure it AWAY from battery.
- Unplug battery – ground connection.
- Remove the door panels – if you are installing new speakers Front / Rear.
- Remove door sills.
- Remove all 4 bolts front driver seat
- Remove headunit.
- Remove front / rear speakers.
- Remove dash speakers speakers.
- If you will be matting your doors we suggest doing this before you begin the steps below. Keep in mind matting will add a full day to your install.
Installation Steps:
- Run power wire from battery to new amp location. (see video)
- Assemble the fuse block and complete under hood details. (Do not connect to battery)
- Run subwoofer wire to rear of vehicle per the installation video.
- Install amps / amp rack per video. (do not connect speaker output connections)
- Connect input side of amp first. (Blue molex plugs from direct connect harness)
- Connect battery
- Tune amplifiers per tuning video(s).
- Install front / rear speakers.
- Install subwoofer.
- Test system – ensure playing correctly.
- disconnect battery.
- Install center console.
- Install seats BEFORE installing door panels and door sills. (battery should be unplugged)
- Install door sills.
- Install door panels.
- Connect battery.
- Test the sound and ensure all playing properly.
- Open a single beverage, beat your chest and listen to your tunes for about 10 minutes.
- Finish cleaning up odds and ends.
- Be sure to save ALL stock parts.
Congratulations you just installed an audio system that would have cost thousands of $ at your local audio shop.
System 1 Install Videos:
Preparing for installation:
Assemble Amp Rack & 5 Channel Amp
How to remove head unit:
How to remove tweeters / dash speakers:
How to remove door panels:
How to remove front driver seat:
NOTE: YOU CAN LEAVE SEAT IN PLACE JUST LEAN IT BACKWARDS
Installing Power Wire:
How to install Front Door Speakers:
How to install subwoofer wire:
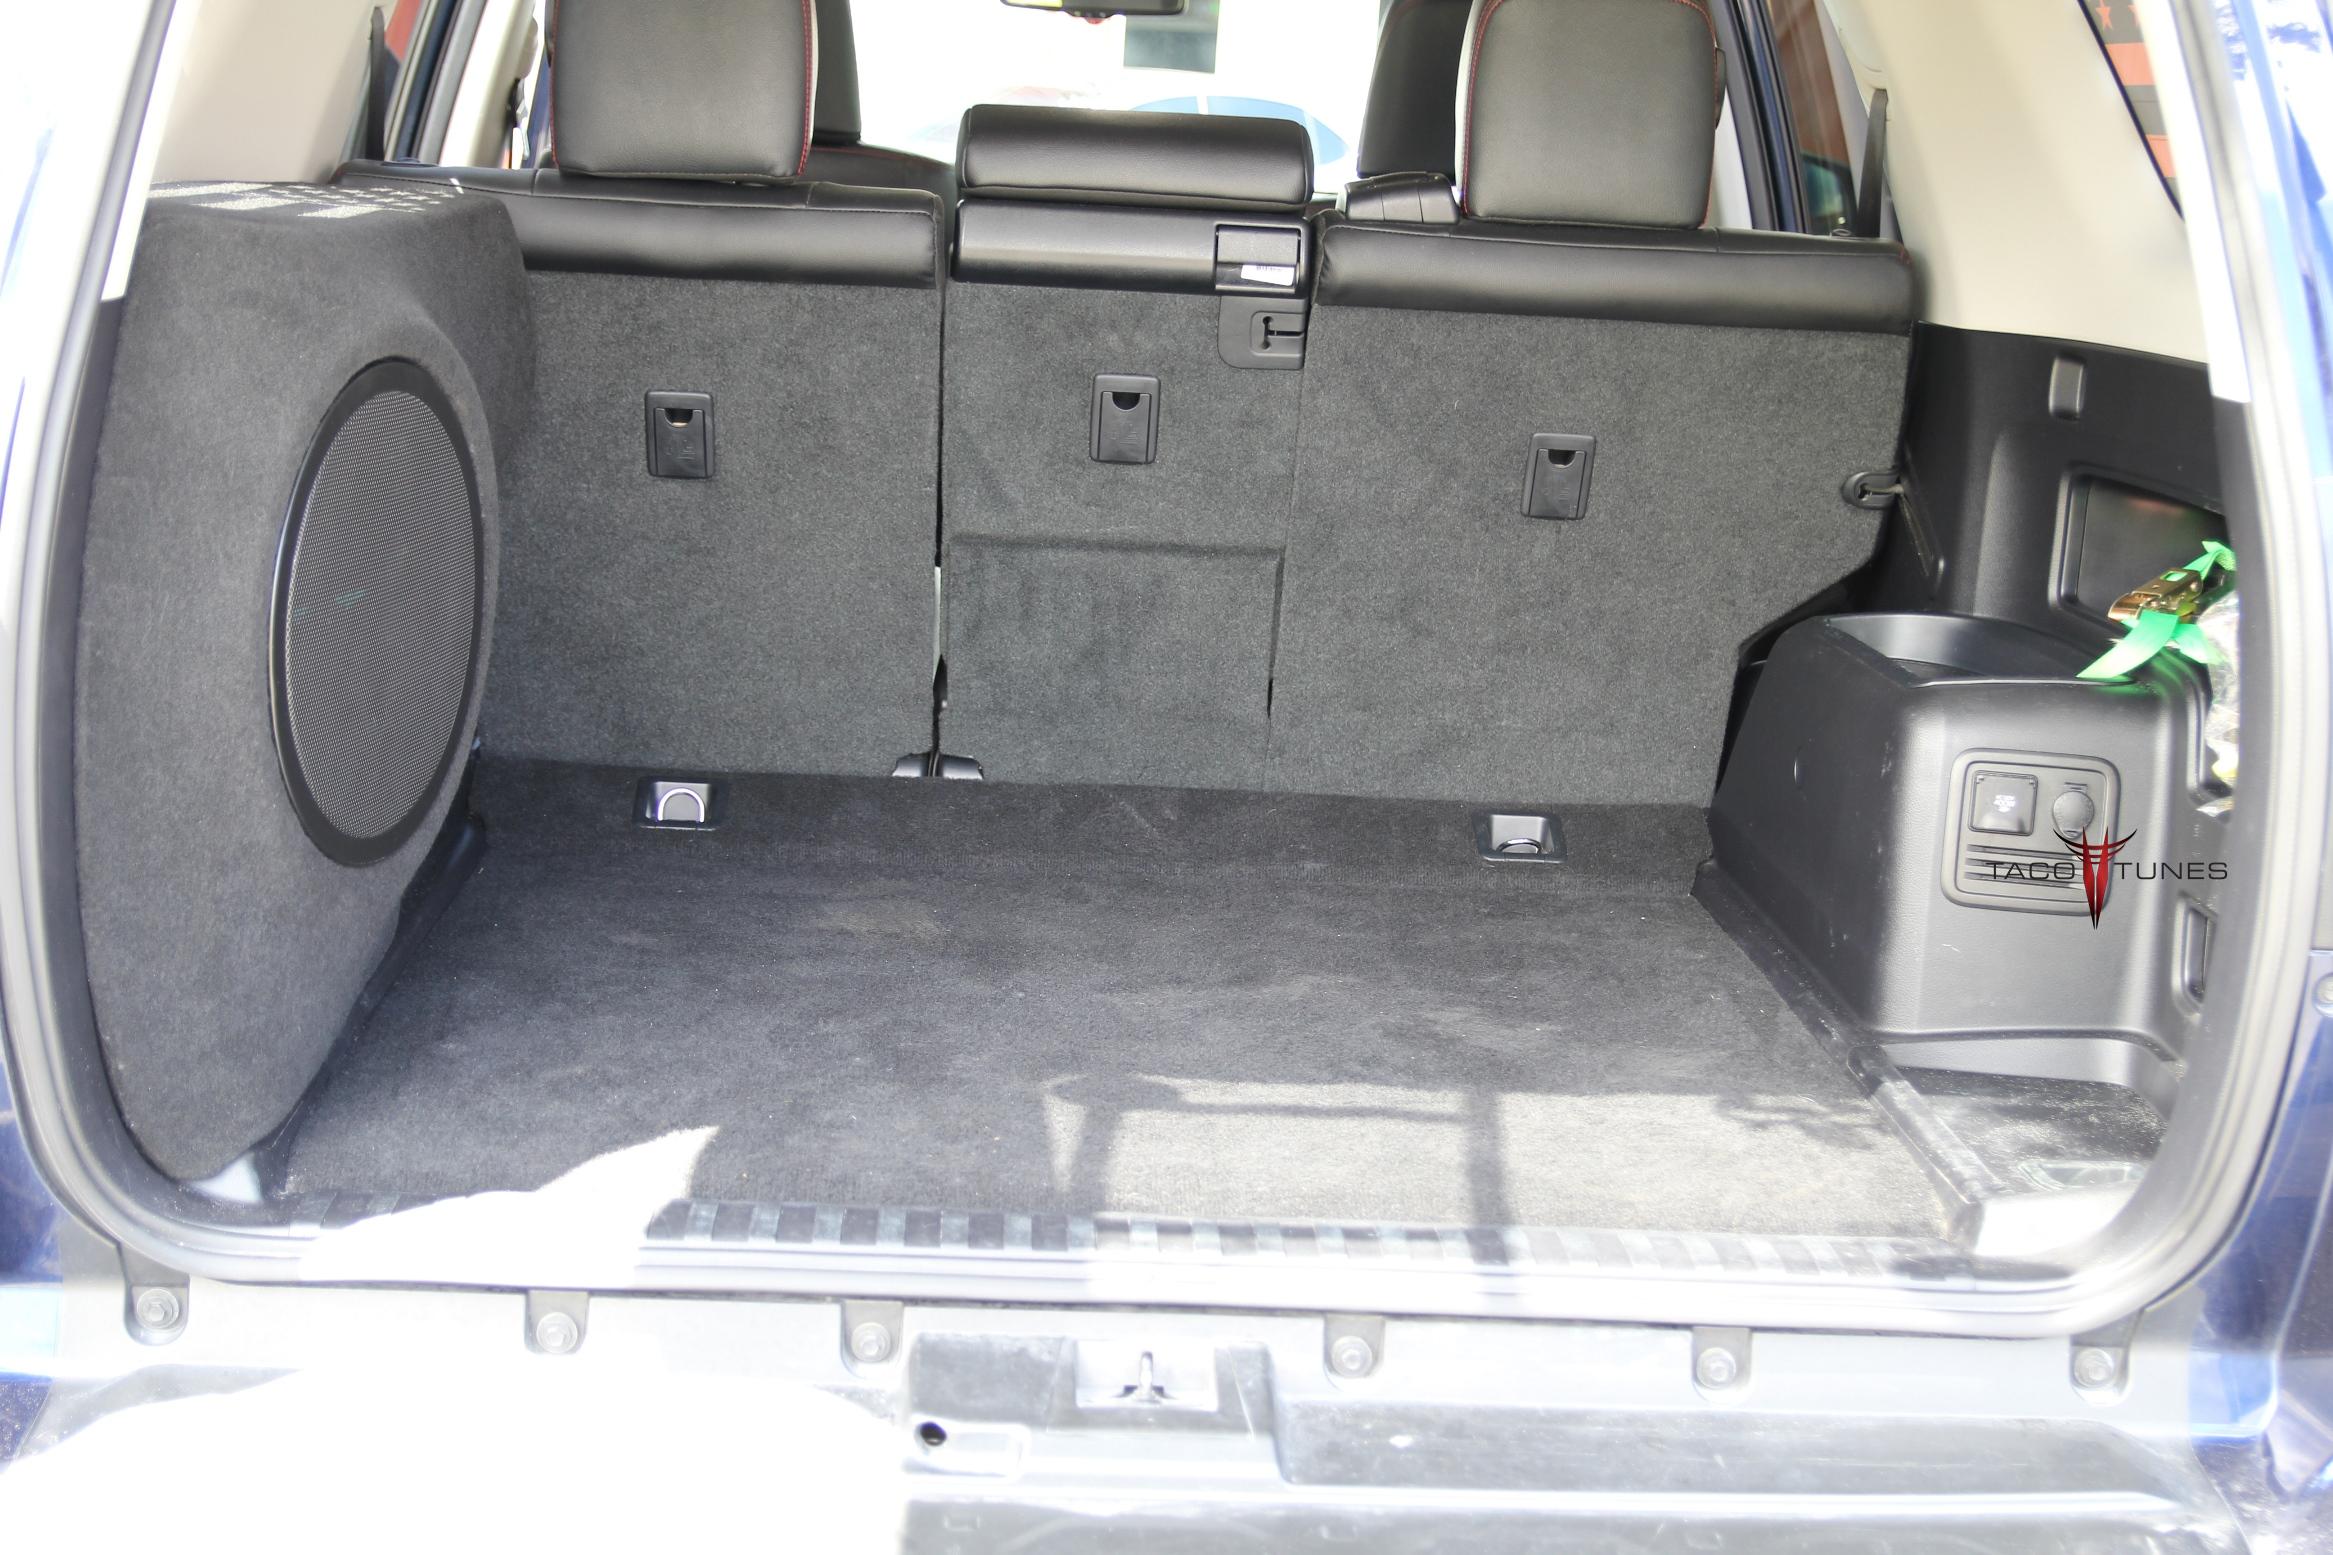
Install / Assemble Subwoofer Box:
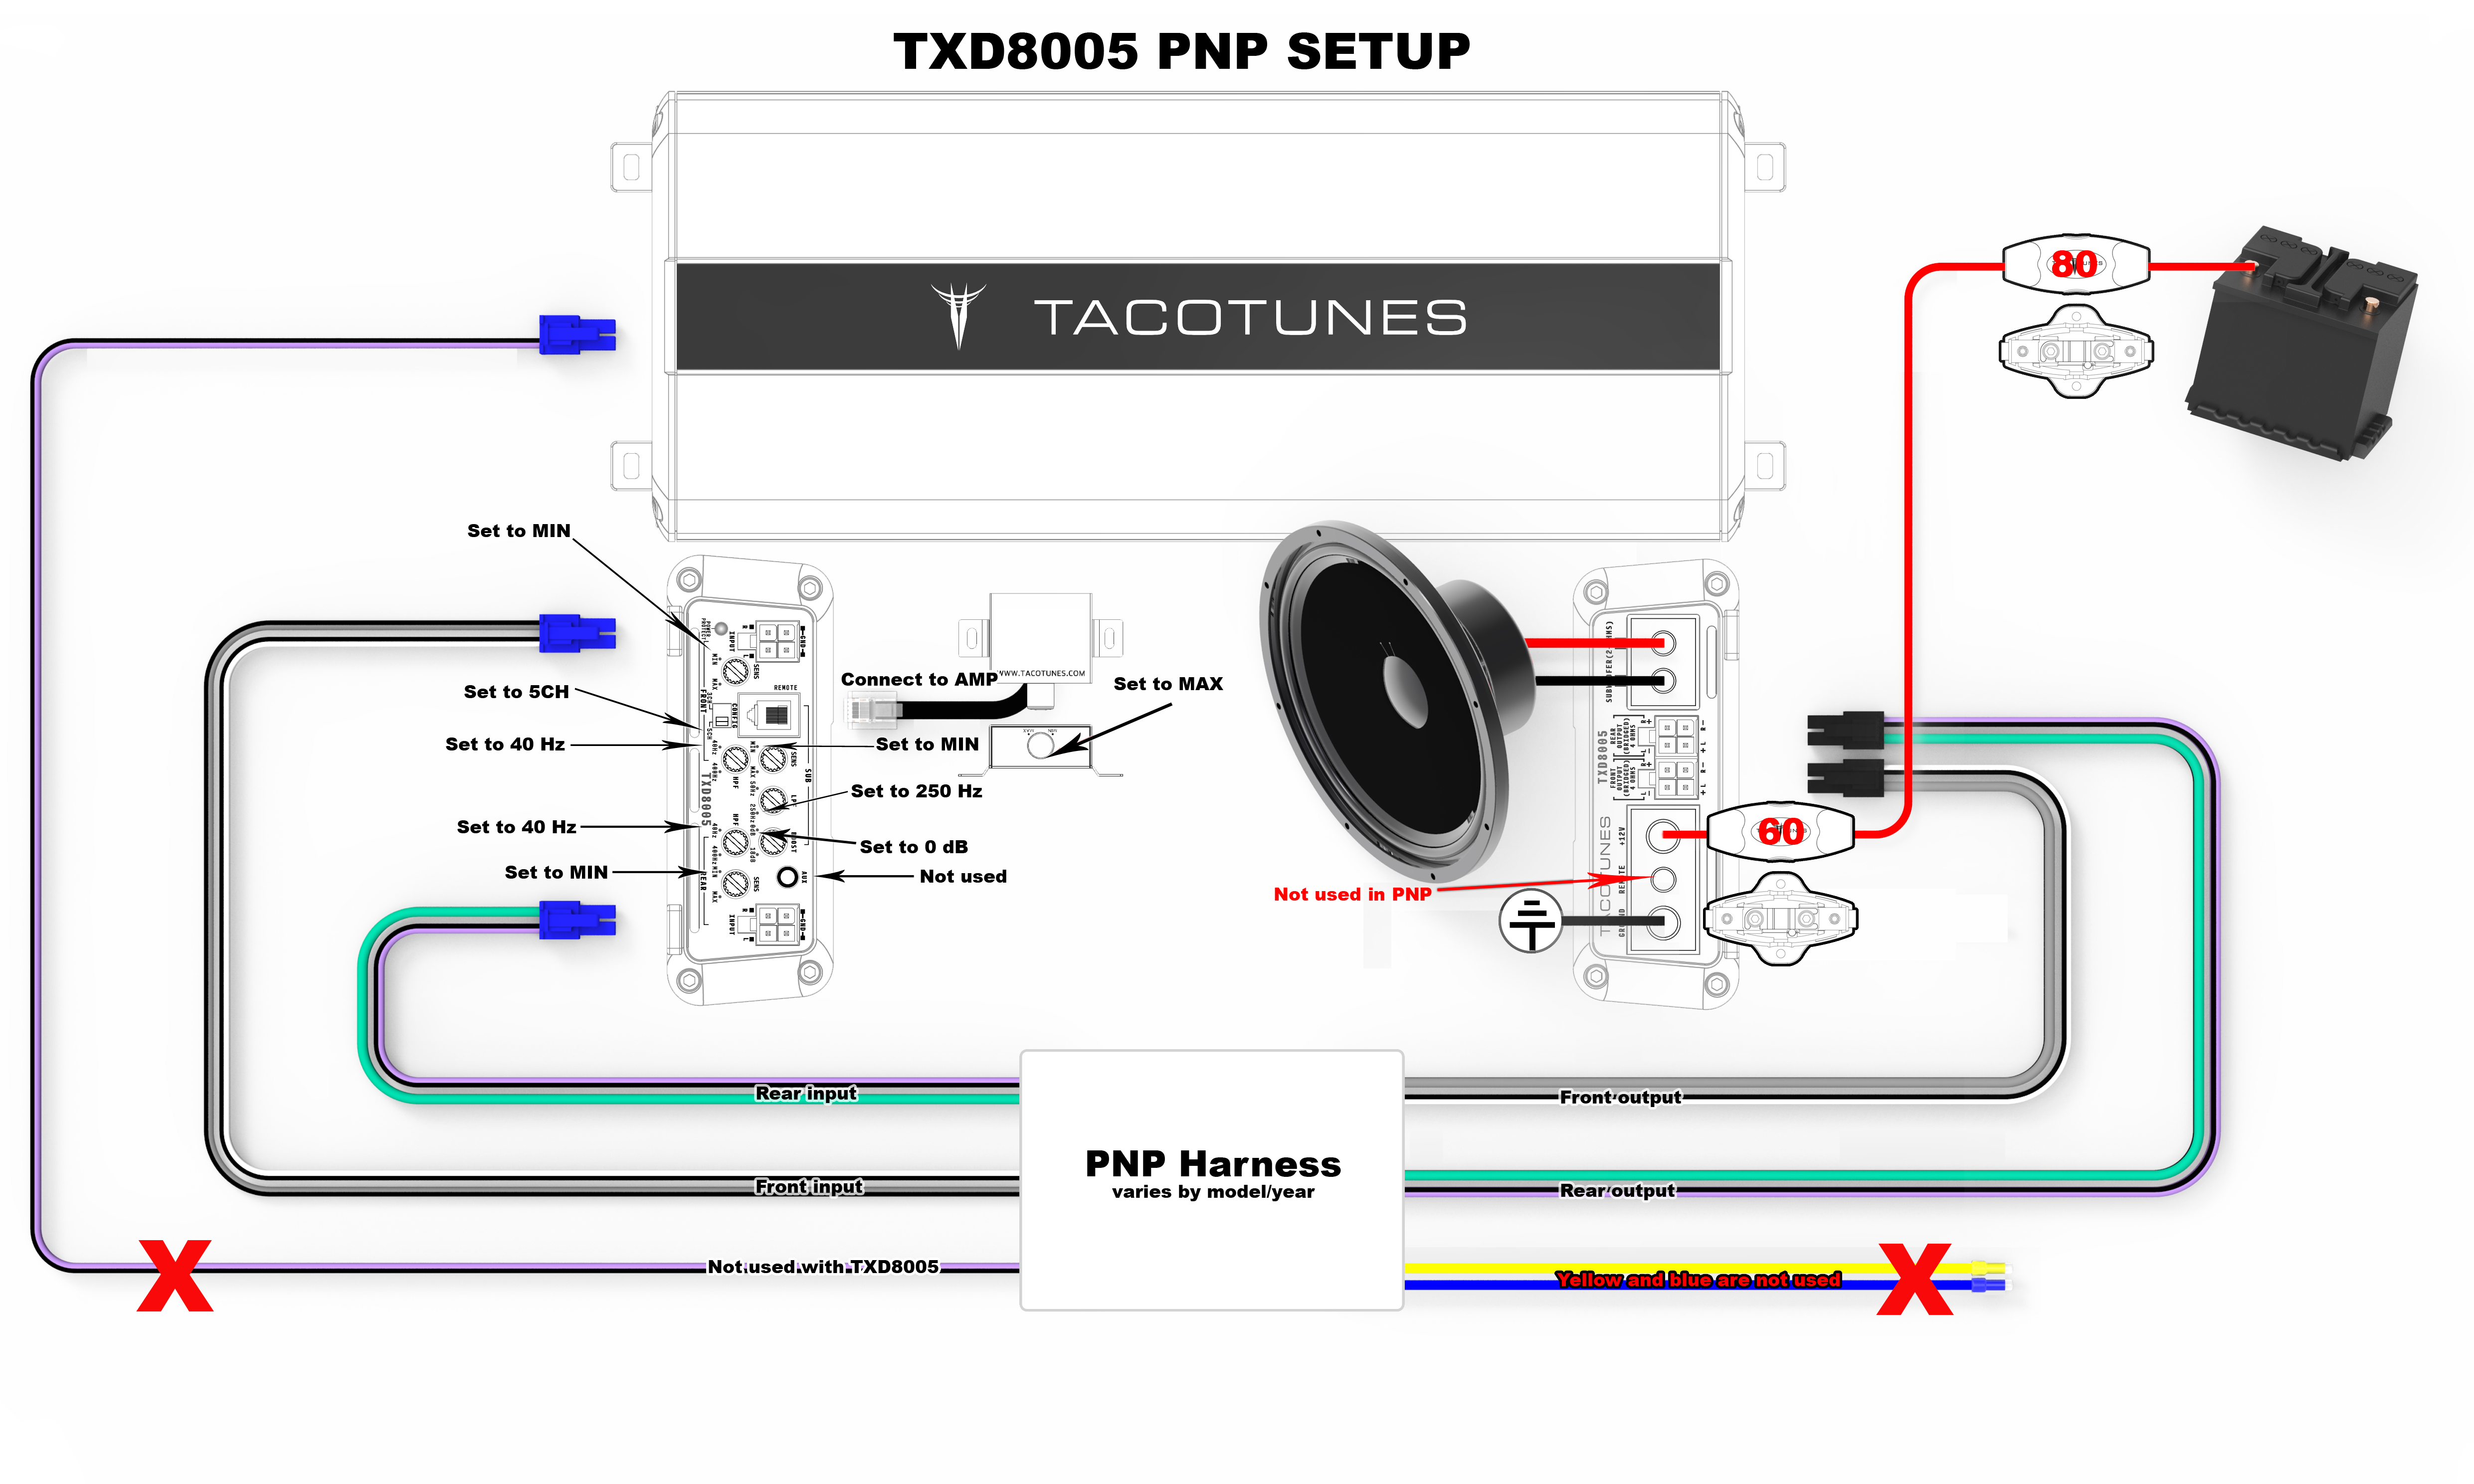
How to tune TXD8005
How to tune TXD8005 (System 1)