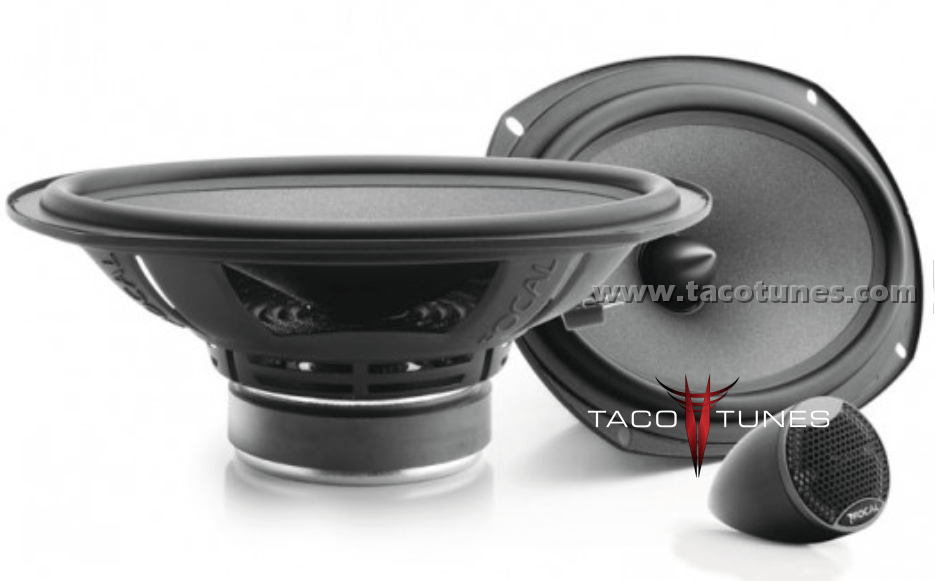
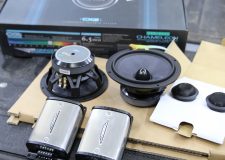
Focal Performance PS 165 Component Speakers Toyota Tundra
Focal Performance PS 165 Component Speakers
Toyota Tundra Focal Performance PS 165 Component Speakers
To install Focal Performance PS 165 Component Speakers into your Toyota Tundra, you will want to use tacotunes.com speaker adapters designed to work in your Tundra. Focal Performance PS 165 Component Speakers require a 5.6” cutout diameter for the mid range speakers. The Focal Integration 165 VRS Component Speakers tweeters will require a 1.677″ cutout diameter.
Focal Integration ISS 690 Component 6×9 Speakers Toyota Tundra
Toyota TundraFocal Integration ISS 690 Component 6×9 Speakers
To install iFocal Integration ISS 690 Component 6×9 Speakers into your Toyota Tundra, you will want to use tacotunes.com speaker adapters designed to work in your Tundra. The Focal Integration ISS 690 Component 6×9 Speakers work with our 6×9 speaker mounts for the mid range speakers. The Focal Integration ISS 690 Component 6×9 Speakers tweeters will require a 1.677″ cutout diameter.
Focal Integration 165 VRS Component Speakers Toyota Tundra
Focal Integration 165 VRS Component Speakers
Toyota Tundra Focal Integration 165 VRS Component Speakers
To install Focal Integration 165 VRS Component Speakers into your Toyota Tundra, you will want to use tacotunes.com speaker adapters designed to work in your Tundra. TheFocal Integration 165 VRS Component Speakers require a 5.6” cutout diameter for the mid range speakers. The Focal Integration 165 VRS Component Speakers tweeters will require a 1.83″ cutout diameter.
6-3/4″ component speaker system (includes 2 woofers, 2 tweeters, 2 crossover networks, and hardware)
shallow-mount Polyglass woofer with butyl rubber surround
non-resonant zamak (zinc alloy) basket
aluminum/magnesium inverted dome tweeter
outboard crossover with 3-level tweeter control
grilles included
6-60 watts RMS power range (120 watts peak)
frequency response: 70-28,000 Hz
sensitivity: 93 dB
depth: 2-1/4″
warranty: 1 year
Integration
You have a car and you enjoy listening to music. We’ve got what you need: the systems of the Integration line. Easy and quick to install, you can even do it yourself, easily replace your original system and these speakers will give you the best Focal sound.
Toyota Tundra Focal Access 165A1 SG Component Speakers
To install Focal Access 165A1 SG Component Speakers into your Toyota Tundra, you will want to use tacotunes.com speaker adapters designed to work in your Tundra. The Focal Access 165A1 SG Component Speakers require a 5.6” cutout diameter for the mid range speakers. The Focal Access 165A1 SG Component Speakers tweeters will require a 1.8″ cutout diameter.
component speaker system includes two 6-3/4″ woofers, 2 tweeters, 2 external crossovers, and 2 woofer grilles
humidity-resistant, woven glass-fiber woofer in non-resonant ABS/fiberglass basket
butyl rubber surround
1″ aluminum inverted dome tweeter
external crossover with 3-position tweeter level
4-ohm impedance
6-60 watts RMS power range (120 watts peak)
frequency response: 60-20,000 Hz
sensitivity: 92 dB
mounting depth: 2-9/16″
warranty: 1 year
Access SG
Access the Musicality of Focal
Discover the world of Focal sound quality with Access SG, a range that incorporates technology, performance and affordability. The same Focal character and our philosophy of “The Spirit of Sound” is displayed by the extreme attention to detail found at every development stage for the various speakers within the Access SG line. The essential component of these speakers, in terms of quality of reproduction, richness of sound and image detail is the inverted dome aluminum tweeter, whose inclusion represented a unique Focal technology into a more affordable market segment. The subwoofers combine high sensitivity and high power handling. The woven glass fiber cone found on all Access SG line speakers and subwoofers combine the dynamics and precision on mid-range frequencies while offering deep, articulated bass.
TN 44 Tweeter
Aluminum inverted dome tweeter technology offers significant rigidity and lowers distortion. The main advantage of the inverted dome shape is ideal air coupling due to its inverted shape, which allows a very wide soundstage and very accurate image unlike a traditional raised dome, which produces a weak coil/dome energy transfer.
All Weather Woven Glass Fiber Cone
The Access SG speakers and subwoofers are built with a light and stiff cone coupled with a butyl rubber surround, that offer a degree of quality never before encountered at this price level. This special all weather cone, will perform in hot and humid environments without distortion or warping. The subwoofer’s power handling and reliability are remarkable thanks to deliberately oversized voice coils, resulting in deep and accurate bass.
Crossover
The Access SG crossovers found in all Access SG Component systems fully reflect Focal’s philosophy, which is oriented towards in-car application and uncompromising quality requirements. Polypropylene capacitors bring to the Components high fidelity and distortion free dynamics. Level control on the crossover allows further refinement of the tuning of the tweeter in any mounting location.
Clarion SQR 1722 Component Speakers Toyota Tundra Picture
Clarion SQR 1722 Component Speakers
Toyota Tundra Clarion SQR 1722 Component Speakers
To install Clarion SQR 1722 Component Speakers into your Toyota Tundra, you will want to use tacotunes.com speaker adapters designed to work in your Tundra. The Clarion SQR 1722 Component Speakers require a 5.6” cutout diameter for the mid range speakers. The Clarion SQR 1722 Component Speakerstweeters will require a 1.8125″ cutout diameter.
How to install Alpine SPS 110TW Tweeters in your Toyota Tundra
Below you will find instructions on how to install Alpine SPS 110TW Tweeters. Please be sure to watch our videos on how to install the tweeter mounts. When you order these from our site, you will want to specify a custom size cutout @ 2.07″ cutout
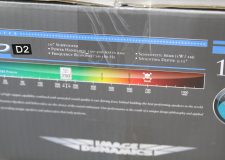
power handling: 5-150 watts RMS (450 watts peak power)
frequency response: 1,000-29,000 Hz
impedance: 4 ohms
sensitivity: 88 dB
flush-mount depth: 11/16″
warranty: 1 year
Alpine SPS 110TW Tweeters Toyota Tundra
The Look You Want
The Type-S Component tweeters include a removable logo, so you can go for a high-profile look or keep it stealth… your choice.
Easy to Install
Type-S Component tweeters come with a 15-degree swivel flush cup mount and and stealth OEM mount for easy integration into any car. Plus, at only ¾” deep (flush mount), they will fit virtually anywhere.
The Type-S component tweeter borrows some Type-R technology like a copper-clad aluminum voice coil, copper shorting cap, high-grade neodymium magnet, and aluminum bobbin. These features mean that the SPS-110TW deliver best-in-class power handling of 100 watts RMS and 300 watts peak, so turn up the volume!
High Power Handling for High Volume
The Type-S component tweeter borrows some Type R technology like a copper-clad aluminum voice coil, copper shorting cap, high-grade neodymium magnet, and aluminum bobbin. These features mean that the SPS-110TW deliver best-in-class power handling of 100 watts RMS and 300 watts peak, so turn up the volume!
In-Line Crossover Included
The small in-line crossover network provides a 12 dB/Octave slope and uses high-grade electrical components for clean sound. It’s small size also makes installation a snap.
Smooth Operator
The SPS’s 1” pure silk dome tweeter diaphragm is designed for wide frequency range and high efficiency, while never sounding harsh or shrill
Add great-sounding highs to any system… affordably.
The same great tweeter that is included with the Type-S Component speakers is now available as a separate component. Now you can add on an efficient, affordable tweeter to any OEM or aftermarket sound system with ease.
Add great-sounding highs to any system… affordably.
The same great tweeter that is included with the Type-S Component speakers is now available as a separate component. Now you can add on an efficient, affordable tweeter to any OEM or aftermarket sound system with ease.
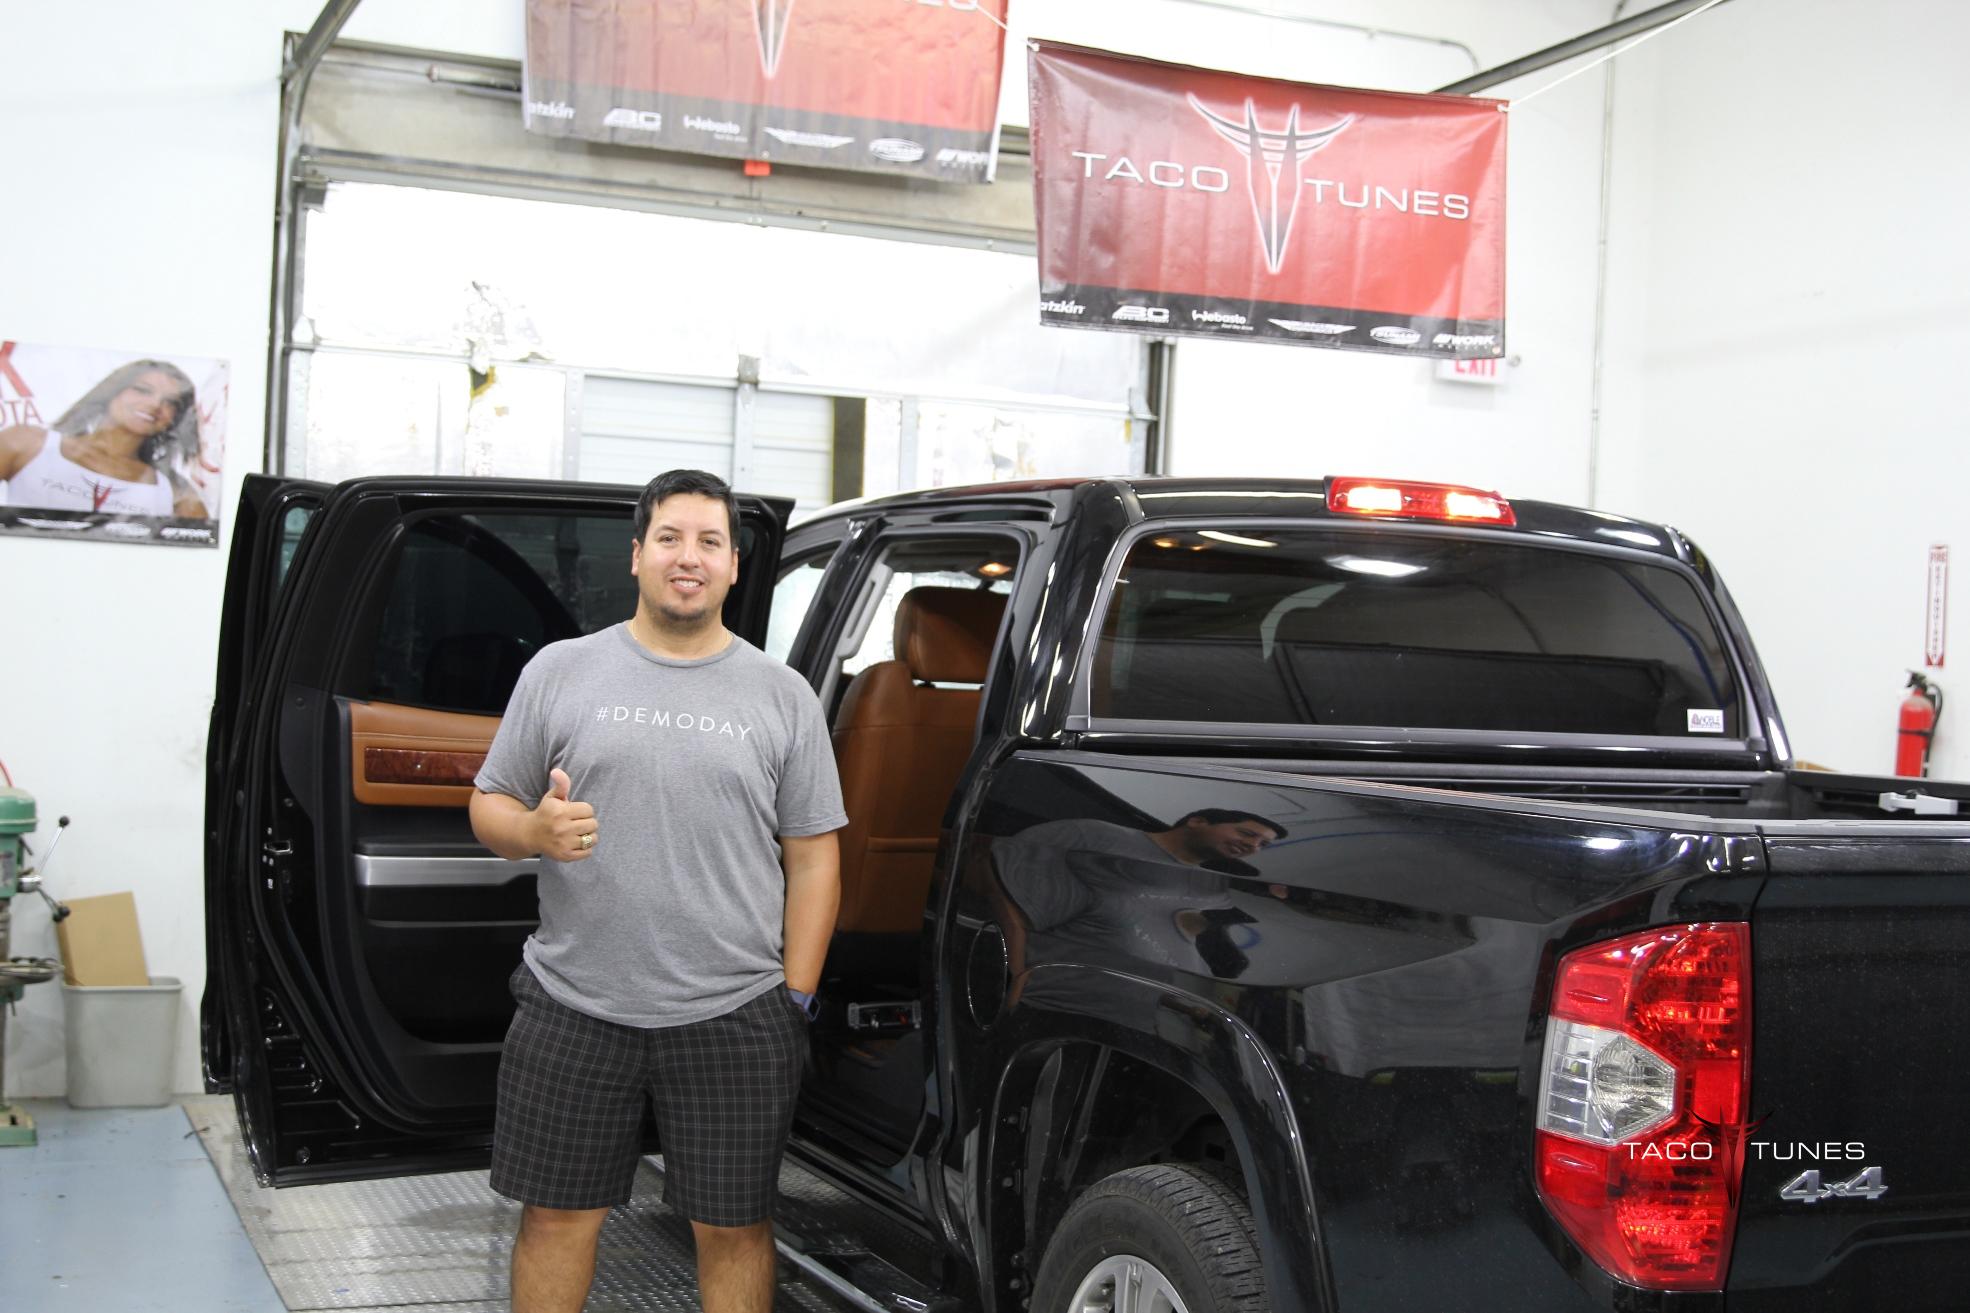
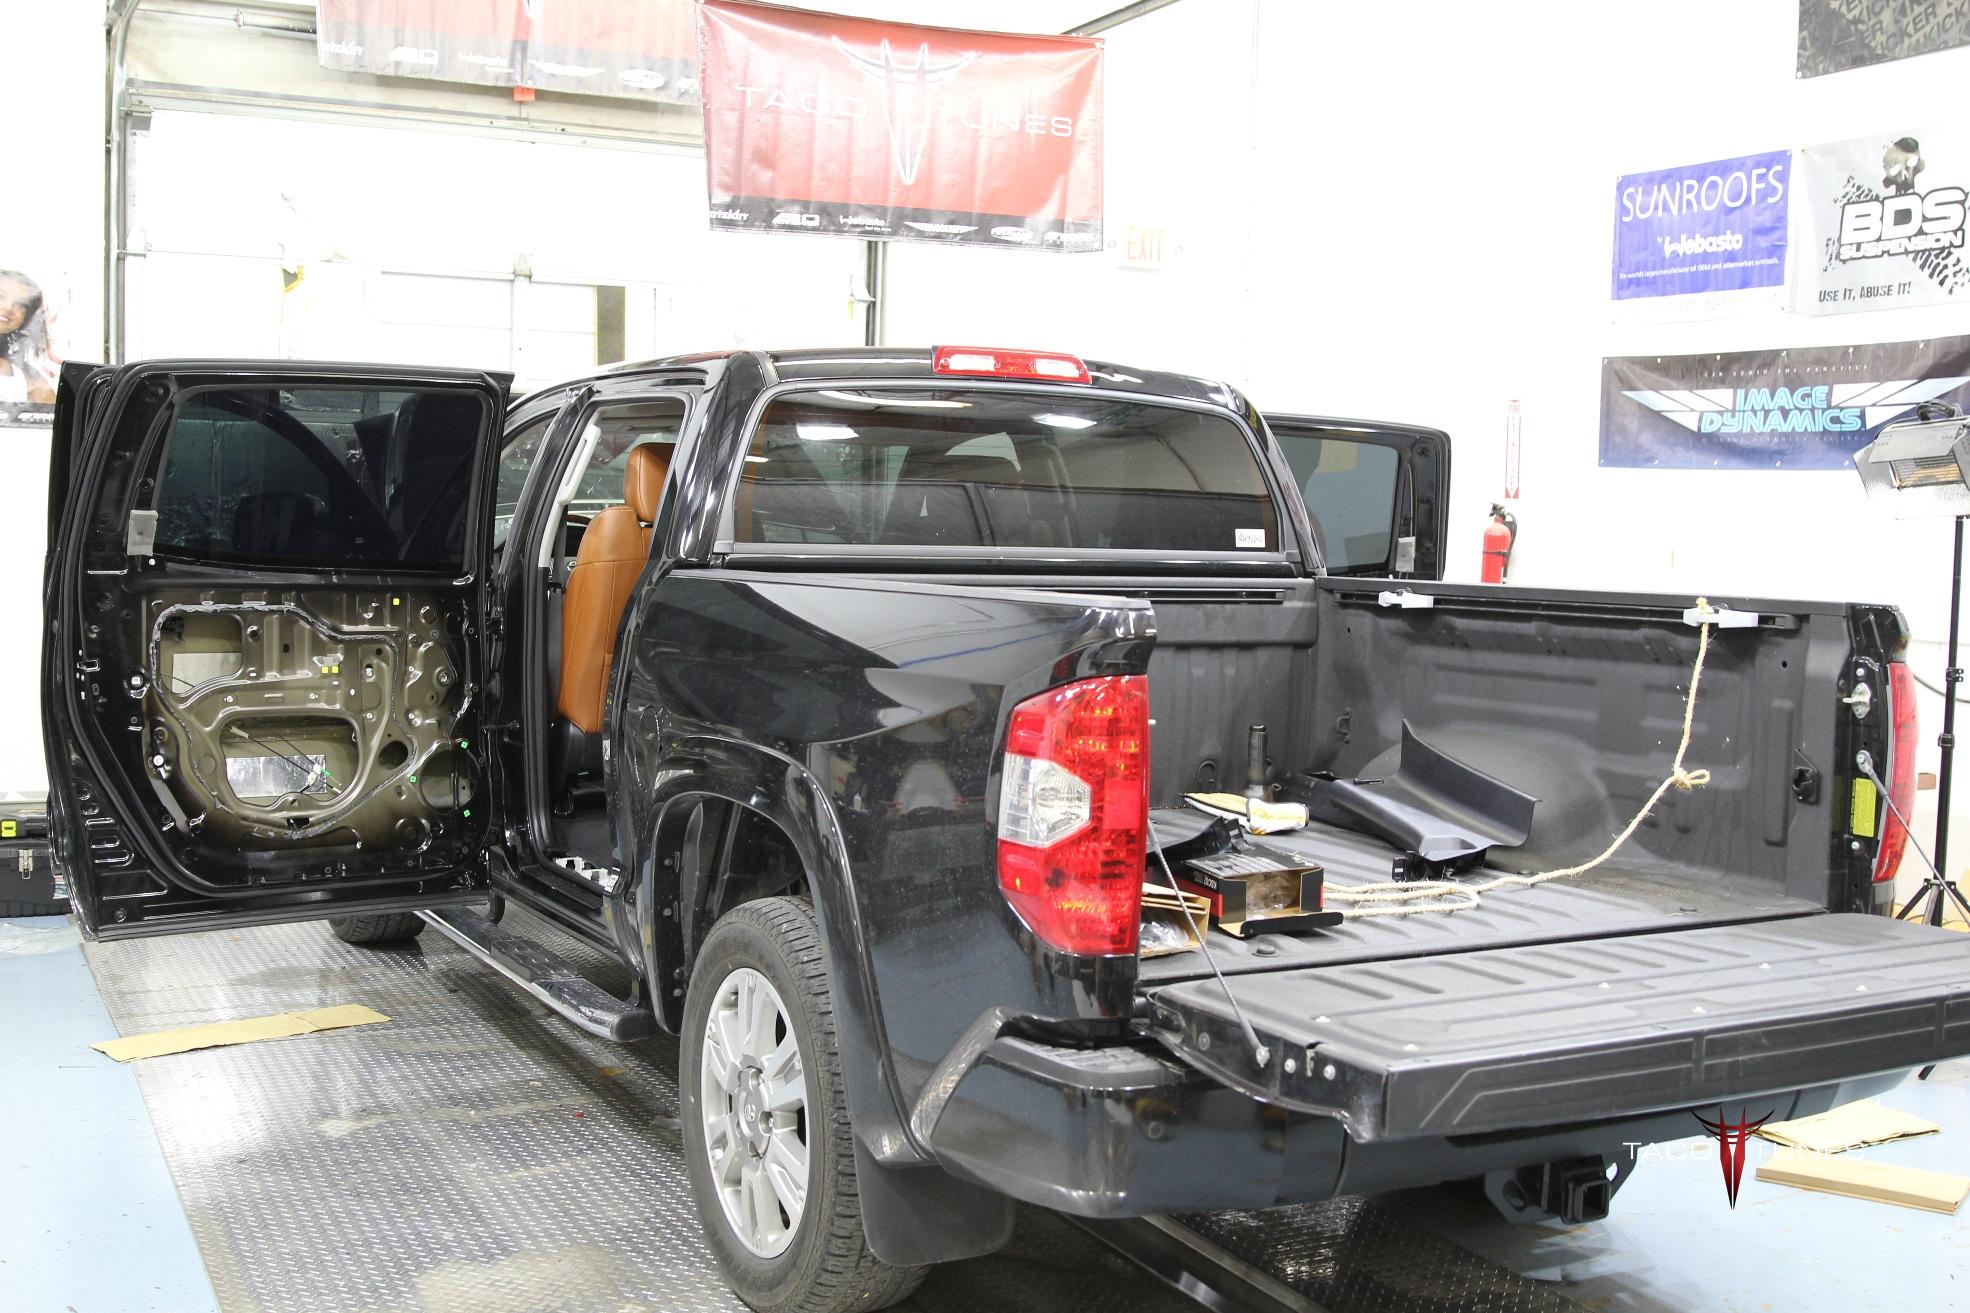
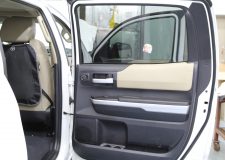
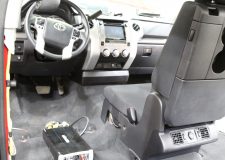
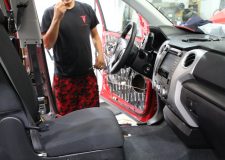
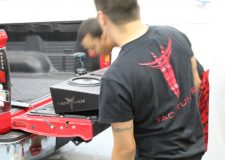
2015 Toyota Tundra CrewMax 1794 Edition Stereo System Upgrade
2015 Toyota Tundra CrewMax 1794 Edition Stereo System Upgrade
2015 Toyota Tundra CrewMax 1794 Edition Stereo System Upgrade
2015 Toyota Tundra CrewMax 1794 Edition Stereo System Upgrade ReCurve EZQ
2015 Toyota Tundra CrewMax 1794 Edition Stereo System Upgrade
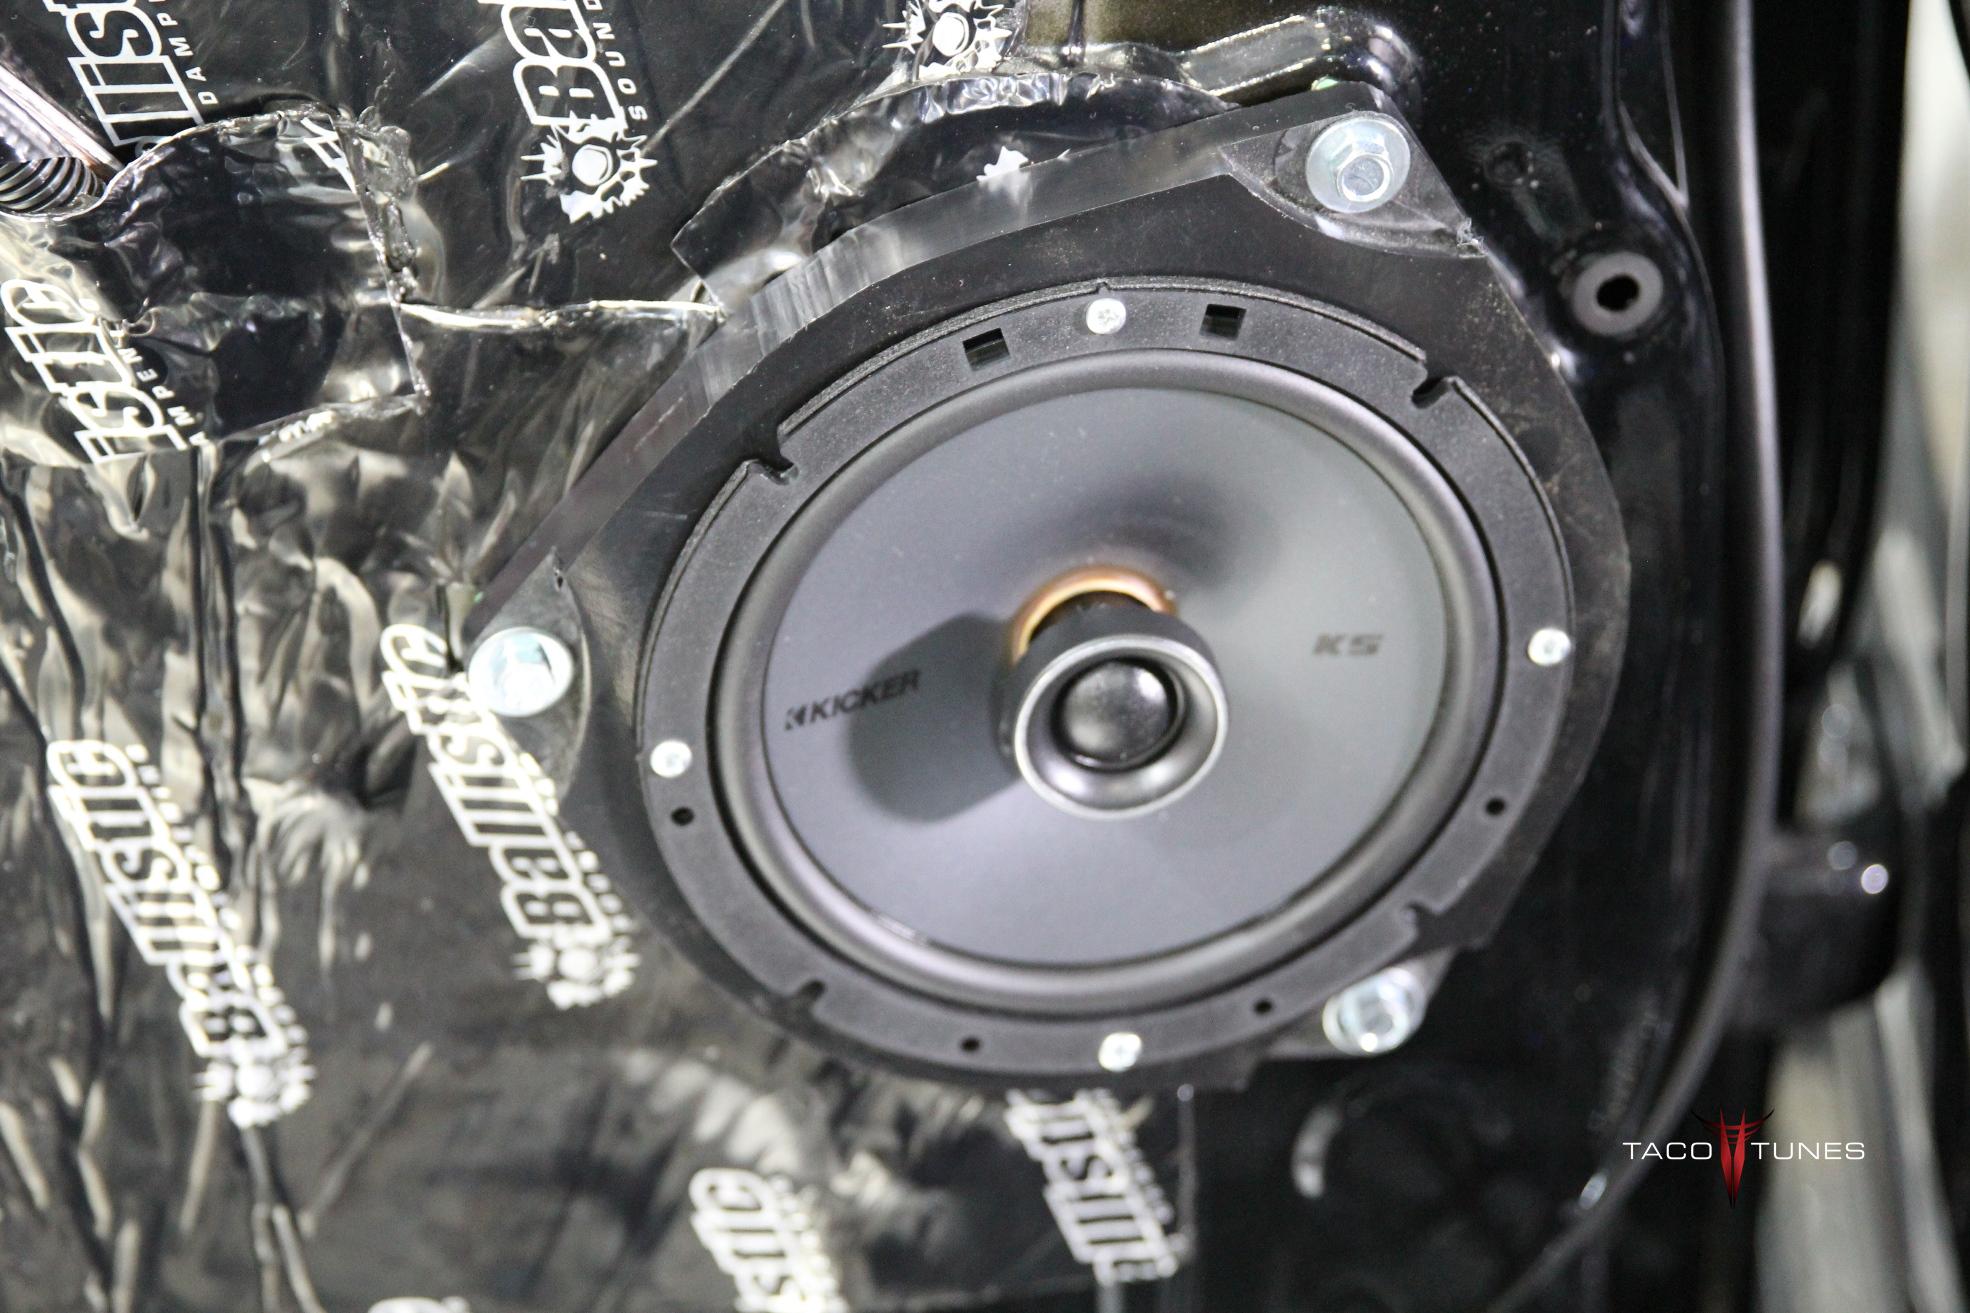
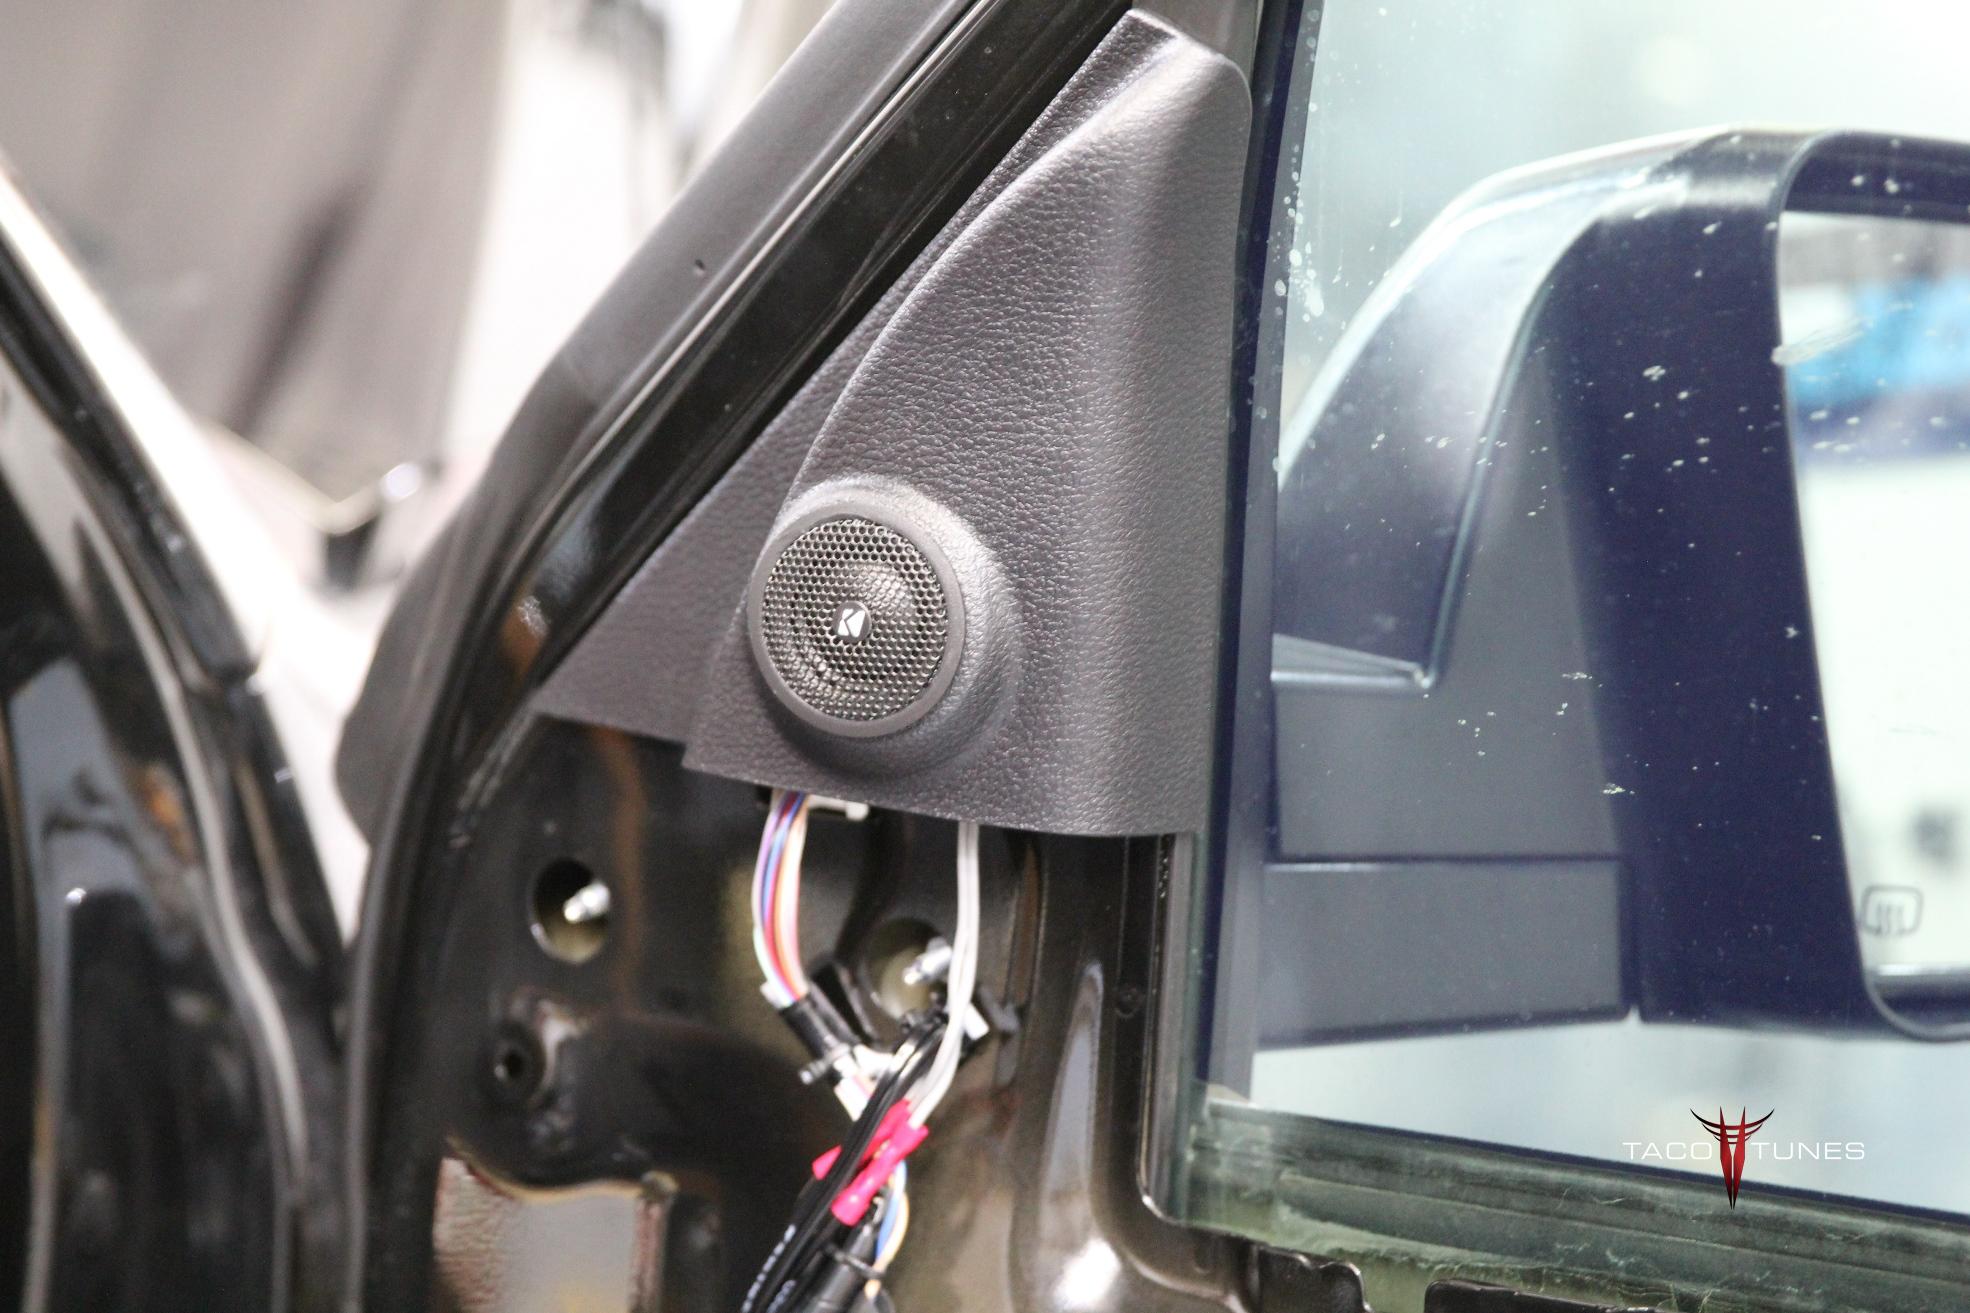
2015 Toyota Tundra CrewMax 1794 Edition Kicker KSS67 Tweeters
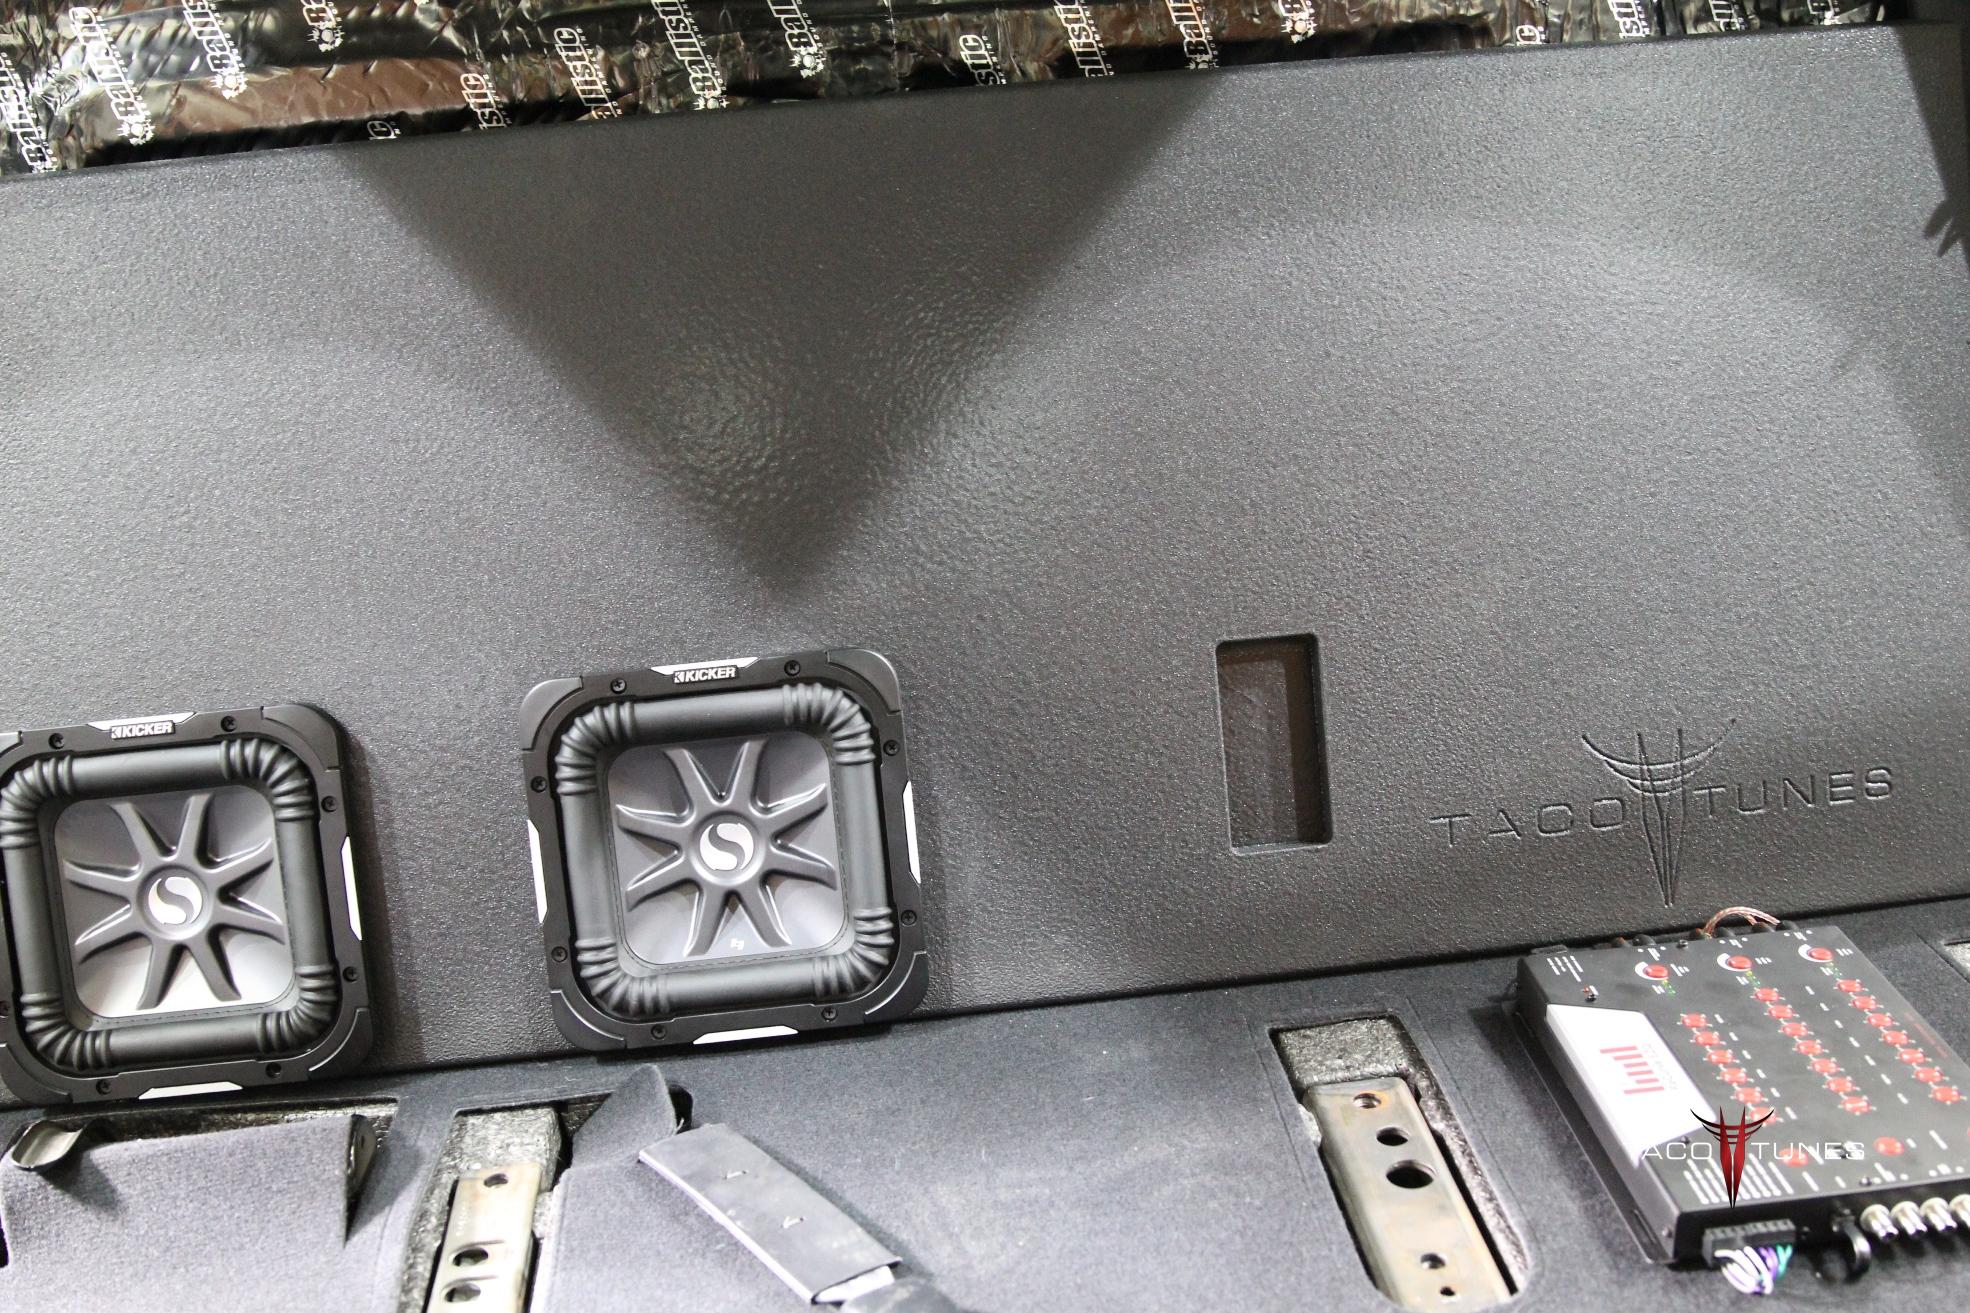
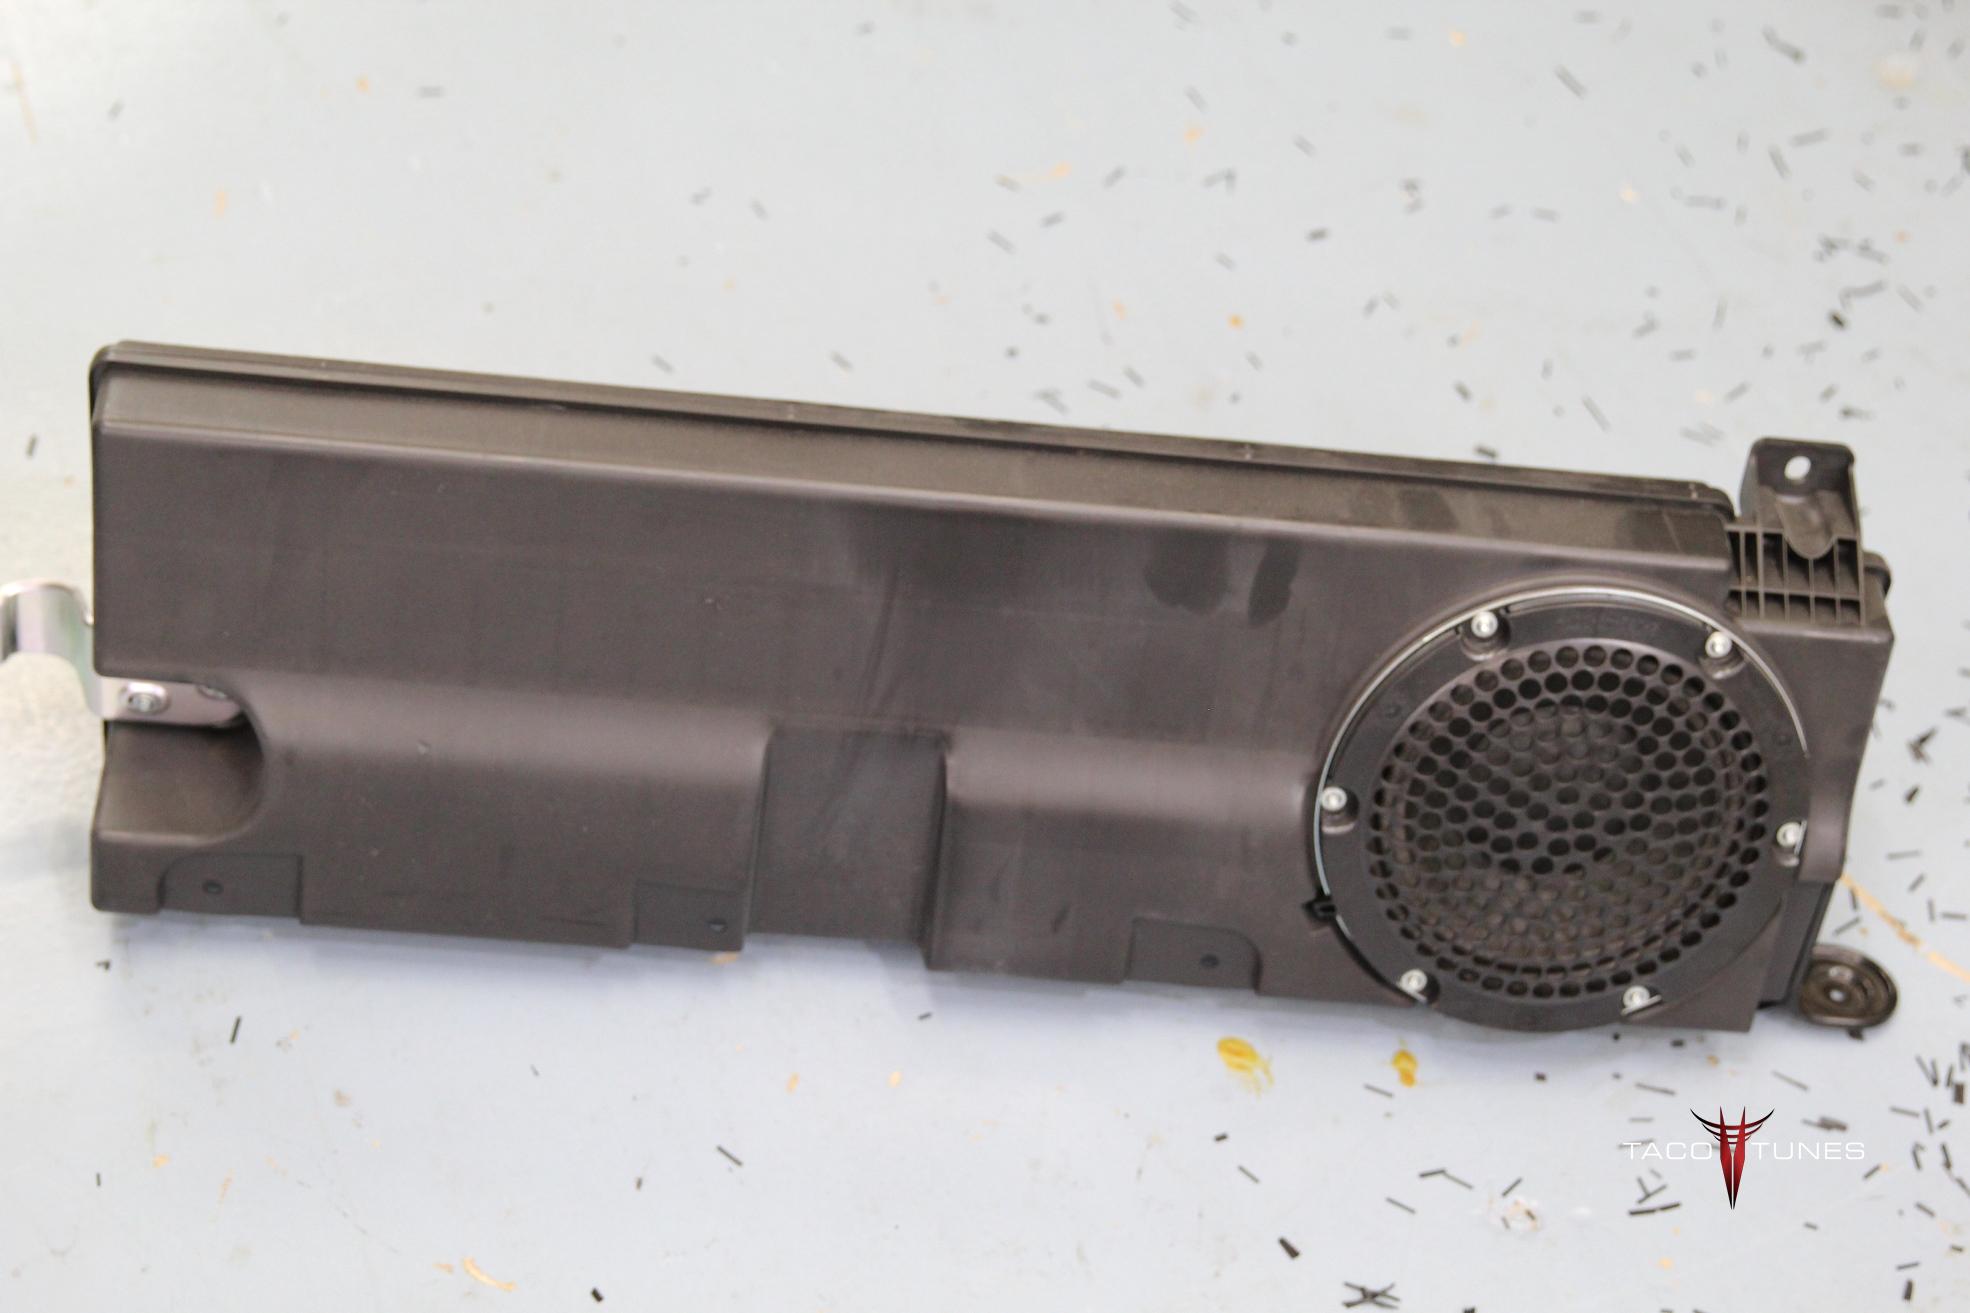
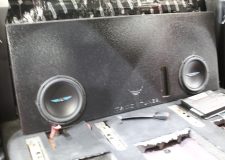
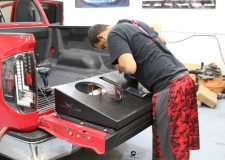
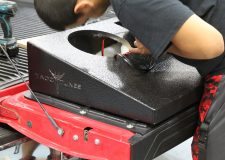
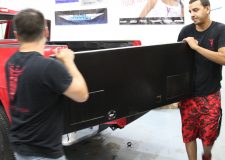
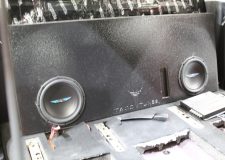
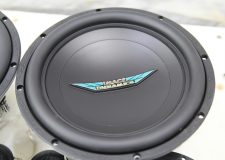
2015 Toyota Tundra CrewMax Kicker L7 Subwoofer Box
2015 Toyota Tundra CrewMax Kicker L7 Subwoofer Box
2015 Toyota Tundra CrewMax Kicker L7 Subwoofer Box
2015 Toyota Tundra CrewMax 1794 Edition Stereo System Upgrade
2015 Toyota Tundra CrewMax 1794 Edition Stereo System Upgrade
2015 Toyota Tundra CrewMax Exile Javelin 5 Channel Amplifier
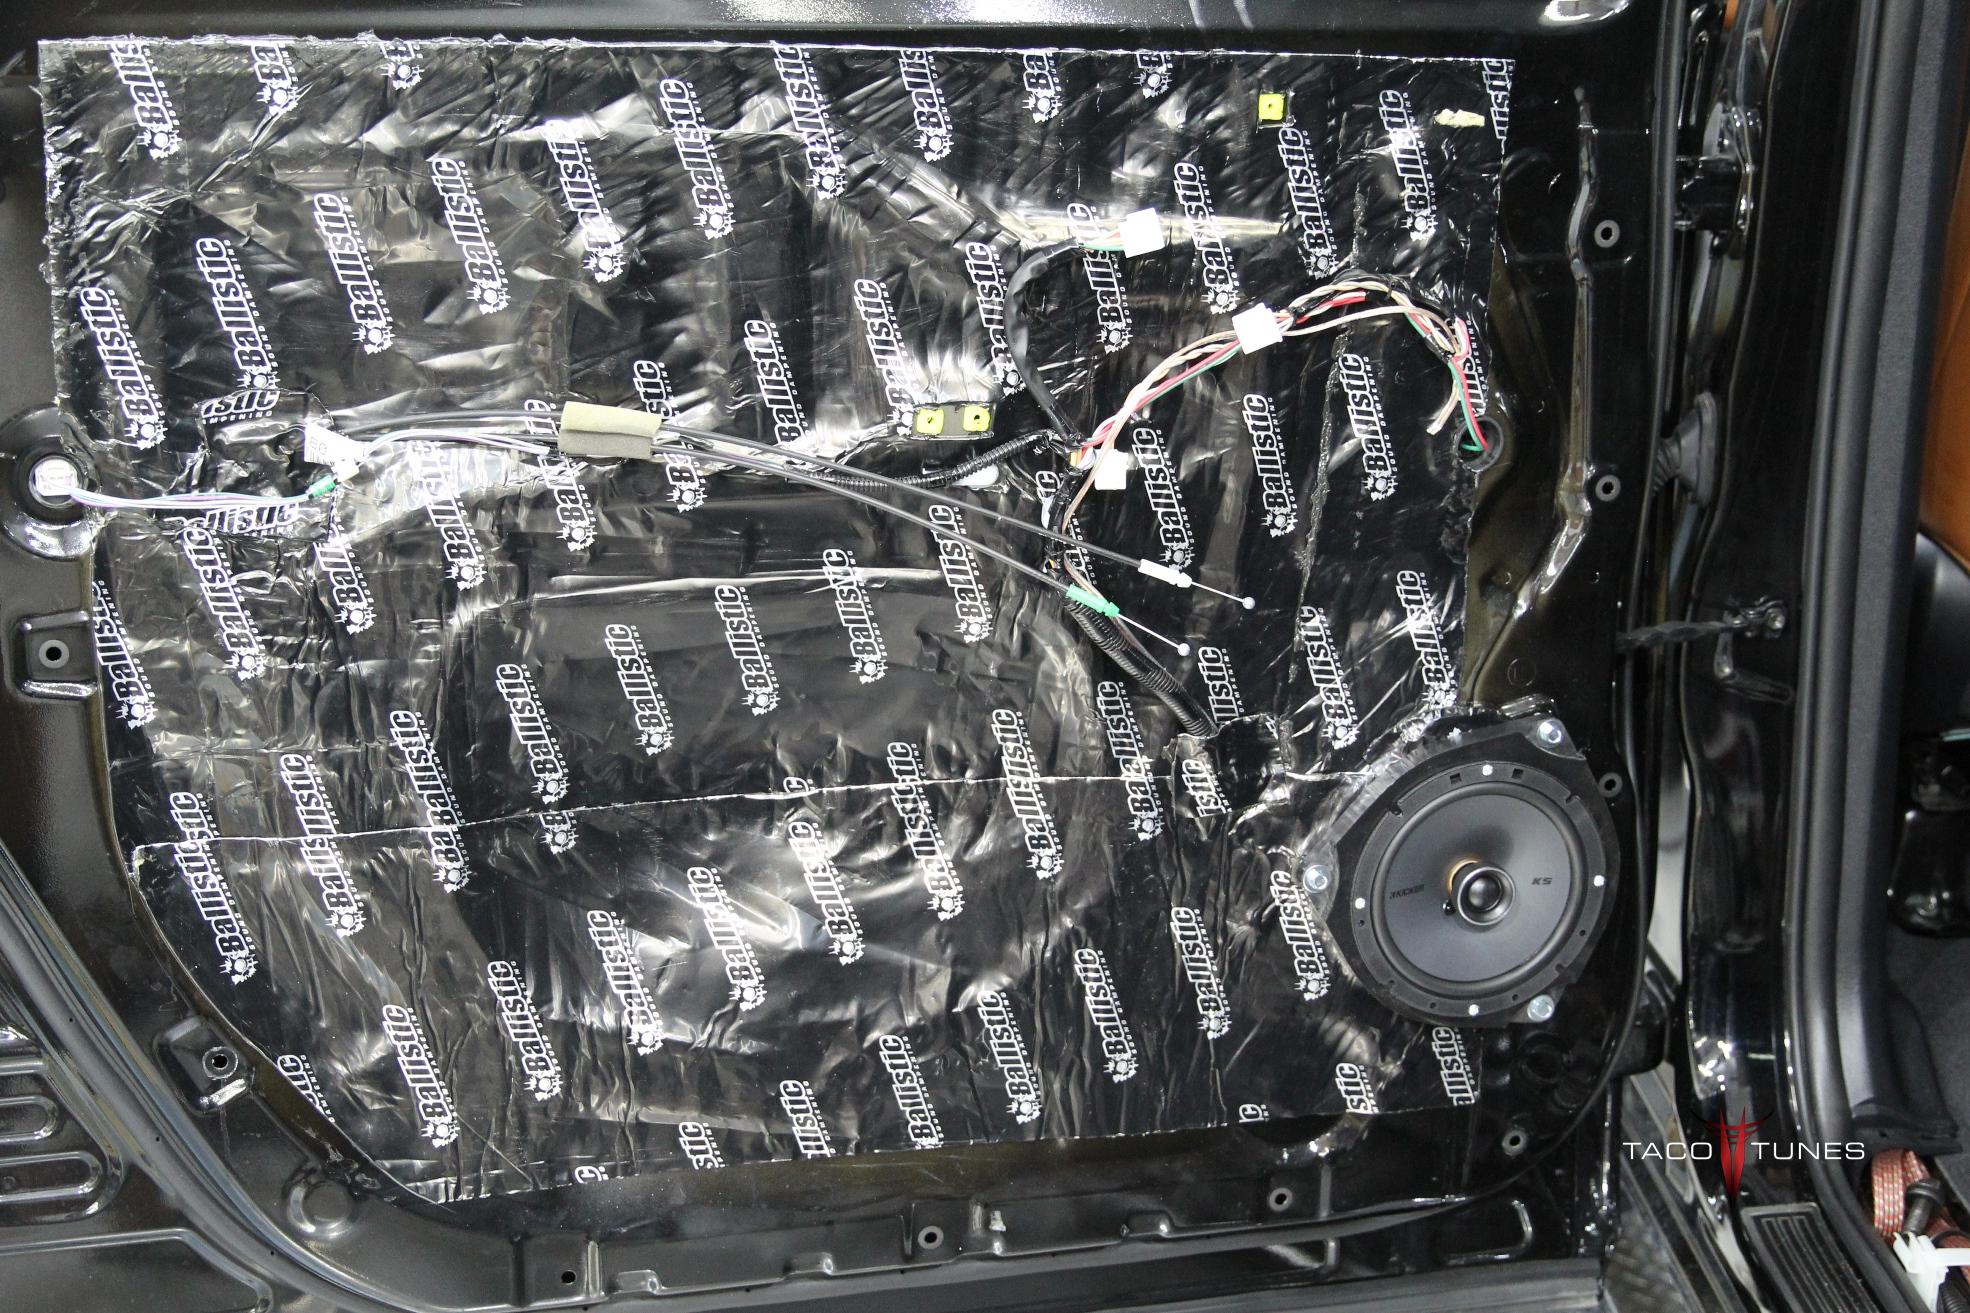
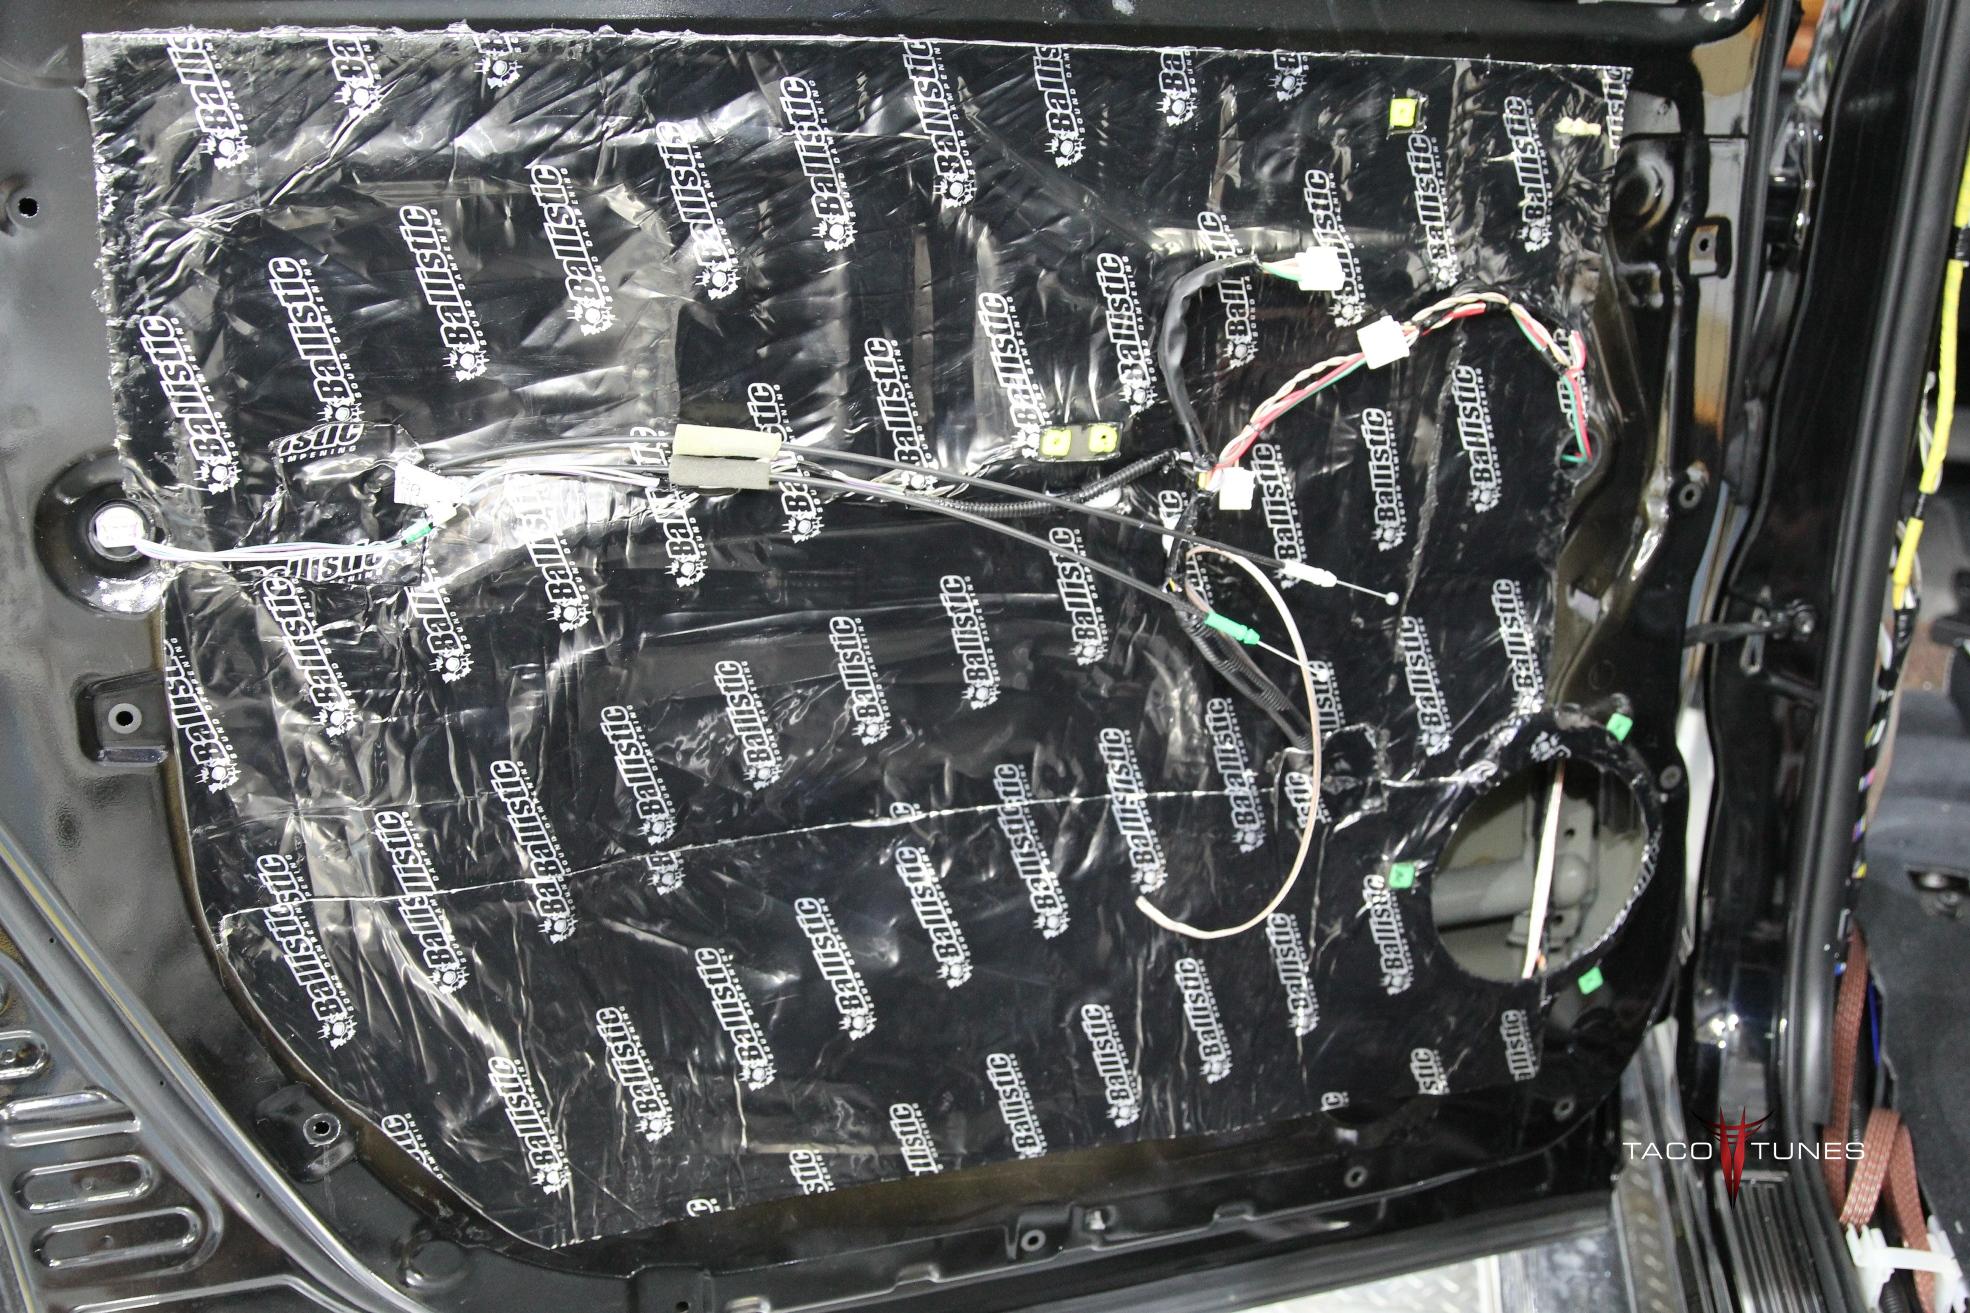
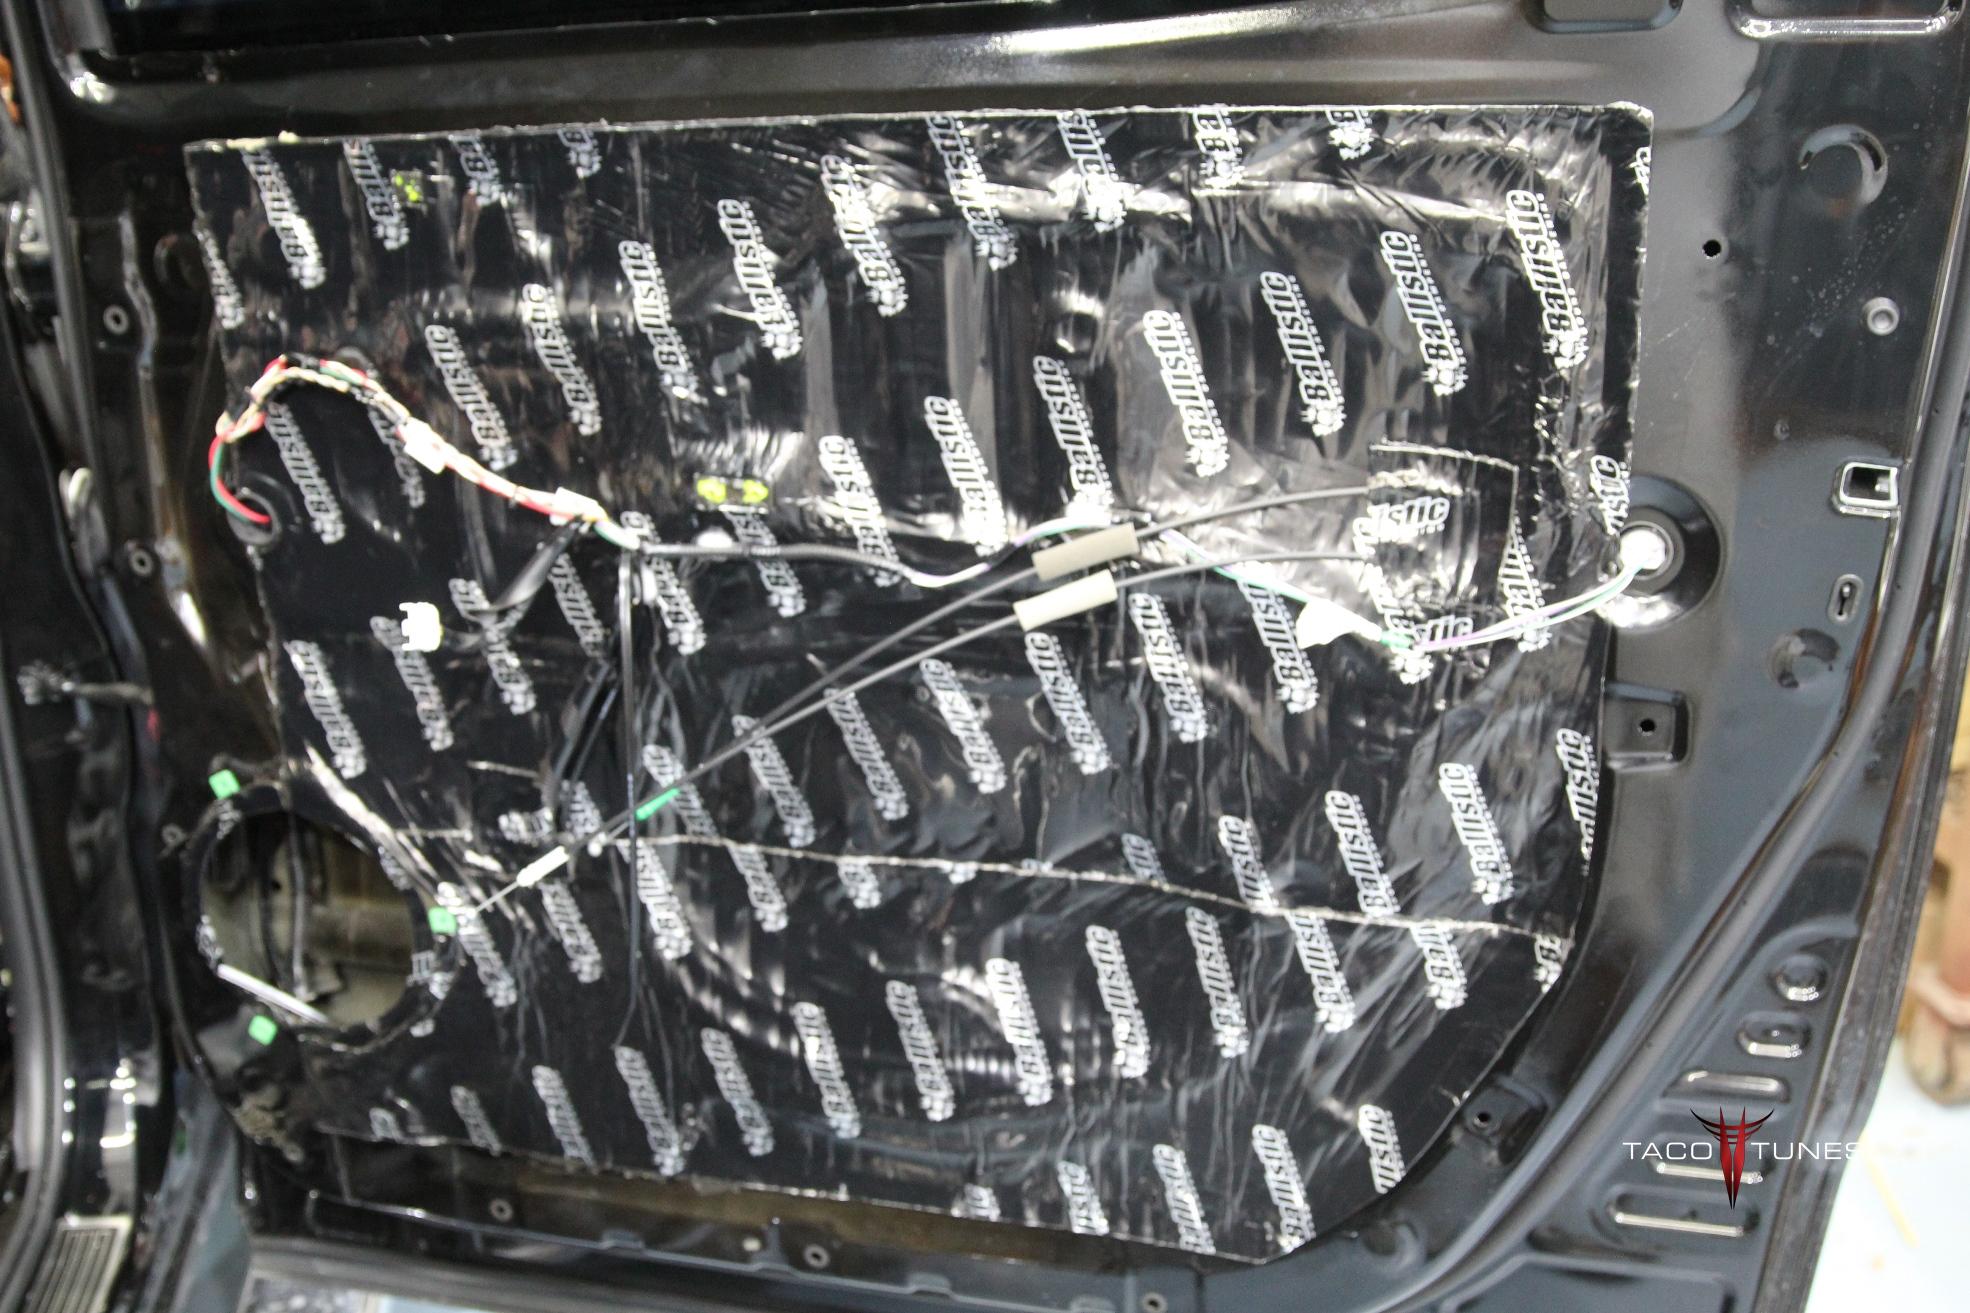
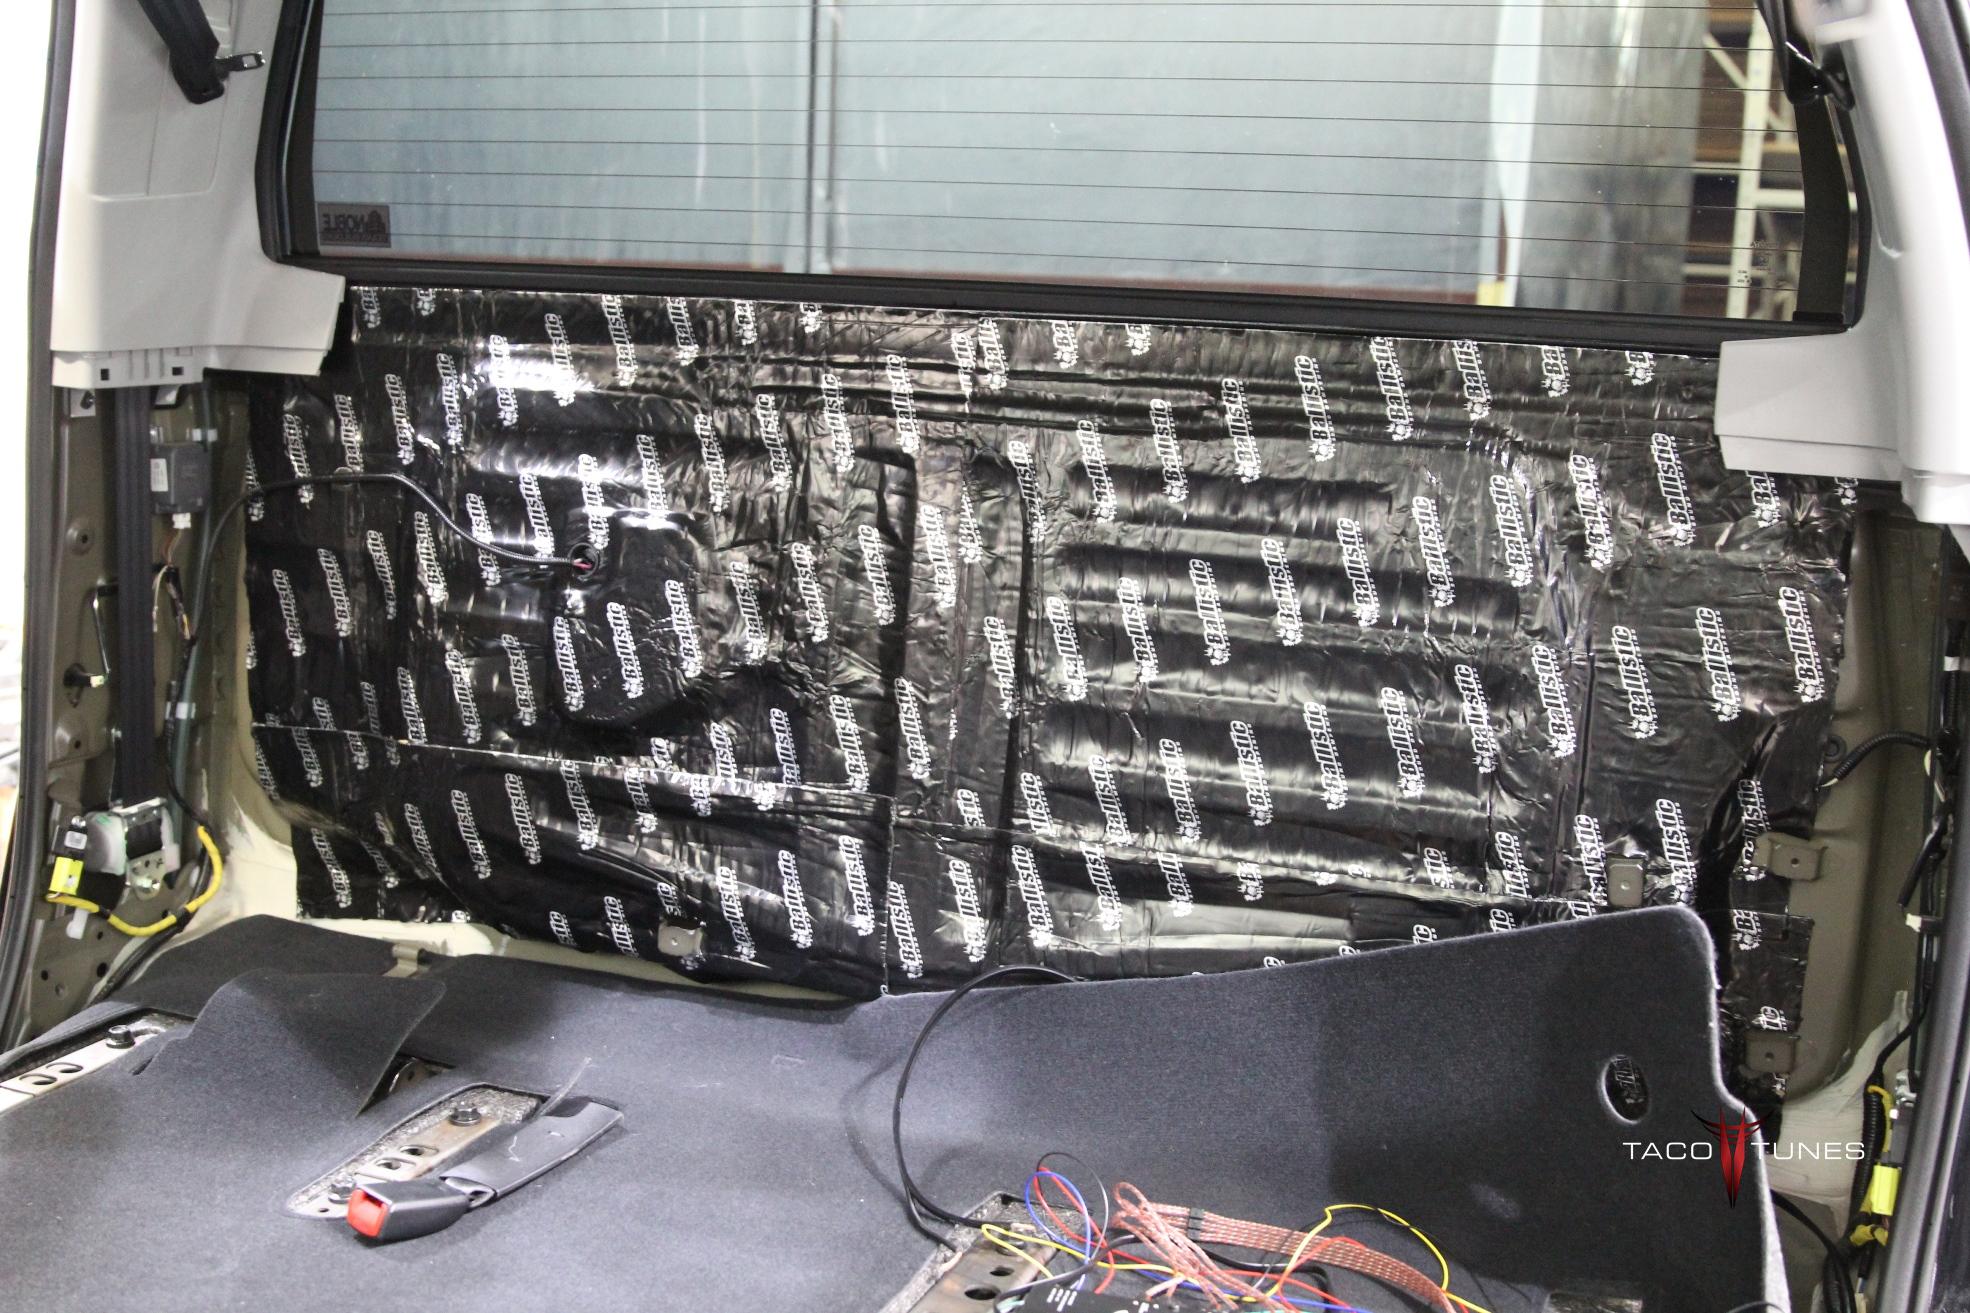
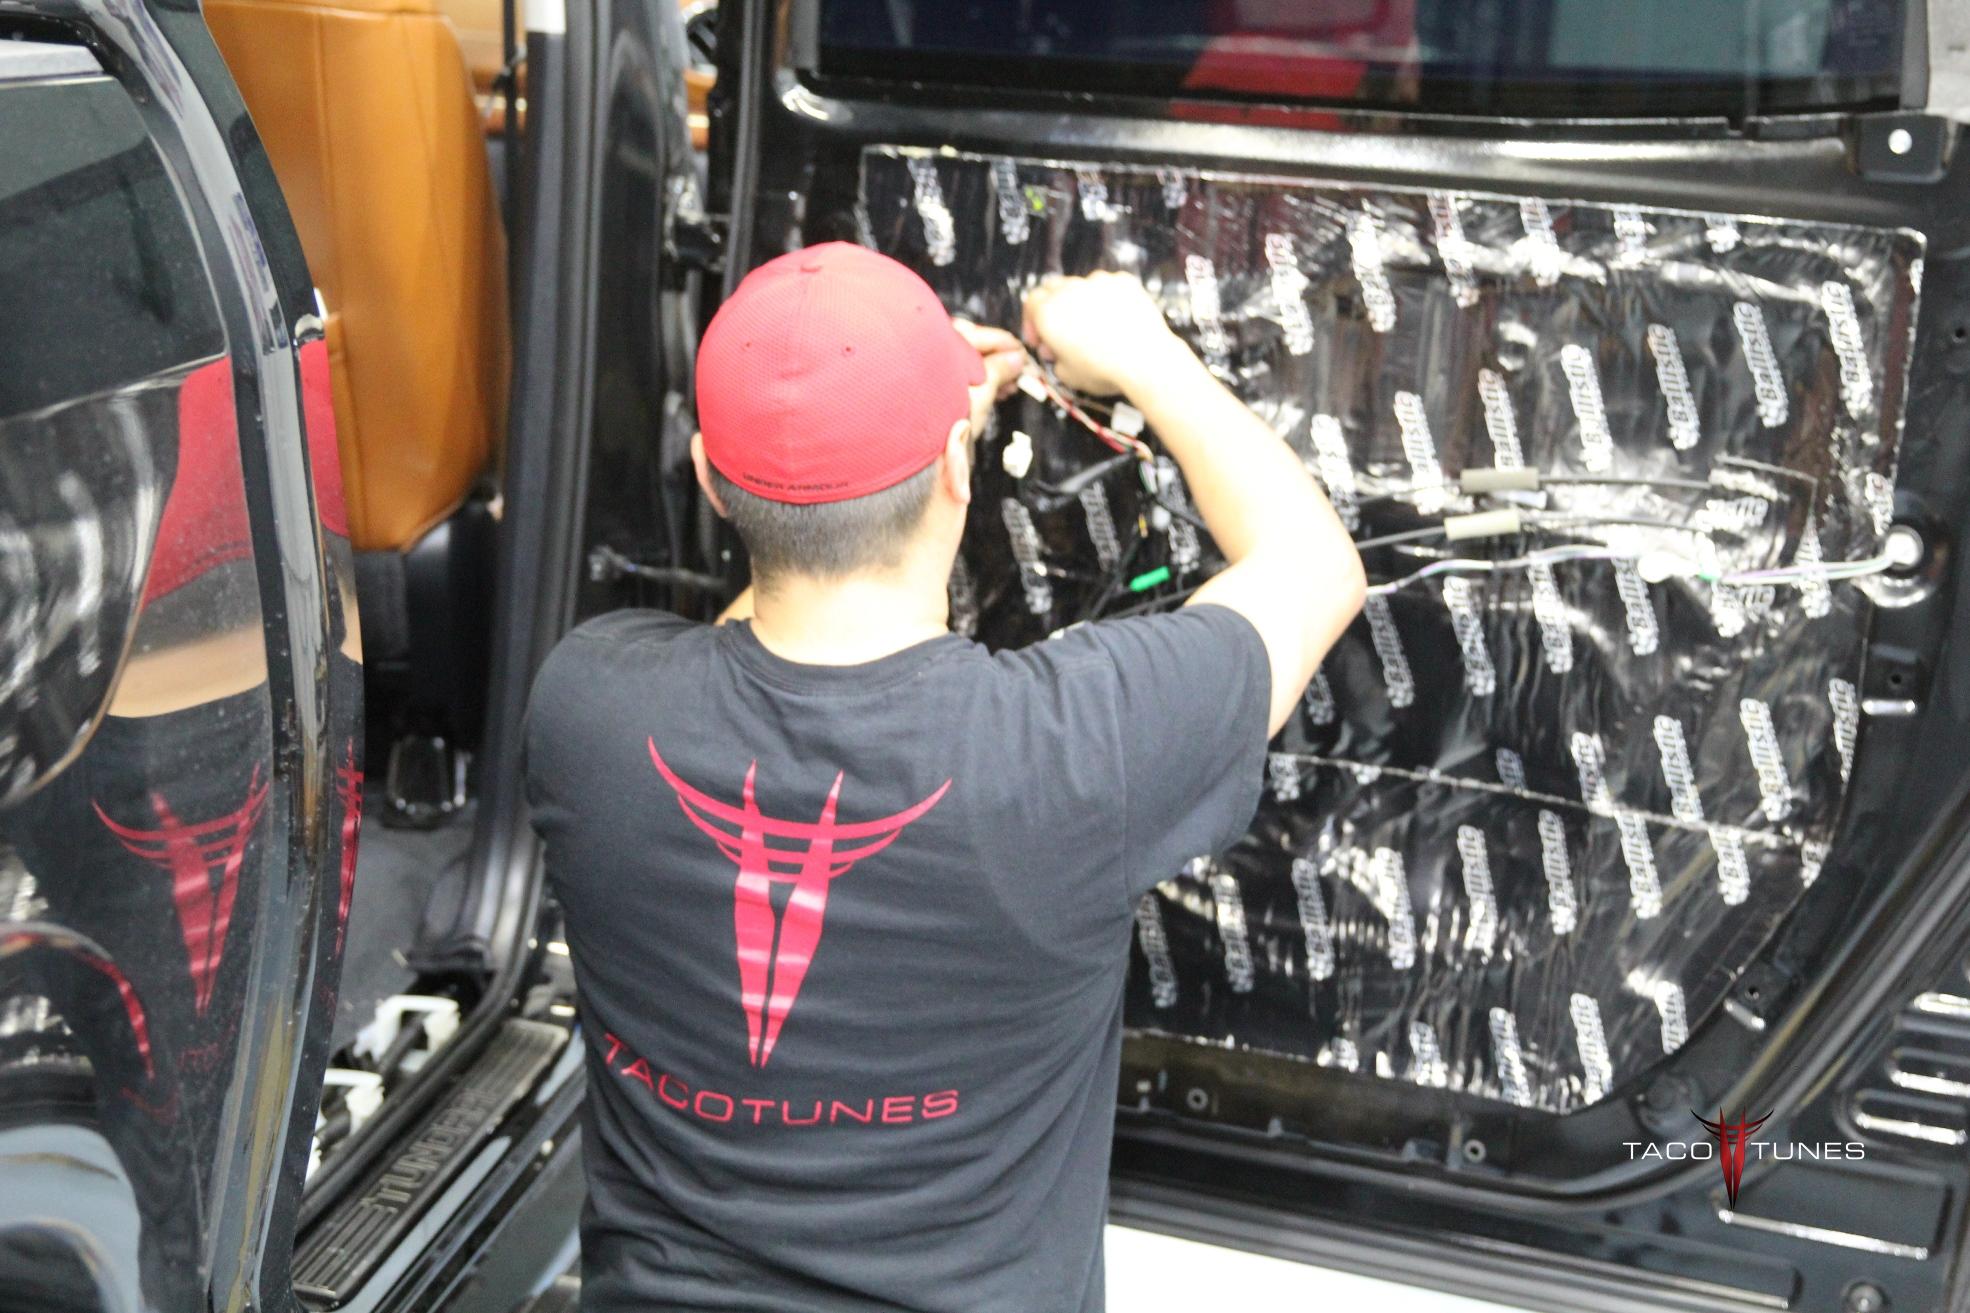
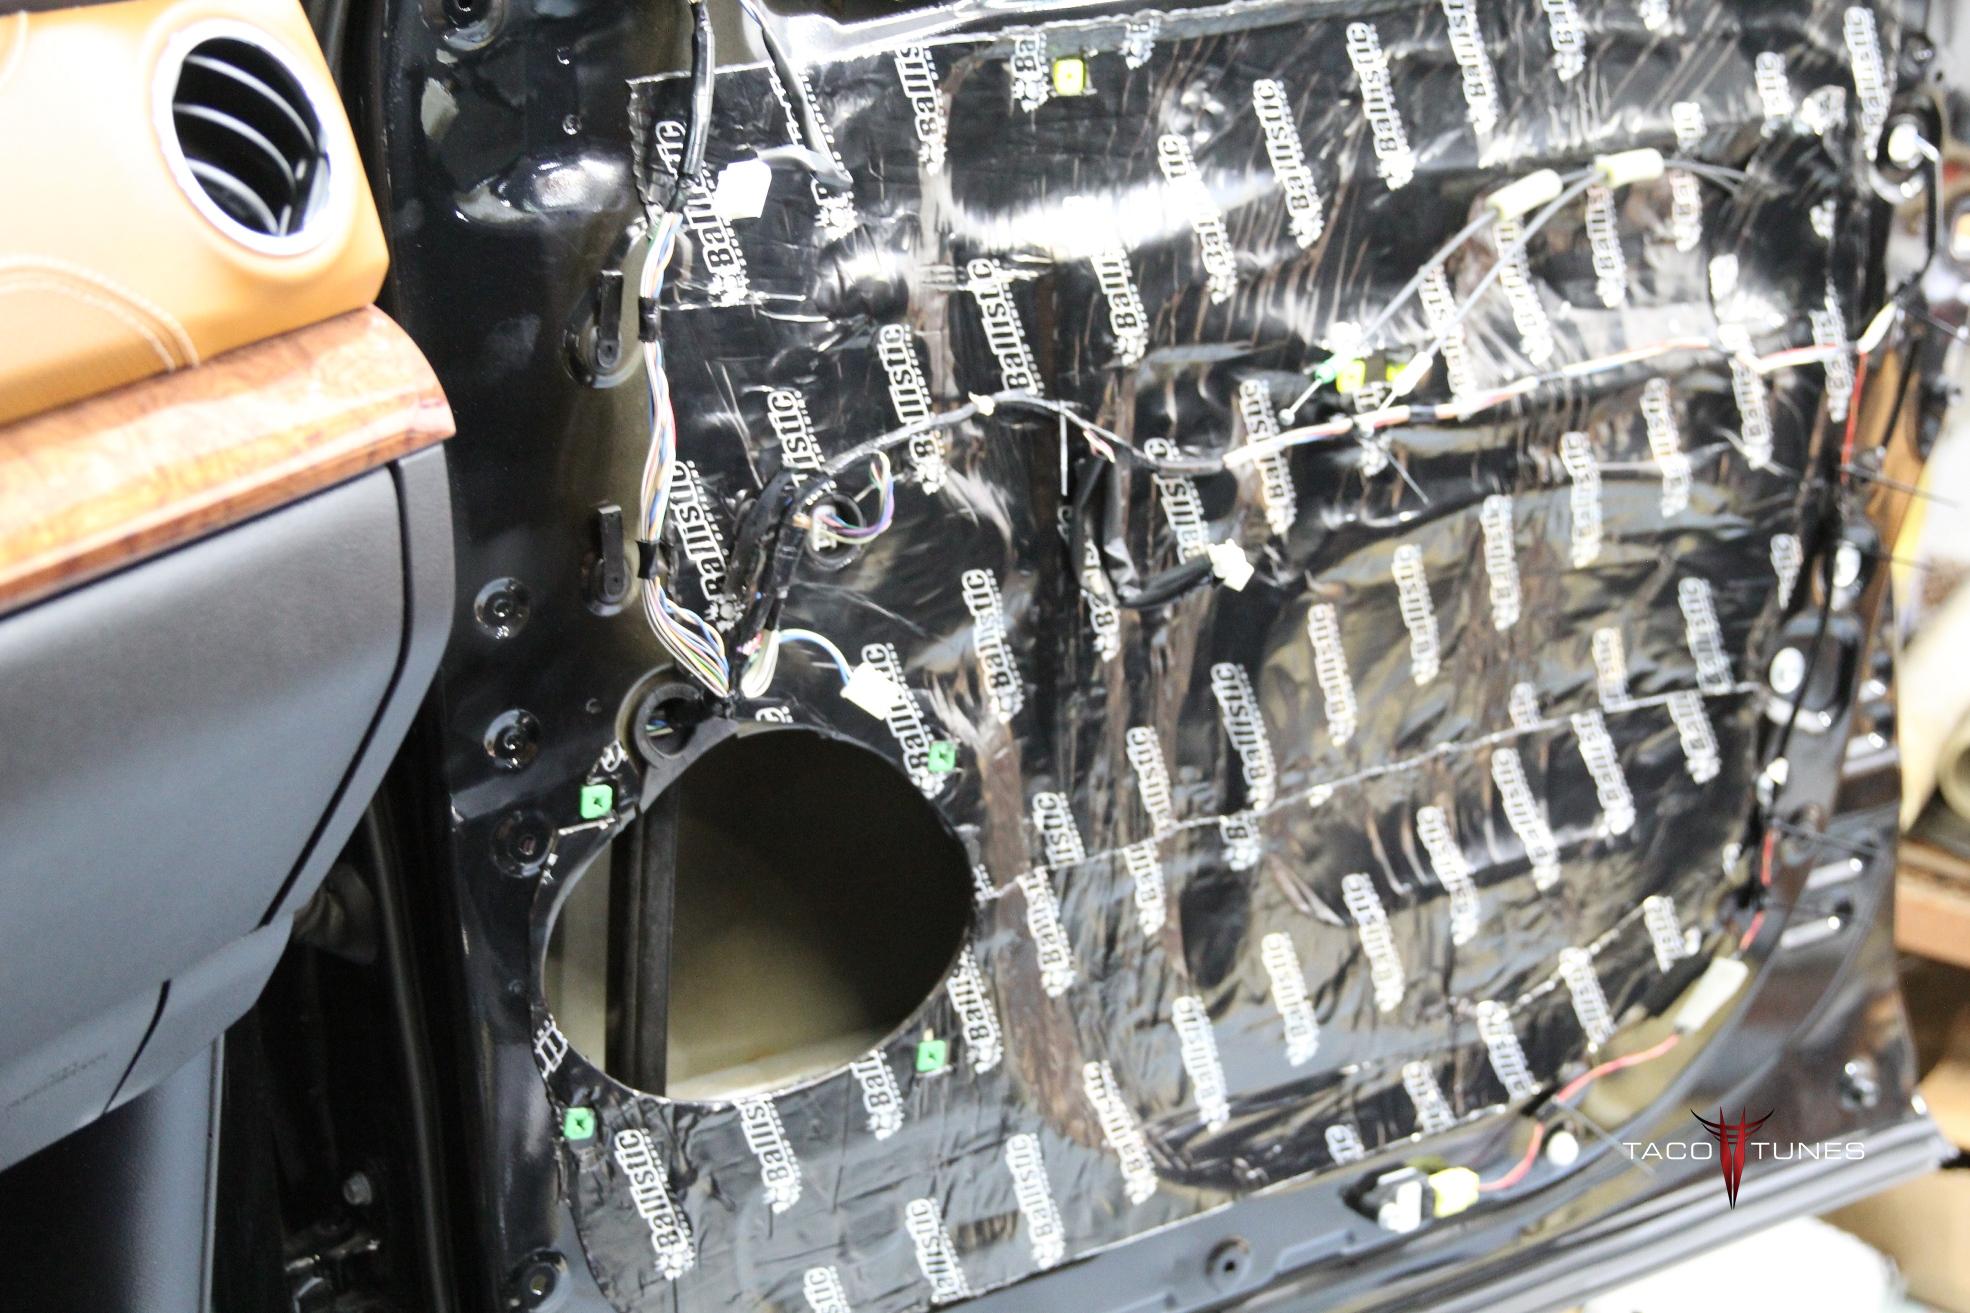
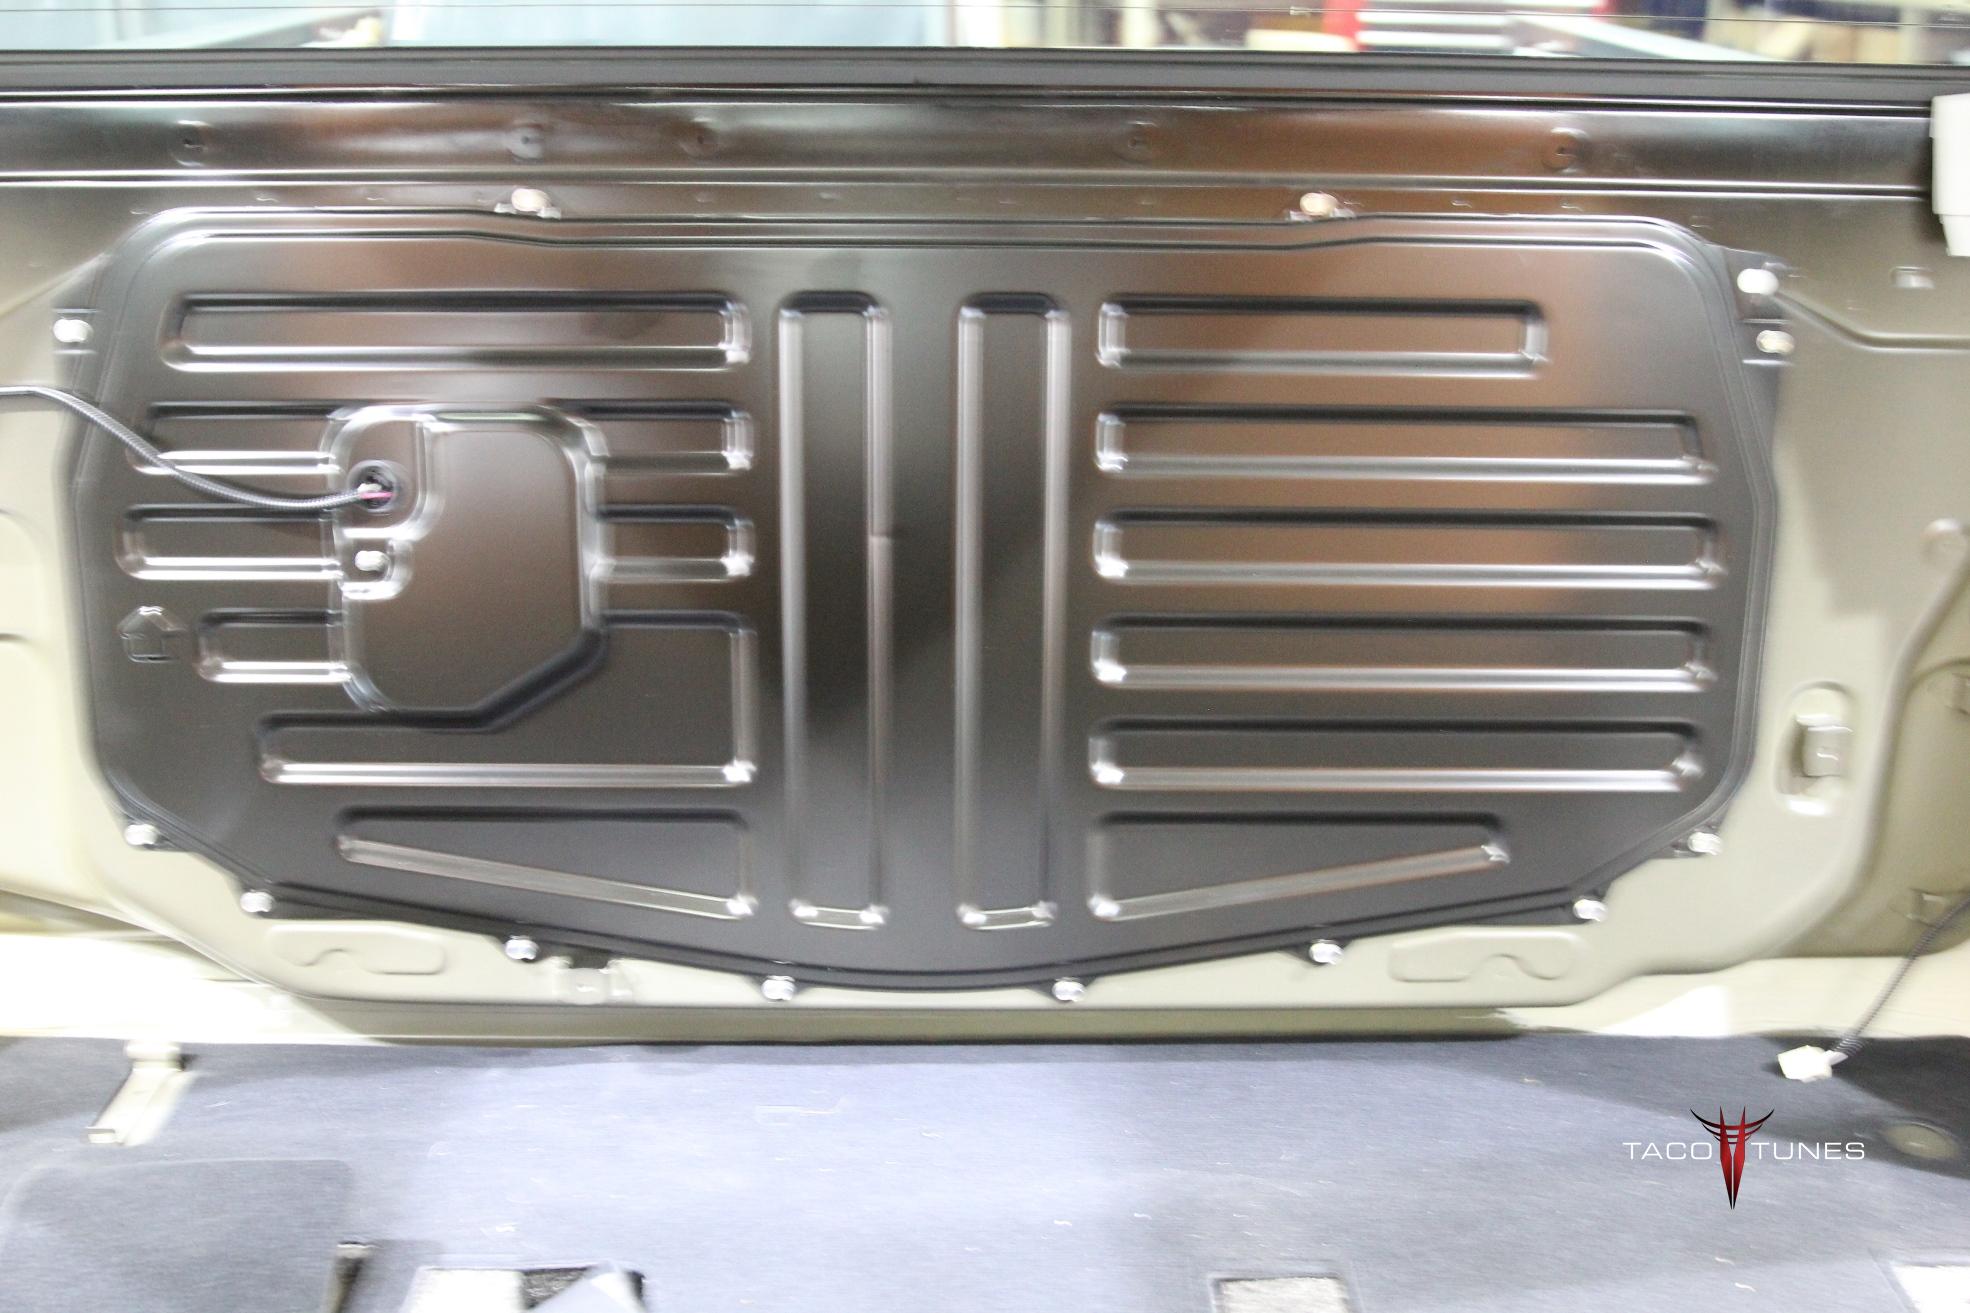
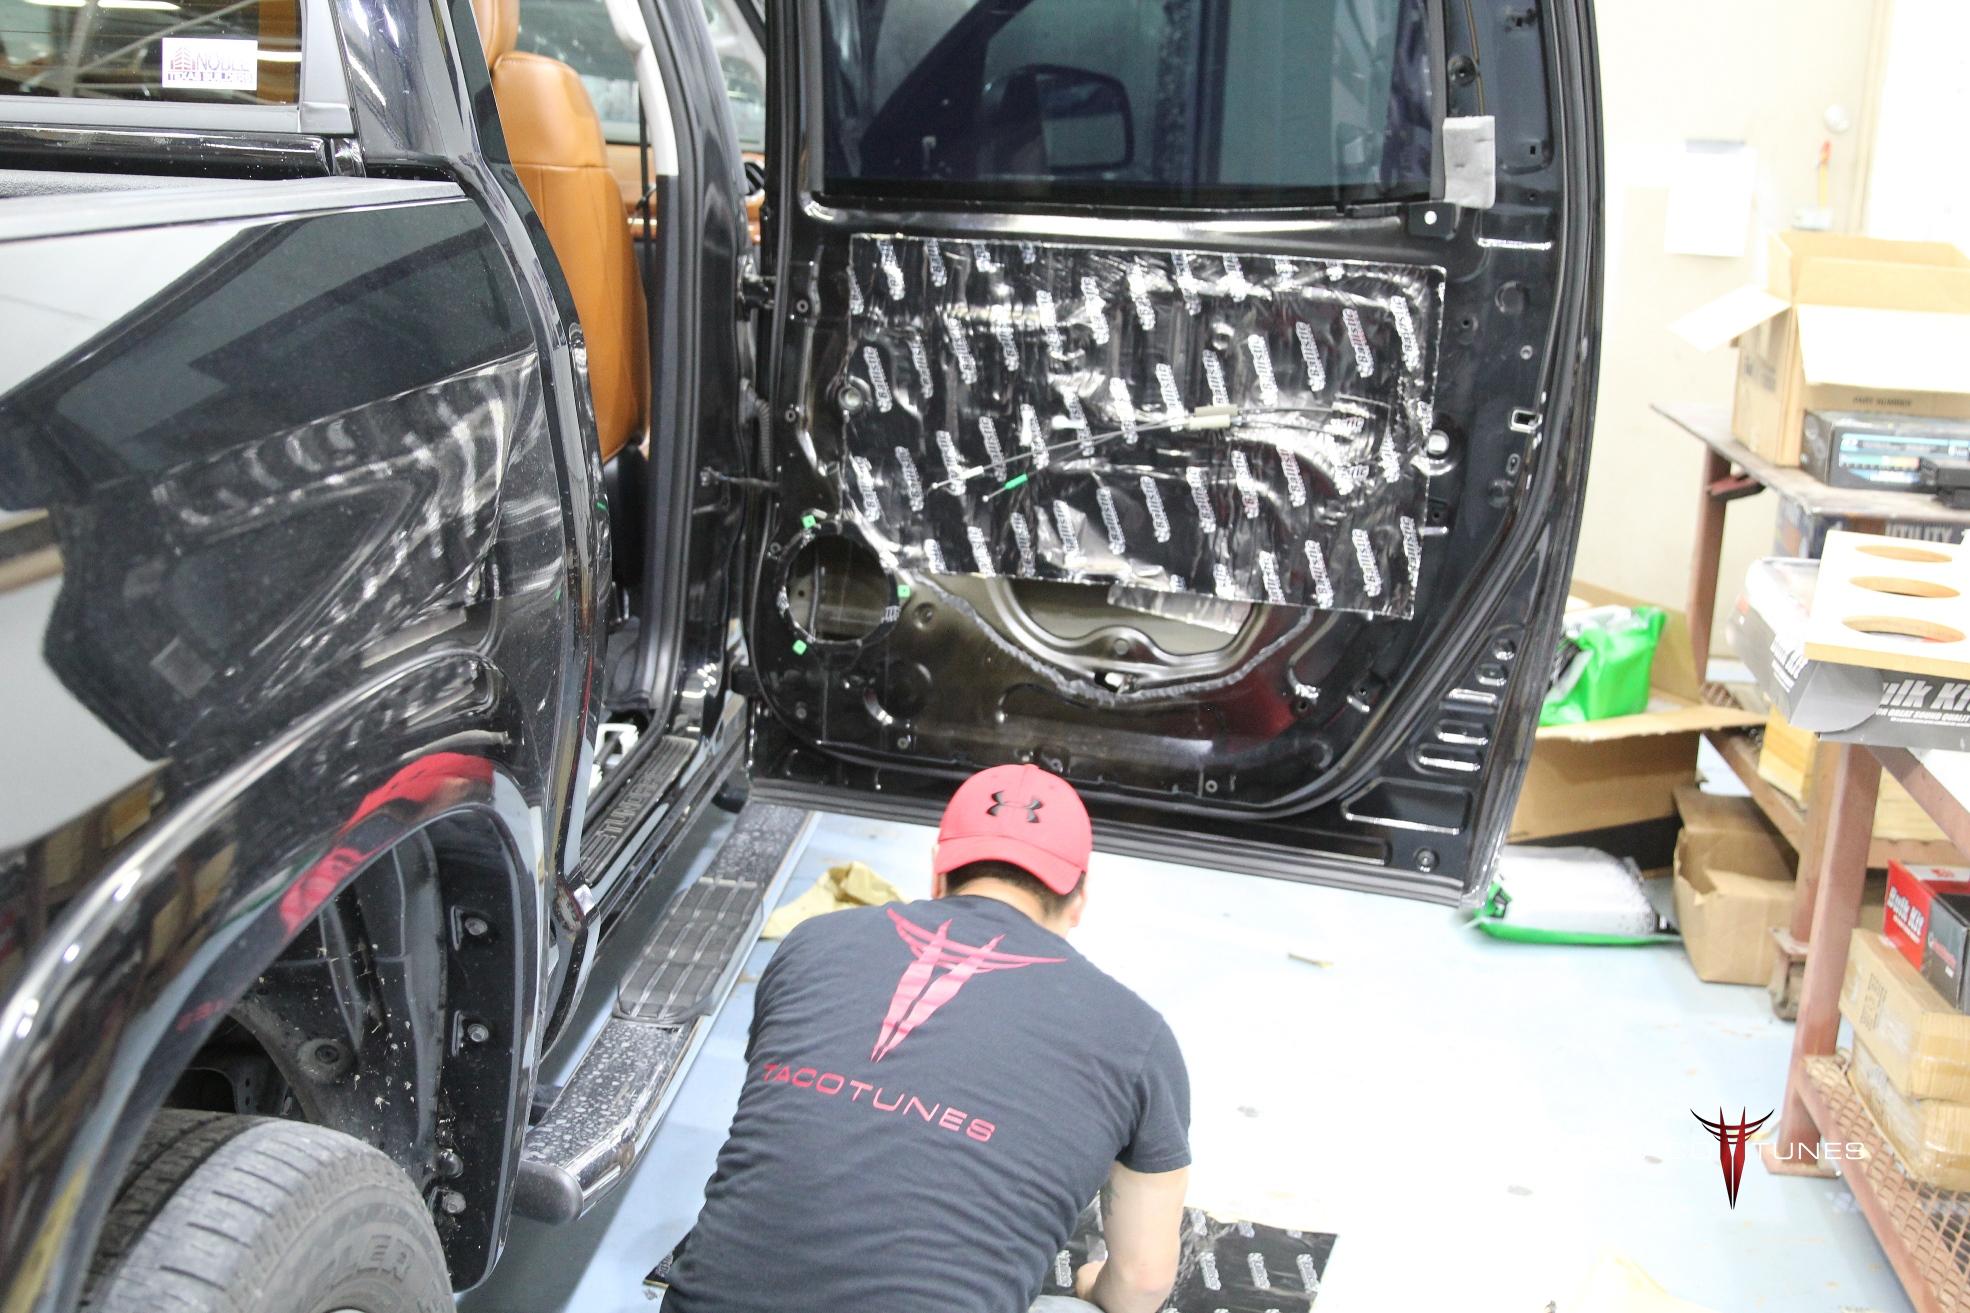
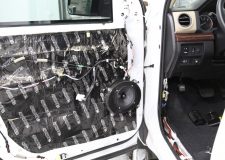
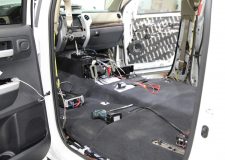
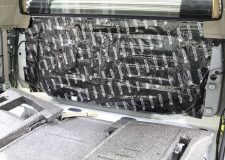
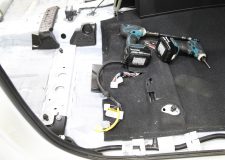
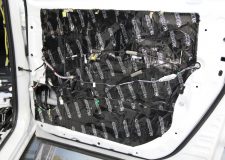
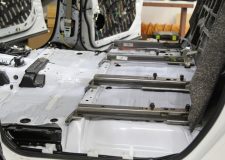
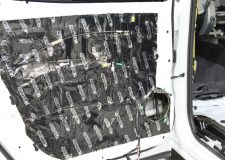
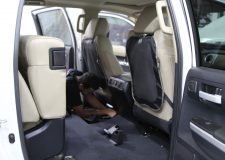
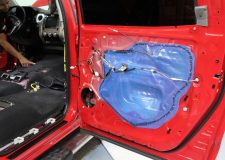
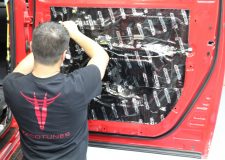
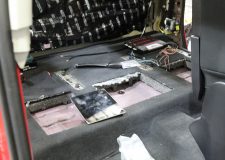
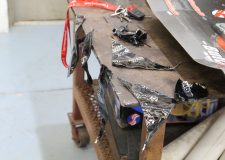
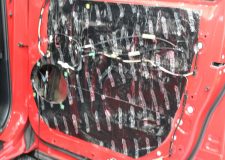
2015 Toyota Tundra CrewMax Ballistic Matting Sound Deadener Installation
2015 Toyota Tundra CrewMax Ballistic Matting Sound Deadener Installation
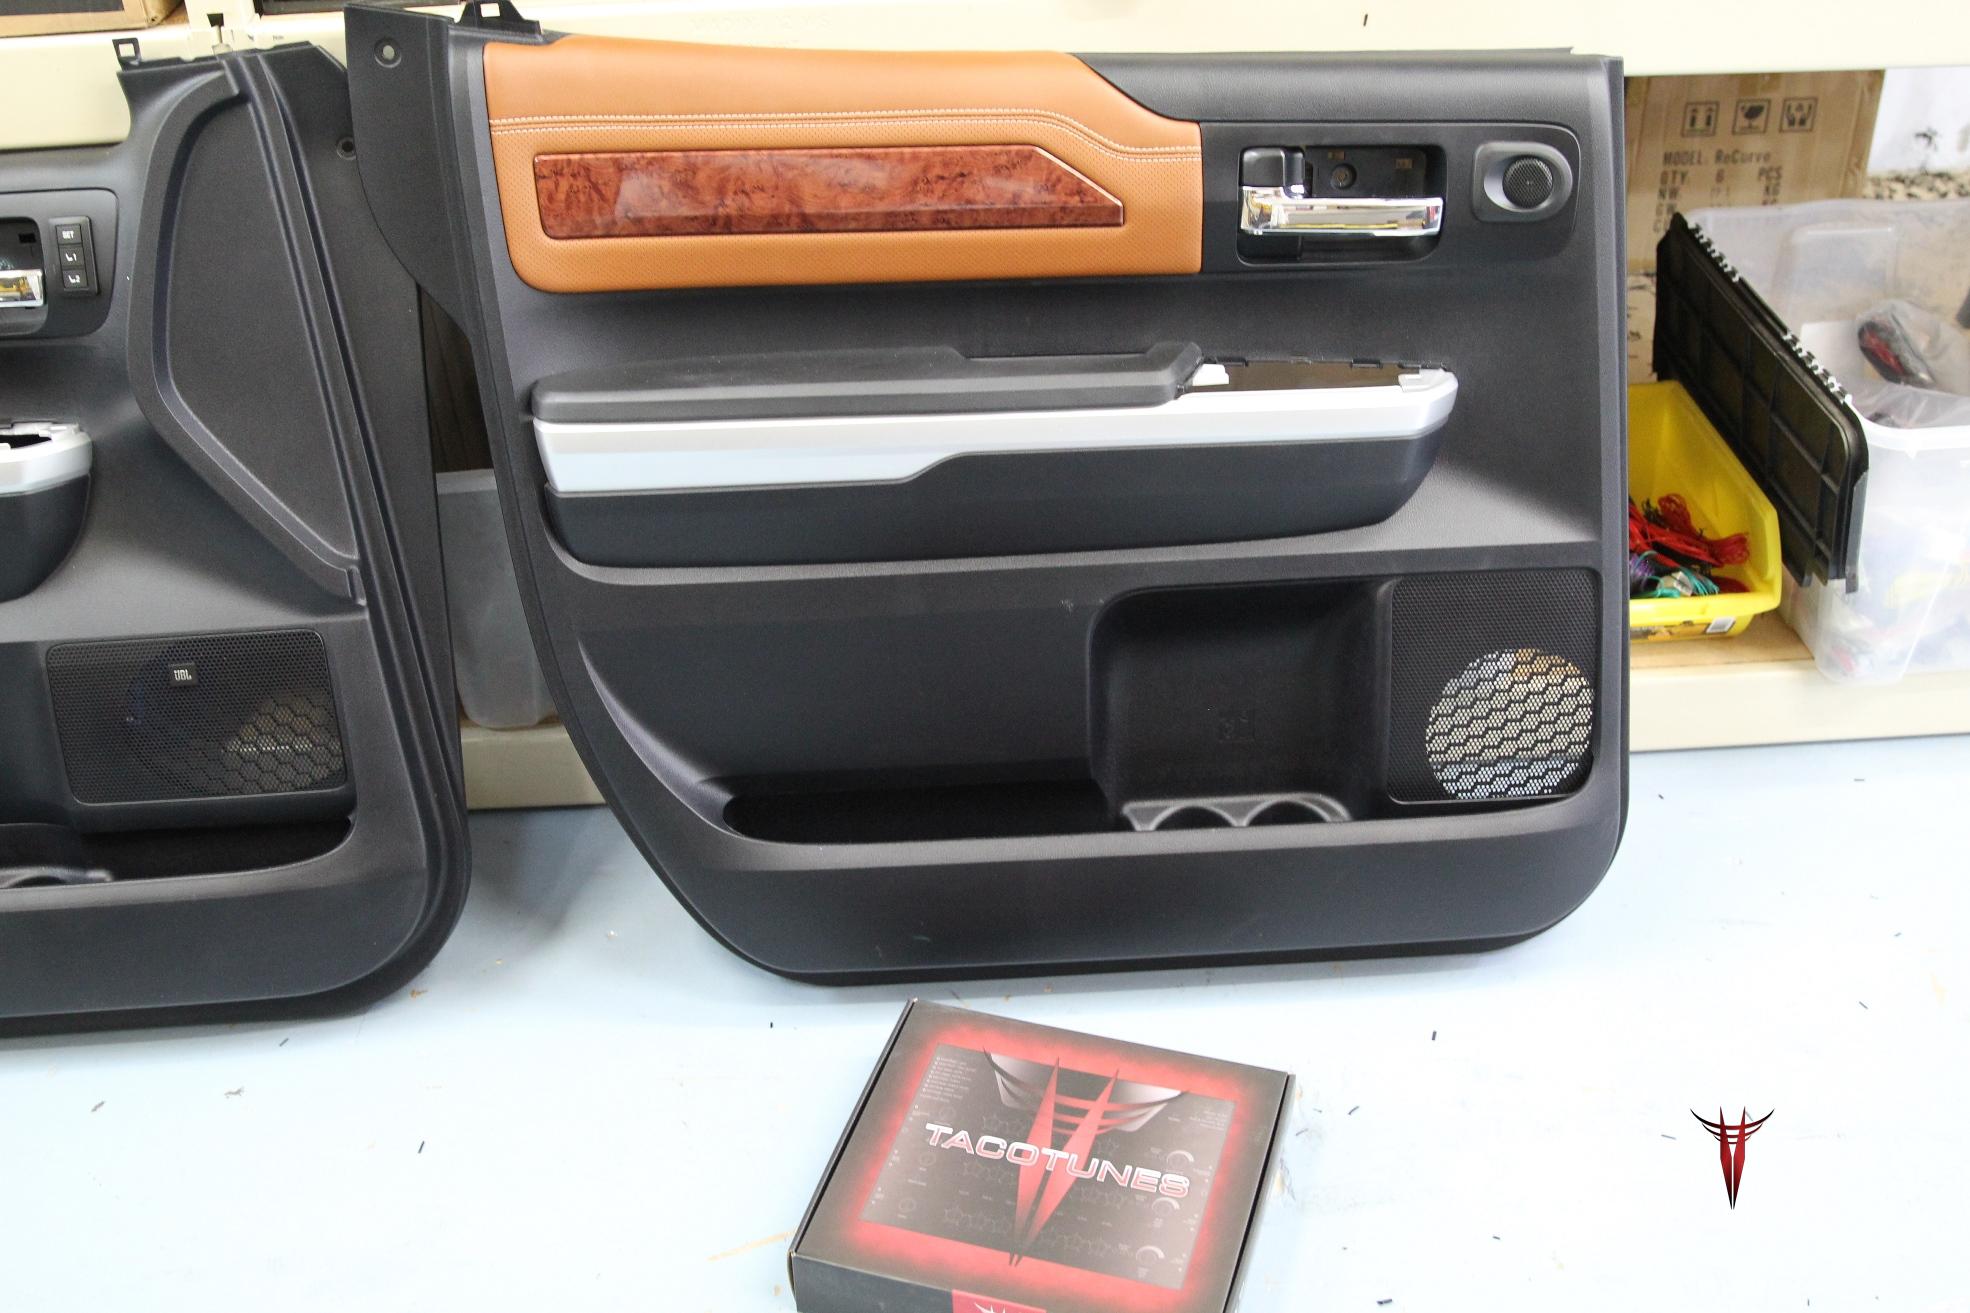
2015 Toyota Tundra CrewMax 1794 Edition Kicker KSS67 Tweeters
2015 Toyota Tundra CrewMax 1794 Edition Kicker KSS67 Speakers
2015 Toyota Tundra CrewMax Ballistic Matting Sound Deadener Installation
2015 Toyota Tundra CrewMax Ballistic Matting Sound Deadener Installation
2015 Toyota Tundra CrewMax 1794 Edition Stereo System Upgrade
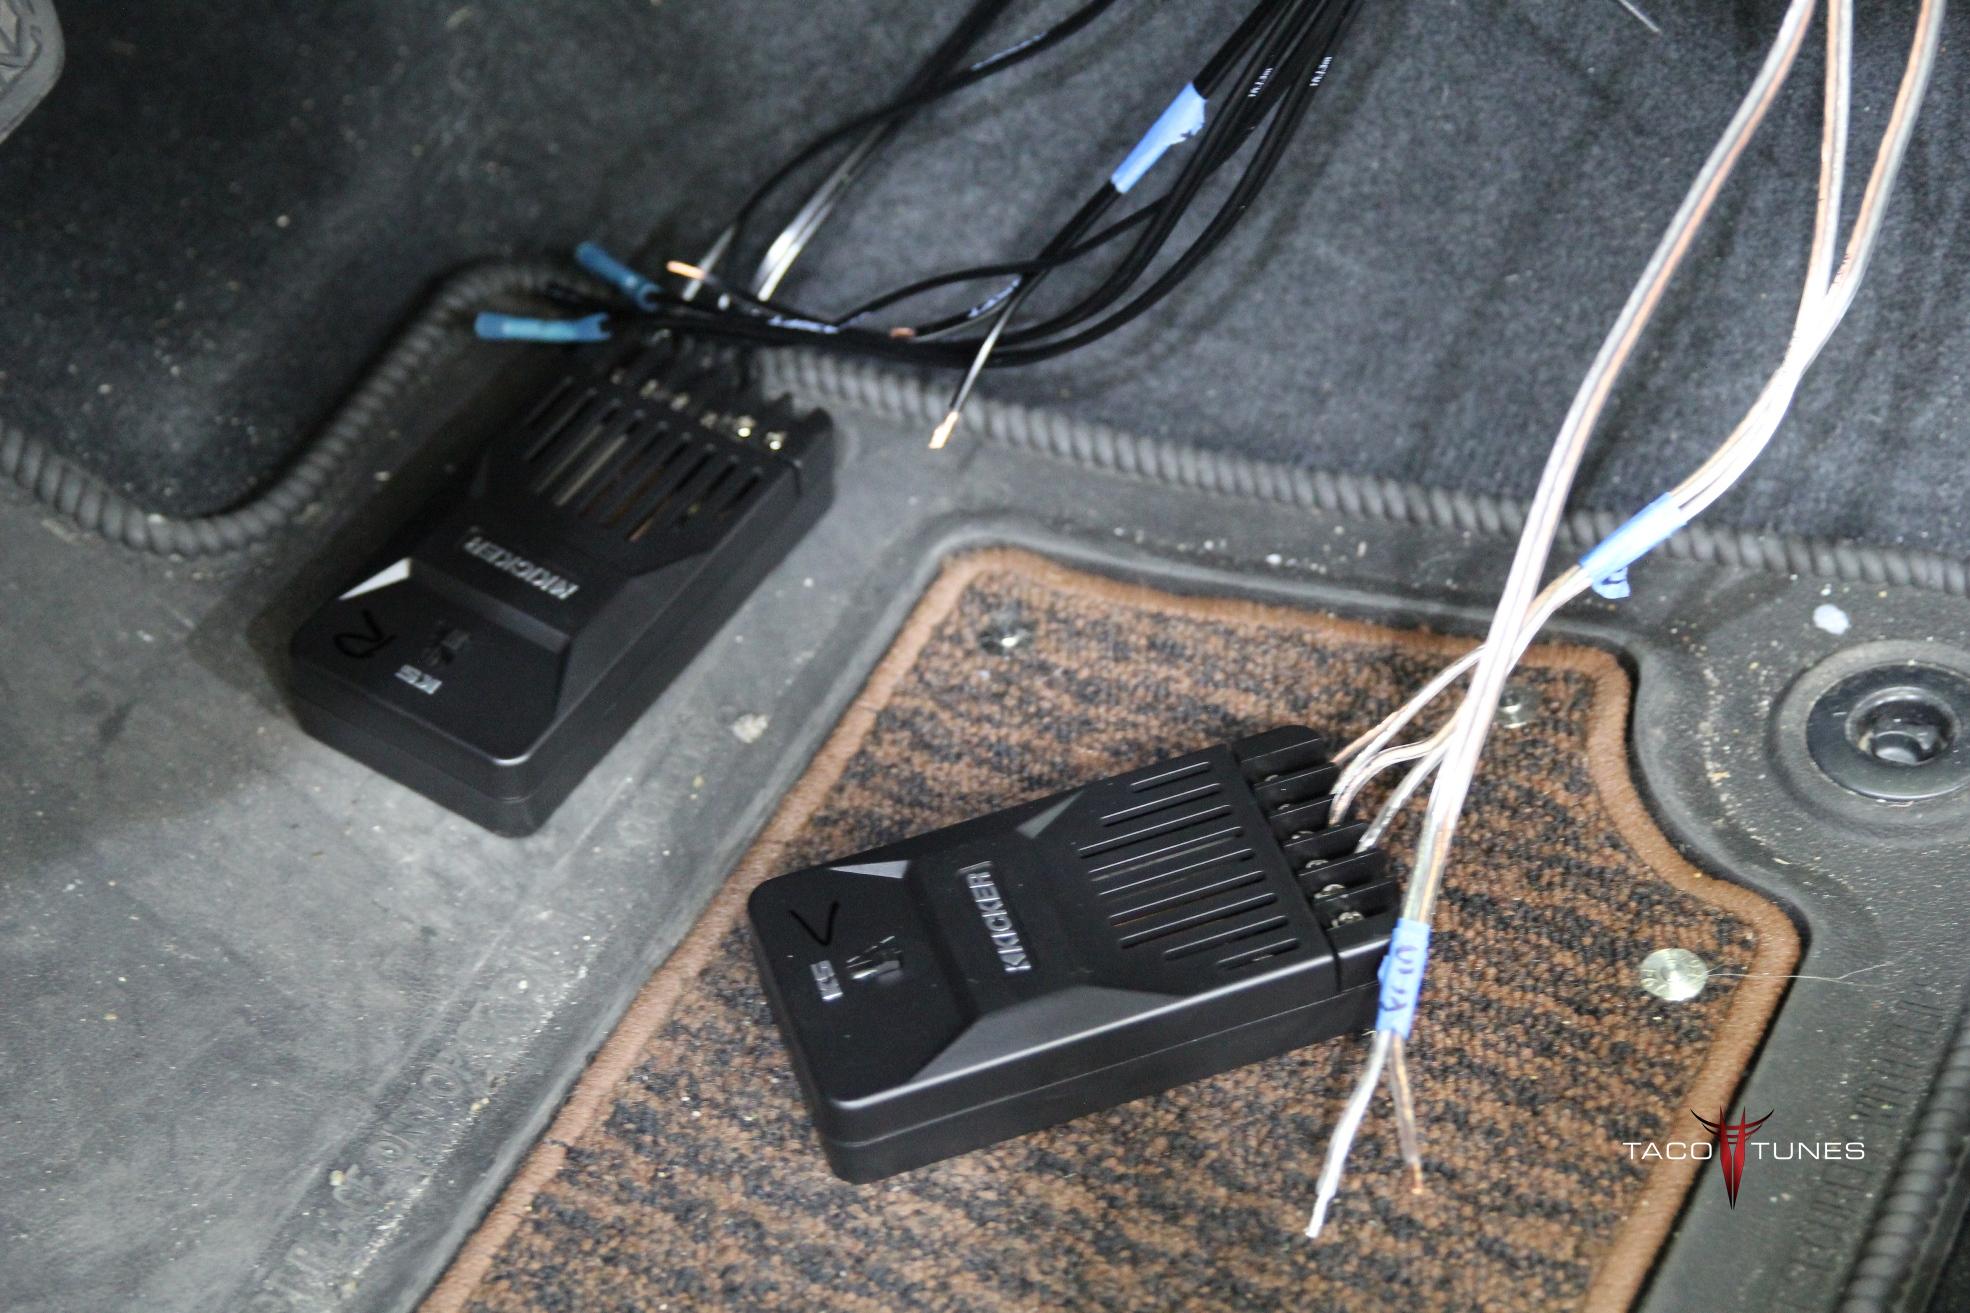
2015 Toyota Tundra CrewMax 1794 Edition Kicker KSS67 Crossovers
2015 Toyota Tundra CrewMax 1794 Edition Stereo System Upgrade
2015 Toyota Tundra CrewMax 1794 Edition Kicker KSS67 Tweeters Speakers
2015 Toyota Tundra CrewMax 1794 Edition Kicker KSS67 Tweeters Speakers
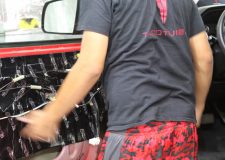
2015 Toyota Tundra CrewMax Ballistic Matting Sound Deadener Installation
2015 Toyota Tundra CrewMax Ballistic Matting Sound Deadener Installation
2015 Toyota Tundra CrewMax 1794 Edition Stereo System Upgrade
2015 Toyota Tundra CrewMax 1794 Edition Stereo System Upgrade
2015 Toyota Tundra CrewMax 1794 Edition Stereo System Upgrade
2015 Toyota Tundra CrewMax 1794 Edition Stereo System Upgrade
2015 Toyota Tundra CrewMax 1794 Edition Stereo System Upgrade
2015 Toyota Tundra CrewMax 1794 Edition Stereo System Upgrade
2015 Toyota Tundra CrewMax Kicker L7 Subwoofer Box
2015 Toyota Tundra CrewMax Ballistic Matting Sound Deadener Installation
2015 Toyota Tundra CrewMax Ballistic Matting Sound Deadener Installation
2015 Toyota Tundra CrewMax Ballistic Matting Sound Deadener Installation
2015 Toyota Tundra CrewMax 1794 Edition Stereo System Upgrade
2015 Toyota Tundra CrewMax Ballistic Matting Sound Deadener Installation
2015 Toyota Tundra CrewMax 1794 Edition Stereo System Upgrade
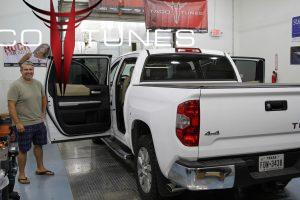
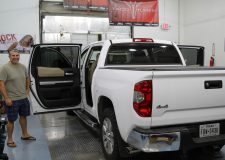
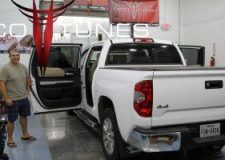
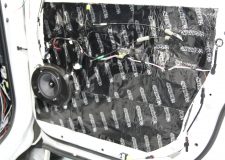
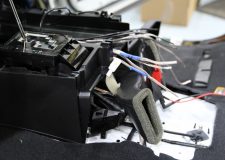
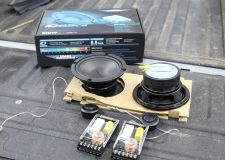
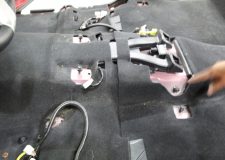
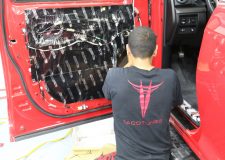
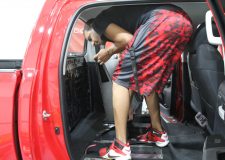
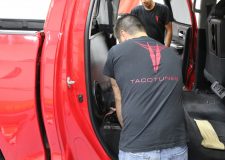
Below you will find a detailed listing of all the parts we used in the installation.
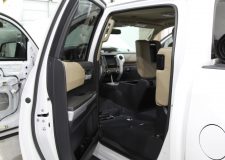
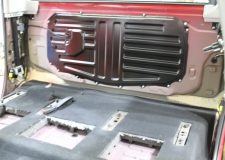
Typical Installation time is 1 day, however we matted the front, rear doors and the rear wall behind the subwoofer. If we are matting the truck we keep the truck for two days. One day audio installation and matting jobs are possible, but require at least 14 hours with the truck.
Below is a detailed listing of the audio products installed in Jon’s Tundra CrewMax
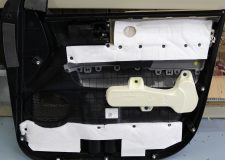
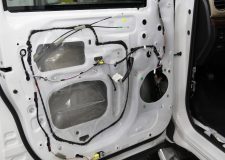
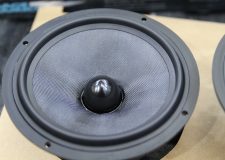
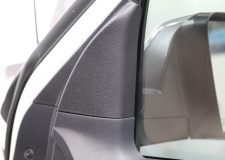
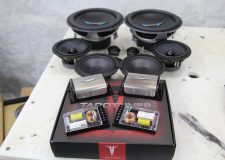
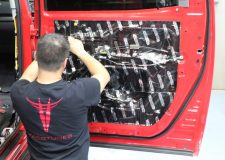
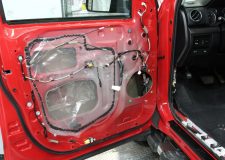
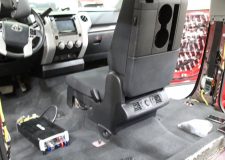
Front Door Component Speakers:
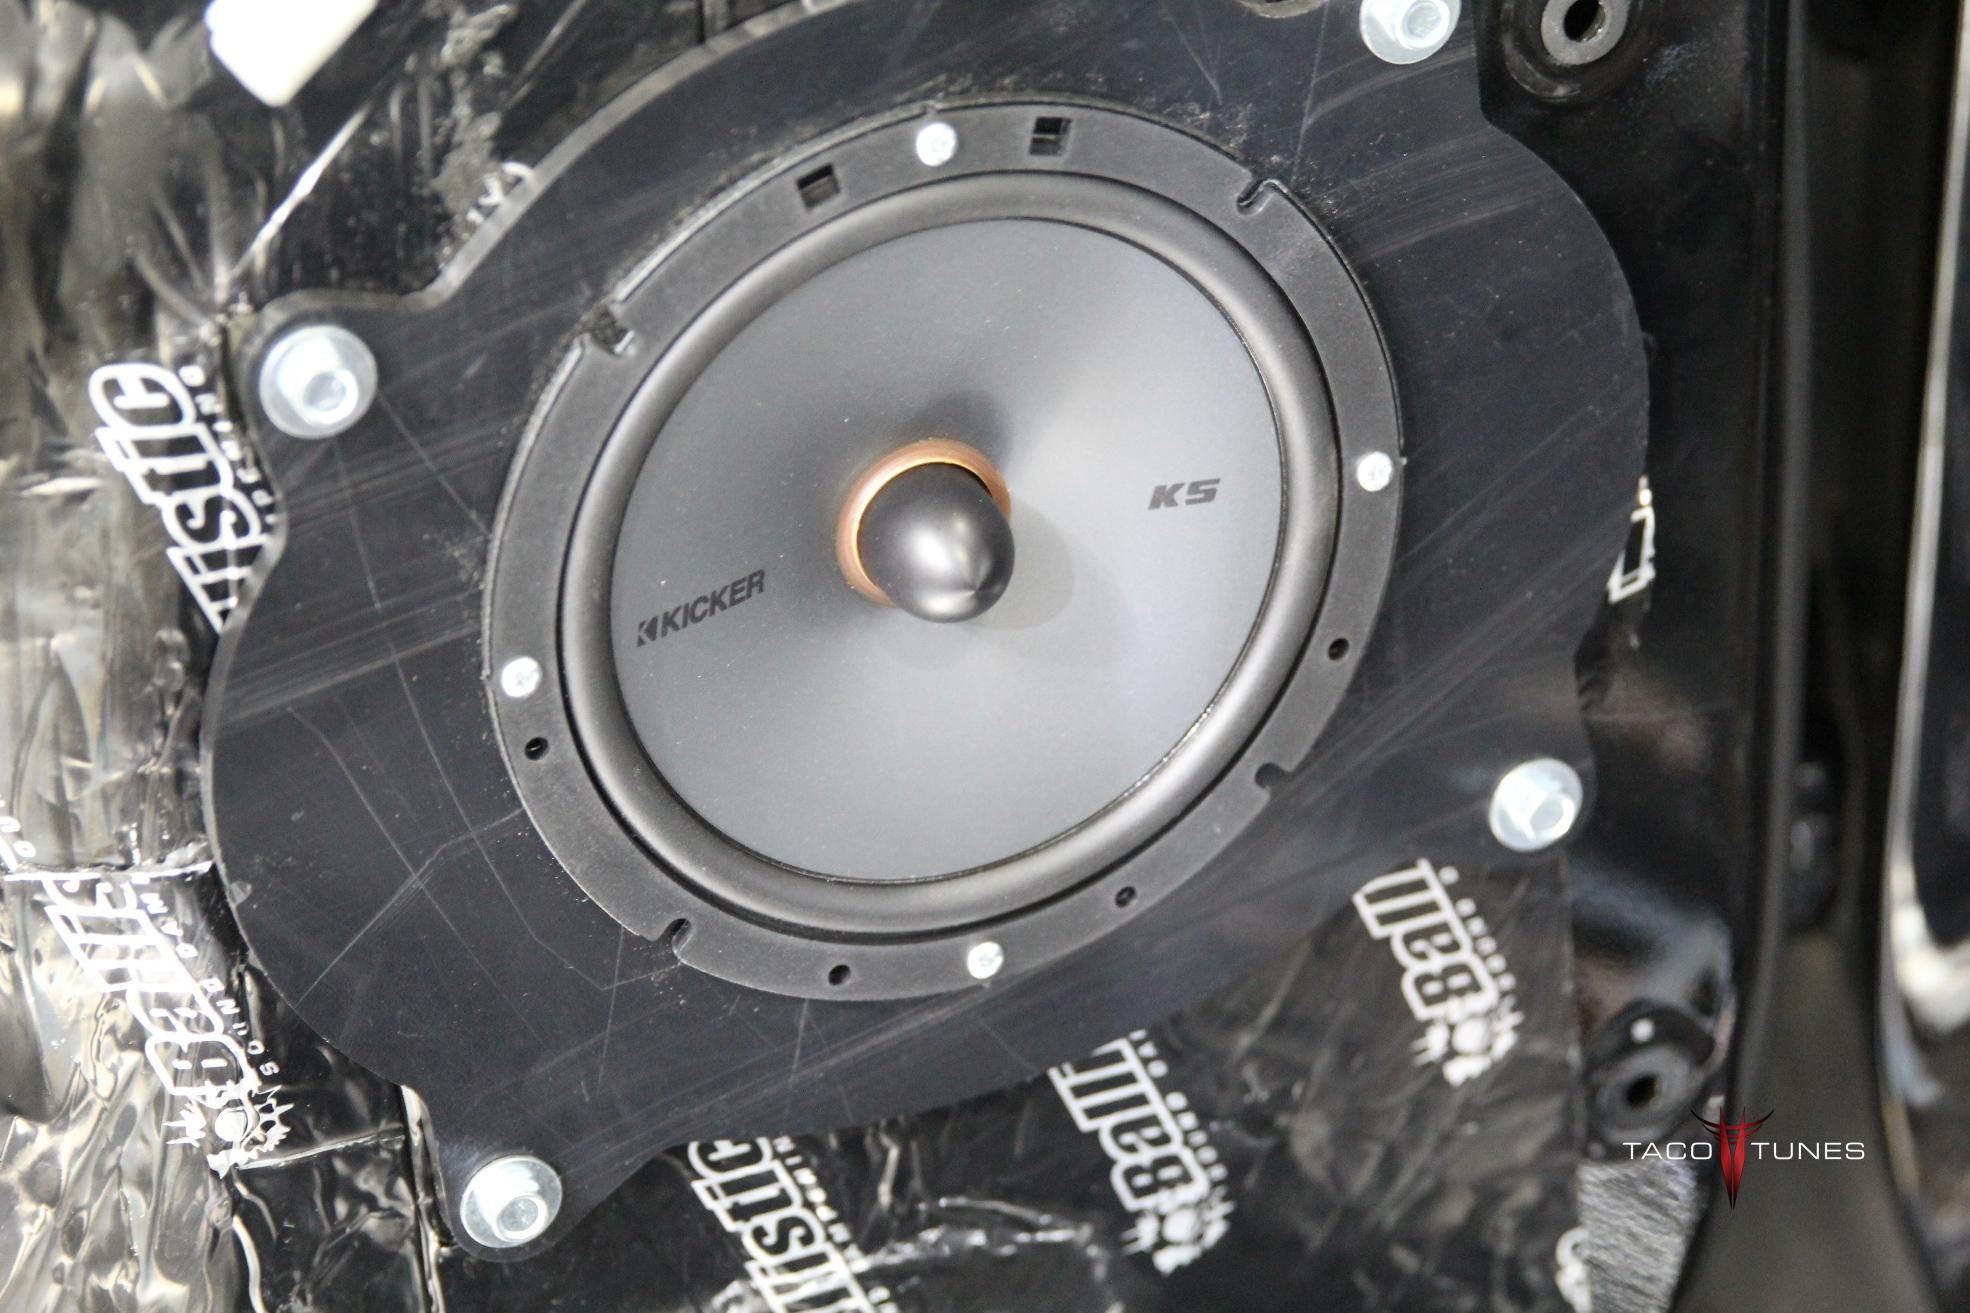
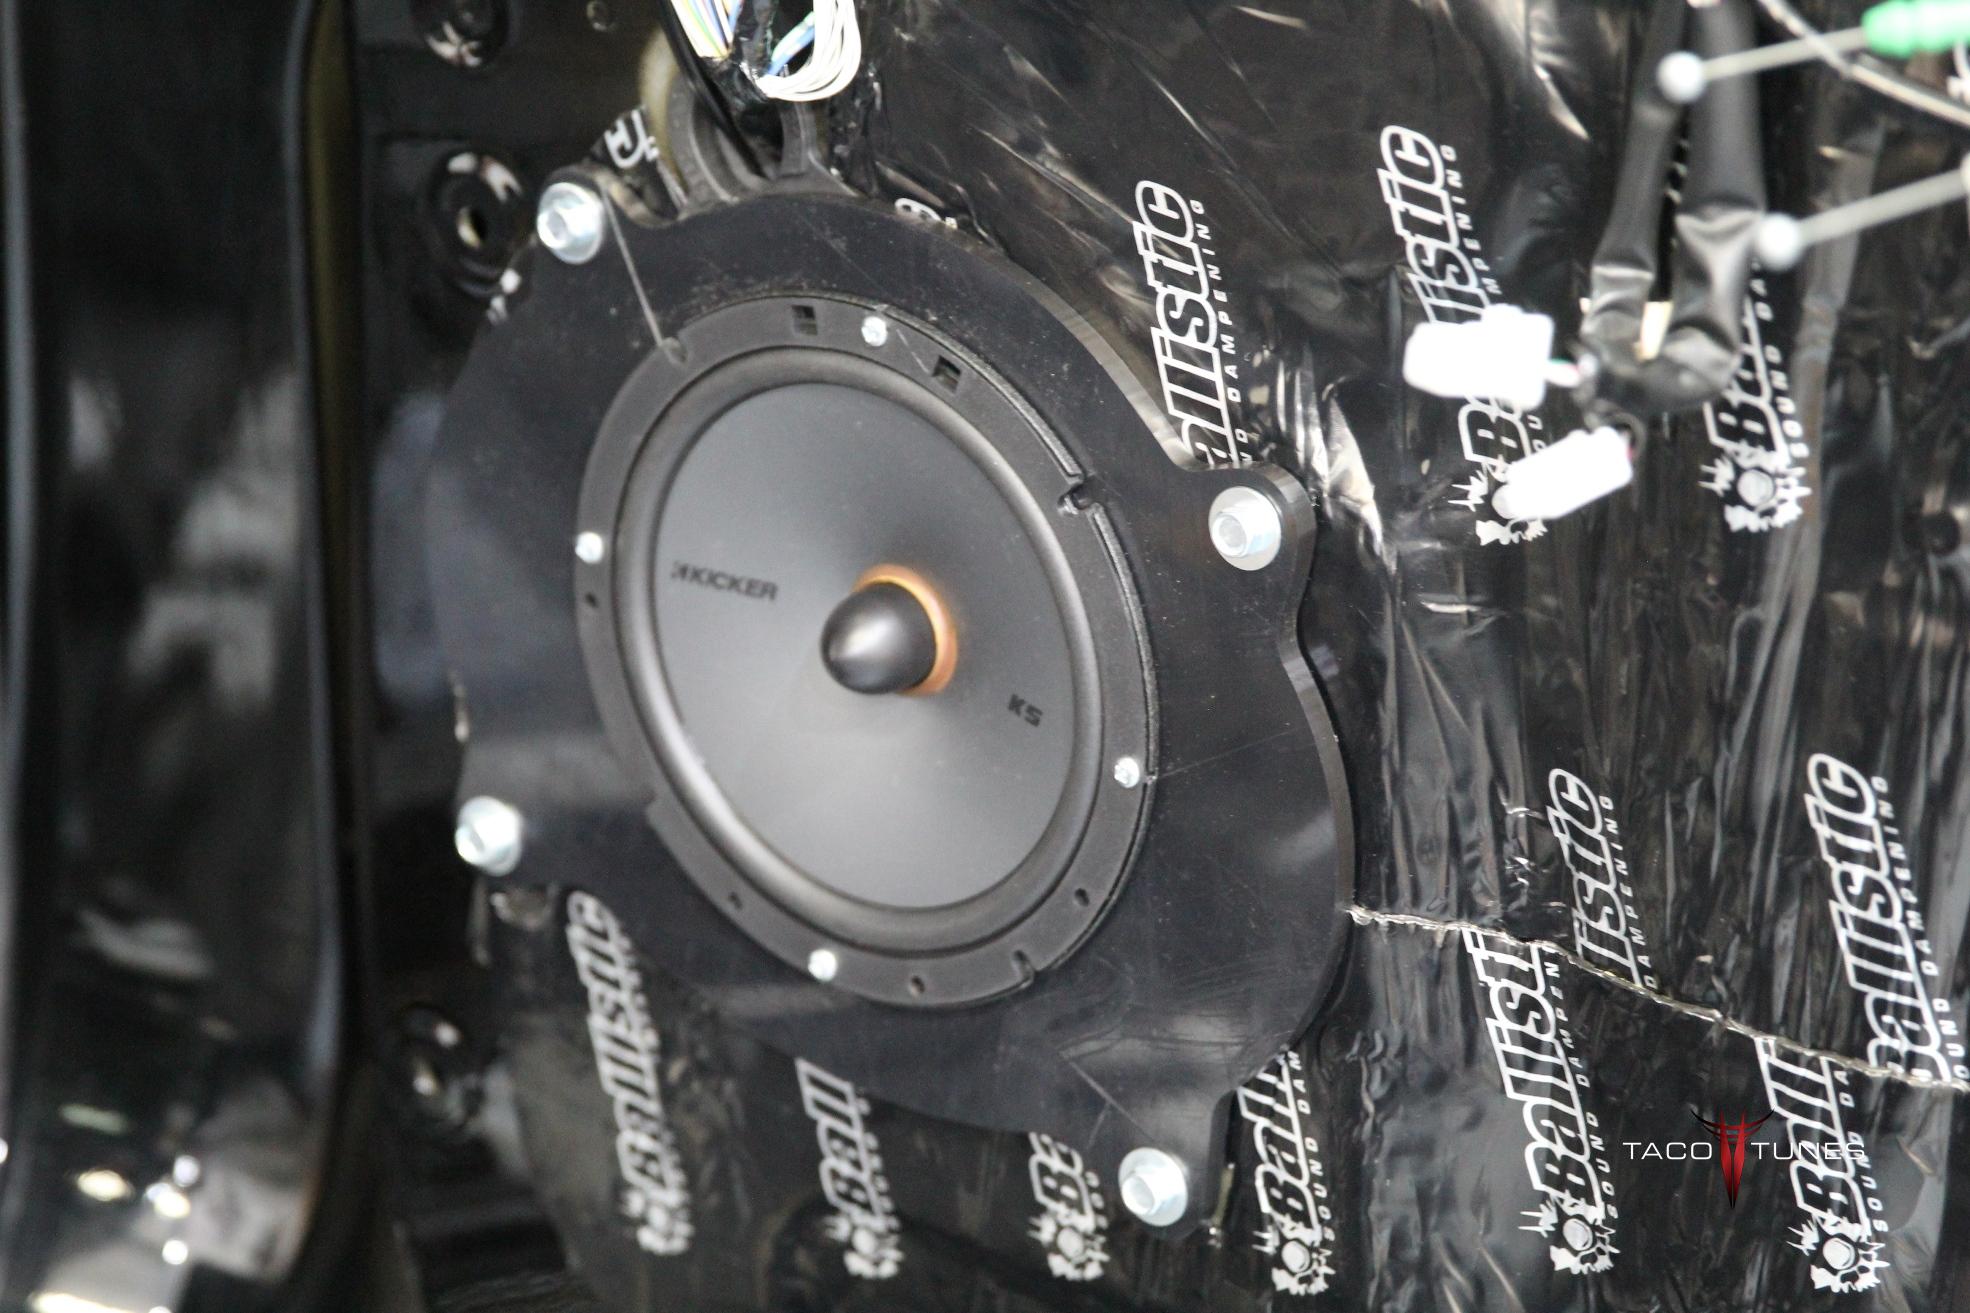
Kicker KSS67 Component Speakers
Tacotunes.com heavy duty speaker mounts cut to 5.6”
KSS Mid bass Drivers -100 Watts RMS
KSS Crossover
KSS Dome Tweeter
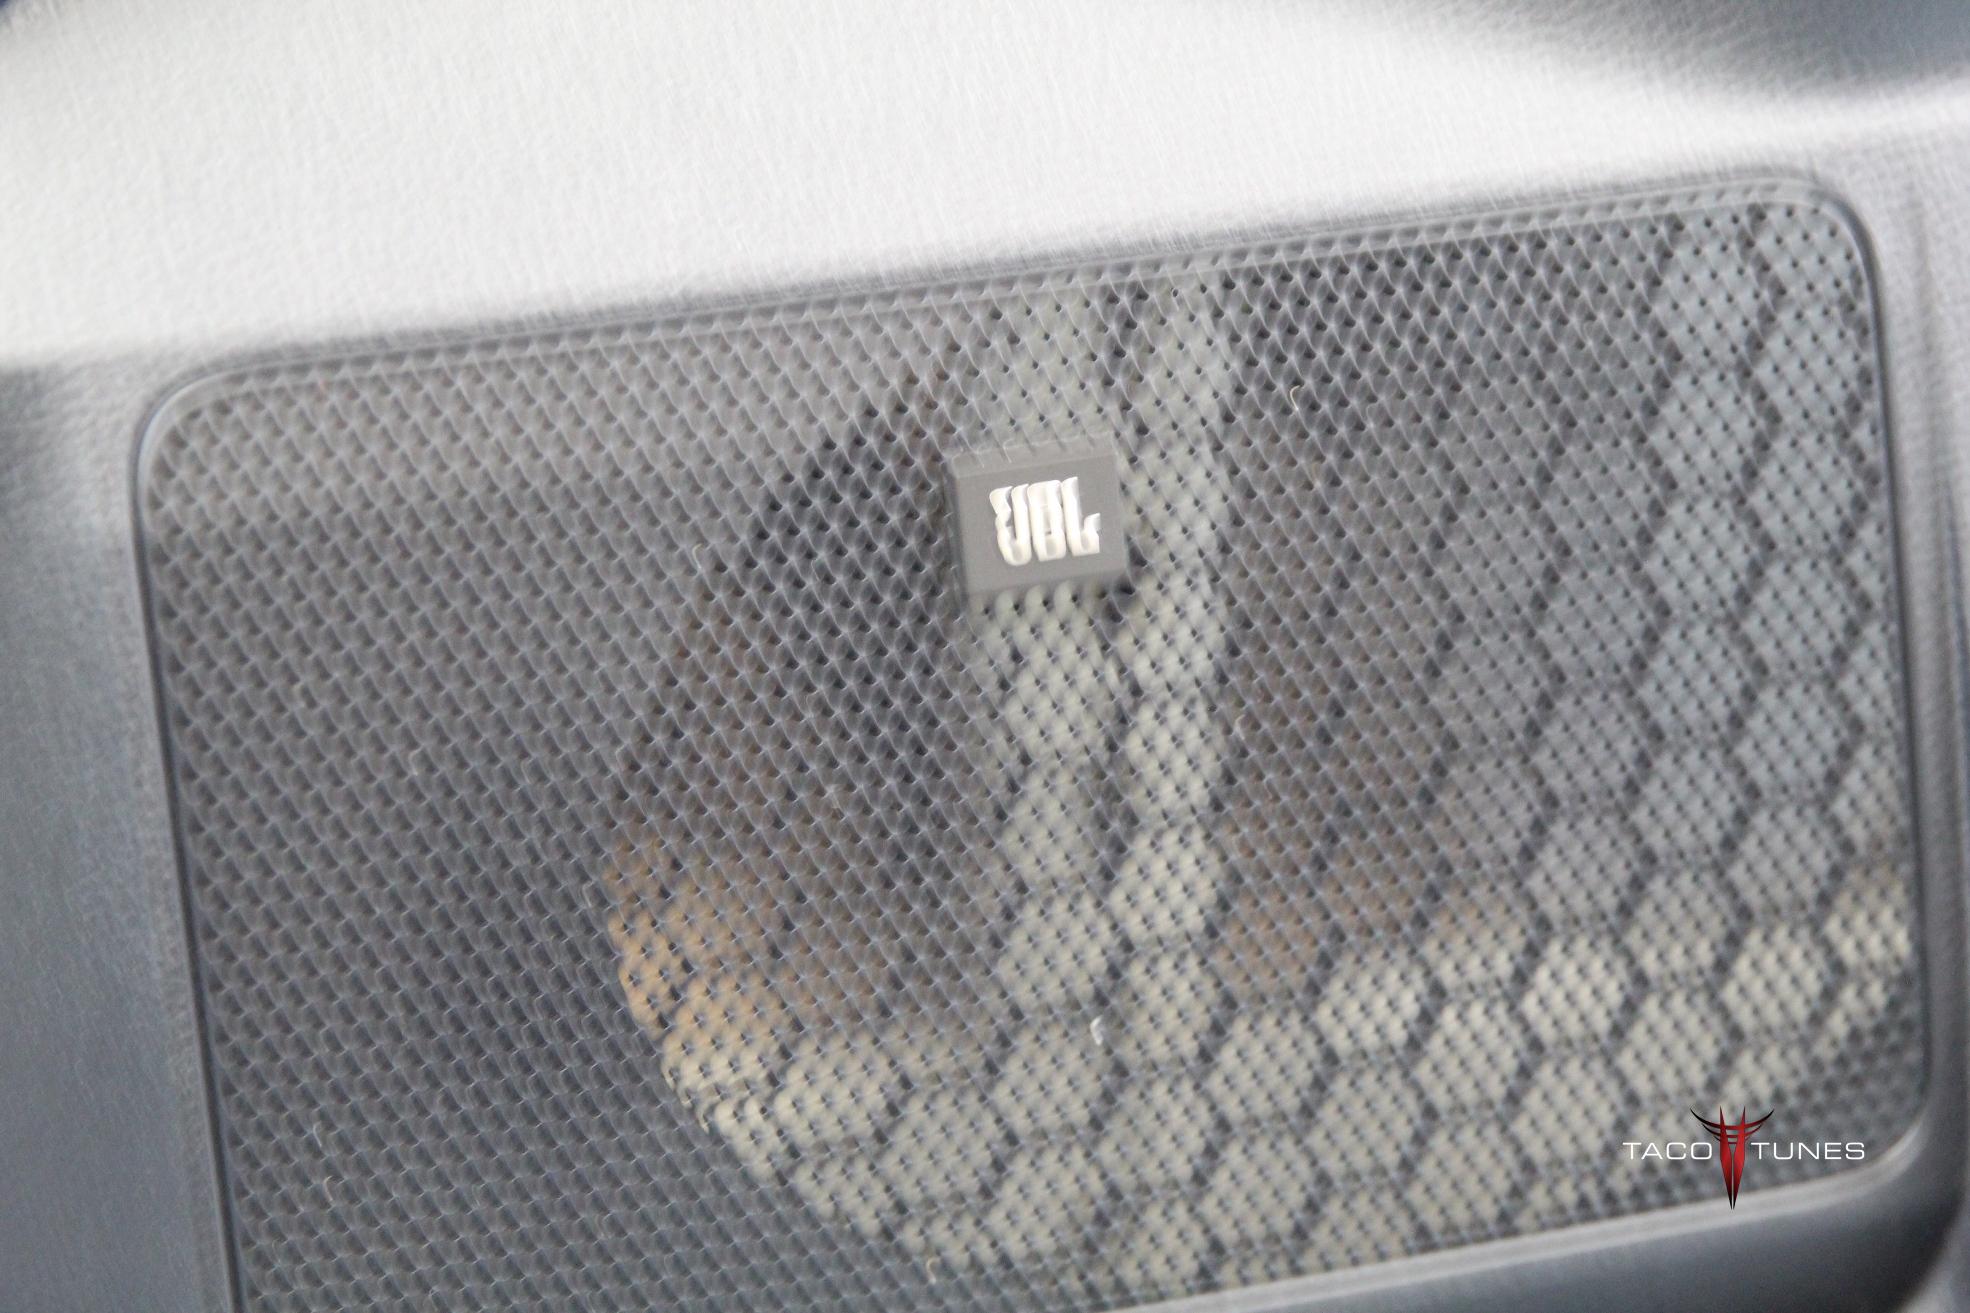
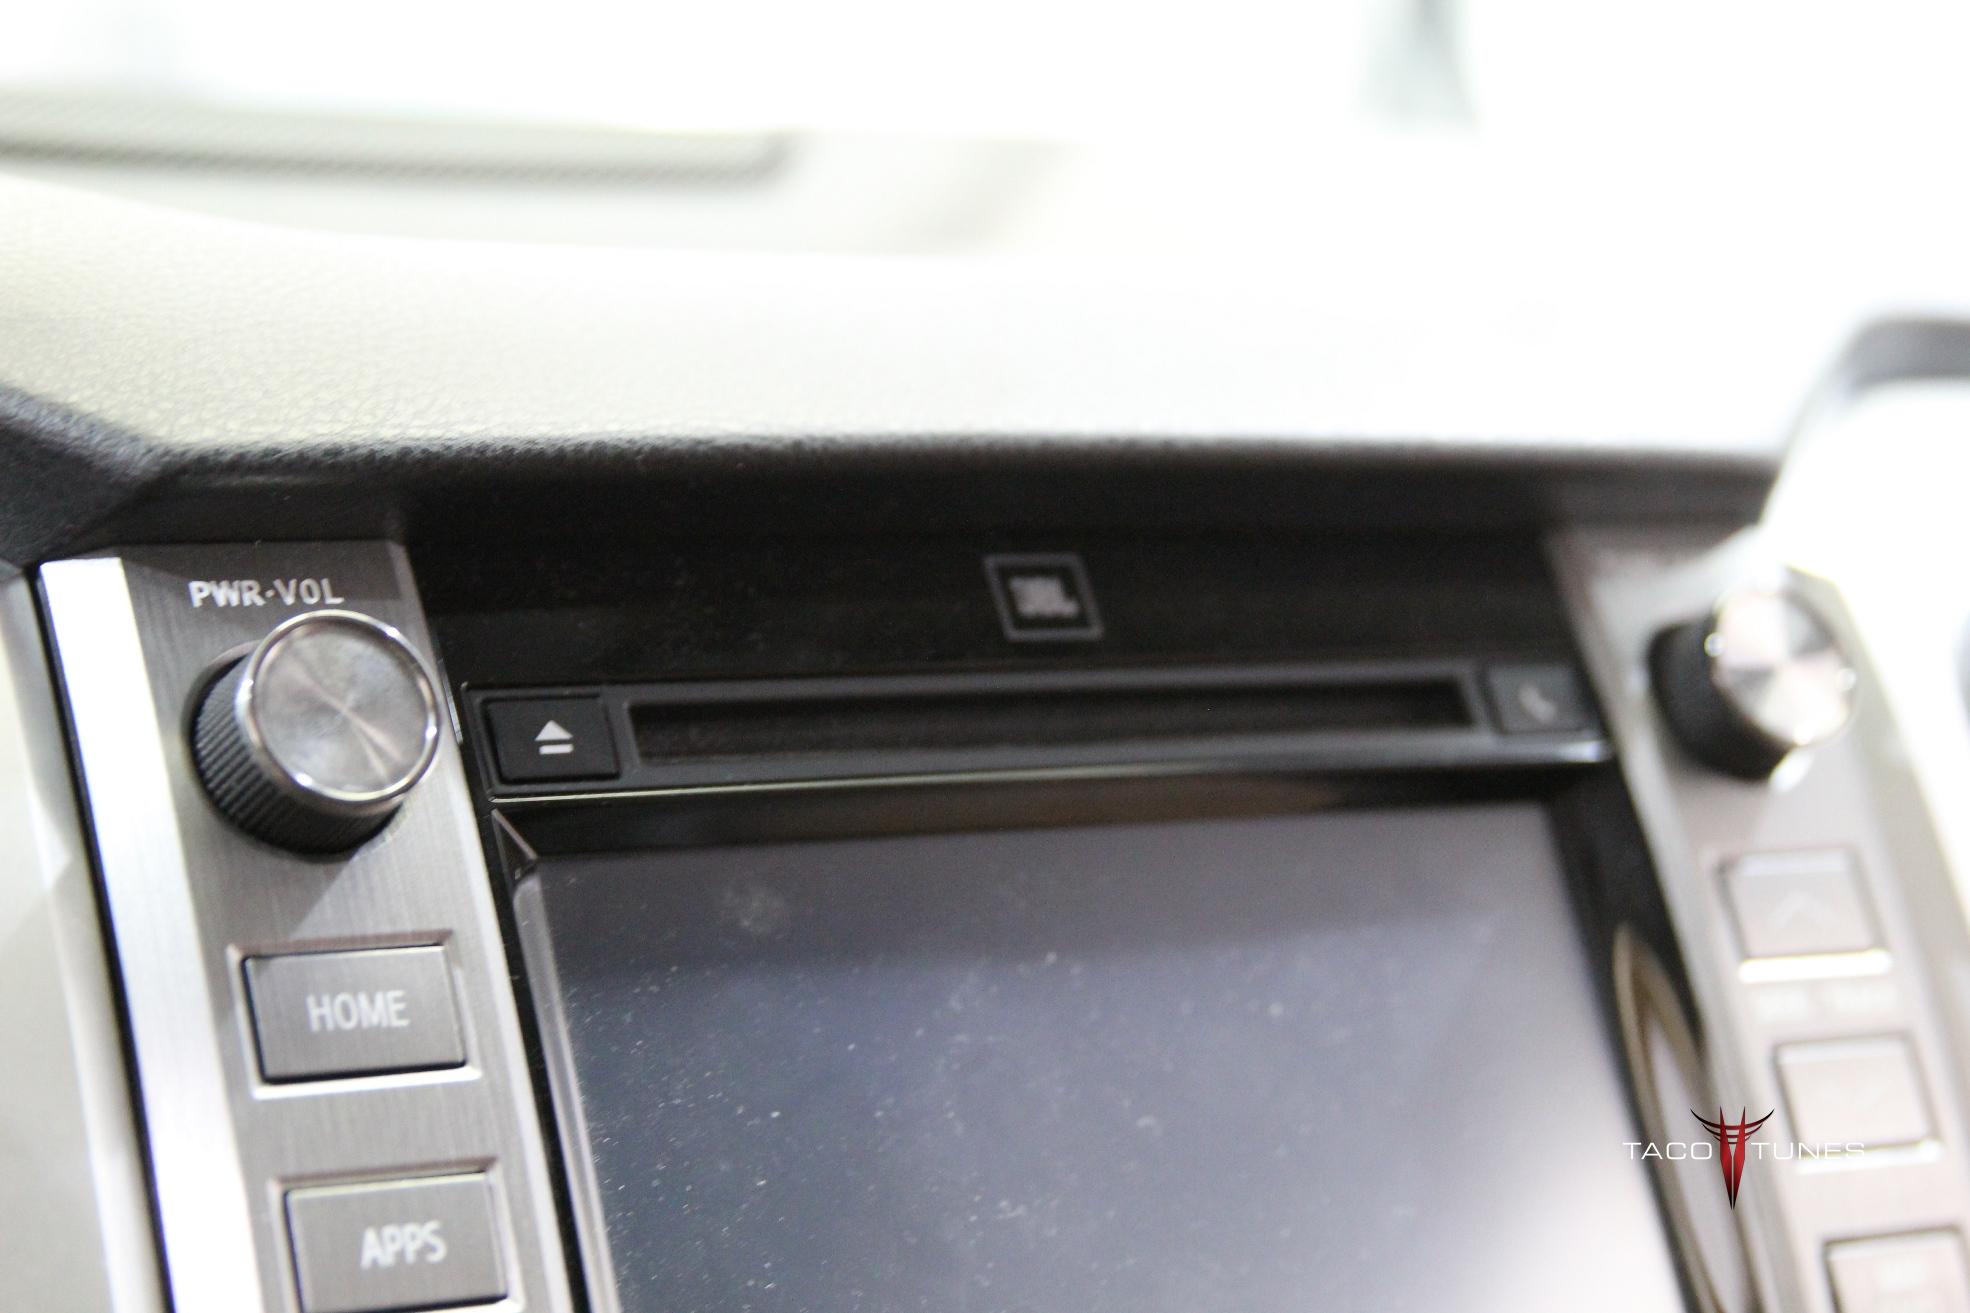
NOTE: JBL equipped
Use Stock Sail Panel for Tweeter mounts.
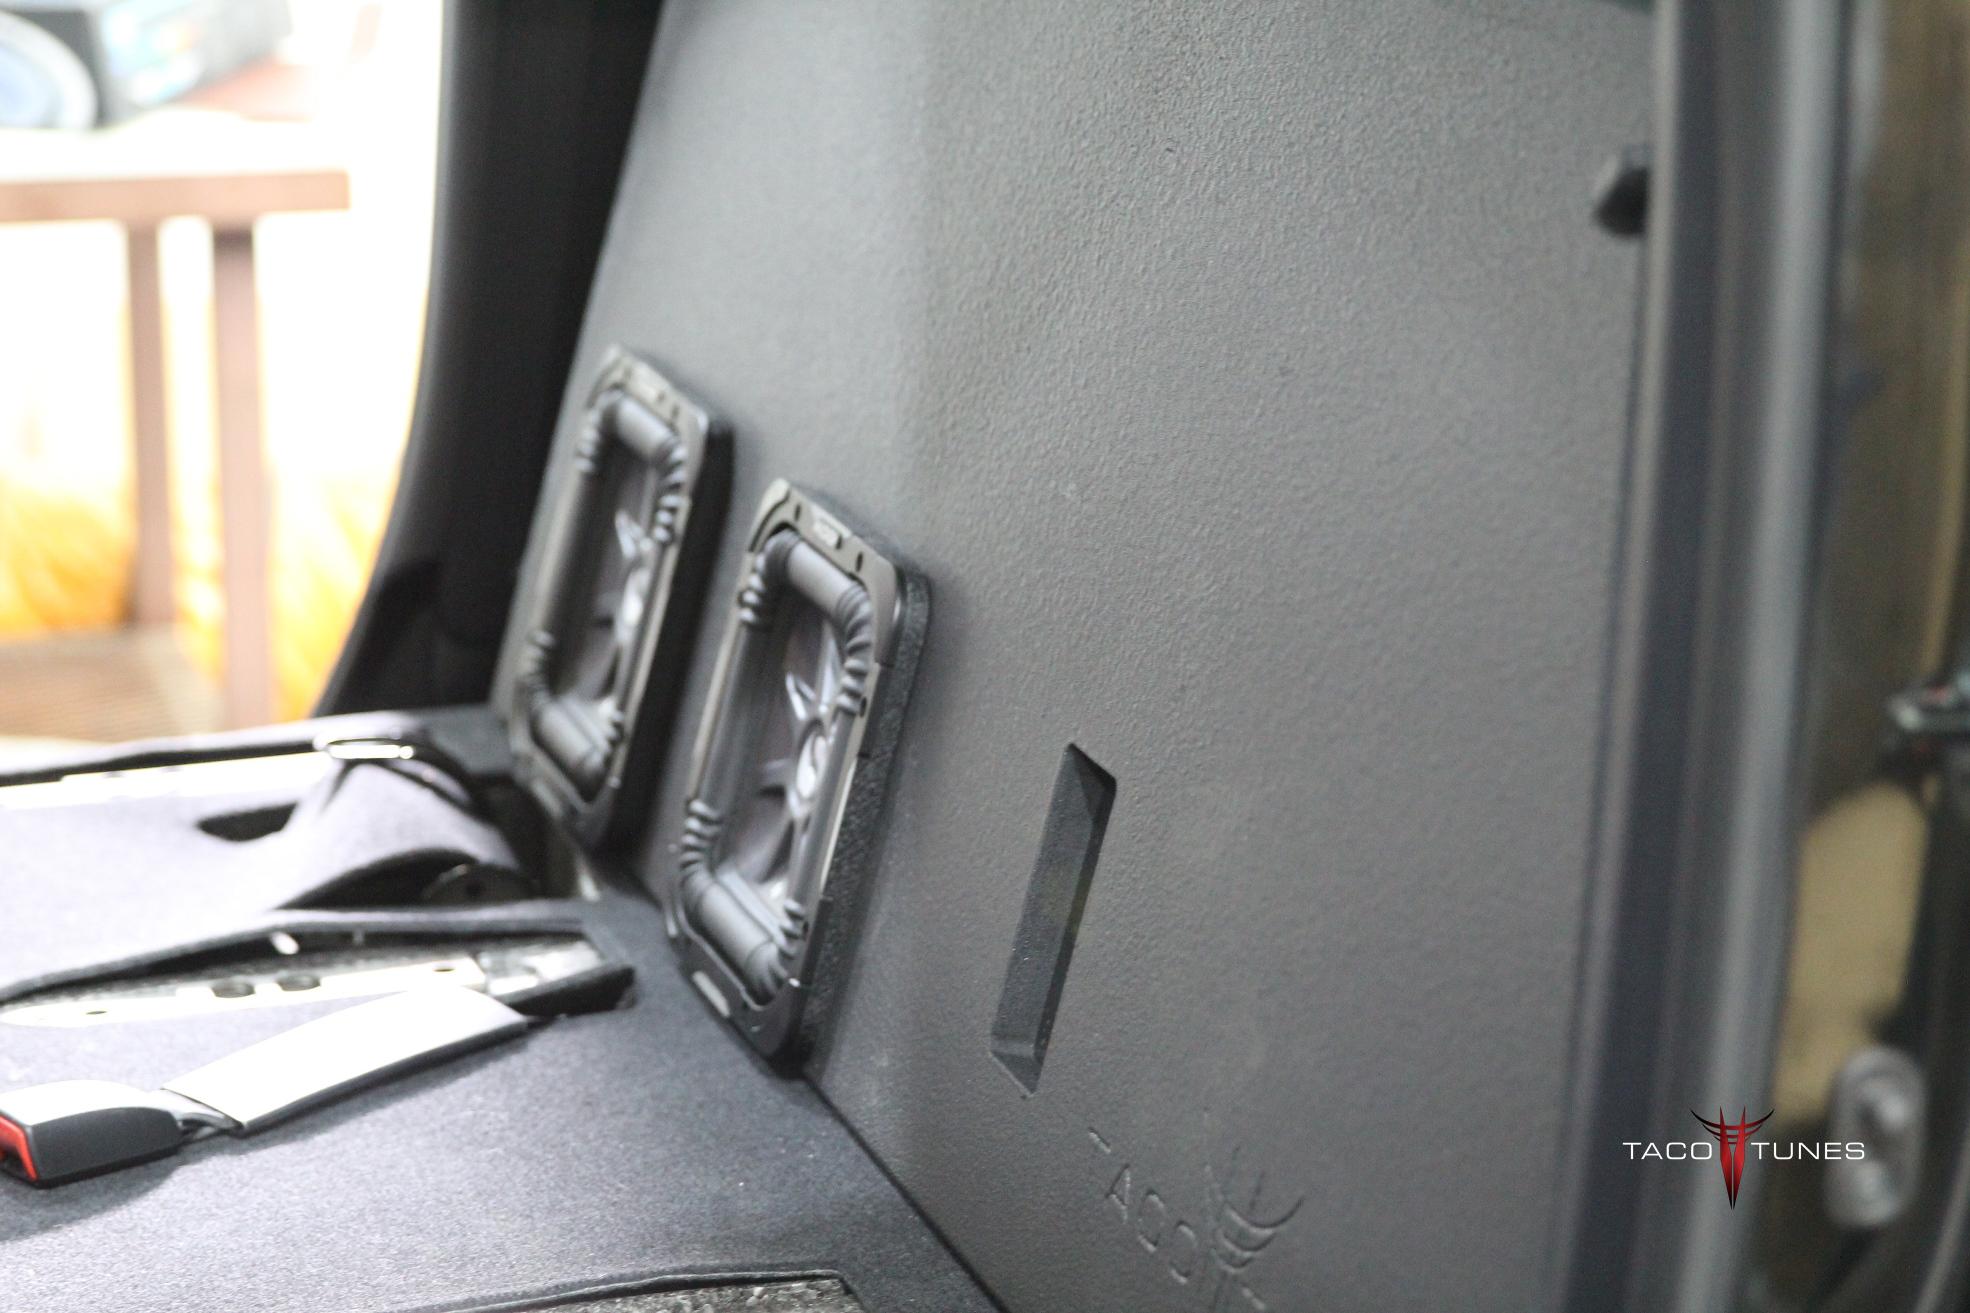
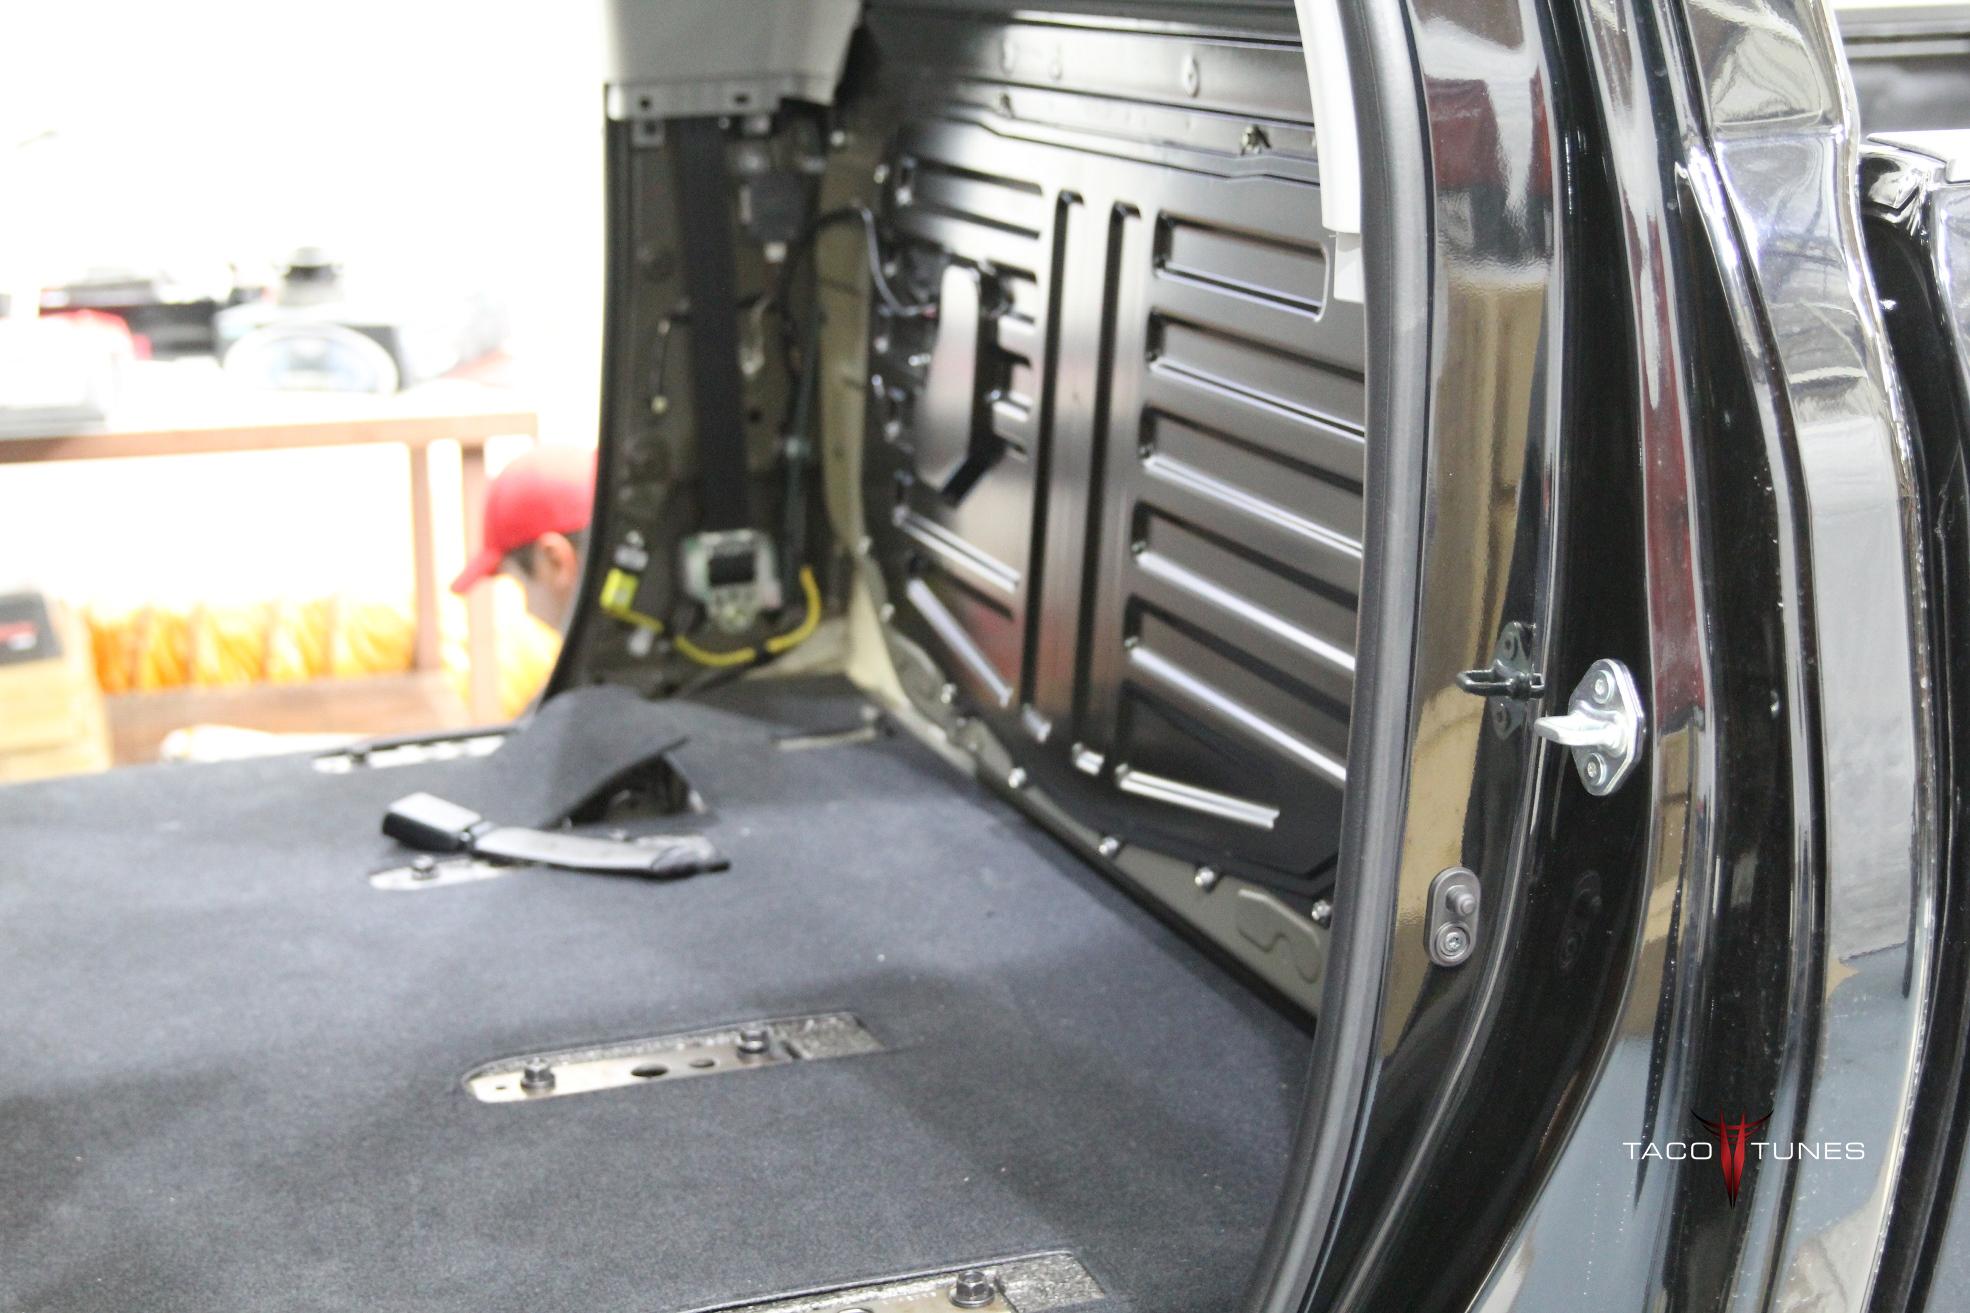
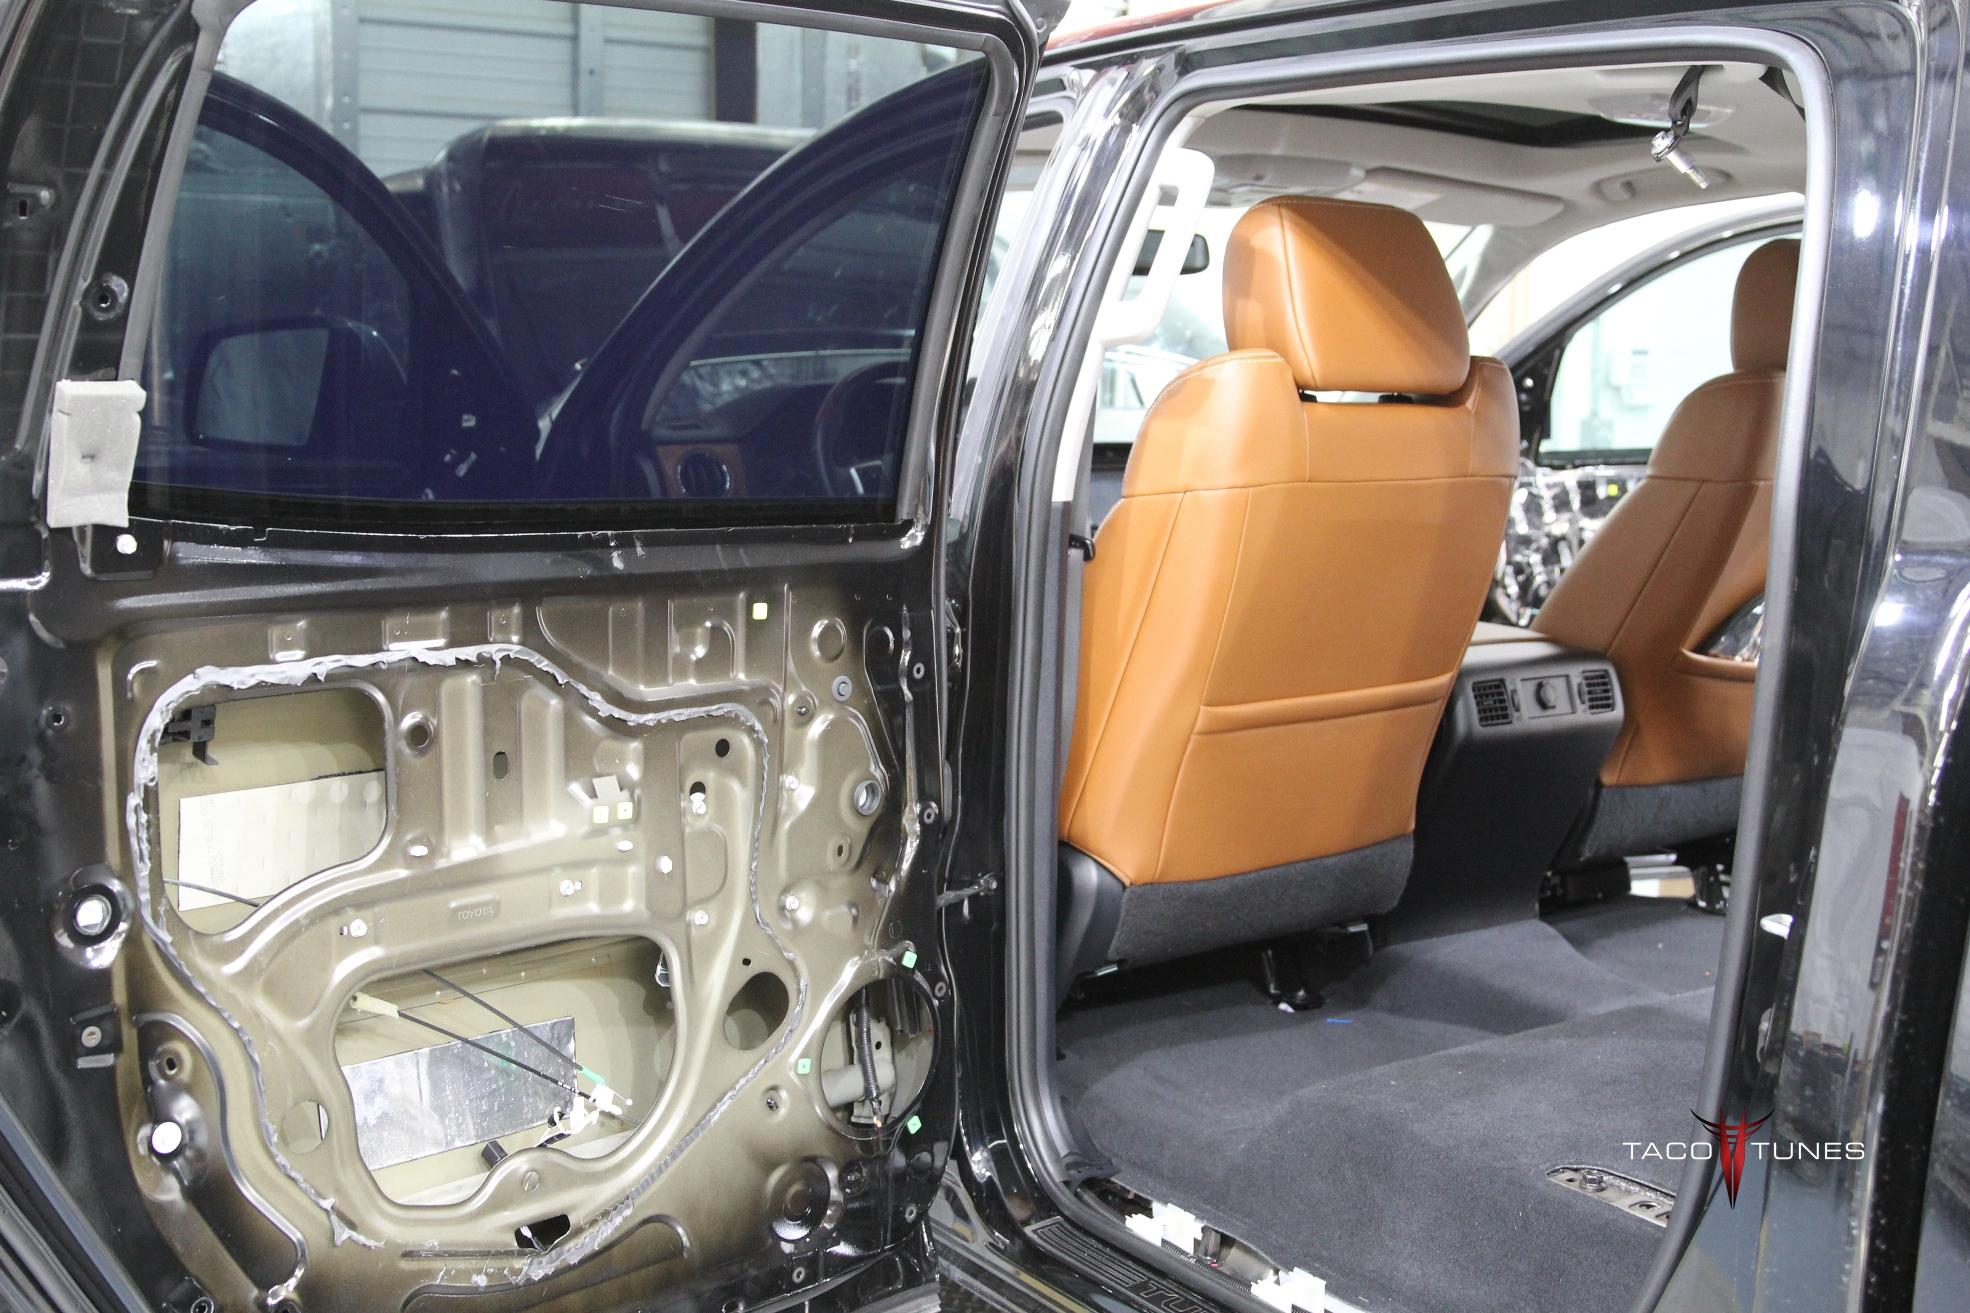
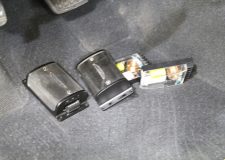
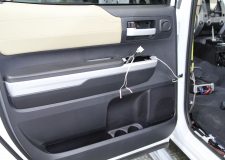
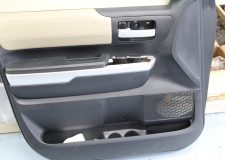
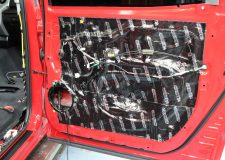
Rear Door Components:
Kicker KSS
Tweeters will fit in stock door location
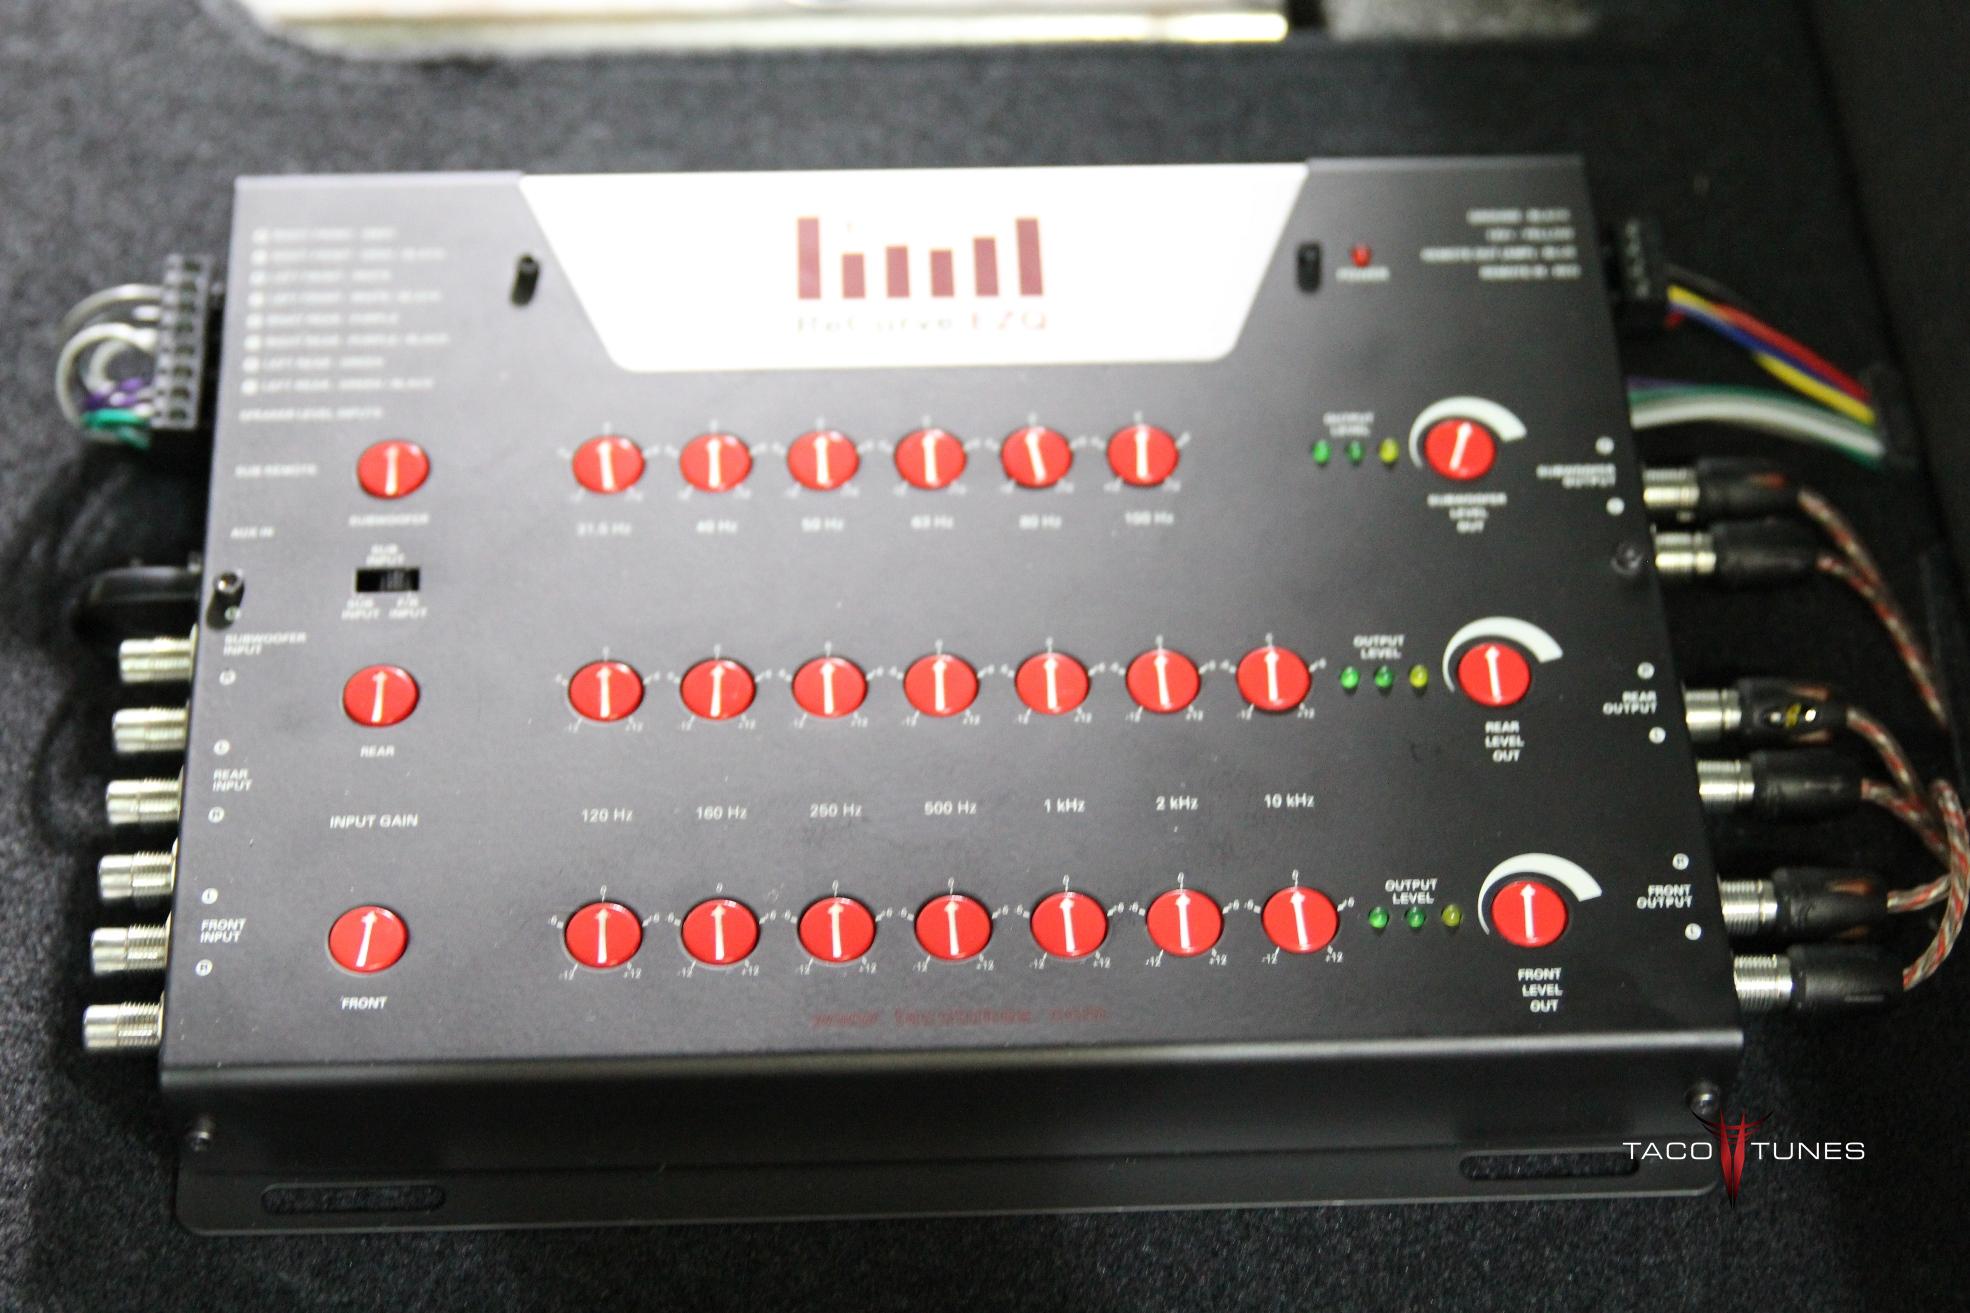
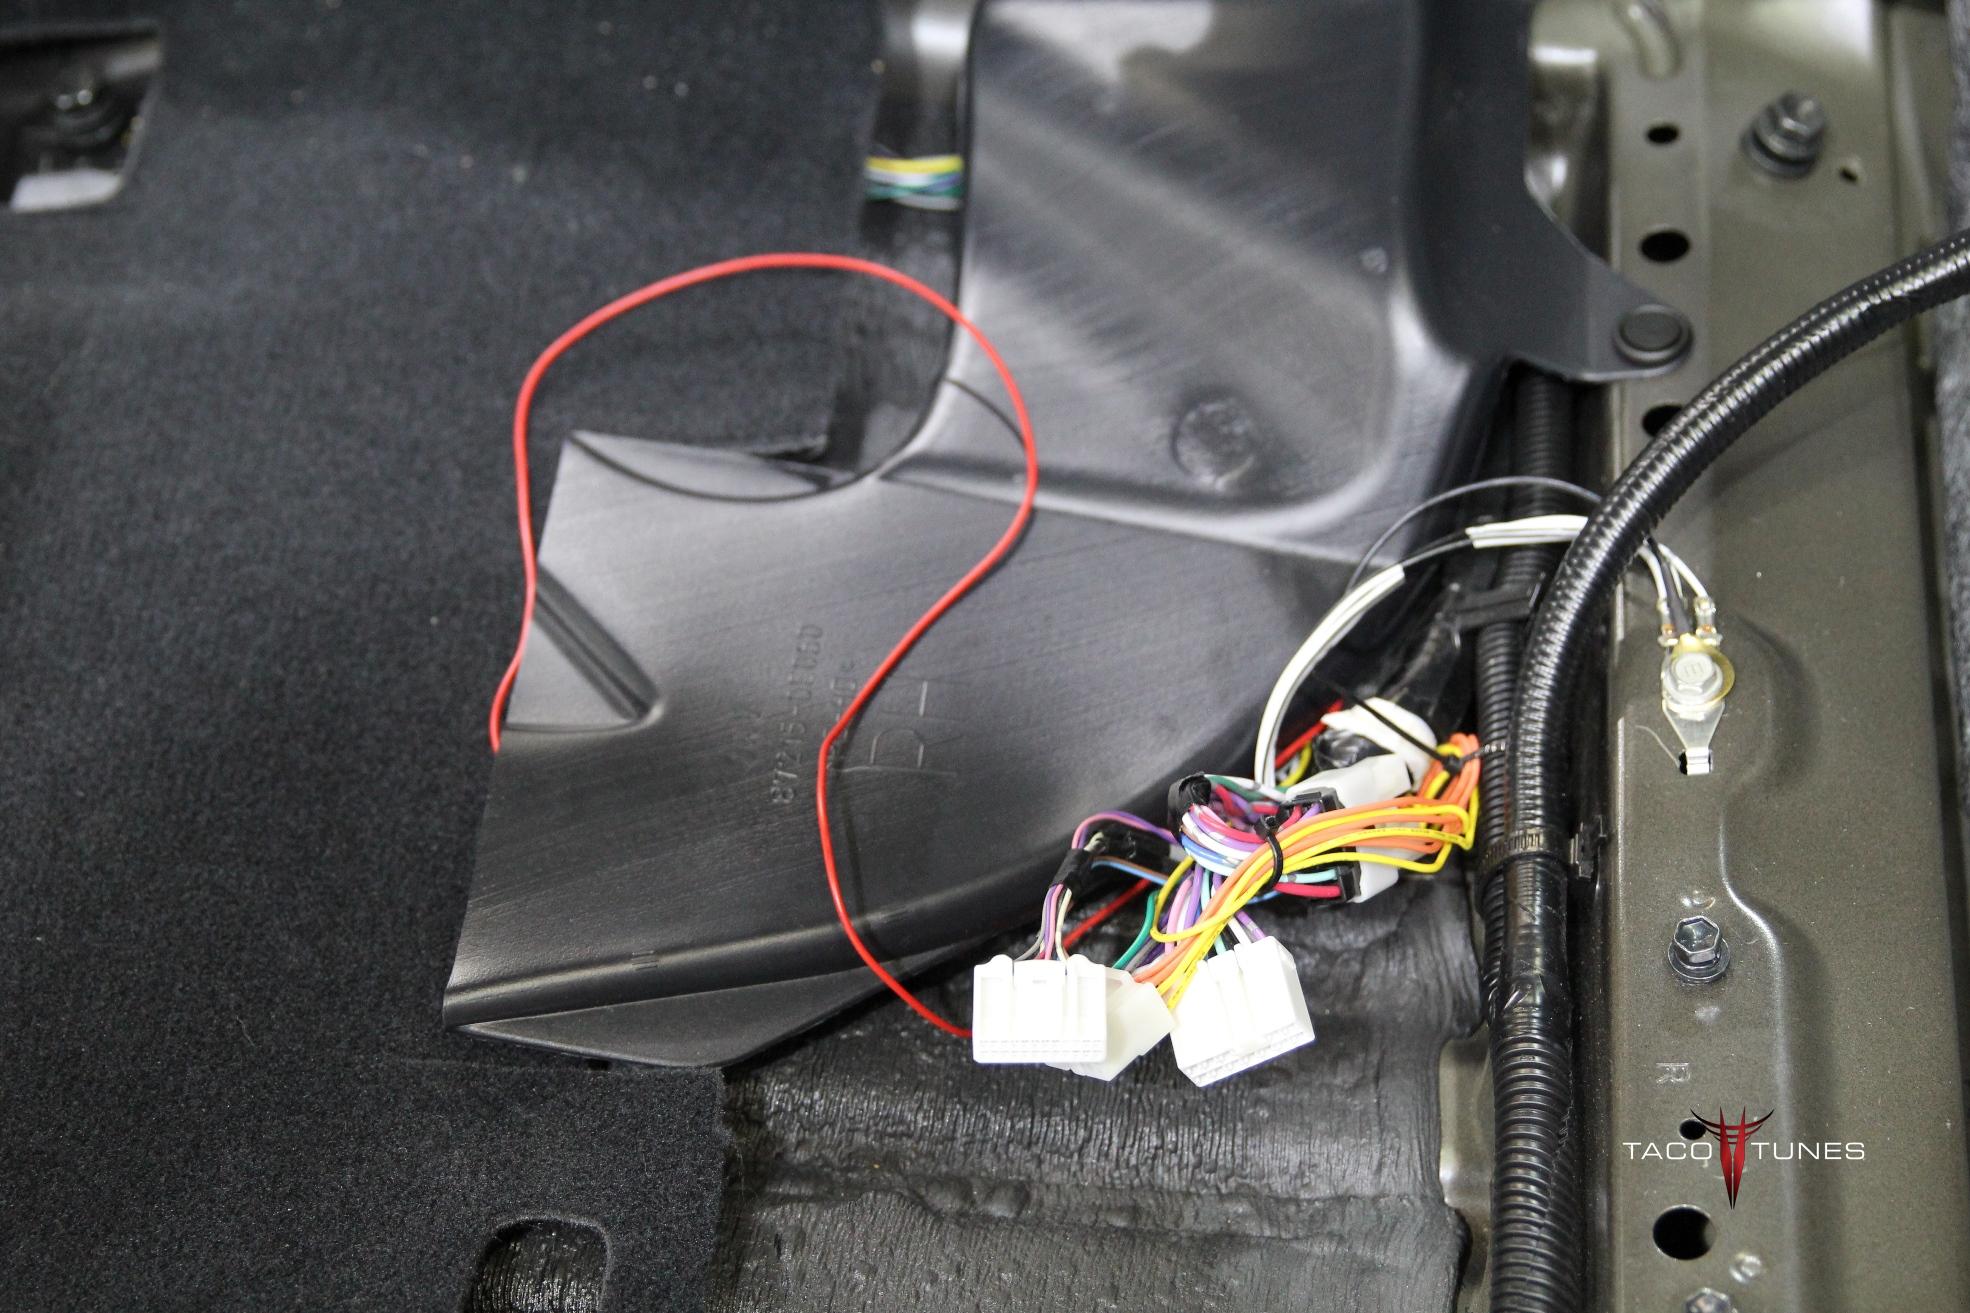
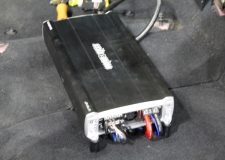
Sound Processor:
Tacotunes.com ReCurve EZQ
Tacotunes.com JBL Harness
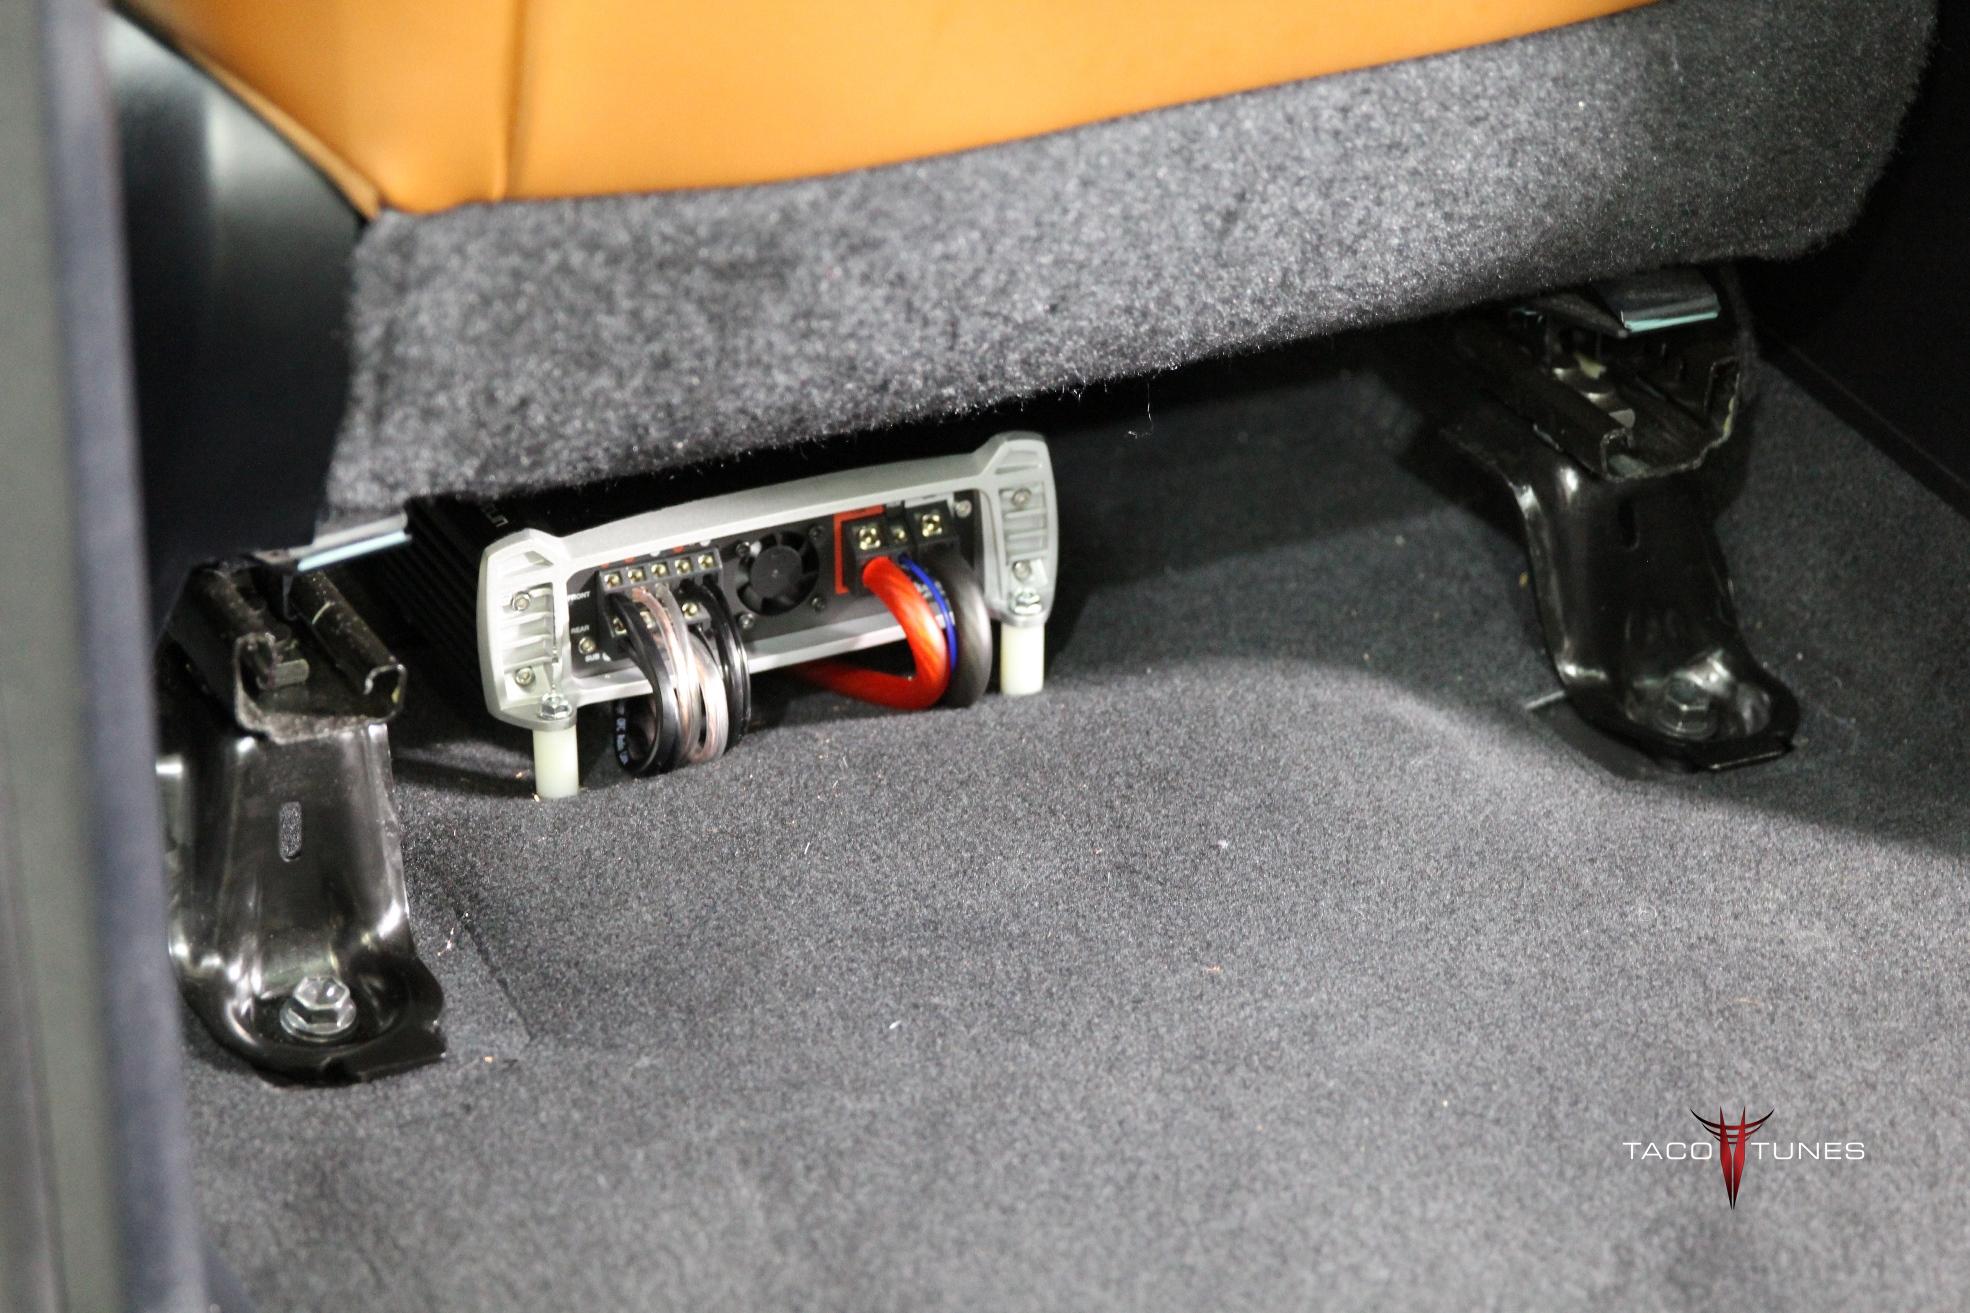
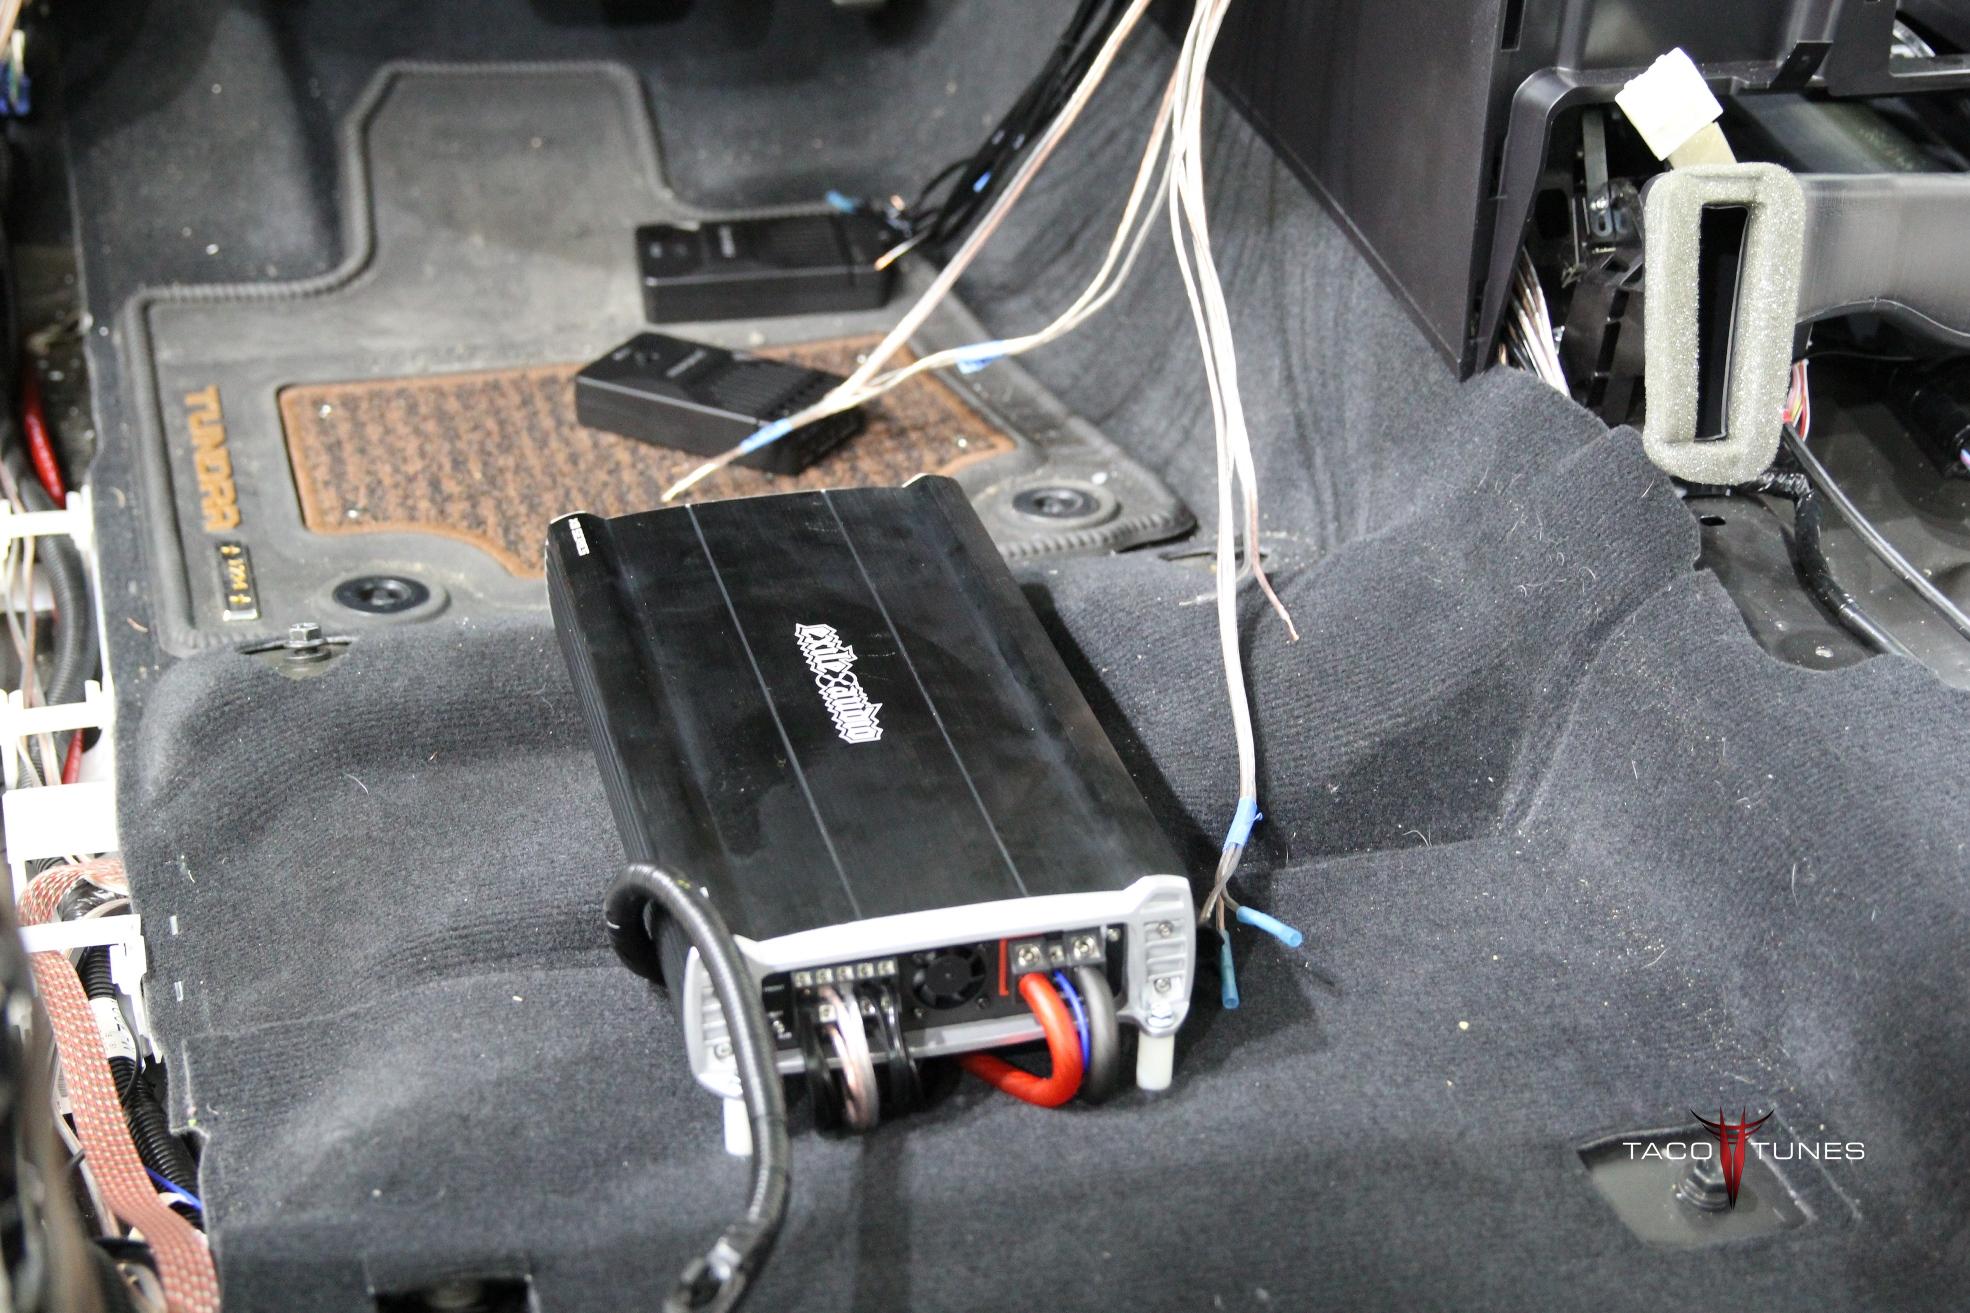
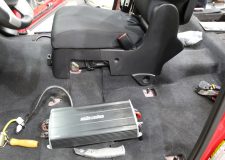
Amp:
Exile Audio 5 channel amp
100 watts x 4 to each speaker and 800 x 1 (subwoofer)
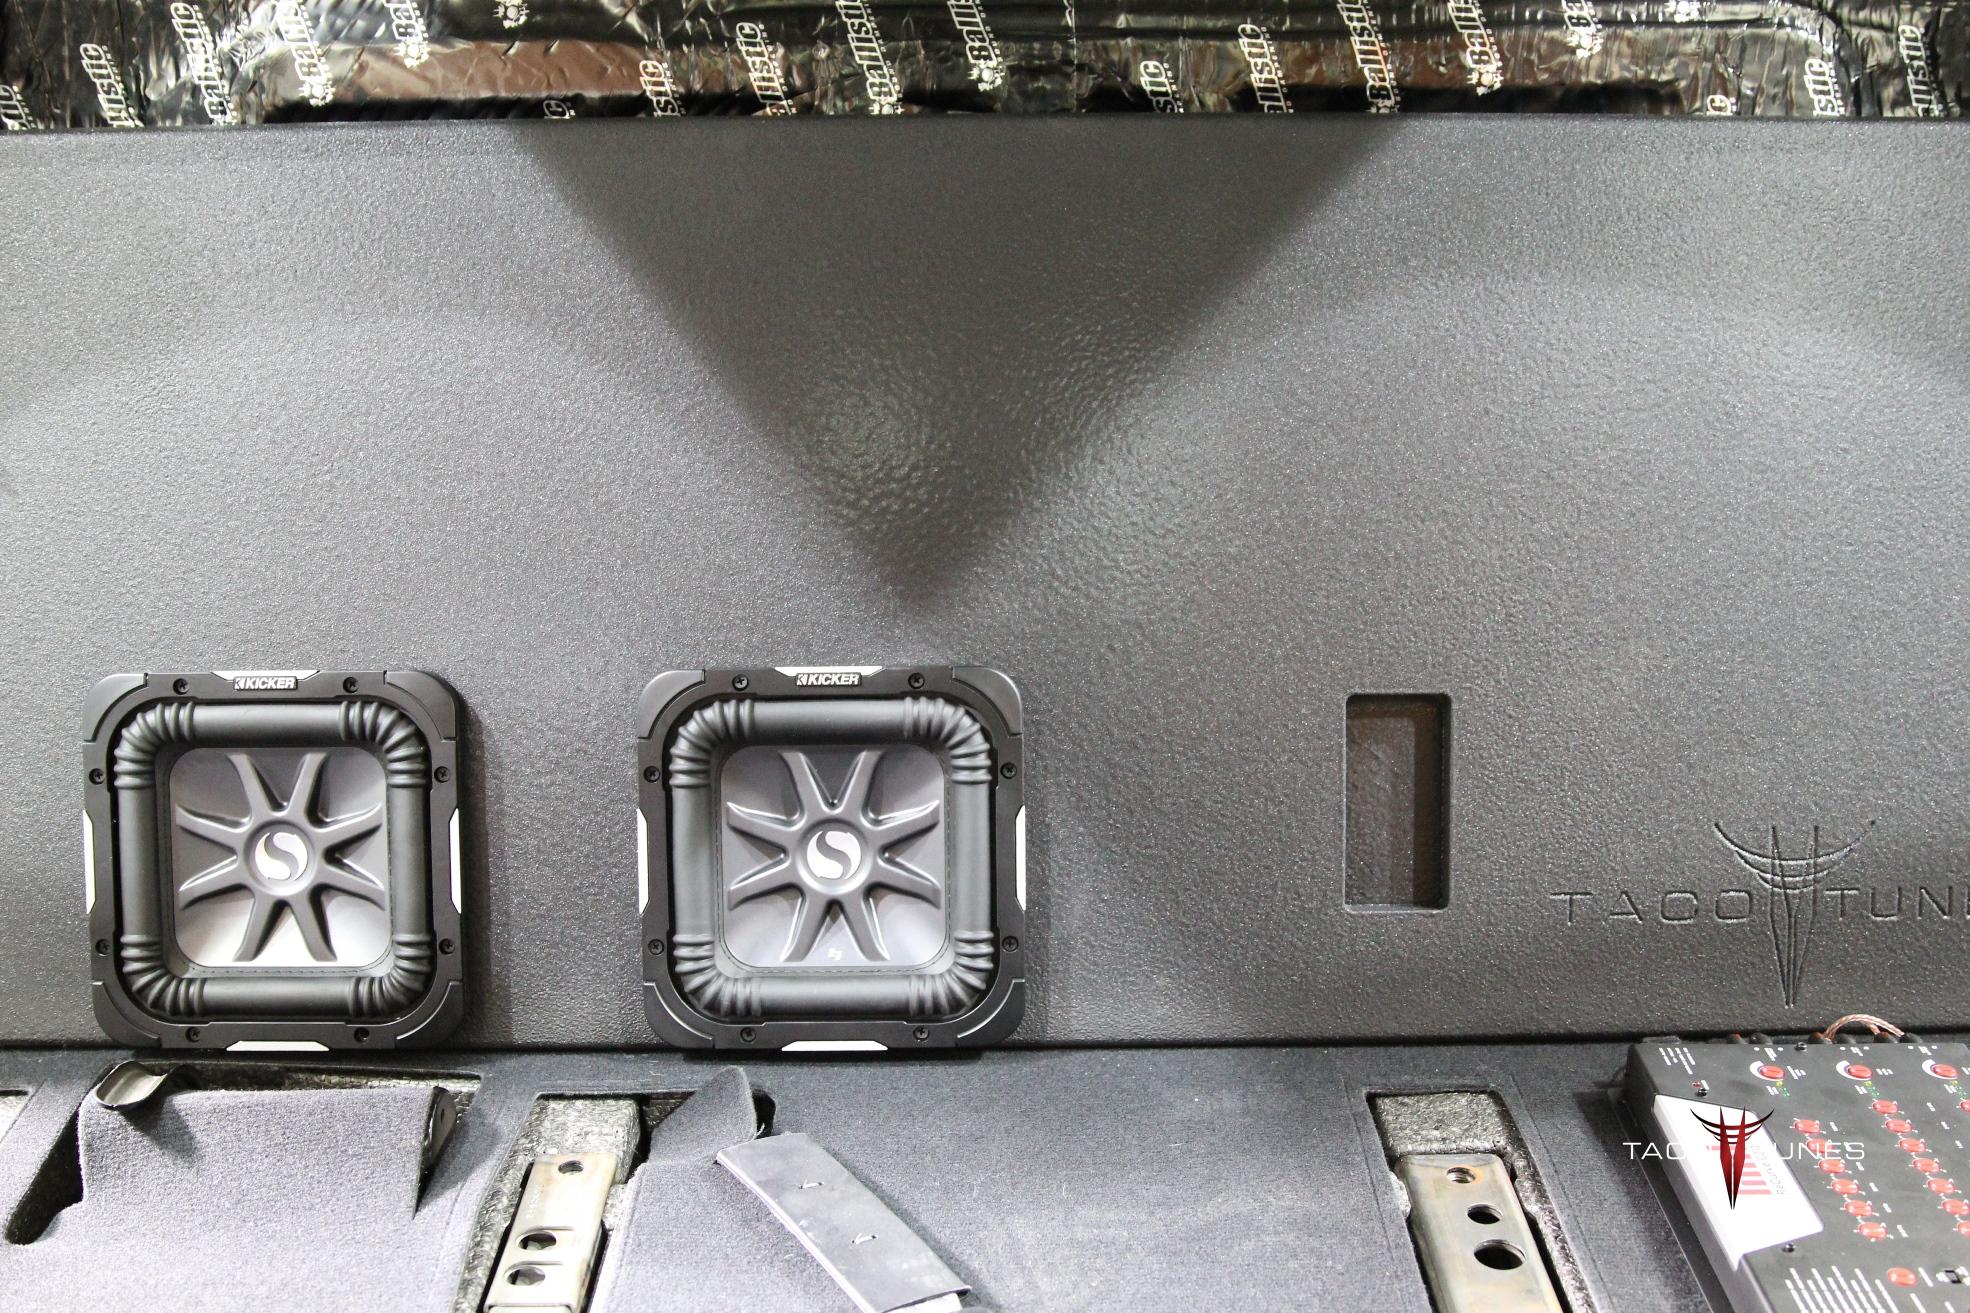
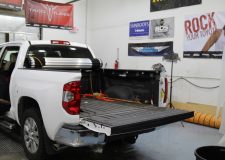
Subwoofer(s):
Subwoofer Box & Subwoofers
Kicker L7 8″ Square x 2 Subwoofers
Tundra Install kit:
Stereo & Wiring Installation kit:
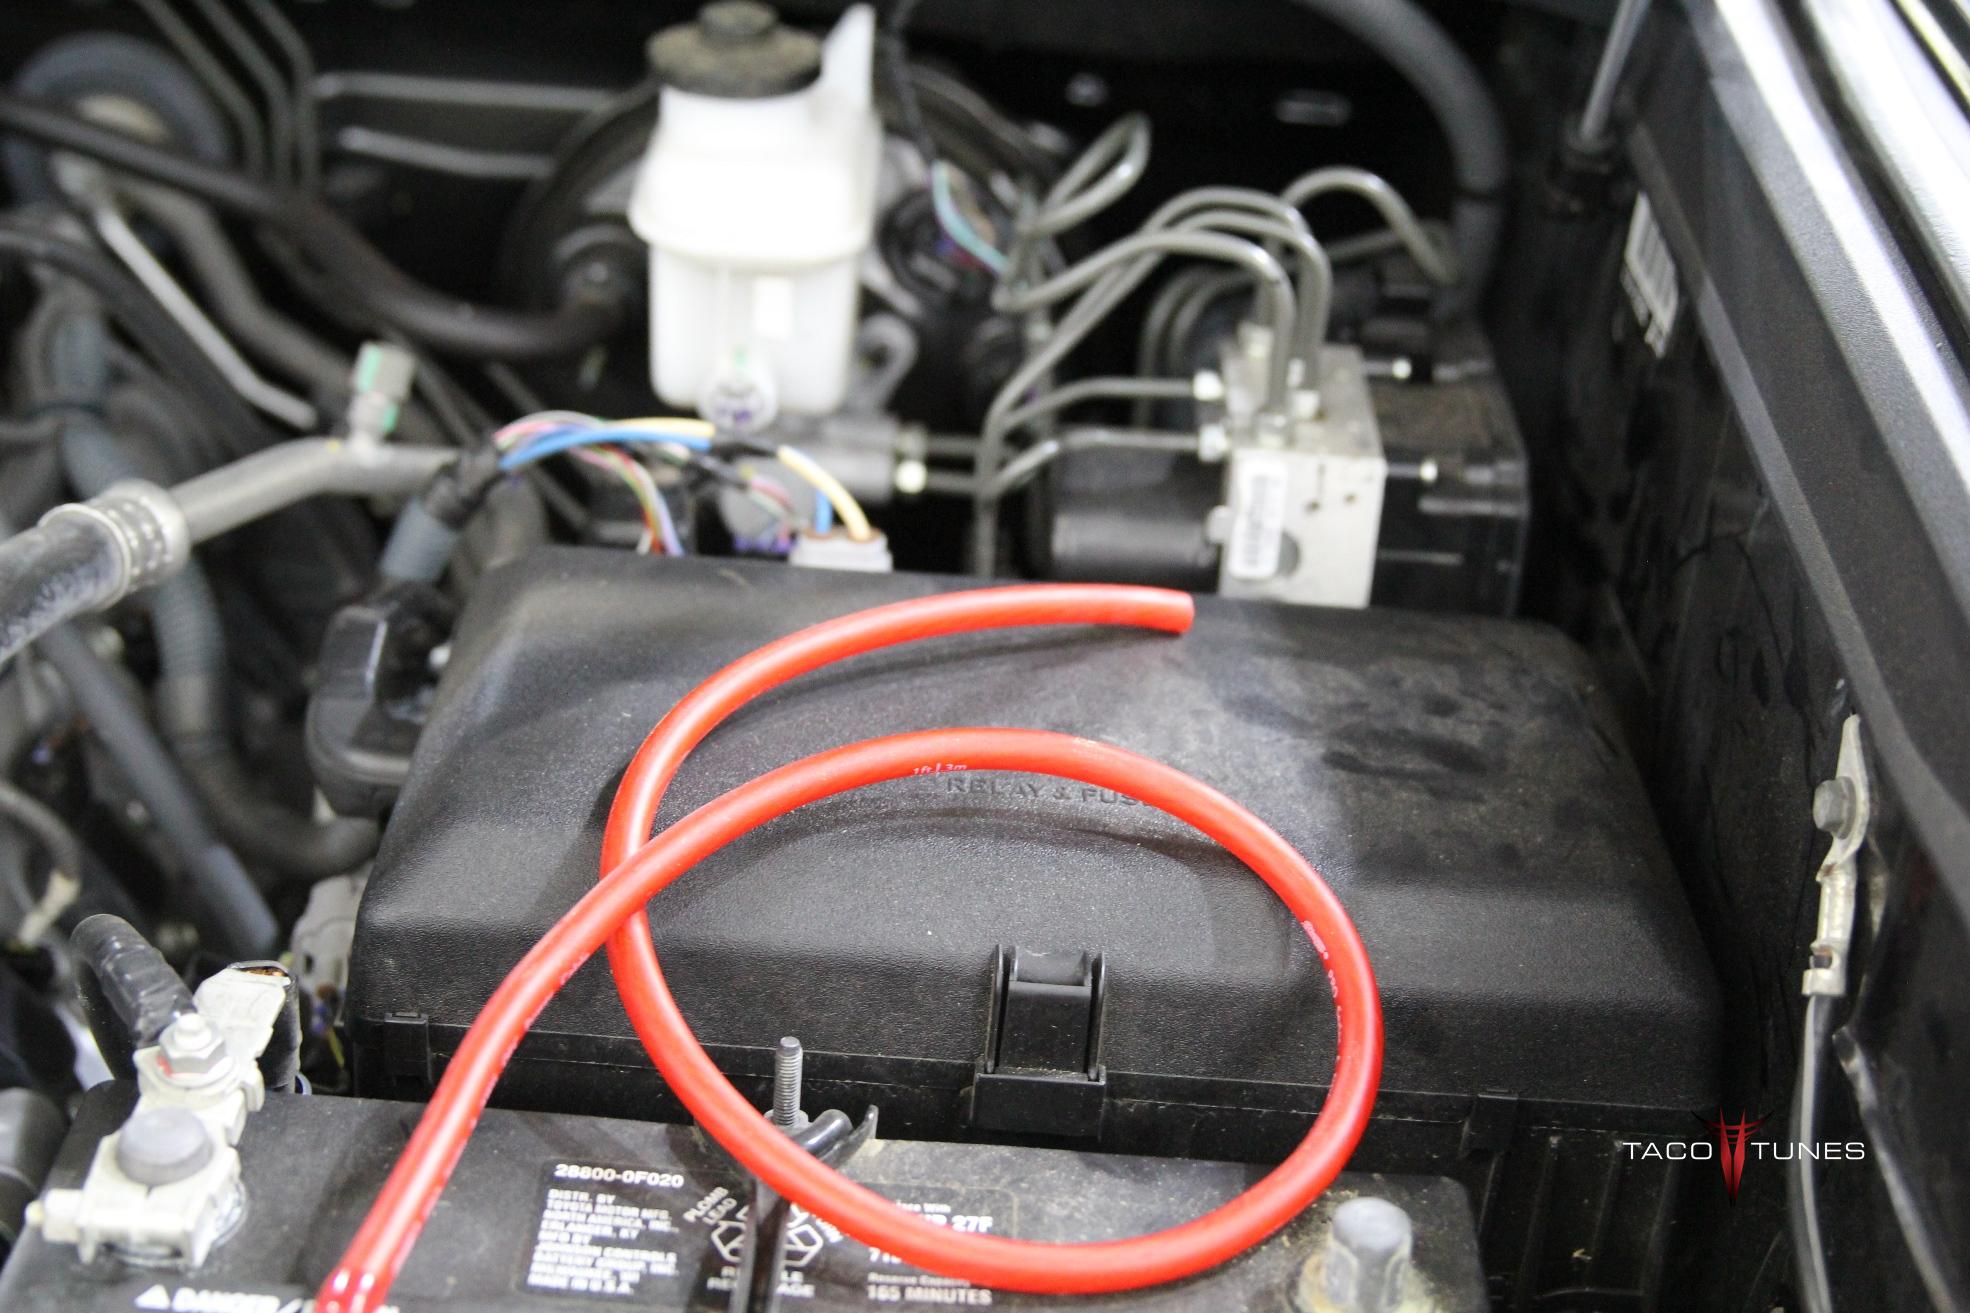
Stinger Power, Speaker and Signal Cables:
Positive:
Stinger 3′ POWER CABLE 4GA – Ring Terminal Attached
Stinger 13′ POWER CABLE 4GA
Negative:
Stinger 4′ POWER CABLE 4GA – Ring Terminal Attached
Color Coded Speaker Wire:
Stinger 50′ 16GA Black Speaker Wire (Driver Side Speakers)
Stinger 50′ 16GA Silver Speaker Wire (Passenger Side Speakers)
Stinger 25′ 18GA Black Speaker wire (Driver Side Tweeters)
Stinger 50′ 18GA Silver Speaker Wire (Passenger Side Tweeters)
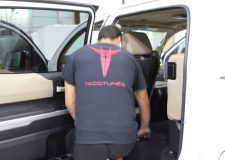
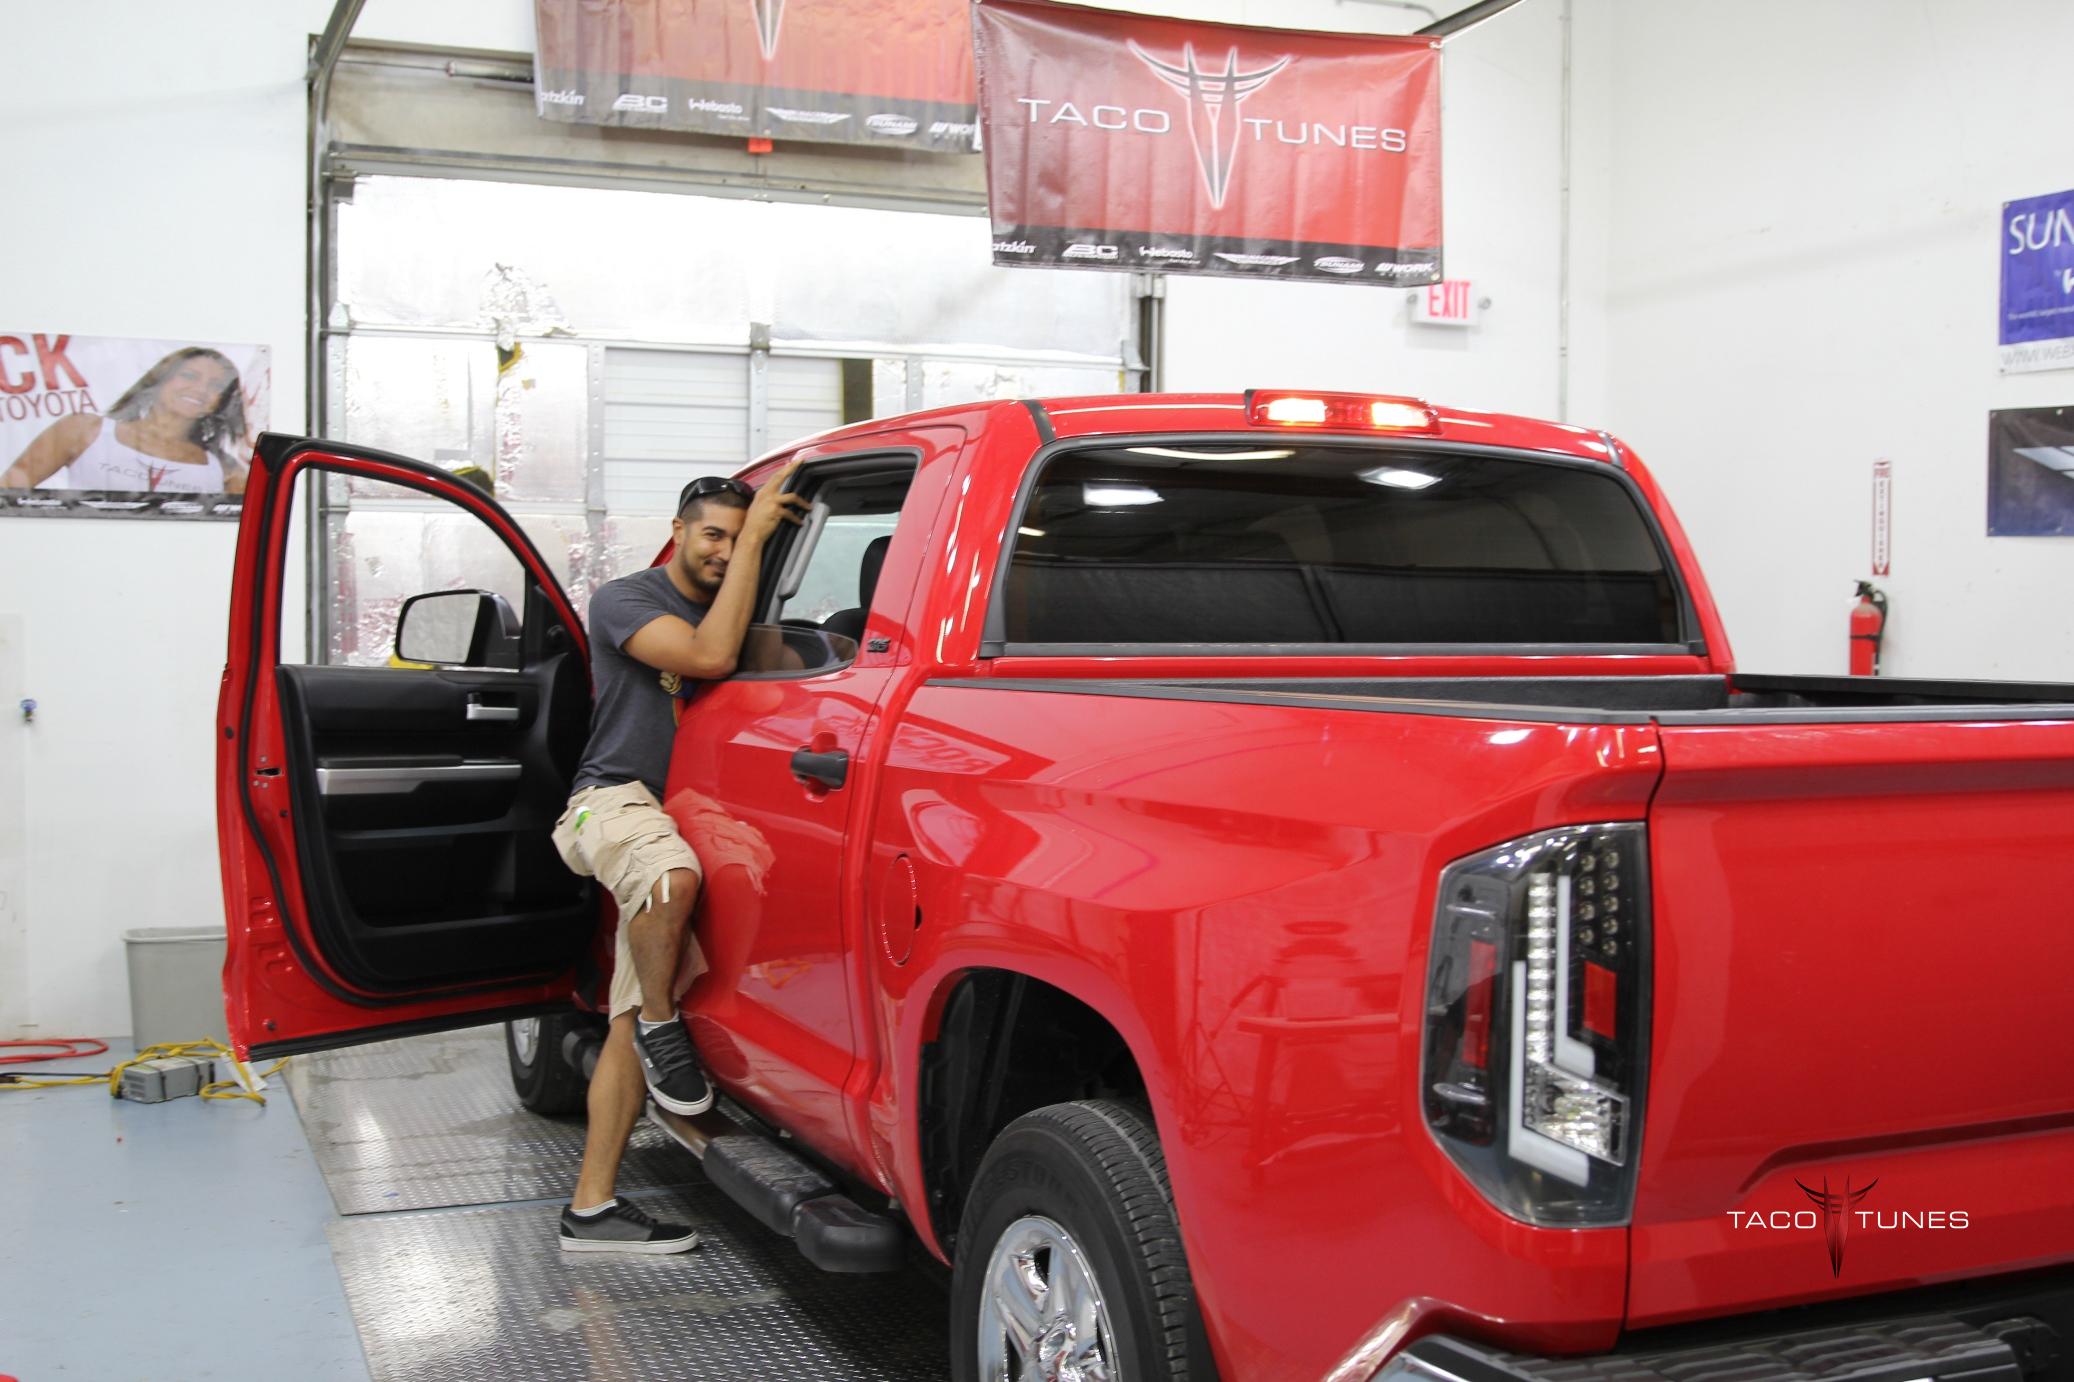
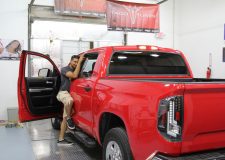
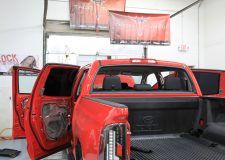
Jons 2015 Toyota Tundra CrewMax Limited Audio System Upgrade Austin TX
Jons 2015 Toyota Tundra CrewMax Limited Audio System Upgrade Austin TX
Jons 2015 Toyota Tundra CrewMax Limited Audio System Upgrade Austin TX
Jons 2015 Toyota Tundra CrewMax Limited Audio System Upgrade Austin TX
Jons 2015 Toyota Tundra CrewMax Limited Audio System Upgrade Austin TX
Jons 2015 Toyota Tundra CrewMax Limited Audio System Upgrade Austin TX
Jons 2015 Toyota Tundra CrewMax Limited Audio System Upgrade Austin TX
Jons 2015 Toyota Tundra CrewMax Limited Audio System Upgrade Austin TX
Jons 2015 Toyota Tundra CrewMax Limited Audio System Upgrade Austin TX
Jons 2015 Toyota Tundra CrewMax Limited Audio System Upgrade Austin TX
Jons 2015 Toyota Tundra CrewMax Limited Audio System Upgrade Austin TX
Jons 2015 Toyota Tundra CrewMax Limited Audio System Upgrade Austin TX
Jons 2015 Toyota Tundra CrewMax Limited Audio System Upgrade Austin TX
Jons 2015 Toyota Tundra CrewMax Limited Audio System Upgrade Austin TX
Jons 2015 Toyota Tundra CrewMax Limited Audio System Upgrade Austin TX
Jons 2015 Toyota Tundra CrewMax Limited Audio System Upgrade Austin TX
Jons 2015 Toyota Tundra CrewMax Limited Audio System Upgrade Austin TX
Jons 2015 Toyota Tundra CrewMax Limited Audio System Upgrade Austin TX
Jons 2015 Toyota Tundra CrewMax Limited Audio System Upgrade Austin TX
Jons 2015 Toyota Tundra CrewMax Limited Audio System Upgrade Austin TX
Jons 2015 Toyota Tundra CrewMax Limited Audio System Upgrade Austin TX
Jons 2015 Toyota Tundra CrewMax Limited Audio System Upgrade Austin TX
Jons 2015 Toyota Tundra CrewMax Limited Audio System Upgrade Austin TX
Jons 2015 Toyota Tundra CrewMax Limited Audio System Upgrade Austin TX
Jons 2015 Toyota Tundra CrewMax Limited Audio System Upgrade Austin TX
Jons 2015 Toyota Tundra CrewMax Limited Audio System Upgrade Austin TX
Jons 2015 Toyota Tundra CrewMax Limited Audio System Upgrade Austin TX
Jons 2015 Toyota Tundra CrewMax Limited Audio System Upgrade Austin TX
Jons 2015 Toyota Tundra CrewMax Limited Audio System Upgrade Austin TX
Jons 2015 Toyota Tundra CrewMax Limited Audio System Upgrade Austin TX
Jons 2015 Toyota Tundra CrewMax Limited Audio System Upgrade Austin TX
Jons 2015 Toyota Tundra CrewMax Limited Audio System Upgrade Austin TX
Jons 2015 Toyota Tundra CrewMax Limited Audio System Upgrade Austin TX
Jons 2015 Toyota Tundra CrewMax Limited Audio System Upgrade Austin TX
Below you will find a detailed listing of all the parts we used in the installation.
Typical Installation time is 1 day, however we matted the front, rear doors and the rear wall behind the subwoofer. If we are matting the truck we keep the truck for two days. One day audio installation and matting jobs are possible, but require at least 14 hours with the truck.
Below is a detailed listing of the audio products installed in Jon’s Tundra CrewMax
Front Door Component Speakers:
Image Dynamics CXS64
Tacotunes.com heavy duty speaker mounts cut to 5.6”
CXS Mid bass Drivers -125 Watts RMS
CXS Crossover
CXS 28M Silk Dome Tweeter
NOTE: JBL equipped
Use Stock Sail Panel for Tweeter mounts.
Rear Door Components:
Image Dynamics CTX65CS
Tacotunes.com heavy duty speaker mounts cut to 5.6”
CTX65CS Mid bass drivers Handles -100 watts RMS
CTX65CS Crossover
CTX Tweeters
Tweeters will fit in stock door location
Sound Processor:
Tacotunes.com ReCurve EZQ
Tacotunes.com JBL Harness
Amp:
Exile Audio 5 channel amp
100 watts x 4 to each speaker and 800 x 1 (subwoofer)
Ruben’s Toyota Tundra CrewMax Complete Audio System Upgrade El Paso TX
Ruben drove nearly 8 hours from El Paso Texas to have us install his SQ1 pacakge in his 2015 Toyota Tundra CrewMax. He wanted to get his system installed before he starts on the rest of his mods.
Installation Summary / History:
Toyota Year / Model: 2015 Toyota Tundra CrewMax SR5
Toyota Tundra CrewMax Complete Audio System Upgrade El Paso TX
Toyota Tundra CrewMax Complete Audio System Upgrade El Paso TX
Toyota Tundra CrewMax Complete Audio System Upgrade El Paso TX
Toyota Tundra CrewMax Complete Audio System Upgrade El Paso TX
Toyota Tundra CrewMax Complete Audio System Upgrade El Paso TX
Toyota Tundra CrewMax Complete Audio System Upgrade El Paso TX
Toyota Tundra CrewMax Complete Audio System Upgrade El Paso TX
Toyota Tundra CrewMax Complete Audio System Upgrade El Paso TX
Toyota Tundra CrewMax Complete Audio System Upgrade El Paso TX
Toyota Tundra CrewMax Complete Audio System Upgrade El Paso TX
Toyota Tundra CrewMax Complete Audio System Upgrade El Paso TX
Toyota Tundra CrewMax Complete Audio System Upgrade El Paso TX
Toyota Tundra CrewMax Complete Audio System Upgrade El Paso TX
Toyota Tundra CrewMax Complete Audio System Upgrade El Paso TX
Toyota Tundra CrewMax Complete Audio System Upgrade El Paso TX
Toyota Tundra CrewMax Complete Audio System Upgrade El Paso TX
Toyota Tundra CrewMax Complete Audio System Upgrade El Paso TX
Toyota Tundra CrewMax Complete Audio System Upgrade El Paso TX
Toyota Tundra CrewMax Complete Audio System Upgrade El Paso TX
Toyota Tundra CrewMax Complete Audio System Upgrade El Paso TX
Toyota Tundra CrewMax Complete Audio System Upgrade El Paso TX
Toyota Tundra CrewMax Complete Audio System Upgrade El Paso TX
Toyota Tundra CrewMax Complete Audio System Upgrade El Paso TX
Toyota Tundra CrewMax Complete Audio System Upgrade El Paso TX
Toyota Tundra CrewMax Complete Audio System Upgrade El Paso TX
Toyota Tundra CrewMax Complete Audio System Upgrade El Paso TX
Toyota Tundra CrewMax Complete Audio System Upgrade El Paso TX
Toyota Tundra CrewMax Complete Audio System Upgrade El Paso TX
Toyota Tundra CrewMax Complete Audio System Upgrade El Paso TX
Toyota Tundra CrewMax Complete Audio System Upgrade El Paso TX
Toyota Tundra CrewMax Complete Audio System Upgrade El Paso TX
Toyota Tundra CrewMax Complete Audio System Upgrade El Paso TX
Toyota Tundra CrewMax Complete Audio System Upgrade El Paso TX
Toyota Tundra CrewMax Complete Audio System Upgrade El Paso TX
Toyota Tundra CrewMax Complete Audio System Upgrade El Paso TX
Toyota Tundra CrewMax Complete Audio System Upgrade El Paso TX
Toyota Tundra CrewMax Complete Audio System Upgrade El Paso TX
Toyota Tundra CrewMax Complete Audio System Upgrade El Paso TX
Toyota Tundra CrewMax Complete Audio System Upgrade El Paso TX
Toyota Tundra CrewMax Complete Audio System Upgrade El Paso TX
Toyota Tundra CrewMax Complete Audio System Upgrade El Paso TX
Toyota Tundra CrewMax Complete Audio System Upgrade El Paso TX
Toyota Tundra CrewMax Complete Audio System Upgrade El Paso TX
Toyota Tundra CrewMax Complete Audio System Upgrade El Paso TX
Toyota Tundra CrewMax Complete Audio System Upgrade El Paso TX
Toyota Tundra CrewMax Complete Audio System Upgrade El Paso TX
Toyota Tundra CrewMax Complete Audio System Upgrade El Paso TX
Toyota Tundra CrewMax Complete Audio System Upgrade El Paso TX
Toyota Tundra CrewMax Complete Audio System Upgrade El Paso TX
Toyota Tundra CrewMax Complete Audio System Upgrade El Paso TX
Toyota Tundra CrewMax Complete Audio System Upgrade El Paso TX
Toyota Tundra CrewMax Complete Audio System Upgrade El Paso TX
Toyota Tundra CrewMax Complete Audio System Upgrade El Paso TX
Below you will find a detailed listing of all the parts we used in the installation.
Typical Installation time is 1 day, however we matted the front, rear doors and the rear wall behind the subwoofer. If we are matting the truck we keep the truck for two days. One day audio installation and matting jobs are possible, but require at least 14 hours with the truck.
Below is a detailed listing of the audio products installed in Chris Tundra CrewMax
Front Door Component Speakers:
Image Dynamics CXS64
Tacotunes.com heavy duty speaker mounts cut to 5.6”
CXS Mid bass Drivers -125 Watts RMS
CXS Crossover
CXS 28M Silk Dome Tweeter
NOTE: JBL equipped
Use Stock Sail Panel for Tweeter mounts.
Rear Door Components:
Image Dynamics CTX65CS
Tacotunes.com heavy duty speaker mounts cut to 5.6”
CTX65CS Mid bass drivers Handles -100 watts RMS
CTX65CS Crossover
CTX Tweeters
Tweeters will fit in stock door location
Sound Processor:
Tacotunes.com ReCurve EZQ
Tacotunes.com JBL Harness
Amp:
Exile Audio 5 channel amp
100 watts x 4 to each speaker and 800 x 1 (subwoofer)
Howdy Parters! We are currently sprucing up our ticket system to better serve you! If you need immediate assistance please text us at 210-472-0000. Dismiss