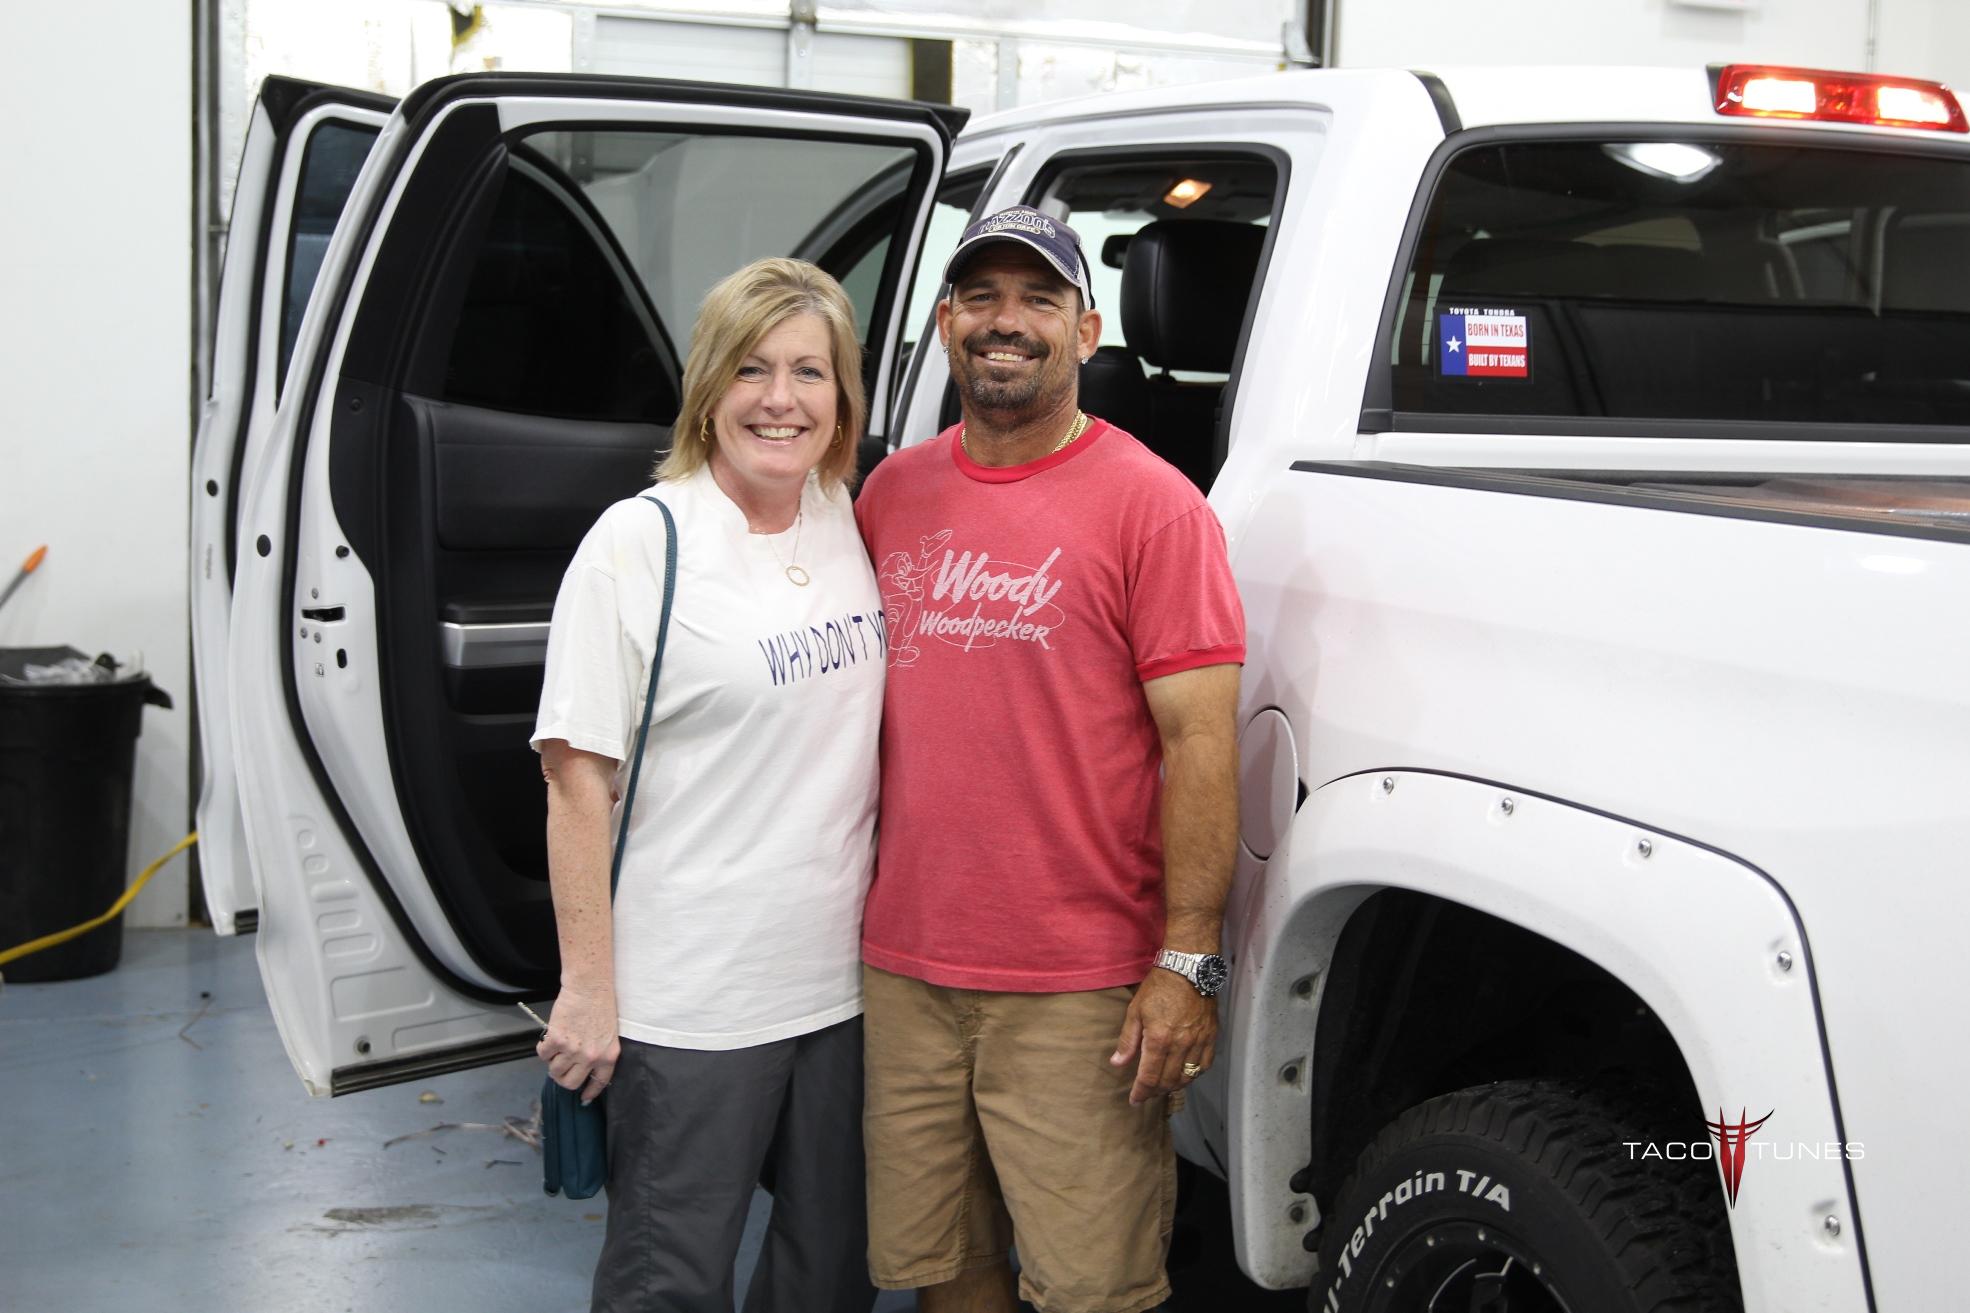
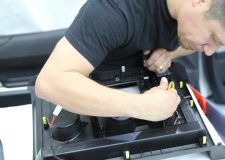
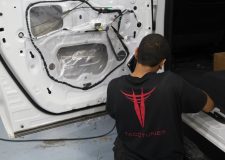
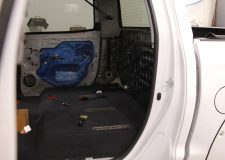
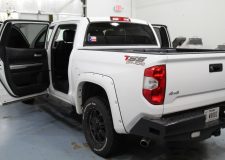
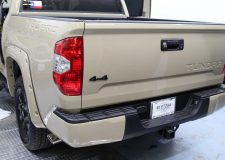
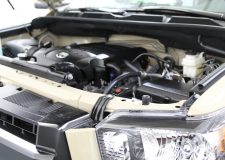
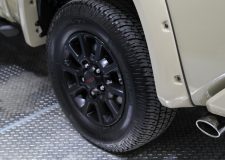
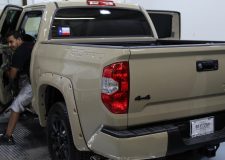
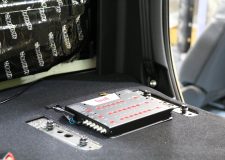
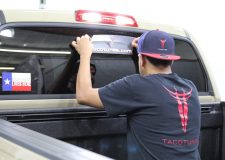
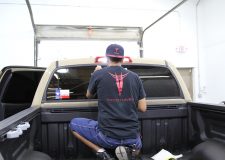
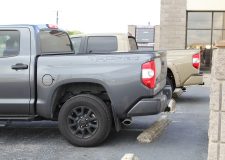
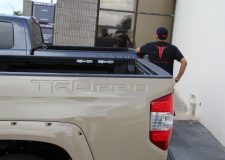
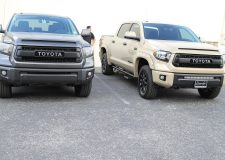
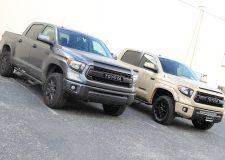
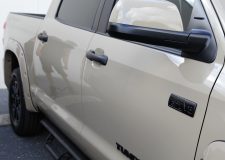
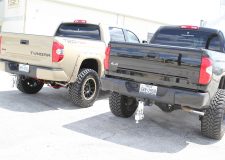
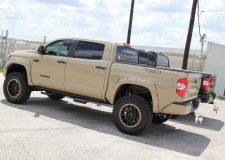
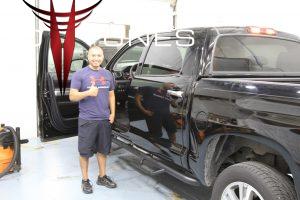
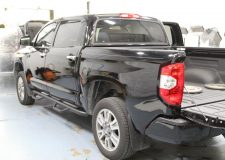
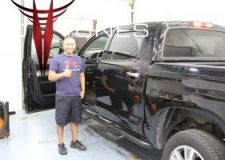
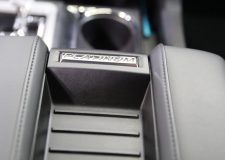
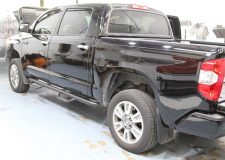
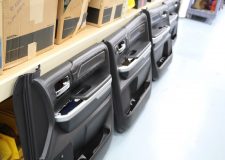
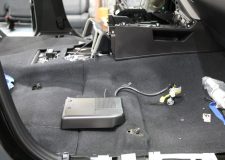
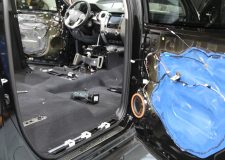
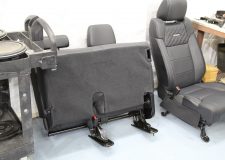
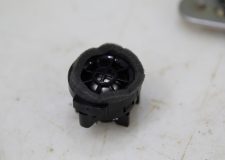
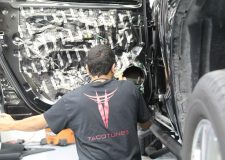
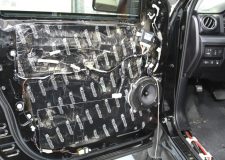
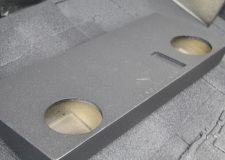
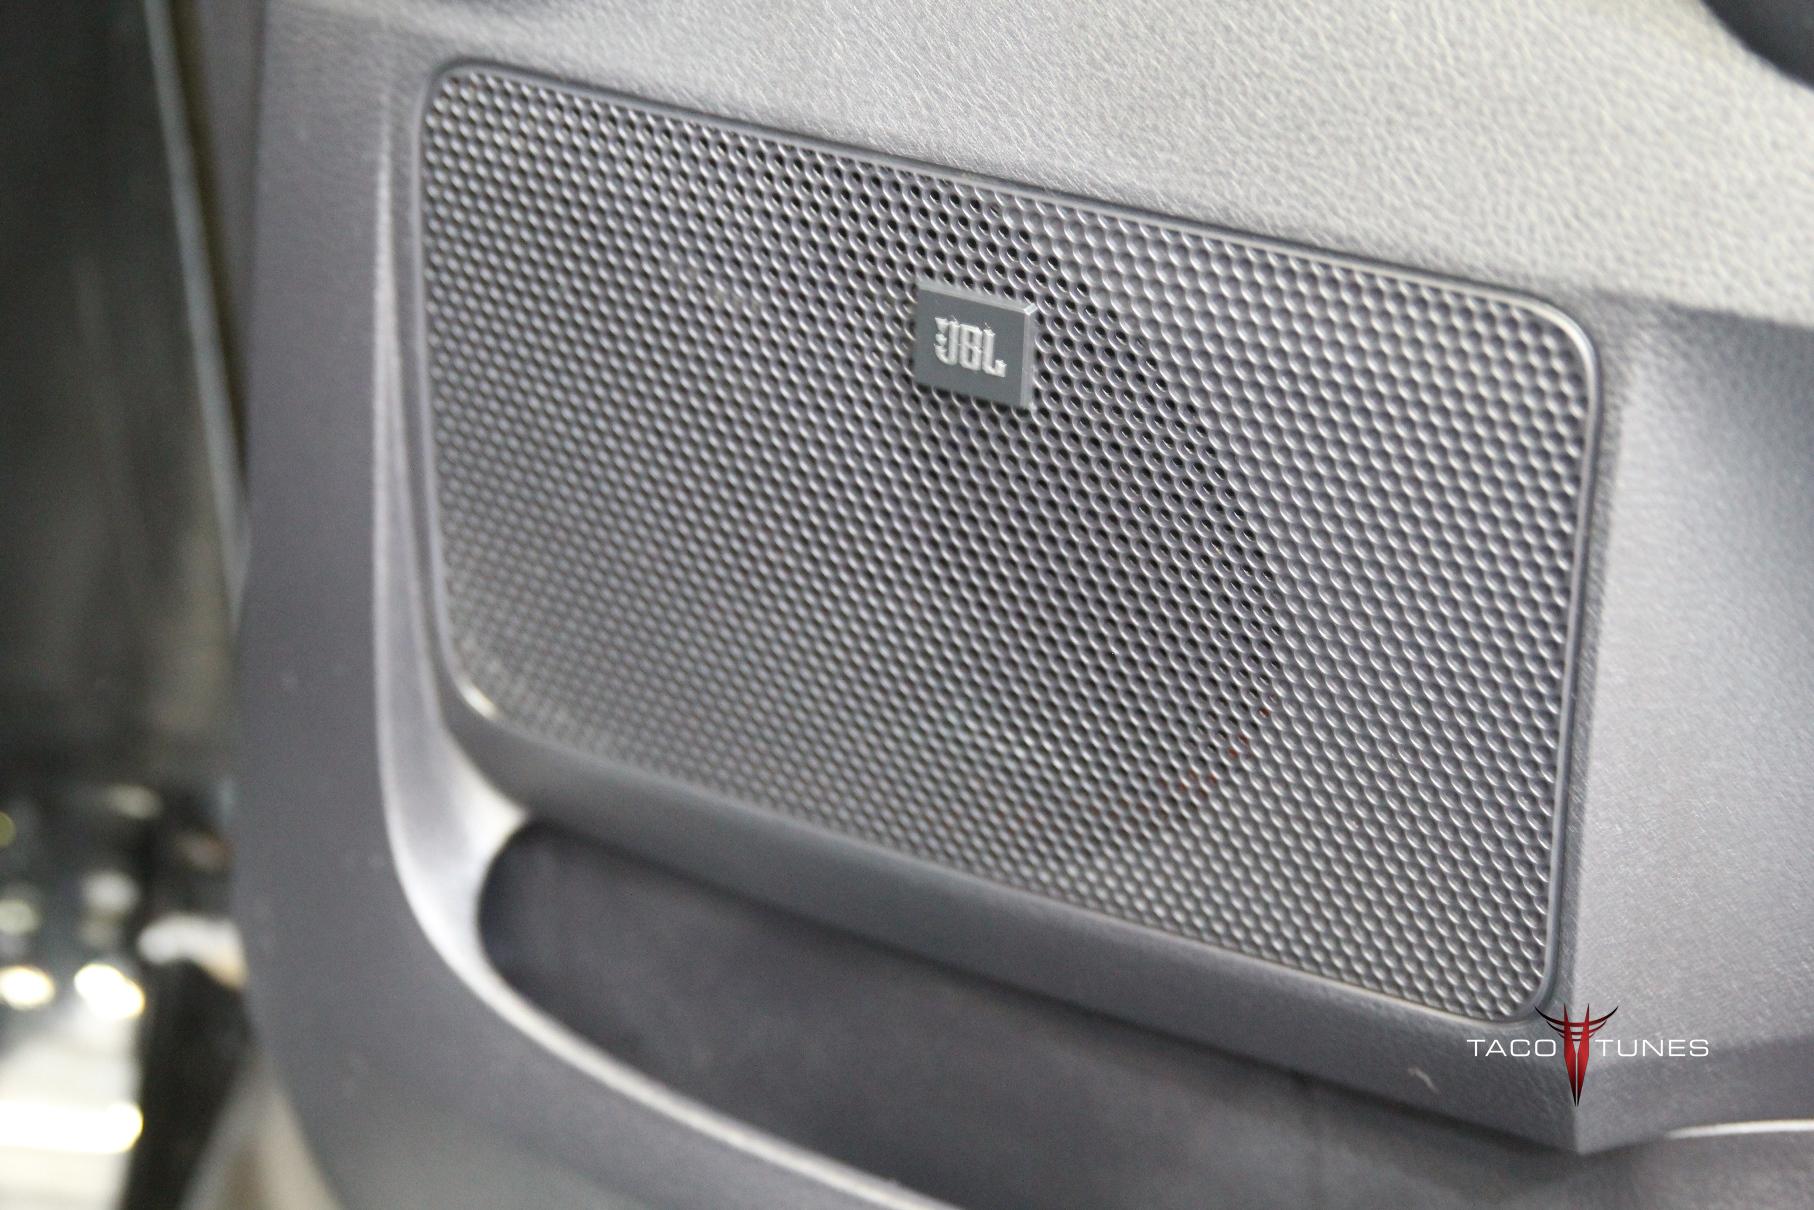
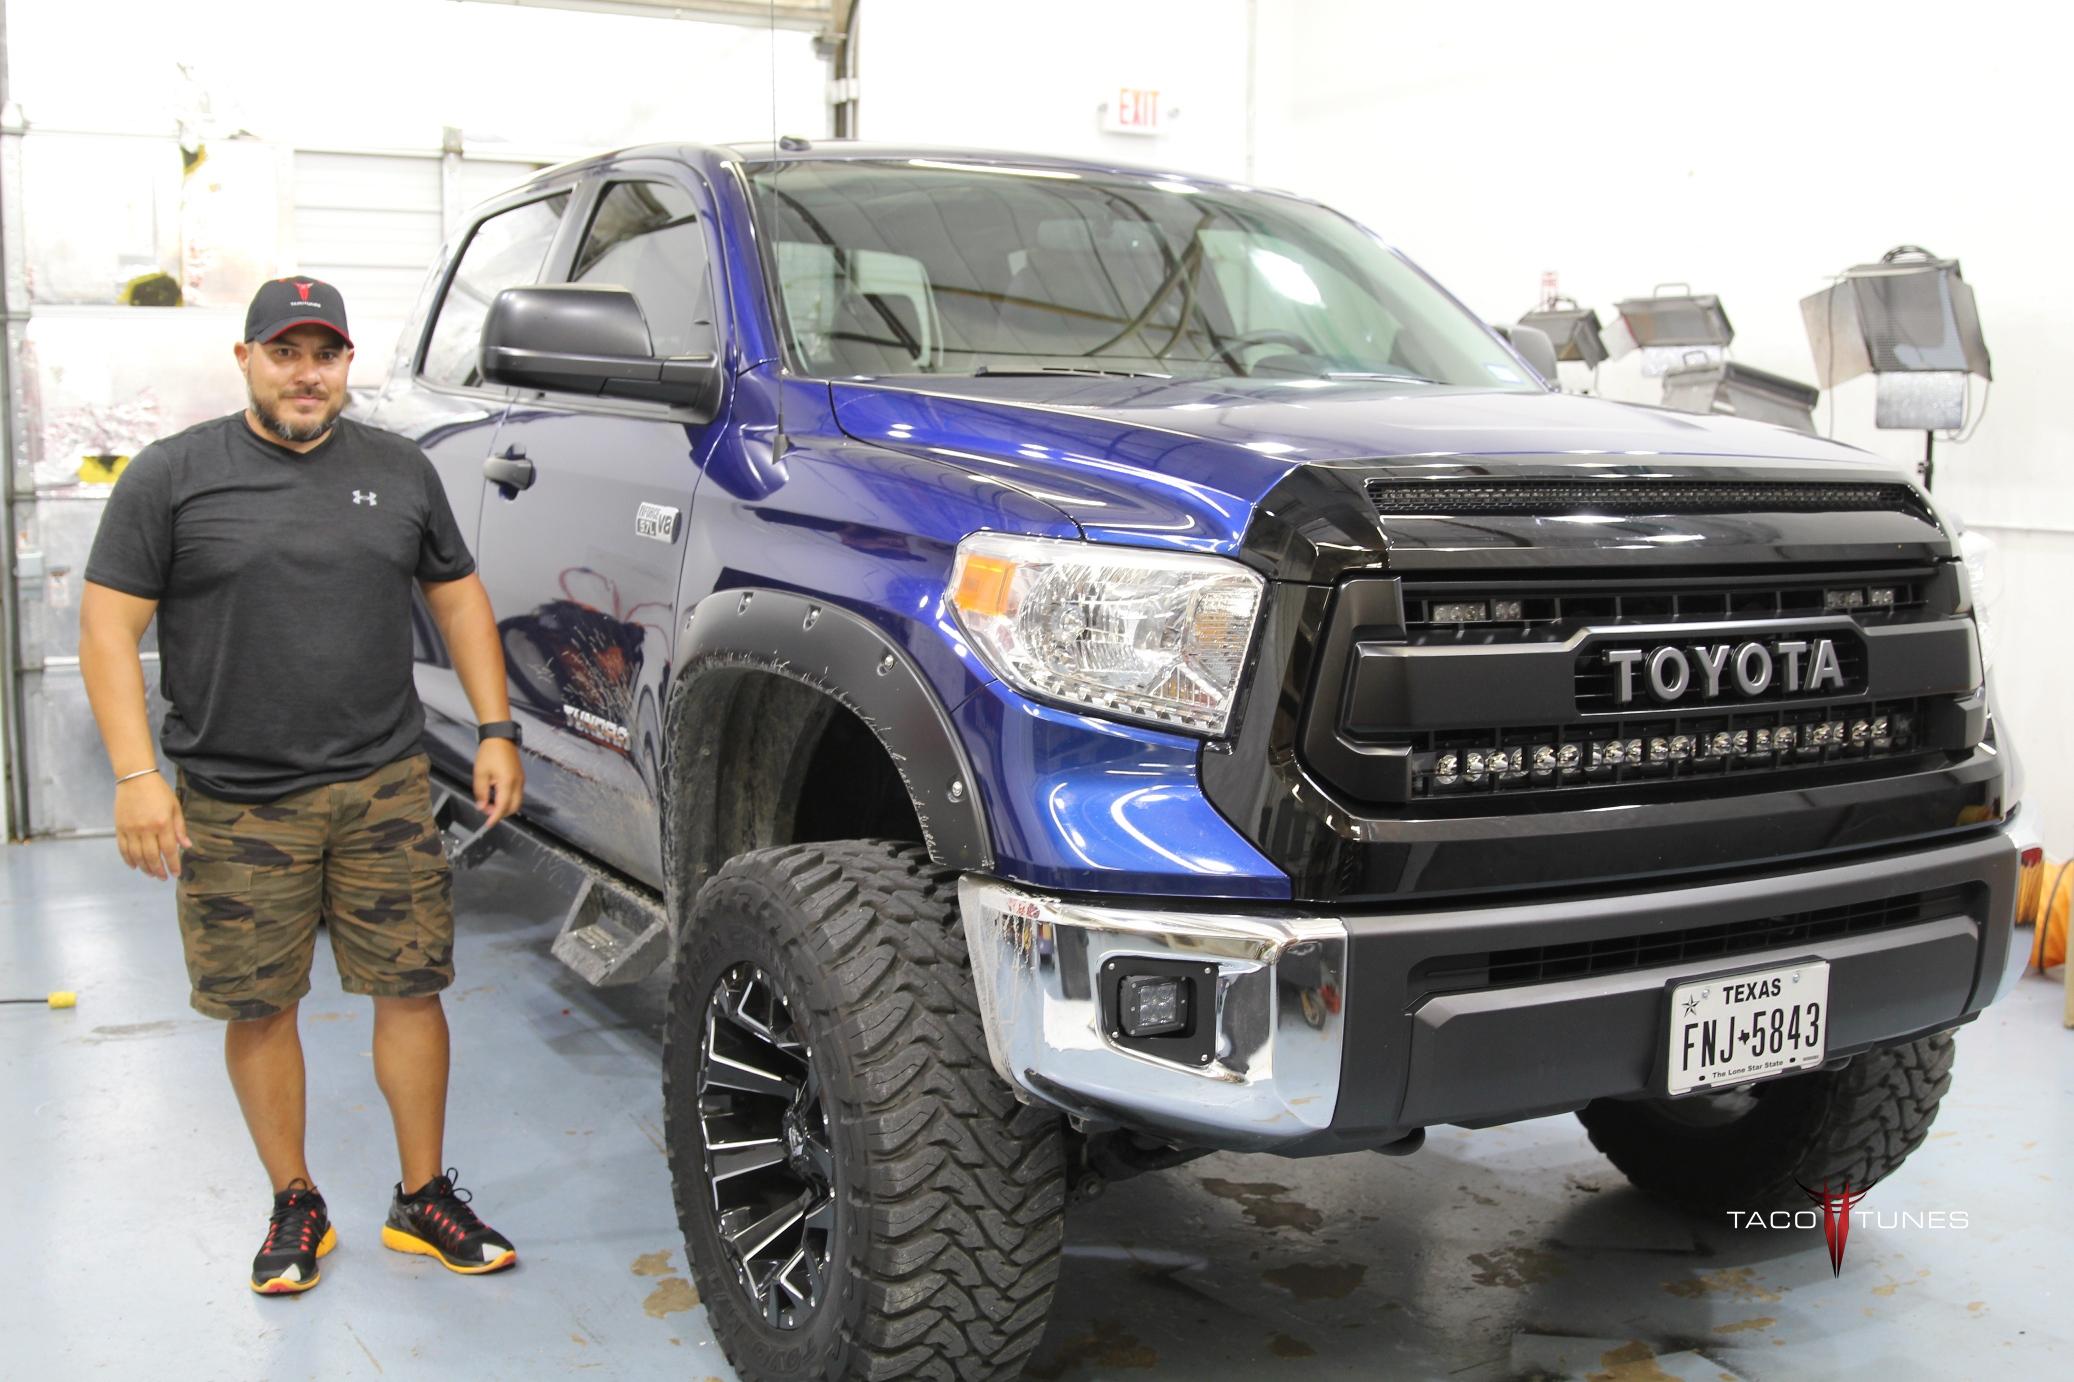
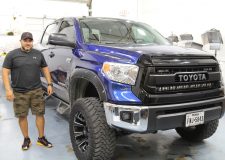
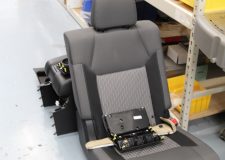
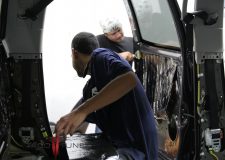
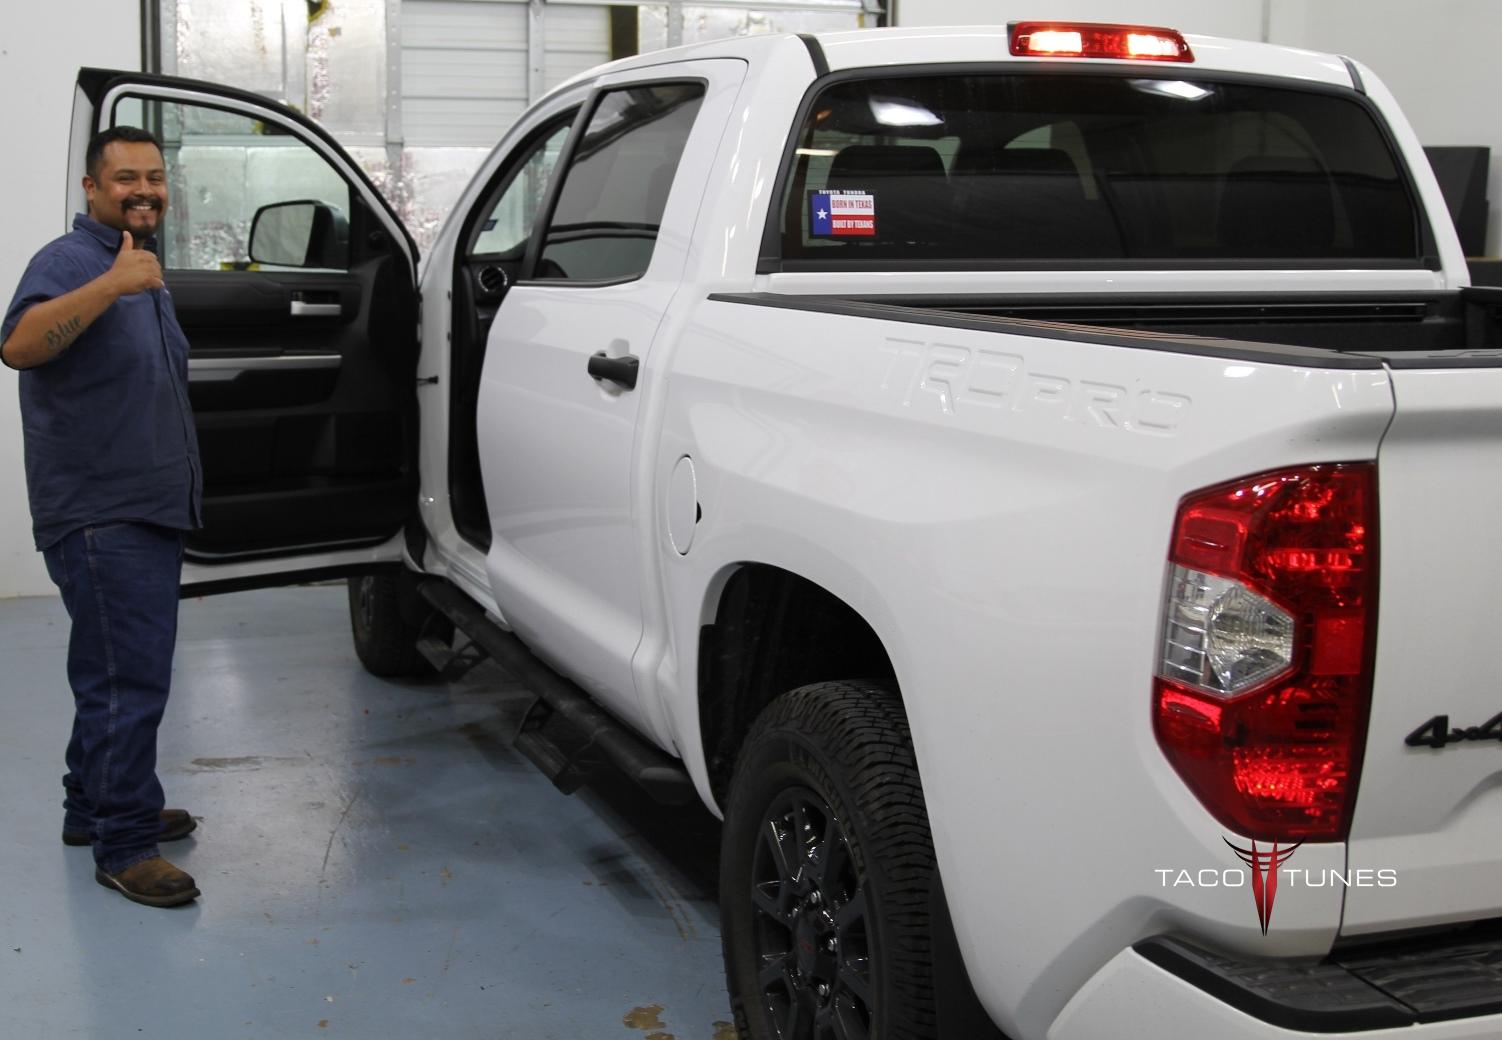
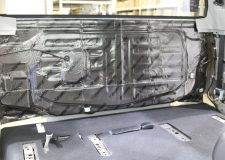
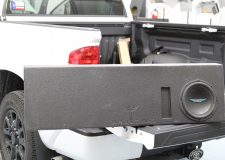
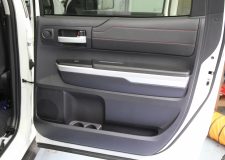
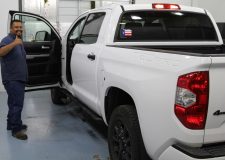
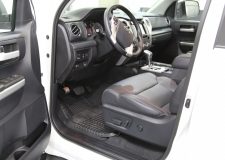
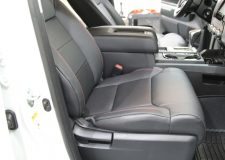
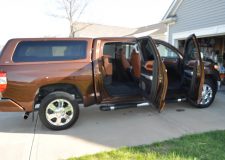
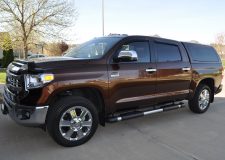
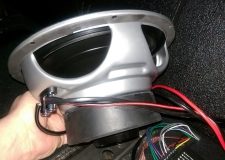
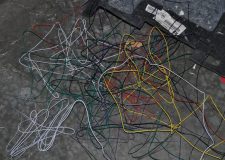
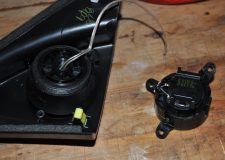
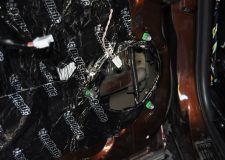
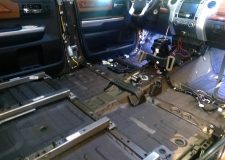
Steve drove in from Abilene, TX to have the system 1 audio package installed in his Toyota Tundra CrewMax TSS
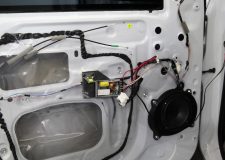
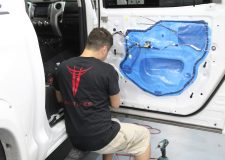
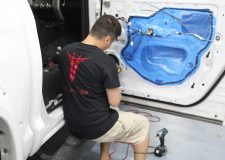
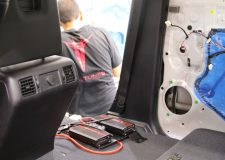
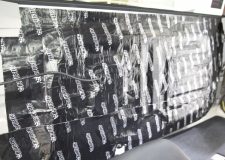
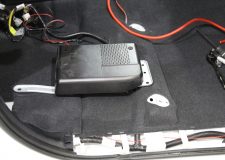
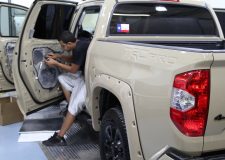
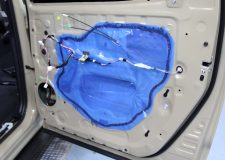
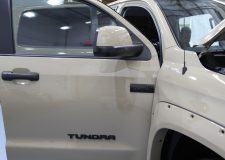
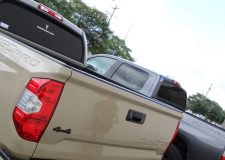
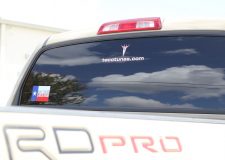
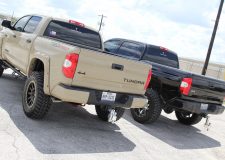
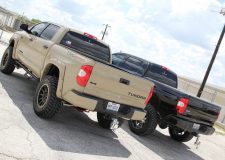
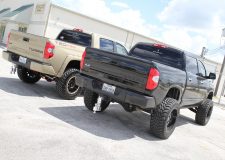
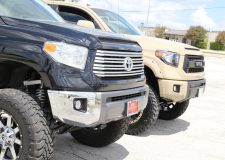
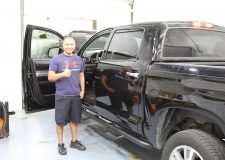
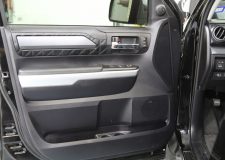
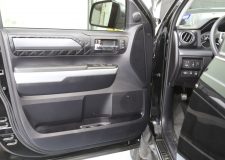
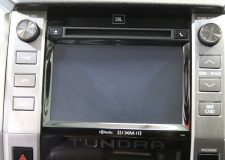
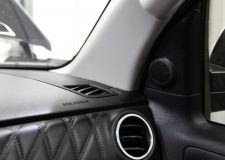
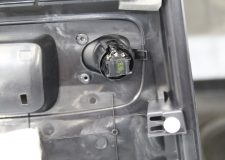
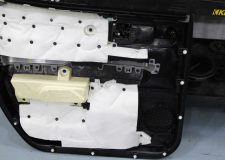
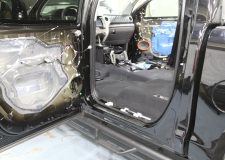
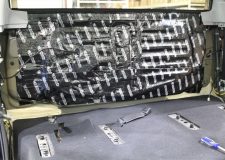
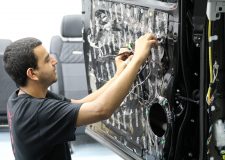
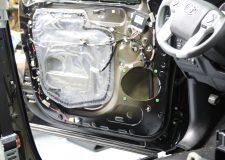
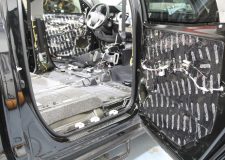
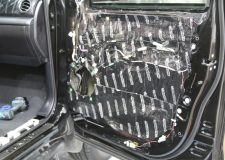
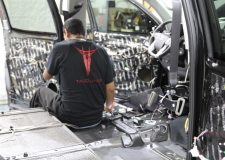
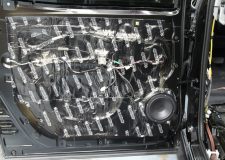
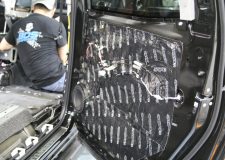
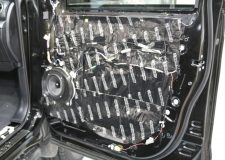
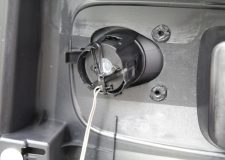
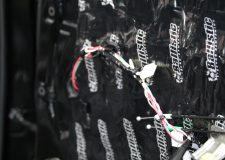
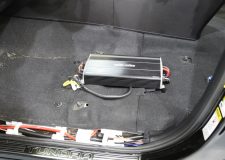
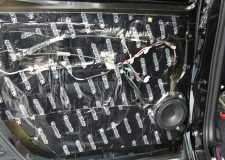
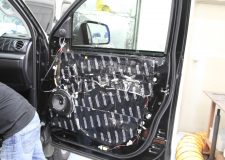
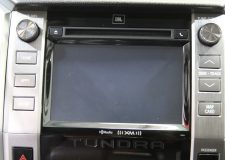
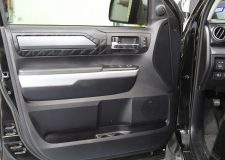
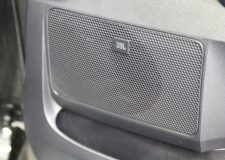
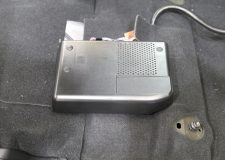
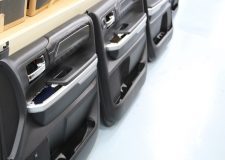
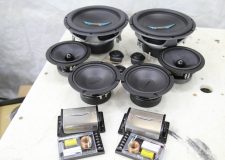
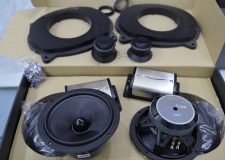
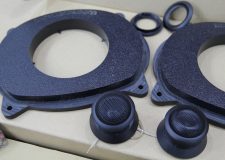
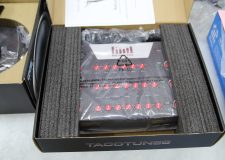
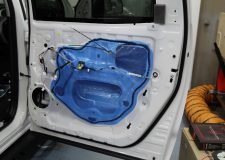
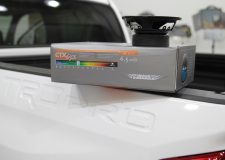
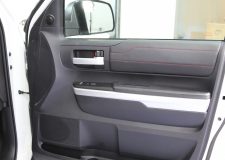
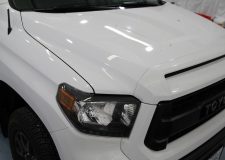
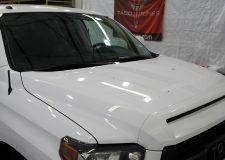
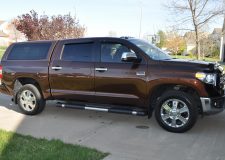
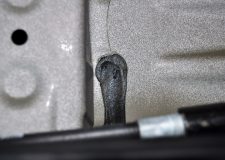
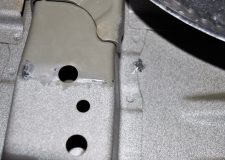
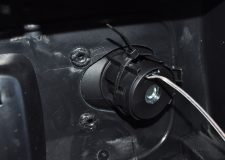
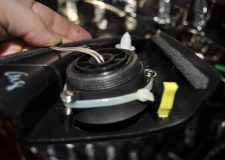
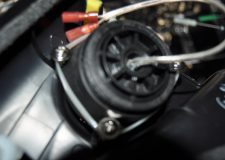
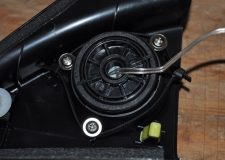
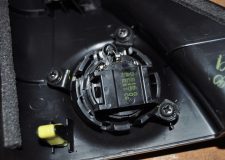
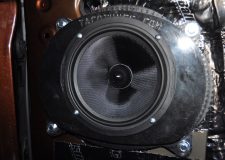
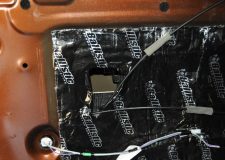
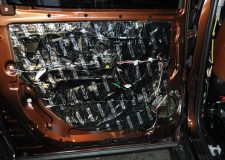
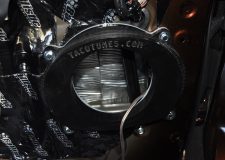
Steve’s Toyota Tundra CrewMax tacotunes plug and play audio system
Steve’s Toyota Tundra CrewMax tacotunes plug and play audio system
Steve’s Toyota Tundra CrewMax tacotunes plug and play audio system
Steve’s Toyota Tundra CrewMax tacotunes plug and play audio system
Steve’s Toyota Tundra CrewMax tacotunes plug and play audio system
Steve’s Toyota Tundra CrewMax tacotunes plug and play audio system
Steve’s Toyota Tundra CrewMax tacotunes plug and play audio system
Steve’s Toyota Tundra CrewMax tacotunes plug and play audio system
Steve’s Toyota Tundra CrewMax tacotunes plug and play audio system
Steve’s Toyota Tundra CrewMax tacotunes plug and play audio system
Steve’s Toyota Tundra CrewMax tacotunes plug and play audio system
Steve’s Toyota Tundra CrewMax tacotunes plug and play audio system
Steve’s Toyota Tundra CrewMax tacotunes plug and play audio system
Steve’s Toyota Tundra CrewMax tacotunes plug and play audio system
Steve’s Toyota Tundra CrewMax tacotunes plug and play audio system
Steve’s Toyota Tundra CrewMax tacotunes plug and play audio system
Steve’s Toyota Tundra CrewMax tacotunes plug and play audio system
Steve’s Toyota Tundra CrewMax tacotunes plug and play audio system
Steve’s Toyota Tundra CrewMax tacotunes plug and play audio system
Steve’s Toyota Tundra CrewMax tacotunes plug and play audio system
Steve’s Toyota Tundra CrewMax tacotunes plug and play audio system
Steve’s Toyota Tundra CrewMax tacotunes plug and play audio system
Steve’s Toyota Tundra CrewMax tacotunes plug and play audio system
Steve’s Toyota Tundra CrewMax tacotunes plug and play audio system
Steve’s Toyota Tundra CrewMax tacotunes plug and play audio system
Steve’s Toyota Tundra CrewMax tacotunes plug and play audio system
Steve’s Toyota Tundra CrewMax tacotunes plug and play audio system
Steve’s Toyota Tundra CrewMax tacotunes plug and play audio system
Steve’s Toyota Tundra CrewMax tacotunes plug and play audio system
Steve’s Toyota Tundra CrewMax tacotunes plug and play audio system
Steve’s Toyota Tundra CrewMax tacotunes plug and play audio system
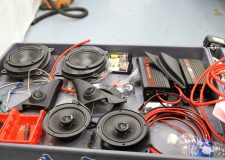
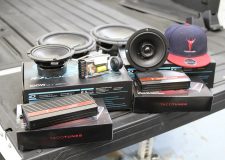
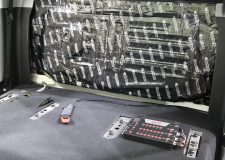
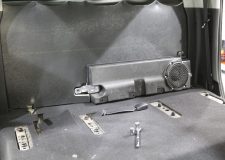
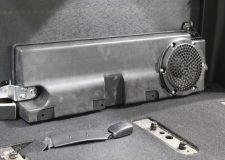
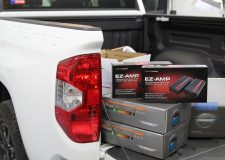
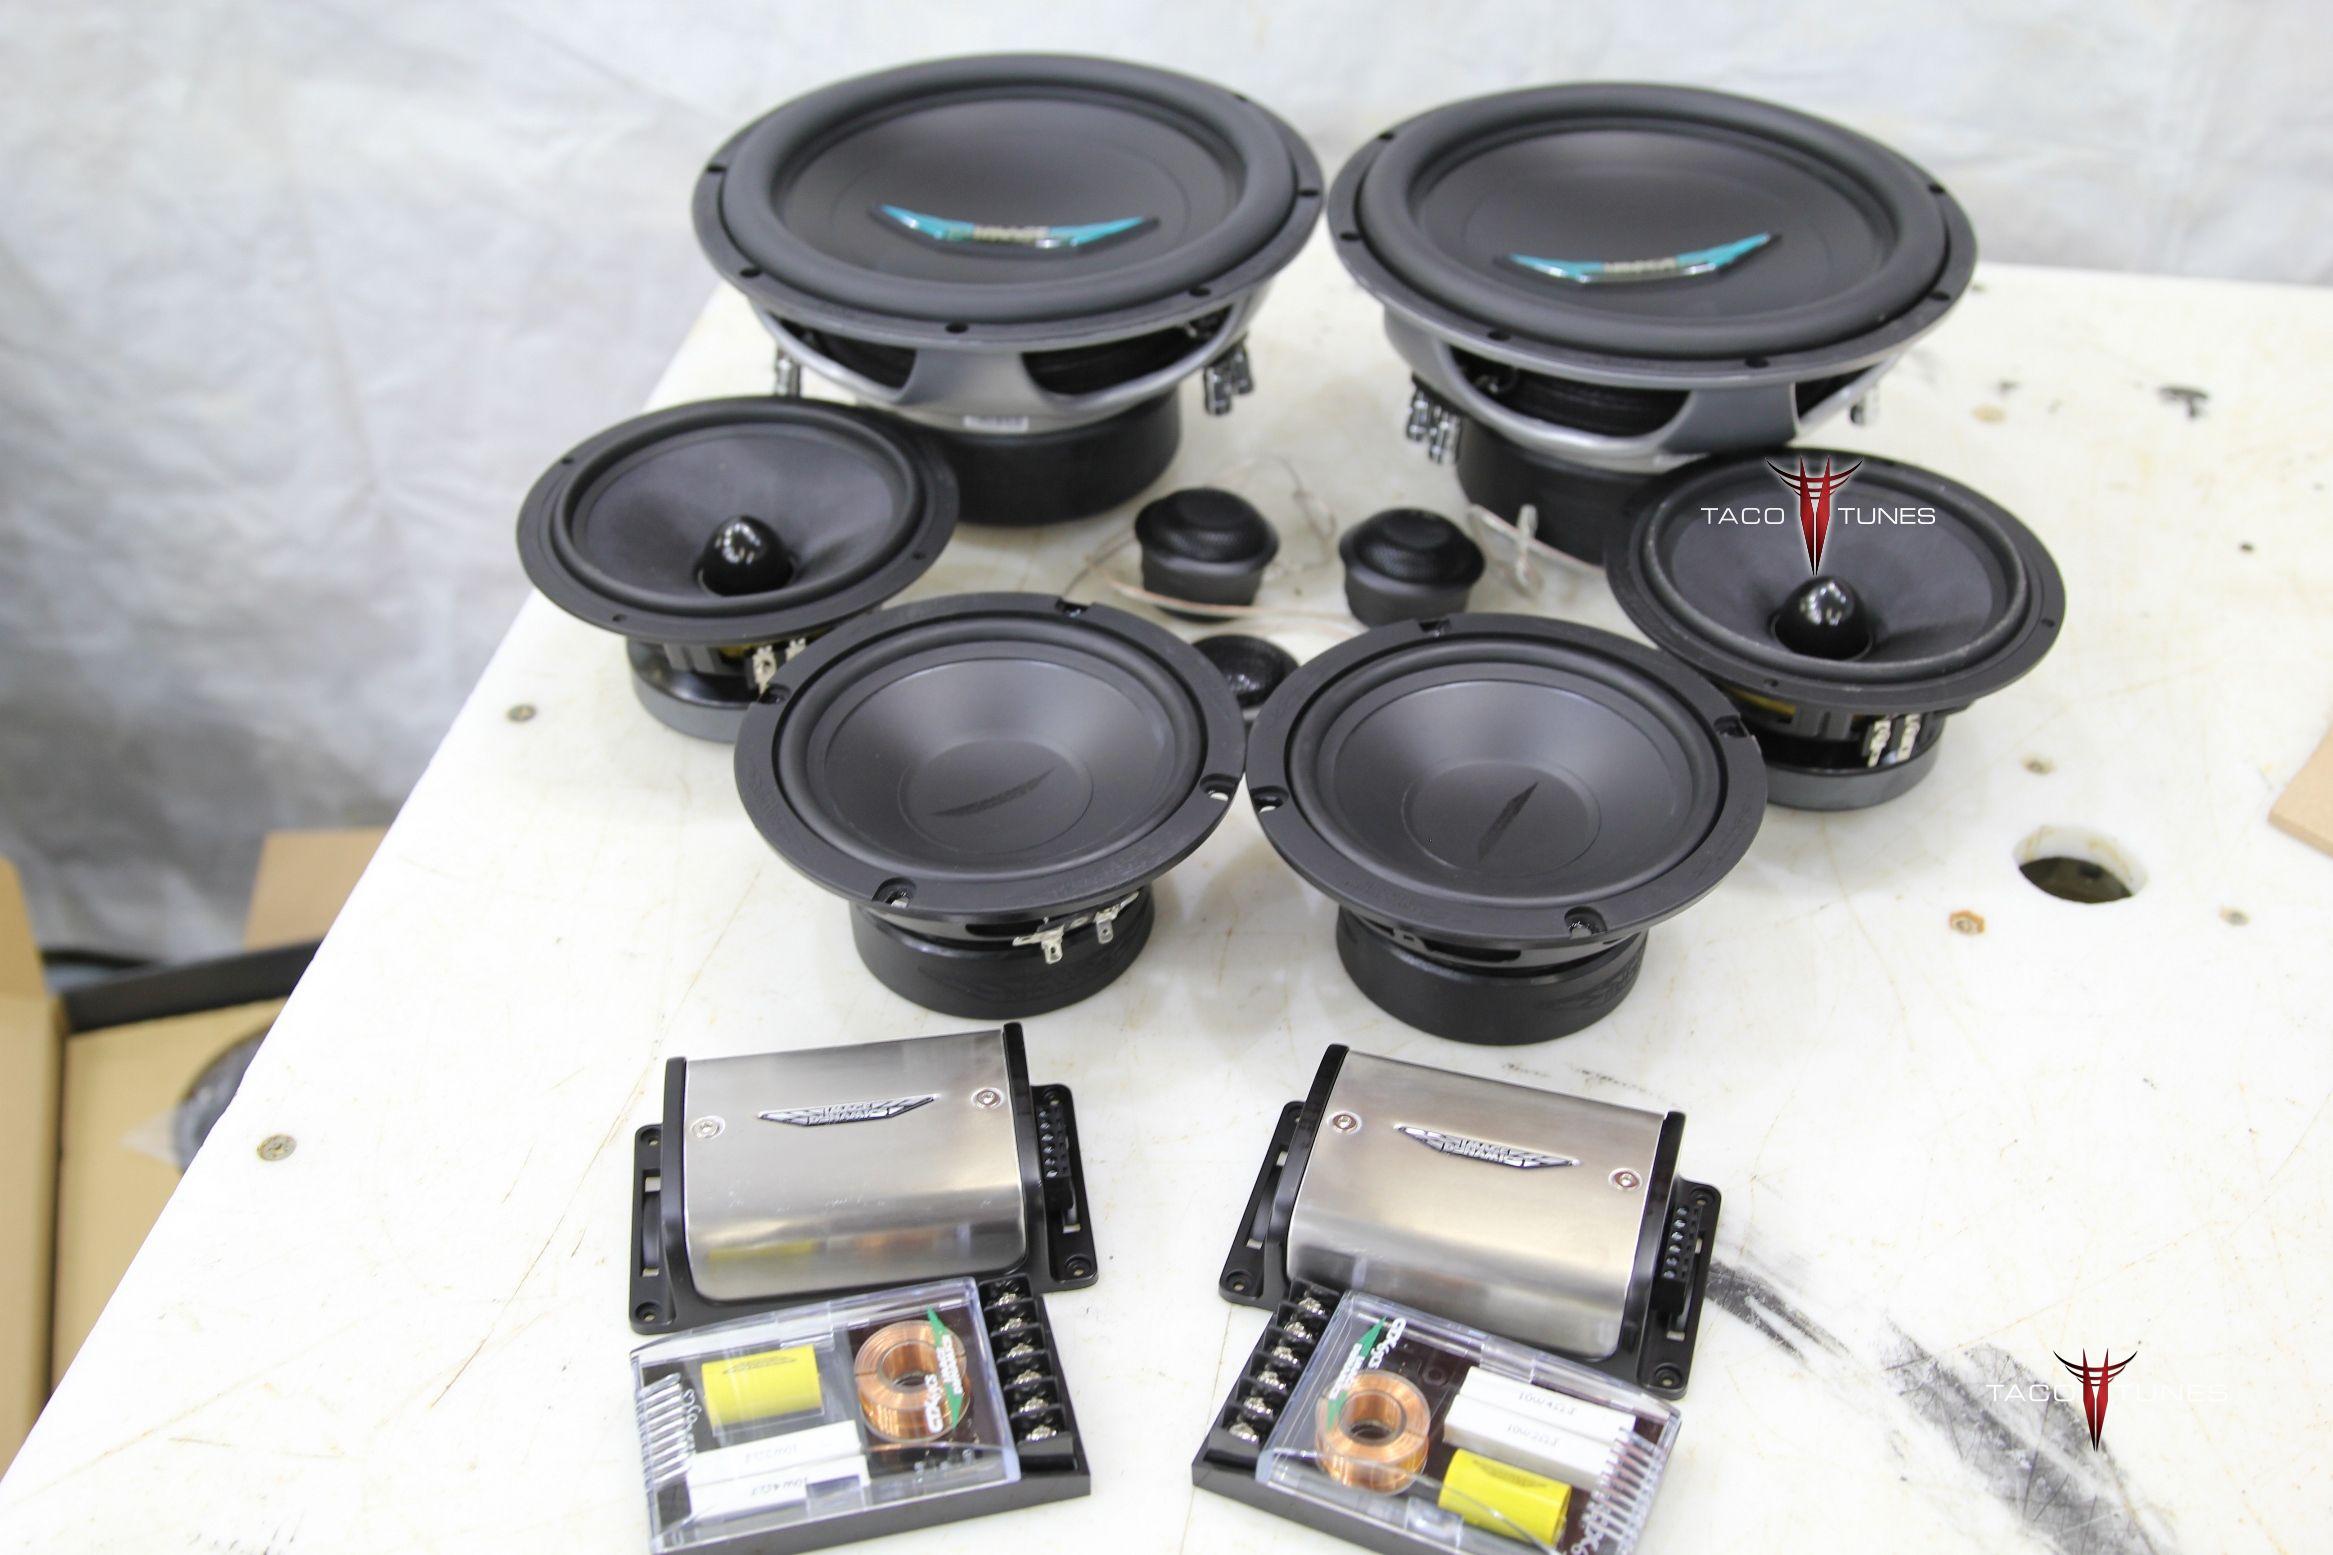
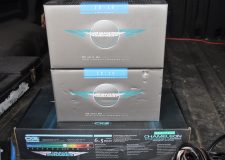
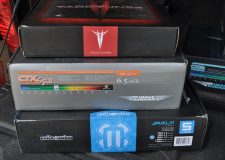
Below you will find a detailed listing of all the parts we used in the installation.
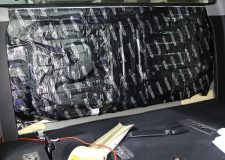
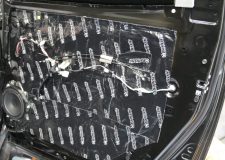
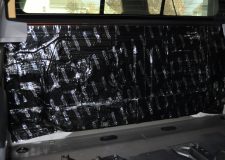
Typical Installation time is 1 day, however we matted the front, rear doors and the rear wall behind the subwoofer. If we are matting the truck we keep the truck for two days. One day audio installation and matting jobs are possible, but require at least 14 hours with the truck.
Below is a detailed listing of the audio products installed in Chris Tundra CrewMax
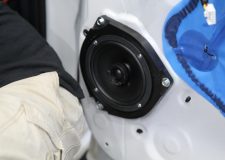
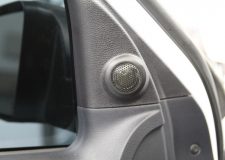
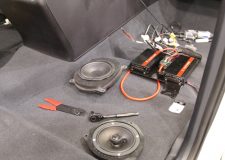
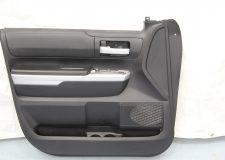
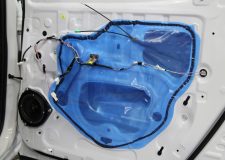
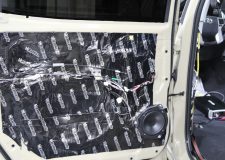
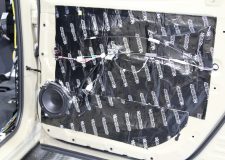
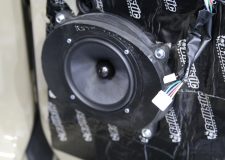
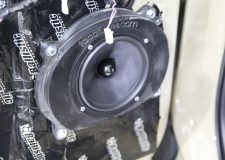
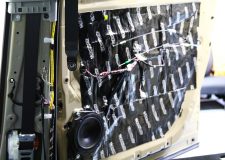
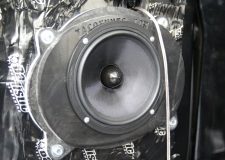
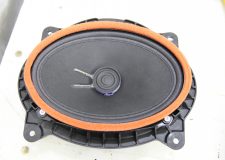
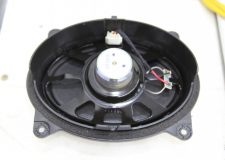
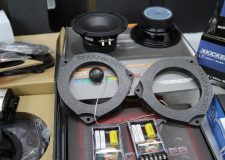
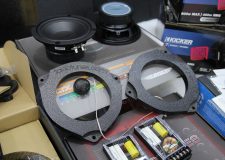
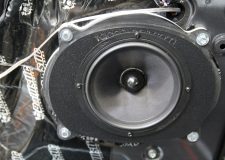
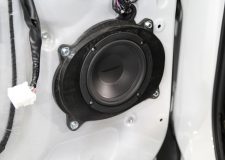
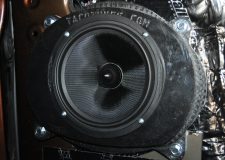
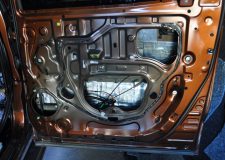
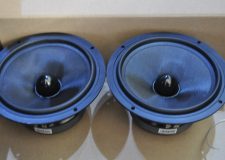
Front Door Component Speakers:
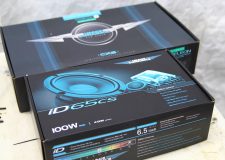
Image Dynamics CTX65CS/ID65CS
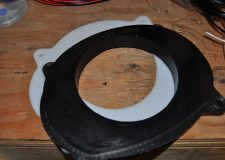
Tacotunes.com heavy duty speaker mounts cut to 5.6”
CTXCS Mid bass Drivers -100 Watts RMS
CTXCS Crossover
CTXCS Tweeter
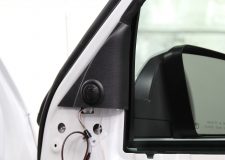
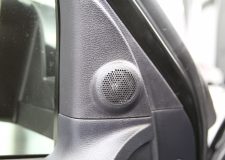
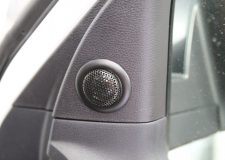
Use Stock Sail Panel for Tweeter mounts.
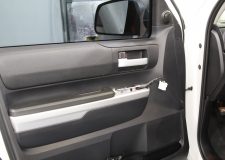
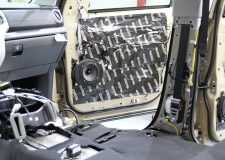
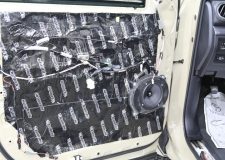
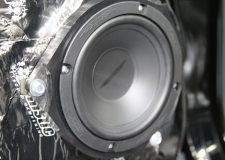
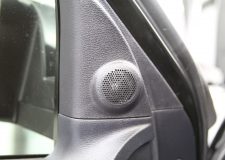
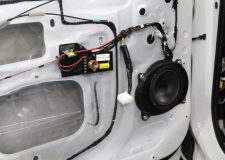
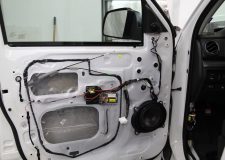
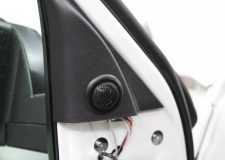
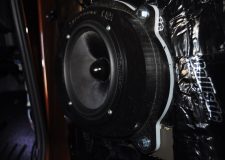
Rear Door Components:
Image Dynamics CTX65CS
Tacotunes.com heavy duty speaker mounts cut to 5.6”
CTX65CS Mid bass drivers Handles -100 watts RMS
CTX65CS Crossover
CTX Tweeters
Tweeters will fit in stock door location
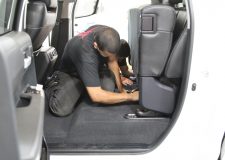
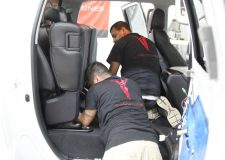
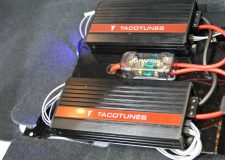
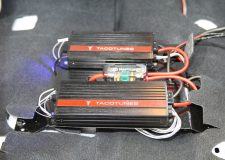
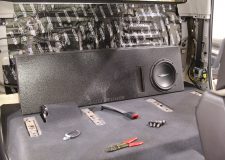
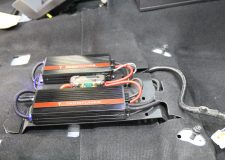
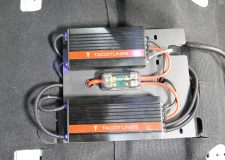
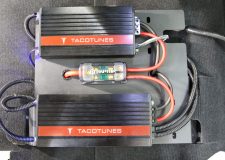
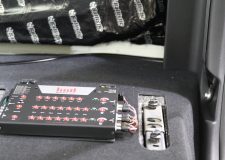
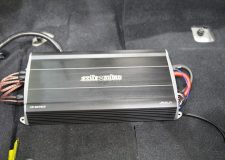
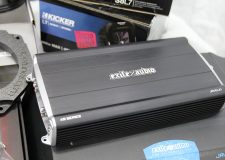
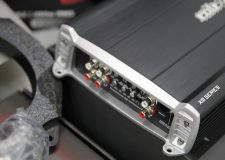
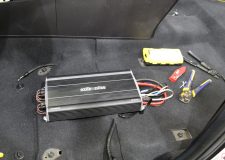
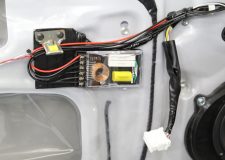
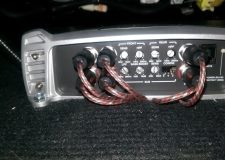
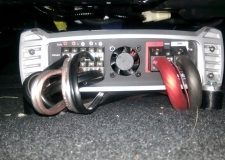
Amp:
tacotunes.com TXD3204 Four channel amplifier
tacotunes.com TXD6001 Mono subwoofer amplifier
100 watts x 4 to each speaker and 800 x 1 (subwoofer)
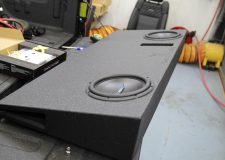
This truck is heading back to the dealership to be used to demonstrate tacotunes.com products.
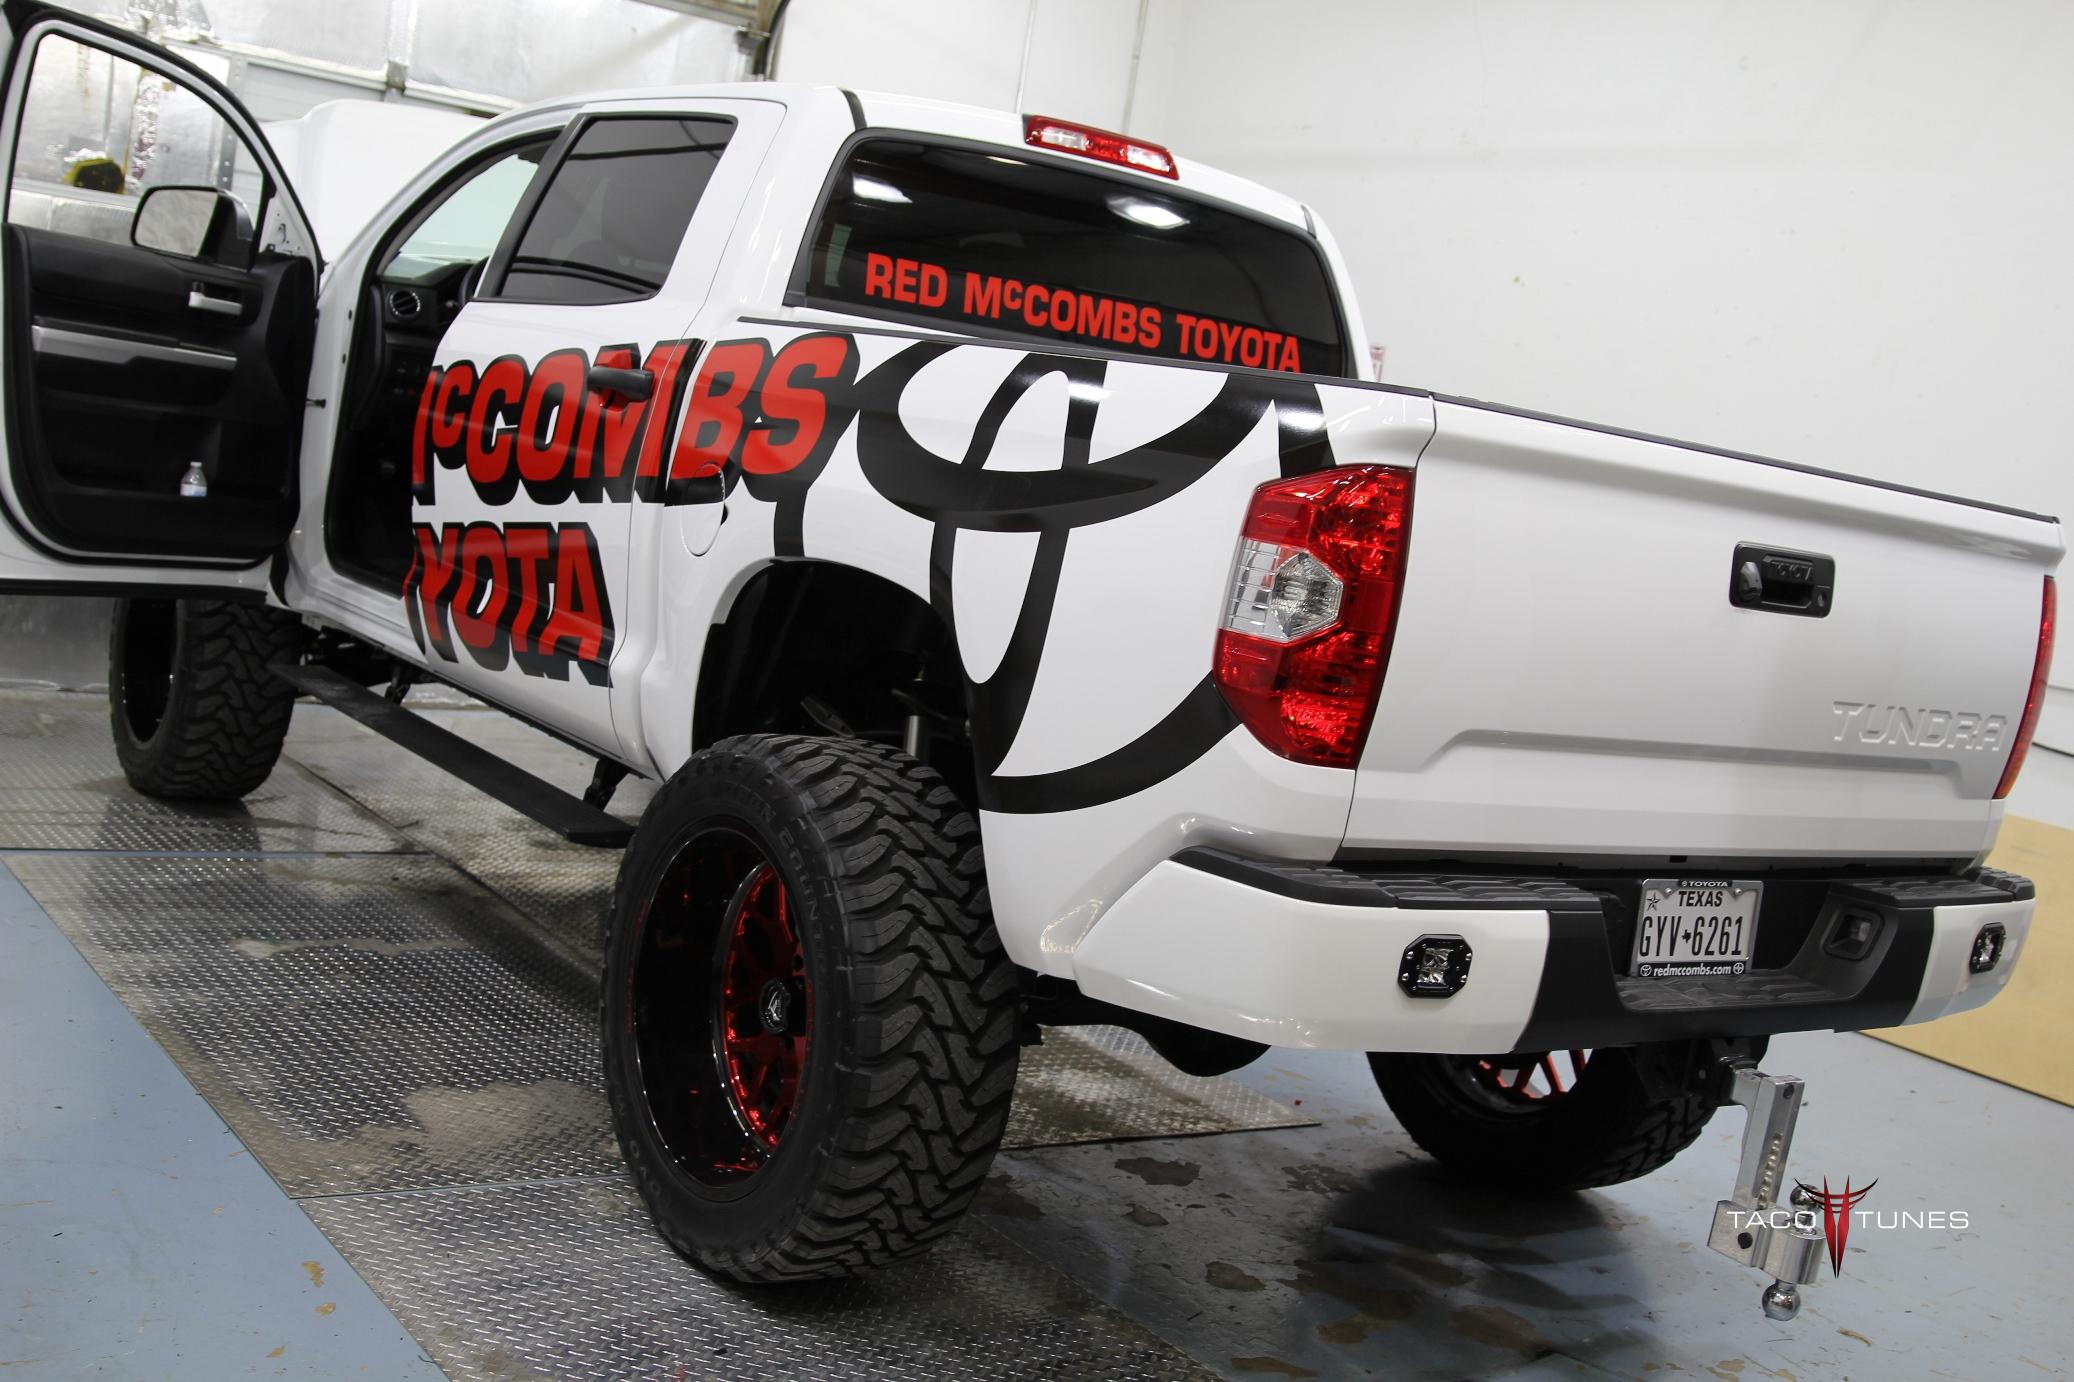
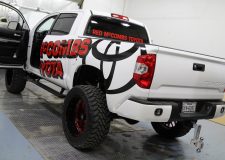
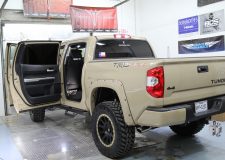
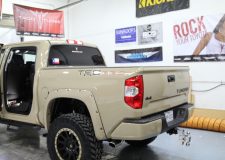
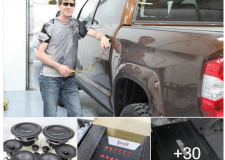
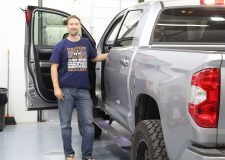
Red McCombs Toyota Tundra CrewMax Plug n Play audio system upgrade
Red McCombs Toyota Tundra CrewMax Plug n Play audio system upgrade
Red McCombs Toyota Tundra CrewMax Plug n Play audio system upgrade
Red McCombs Toyota Tundra CrewMax Plug n Play audio system upgrade
Red McCombs Toyota Tundra CrewMax Plug n Play audio system upgrade
Red McCombs Toyota Tundra CrewMax Plug n Play audio system upgrade
Red McCombs Toyota Tundra CrewMax Plug n Play audio system upgrade
Red McCombs Toyota Tundra CrewMax Plug n Play audio system upgrade
Red McCombs Toyota Tundra CrewMax Plug n Play audio system upgrade
Red McCombs Toyota Tundra CrewMax Plug n Play audio system upgrade
Red McCombs Toyota Tundra CrewMax Plug n Play audio system upgrade
Red McCombs Toyota Tundra CrewMax Plug n Play audio system upgrade
Red McCombs Toyota Tundra CrewMax Plug n Play audio system upgrade
Red McCombs Toyota Tundra CrewMax Plug n Play audio system upgrade
Red McCombs Toyota Tundra CrewMax Plug n Play audio system upgrade
Red McCombs Toyota Tundra CrewMax Plug n Play audio system upgrade
Red McCombs Toyota Tundra CrewMax Plug n Play audio system upgrade
Red McCombs Toyota Tundra CrewMax Plug n Play audio system upgrade
Red McCombs Toyota Tundra CrewMax Plug n Play audio system upgrade
Red McCombs Toyota Tundra CrewMax Plug n Play audio system upgrade
Red McCombs Toyota Tundra CrewMax Plug n Play audio system upgrade
Red McCombs Toyota Tundra CrewMax Plug n Play audio system upgrade
Red McCombs Toyota Tundra CrewMax Plug n Play audio system upgrade
Red McCombs Toyota Tundra CrewMax Plug n Play audio system upgrade
Red McCombs Toyota Tundra CrewMax Plug n Play audio system upgrade
Red McCombs Toyota Tundra CrewMax Plug n Play audio system upgrade
Below you will find a detailed listing of all the parts we used in the installation.
Typical Installation time is 1 day, however we matted the front, rear doors and the rear wall behind the subwoofer. If we are matting the truck we keep the truck for two days. One day audio installation and matting jobs are possible, but require at least 14 hours with the truck.
Below is a detailed listing of the audio products installed in Chris Tundra CrewMax
Front Door Component Speakers:
Image Dynamics CTX65CS/ID65CS
Tacotunes.com heavy duty speaker mounts cut to 5.6”
CTXCS Mid bass Drivers -100 Watts RMS
CTXCS Crossover
CTXCS Tweeter
Use Stock Sail Panel for Tweeter mounts.
Rear Door Components:
Image Dynamics CTX65CS
Tacotunes.com heavy duty speaker mounts cut to 5.6”
CTX65CS Mid bass drivers Handles -100 watts RMS
CTX65CS Crossover
CTX Tweeters
Tweeters will fit in stock door location
Amp:
tacotunes.com TXD3204 Four channel amplifier
tacotunes.com TXD6001 Mono subwoofer amplifier
70 watts x 4 to each speaker and 400 x 1 (subwoofer)
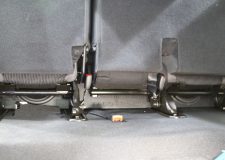
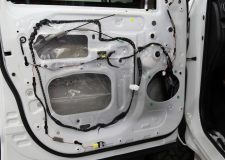
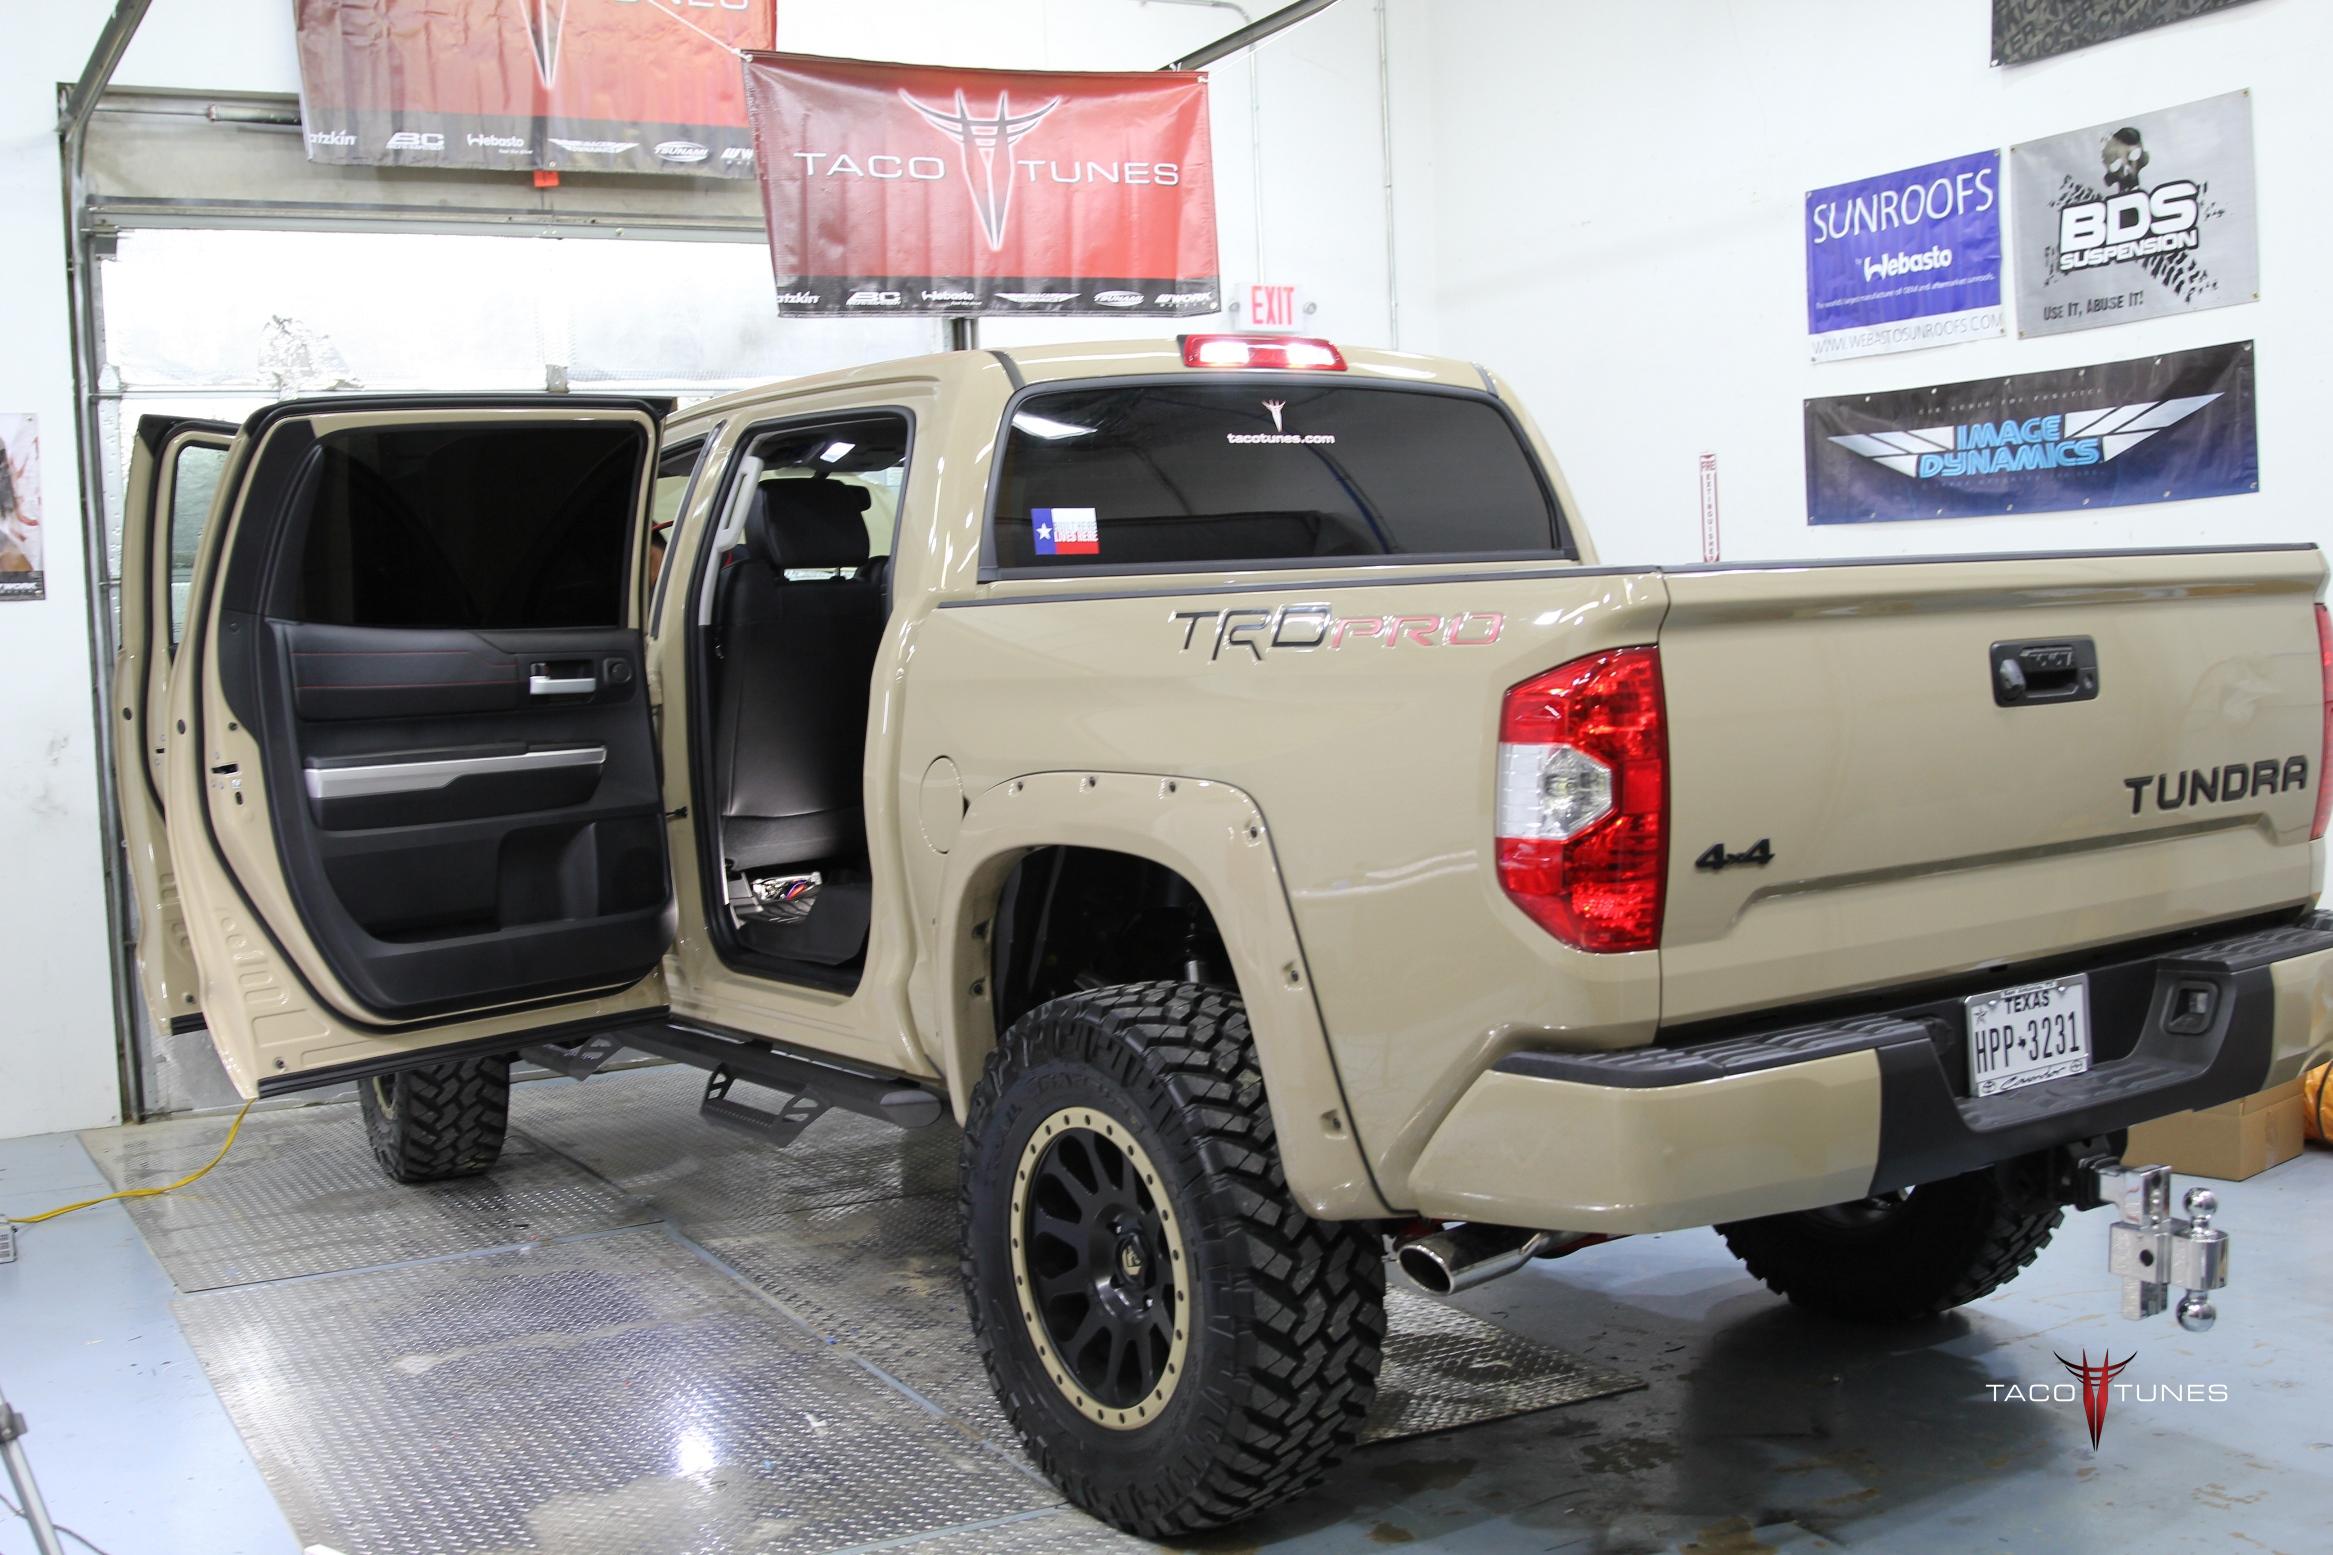
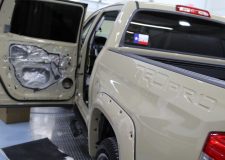
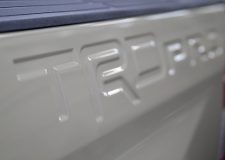
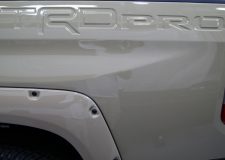
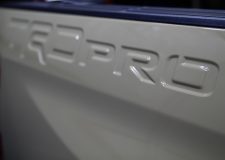
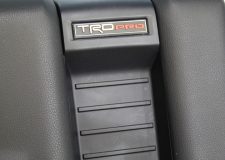
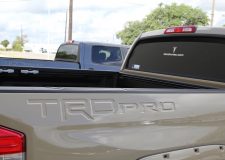
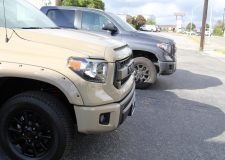
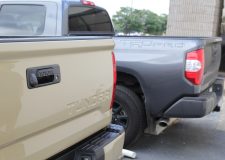
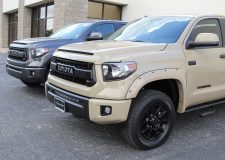
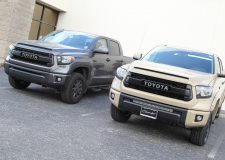
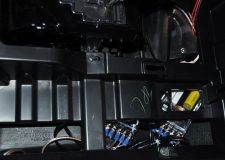
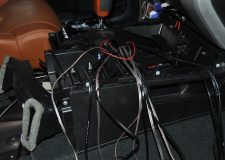
2016 Toyota Tundra CrewMax TRD Pro Complete Audio System Installation
2016 Toyota Tundra CrewMax TRD Pro Complete Audio System Installation
2016 Toyota Tundra CrewMax TRD Pro Complete Audio System Installation
2016 Toyota Tundra CrewMax TRD Pro Complete Audio System Installation
2016 Toyota Tundra CrewMax TRD Pro Complete Audio System Installation
2016 Toyota Tundra CrewMax TRD Pro Complete Audio System Installation
2016 Toyota Tundra CrewMax TRD Pro Complete Audio System Installation
2016 Toyota Tundra CrewMax TRD Pro Complete Audio System Installation
2016 Toyota Tundra CrewMax TRD Pro Complete Audio System Installation
2016 Toyota Tundra CrewMax TRD Pro Complete Audio System Installation
2016 Toyota Tundra CrewMax TRD Pro Complete Audio System Installation
2016 Toyota Tundra CrewMax TRD Pro Complete Audio System Installation
2016 Toyota Tundra CrewMax TRD Pro Complete Audio System Installation
2016 Toyota Tundra CrewMax TRD Pro Complete Audio System Installation
2016 Toyota Tundra CrewMax TRD Pro Complete Audio System Installation
2016 Toyota Tundra CrewMax TRD Pro Complete Audio System Installation
2016 Toyota Tundra CrewMax TRD Pro Complete Audio System Installation
2016 Toyota Tundra CrewMax TRD Pro Complete Audio System Installation
2016 Toyota Tundra CrewMax TRD Pro Complete Audio System Installation
2016 Toyota Tundra CrewMax TRD Pro Complete Audio System Installation
2016 Toyota Tundra CrewMax TRD Pro Complete Audio System Installation
2016 Toyota Tundra CrewMax TRD Pro Complete Audio System Installation
2016 Toyota Tundra CrewMax TRD Pro Complete Audio System Installation
2016 Toyota Tundra CrewMax TRD Pro Complete Audio System Installation
2016 Toyota Tundra CrewMax TRD Pro Complete Audio System Installation
2016 Toyota Tundra CrewMax TRD Pro Complete Audio System Installation
2016 Toyota Tundra CrewMax TRD Pro Complete Audio System Installation
2016 Toyota Tundra CrewMax TRD Pro Complete Audio System Installation
2016 Toyota Tundra CrewMax TRD Pro Complete Audio System Installation
2016 Toyota Tundra CrewMax TRD Pro Complete Audio System Installation
2016 Toyota Tundra CrewMax TRD Pro Complete Audio System Installation
2016 Toyota Tundra CrewMax TRD Pro Complete Audio System Installation
2016 Toyota Tundra CrewMax TRD Pro Complete Audio System Installation
2016 Toyota Tundra CrewMax TRD Pro Complete Audio System Installation
2016 Toyota Tundra CrewMax TRD Pro Complete Audio System Installation
2016 Toyota Tundra CrewMax TRD Pro Complete Audio System Installation
2016 Toyota Tundra CrewMax TRD Pro Complete Audio System Installation
2016 Toyota Tundra CrewMax TRD Pro Complete Audio System Installation
2016 Toyota Tundra CrewMax TRD Pro Complete Audio System Installation
2016 Toyota Tundra CrewMax TRD Pro Complete Audio System Installation
2016 Toyota Tundra CrewMax TRD Pro Complete Audio System Installation
2016 Toyota Tundra CrewMax TRD Pro Complete Audio System Installation
2016 Toyota Tundra CrewMax TRD Pro Complete Audio System Installation
2016 Toyota Tundra CrewMax TRD Pro Complete Audio System Installation
2016 Toyota Tundra CrewMax TRD Pro Complete Audio System Installation
2016 Toyota Tundra CrewMax TRD Pro Complete Audio System Installation
2016 Toyota Tundra CrewMax TRD Pro Complete Audio System Installation
2016 Toyota Tundra CrewMax TRD Pro Complete Audio System Installation
2016 Toyota Tundra CrewMax TRD Pro Complete Audio System Installation
2016 Toyota Tundra CrewMax TRD Pro Complete Audio System Installation
2016 Toyota Tundra CrewMax TRD Pro Complete Audio System Installation
2016 Toyota Tundra CrewMax TRD Pro Complete Audio System Installation
2016 Toyota Tundra CrewMax TRD Pro Complete Audio System Installation
2016 Toyota Tundra CrewMax TRD Pro Complete Audio System Installation
2016 Toyota Tundra CrewMax TRD Pro Complete Audio System Installation
2016 Toyota Tundra CrewMax TRD Pro Complete Audio System Installation
2016 Toyota Tundra CrewMax TRD Pro Complete Audio System Installation
2016 Toyota Tundra CrewMax TRD Pro Complete Audio System Installation
2016 Toyota Tundra CrewMax TRD Pro Complete Audio System Installation
2016 Toyota Tundra CrewMax TRD Pro Complete Audio System Installation
2016 Toyota Tundra CrewMax TRD Pro Complete Audio System Installation
2016 Toyota Tundra CrewMax TRD Pro Complete Audio System Installation
2016 Toyota Tundra CrewMax TRD Pro Complete Audio System Installation
2016 Toyota Tundra CrewMax TRD Pro Complete Audio System Installation
2016 Toyota Tundra CrewMax TRD Pro Complete Audio System Installation
2016 Toyota Tundra CrewMax TRD Pro Complete Audio System Installation
2016 Toyota Tundra CrewMax TRD Pro Complete Audio System Installation
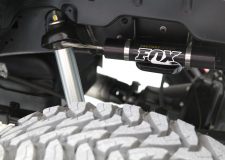
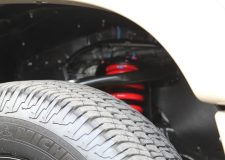
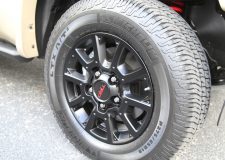
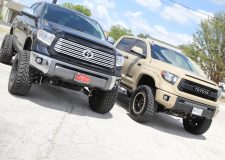
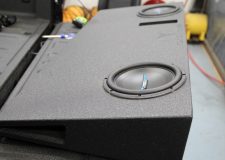
After the lift:
2016 Toyota Tundra Crewmax TRD Pro (1)
2016 Toyota Tundra Crewmax TRD Pro
2016 Toyota Tundra Crewmax TRD Pro
2016 Toyota Tundra Crewmax TRD Pro
2016 Toyota Tundra Crewmax TRD Pro
2016 Toyota Tundra Crewmax TRD Pro
2016 Toyota Tundra Crewmax TRD Pro
2016 Toyota Tundra Crewmax TRD Pro
2016 Toyota Tundra Crewmax TRD Pro
2016 Toyota Tundra Crewmax TRD Pro
2016 Toyota Tundra Crewmax TRD Pro
2016 Toyota Tundra Crewmax TRD Pro
2016 Toyota Tundra Crewmax TRD Pro
Below you will find a detailed listing of all the parts we used in the installation.
Typical Installation time is 1 day, however we matted the front, rear doors and the rear wall behind the subwoofer. If we are matting the truck we keep the truck for two days. One day audio installation and matting jobs are possible, but require at least 14 hours with the truck.
Below is a detailed listing of the audio products installed in Chris Tundra CrewMax
Front Door Component Speakers:
Image Dynamics CXS64
Tacotunes.com heavy duty speaker mounts cut to 5.6”
CXS Mid bass Drivers -125 Watts RMS
CXS Crossover
CXS 28M Silk Dome Tweeter
NOTE: JBL equipped
Use Stock Sail Panel for Tweeter mounts.
Rear Door Components:
Image Dynamics CTX65CS
Tacotunes.com heavy duty speaker mounts cut to 5.6”
CTX65CS Mid bass drivers Handles -100 watts RMS
CTX65CS Crossover
CTX Tweeters
Tweeters will fit in stock door location
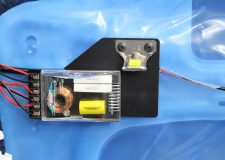
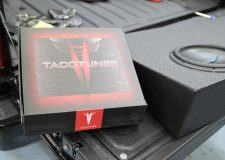
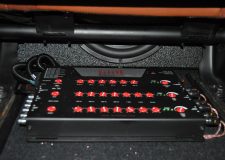
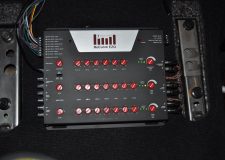
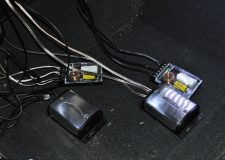
Sound Processor:
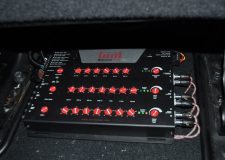
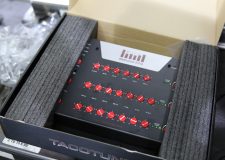
Tacotunes.com ReCurve EZQ
Tacotunes.com JBL Harness
Amp:
Exile Audio 5 channel amp
100 watts x 4 to each speaker and 800 x 1 (subwoofer)
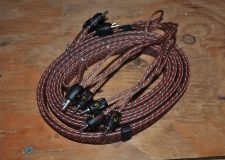
2014+ NON JBL Toyota Tundra System 1x Installation Instructions
Thank you for purchasing the tacotunes.com system 1x complete audio upgrade. This system will allow you to keep your stock head unit and utilize your existing wiring system in your Toyota Tundra. thus making it easier to return your truck back to stock if you choose to sell or trade your truck. Be sure to save ALL your stock parts.
Following the instructions below is crucial to a successful installation. We recommend prepping the following items the day before you begin your installation. This will ensure all the parts are at your disposal. There are a couple of steps where it will help to have a buddy help you out. Not necessary but makes it easier. Do NOT start drinking your favorite beverage until recommend below. Plus be sure to keep your mind sharp. By getting the installation done right the first time you will enjoy years of quality sound in your Toyota Tundra. Shortcuts and rushing through the install will cause issues down the road. Take your time enjoy the install.
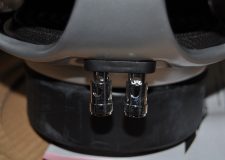
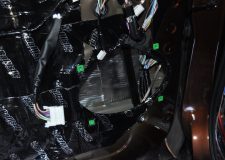
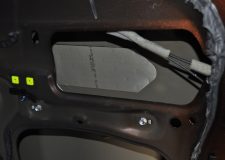
Mount your crossovers to the provided crossover mounts. (see speaker install video)
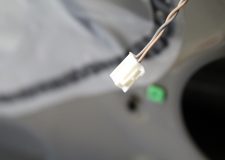
Connect the 18g & 16g wiring to the crossovers
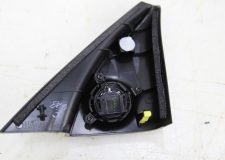
If mounting your tweeters in sail panels, prepare your sail panels.
Assemble your amp rack, amplifier, distribution block etc. (see video below)
Assemble your subwoofer / subwoofer box. (see video below)
Watch installation videos to understand the process.
Get your six pack on ice. DO NOT OPEN until instructed! 🙂
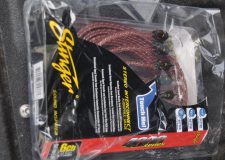
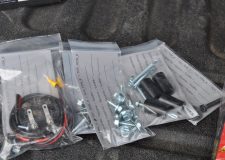
Go over checklist and ensure all parts are in the package. We have a checklist that we do on EACH system. But we are human so it is possible a part was missed.
Installation: 3 – 5 hours
Tundra Preparation
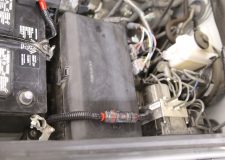
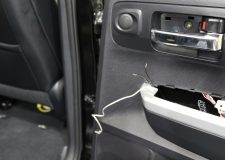
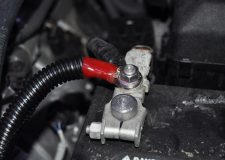
UNPLUG YOUR BATTERY. Remove the NEGATIVE connection from the battery and secure it AWAY from battery.
Unplug battery – ground connection.
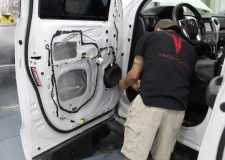
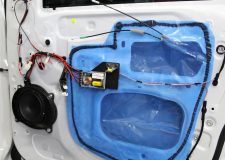
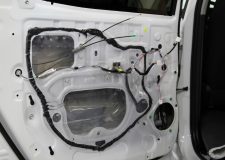
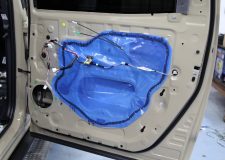
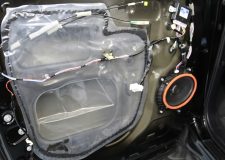
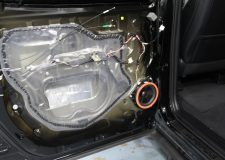
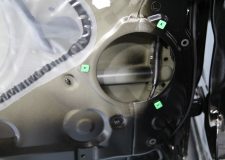
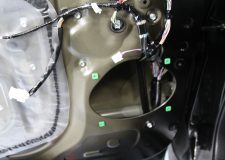
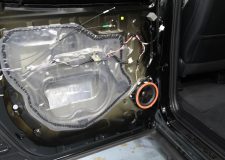
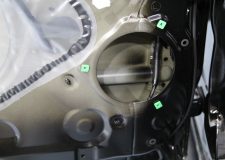
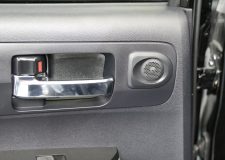
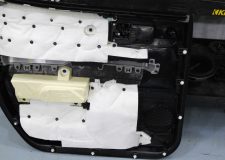
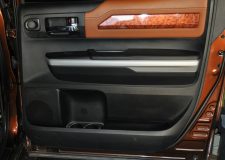
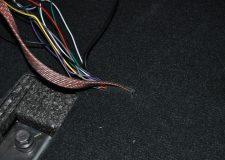
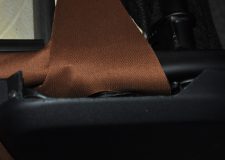
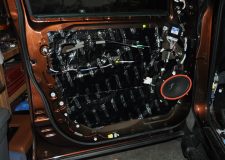
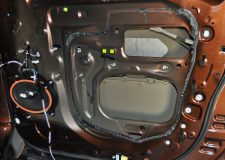
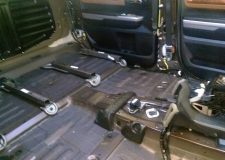
Remove the door panels – if you are installing new speakers.
Remove door sills.
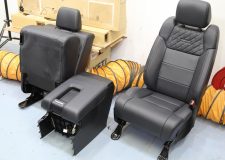
Remove front passenger seat. (you can lean seat back per video)
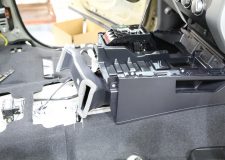
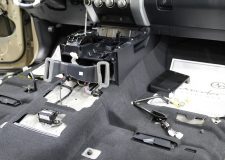
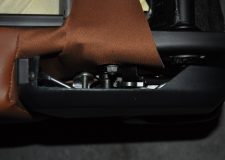
Remove center console cover.
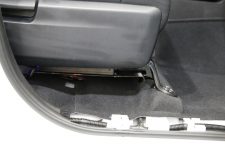
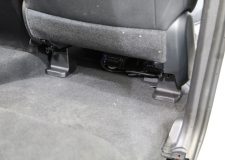
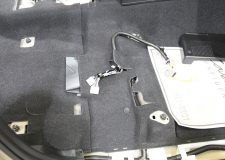
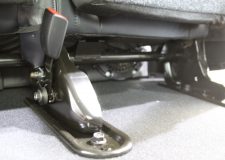
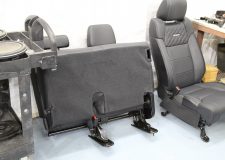
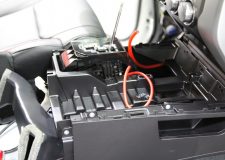
Remove rear seats (if installing subwoofer) – have a friend help the rear seats are heavy. ( you can lean larger seat to front of vehicle to avoid removal). Remove the smaller passenger side seat to make it easier to access amp under front seat. NOTE: Use the rear wall pad (per vid) as a way to protect your carpet from the rear seats.
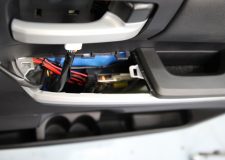
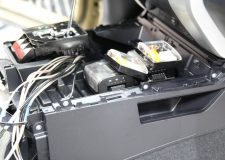
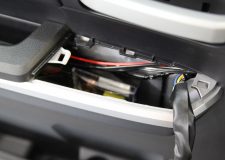
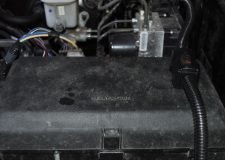
Remove stock amplifier under front passenger seat. (save the bolts)
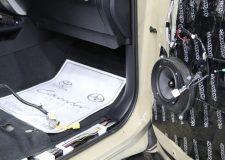
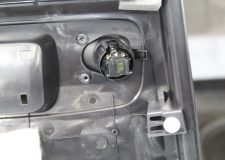
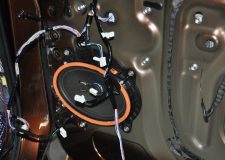
Remove front / rear speakers.
Remove dash speakers / tweeters and center speaker if equipped. You can leave them unplugged and in place, but we recommend leaving them unplugged during and after you have completed your install.
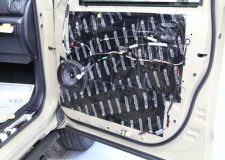
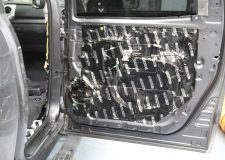
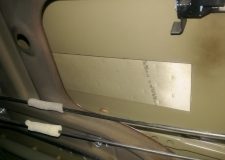
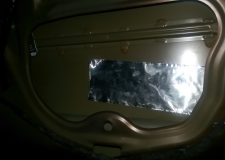
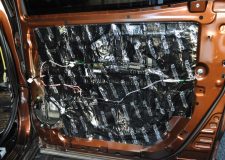
If you will be matting your doors we suggest doing this before you begin the steps below. Keep in mind matting will add a full day to your install.
Installation Steps:
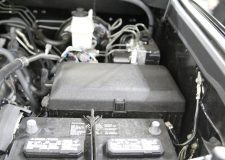
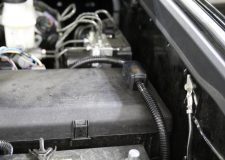
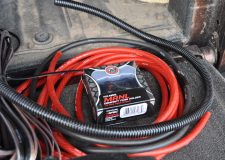
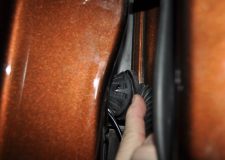
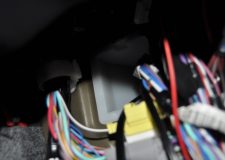
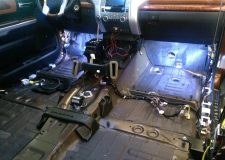
Run power wire from battery to new amp location. (see video)
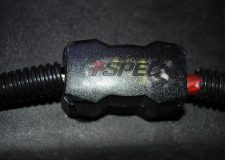
Assemble the fuse block and complete under hood details. (Do not connect to battery)
Run subwoofer wire to rear of vehicle per the installation video.
Install amps / amp rack per video. (do not connect speaker output connections)
Connect input side of amp first. (Blue molex plugs from direct connect harness)
Connect battery
Tune amplifiers per tuning video(s).
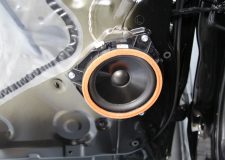
Install front / rear speakers.
Install subwoofer.
Test system – ensure playing correctly.
disconnect battery.
Install center console.
Install seats BEFORE installing door panels and door sills. (battery should be unplugged)
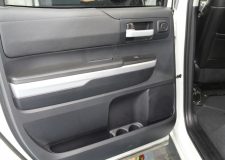
Install door sills.
Install door panels.
Connect battery.
Test the sound and ensure all playing properly.
Open a single beverage, beat your chest and listen to your tunes for about 10 minutes.
Finish cleaning up odds and ends.
Be sure to save ALL stock parts.
Congratulations you just installed an audio system that would have cost thousands of $ at your local audio shop.
JG has had audio systems in most of his vehicles. As you can see by the smile on his face, he was very happy with the results.
Toyota Tundra CrewMax Platinum Complete Audio System Installation San Antonio
Toyota Tundra CrewMax Platinum Complete Audio System Installation San Antonio
Toyota Tundra CrewMax Platinum Complete Audio System Installation San Antonio
Toyota Tundra CrewMax Platinum Complete Audio System Installation San Antonio
Toyota Tundra CrewMax Platinum Complete Audio System Installation San Antonio
Toyota Tundra CrewMax Platinum Complete Audio System Installation San Antonio
Toyota Tundra CrewMax Platinum Complete Audio System Installation San Antonio
Toyota Tundra CrewMax Platinum Complete Audio System Installation San Antonio
Toyota Tundra CrewMax Platinum Complete Audio System Installation San Antonio
Toyota Tundra CrewMax Platinum Complete Audio System Installation San Antonio
Toyota Tundra CrewMax Platinum Complete Audio System Installation San Antonio
Toyota Tundra CrewMax Platinum Complete Audio System Installation San Antonio
Toyota Tundra CrewMax Platinum Complete Audio System Installation San Antonio
Toyota Tundra CrewMax Platinum Complete Audio System Installation San Antonio
Toyota Tundra CrewMax Platinum Complete Audio System Installation San Antonio
Toyota Tundra CrewMax Platinum Complete Audio System Installation San Antonio
Toyota Tundra CrewMax Platinum Complete Audio System Installation San Antonio
Toyota Tundra CrewMax Platinum Complete Audio System Installation San Antonio
Toyota Tundra CrewMax Platinum Complete Audio System Installation San Antonio
Toyota Tundra CrewMax Platinum Complete Audio System Installation San Antonio
Toyota Tundra CrewMax Platinum Complete Audio System Installation San Antonio
Toyota Tundra CrewMax Platinum Complete Audio System Installation San Antonio
Toyota Tundra CrewMax Platinum Complete Audio System Installation San Antonio
Toyota Tundra CrewMax Platinum Complete Audio System Installation San Antonio
Toyota Tundra CrewMax Platinum Complete Audio System Installation San Antonio
Toyota Tundra CrewMax Platinum Complete Audio System Installation San Antonio
Toyota Tundra CrewMax Platinum Complete Audio System Installation San Antonio
Toyota Tundra CrewMax Platinum Complete Audio System Installation San Antonio
Toyota Tundra CrewMax Platinum Complete Audio System Installation San Antonio
Toyota Tundra CrewMax Platinum Complete Audio System Installation San Antonio
Toyota Tundra CrewMax Platinum Complete Audio System Installation San Antonio
Toyota Tundra CrewMax Platinum Complete Audio System Installation San Antonio
Toyota Tundra CrewMax Platinum Complete Audio System Installation San Antonio
Toyota Tundra CrewMax Platinum Complete Audio System Installation San Antonio
Toyota Tundra CrewMax Platinum Complete Audio System Installation San Antonio
Toyota Tundra CrewMax Platinum Complete Audio System Installation San Antonio
Toyota Tundra CrewMax Platinum Complete Audio System Installation San Antonio
Toyota Tundra CrewMax Platinum Complete Audio System Installation San Antonio
Toyota Tundra CrewMax Platinum Complete Audio System Installation San Antonio
Toyota Tundra CrewMax Platinum Complete Audio System Installation San Antonio
Toyota Tundra CrewMax Platinum Complete Audio System Installation San Antonio
Toyota Tundra CrewMax Platinum Complete Audio System Installation San Antonio
Toyota Tundra CrewMax Platinum Complete Audio System Installation San Antonio
Toyota Tundra CrewMax Platinum Complete Audio System Installation San Antonio
Toyota Tundra CrewMax Platinum Complete Audio System Installation San Antonio
Toyota Tundra CrewMax Platinum Complete Audio System Installation San Antonio
Toyota Tundra CrewMax Platinum Complete Audio System Installation San Antonio
Toyota Tundra CrewMax Platinum Complete Audio System Installation San Antonio
Toyota Tundra CrewMax Platinum Complete Audio System Installation San Antonio
Toyota Tundra CrewMax Platinum Complete Audio System Installation San Antonio
Toyota Tundra CrewMax Platinum Complete Audio System Installation San Antonio
Toyota Tundra CrewMax Platinum Complete Audio System Installation San Antonio
Toyota Tundra CrewMax Platinum Complete Audio System Installation San Antonio
Toyota Tundra CrewMax Platinum Complete Audio System Installation San Antonio
Toyota Tundra CrewMax Platinum Complete Audio System Installation San Antonio
Toyota Tundra CrewMax Platinum Complete Audio System Installation San Antonio
Toyota Tundra CrewMax Platinum Complete Audio System Installation San Antonio
Toyota Tundra CrewMax Platinum Complete Audio System Installation San Antonio
Toyota Tundra CrewMax Platinum Complete Audio System Installation San Antonio
Toyota Tundra CrewMax Platinum Complete Audio System Installation San Antonio
Toyota Tundra CrewMax Platinum Complete Audio System Installation San Antonio
Toyota Tundra CrewMax Platinum Complete Audio System Installation San Antonio
Toyota Tundra CrewMax Platinum Complete Audio System Installation San Antonio
Toyota Tundra CrewMax Platinum Complete Audio System Installation San Antonio
Toyota Tundra CrewMax Platinum Complete Audio System Installation San Antonio
Toyota Tundra CrewMax Platinum Complete Audio System Installation San Antonio
Toyota Tundra CrewMax Platinum Complete Audio System Installation San Antonio
Below you will find a detailed listing of all the parts we used in the installation.
Typical Installation time is 1 day, however we matted the front, rear doors and the rear wall behind the subwoofer. If we are matting the truck we keep the truck for two days. One day audio installation and matting jobs are possible, but require at least 14 hours with the truck.
Below is a detailed listing of the audio products installed in Chris Tundra CrewMax
Front Door Component Speakers:
Image Dynamics CXS64
Tacotunes.com heavy duty speaker mounts cut to 5.6”
CXS Mid bass Drivers -125 Watts RMS
CXS Crossover
CXS 28M Silk Dome Tweeter
NOTE: JBL equipped
Use Stock Sail Panel for Tweeter mounts.
Rear Door Components:
Image Dynamics CTX65CS
Tacotunes.com heavy duty speaker mounts cut to 5.6”
CTX65CS Mid bass drivers Handles -100 watts RMS
CTX65CS Crossover
CTX Tweeters
Tweeters will fit in stock door location
Sound Processor:
Tacotunes.com ReCurve EZQ
Tacotunes.com JBL Harness
Amp:
Exile Audio 5 channel amp
100 watts x 4 to each speaker and 800 x 1 (subwoofer)
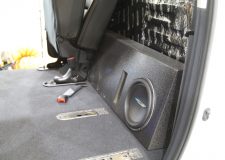
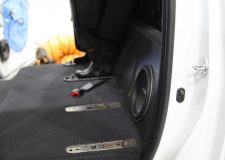
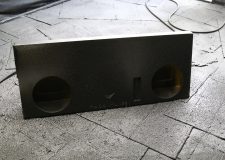
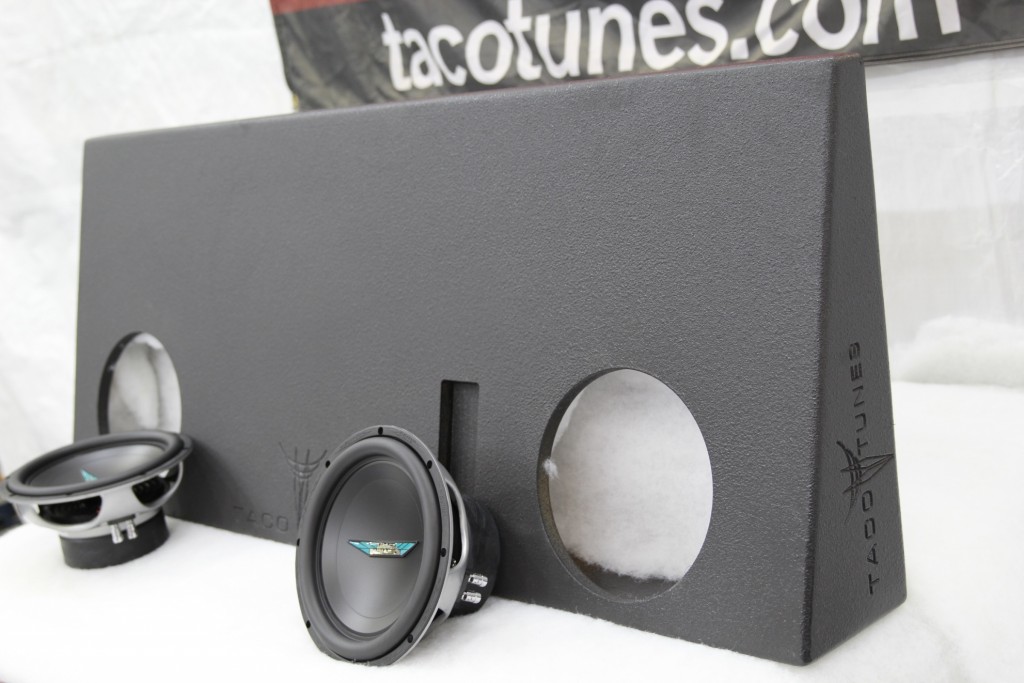
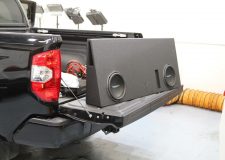
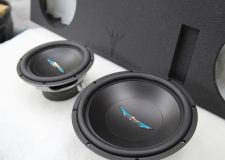
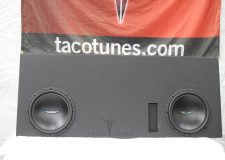
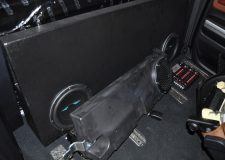
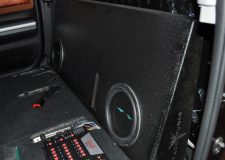
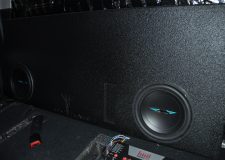
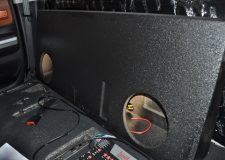
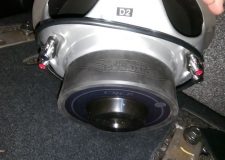
Subwoofer(s):
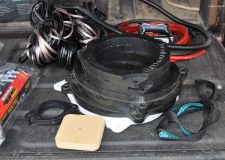
Subwoofer Box & Subwoofers
Tacotunes.com dual 10” subwoofer enclosure 2.0” cu feet
Juan’s Toyota Tundra CrewMax SR5 Complete Stereo System Upgrade San Antonio TX
Juan’s Toyota Tundra CrewMax SR5 Complete Stereo System Upgrade San Antonio TX
Installation Summary / History:
Customer Name: Juan P
Toyota Year / Model: 2015 Toyota Tundra CrewMax 4×4
Head Unit: Non JBL
Color: Midnight Blue
Installed by: tacotunes.com
Juan grew up installing his own audio systems. He came to us with high expectations. He wanted to hear our demo system before he pulled the trigger. After listening the SQ1 package, he opted to upgraded to the dual 12″ SEALED box. This is with the FULL size subwoofers, not shallow mounts. Juan listens to a lot of different music and wanted something that would play slip knot to old Metallica to today’s hip hop.
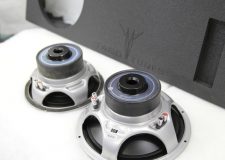
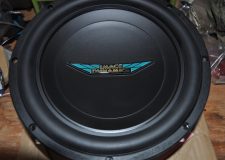
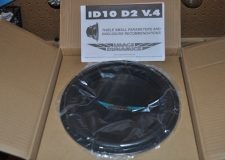
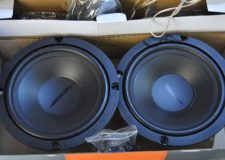
Below you will find a detailed listing of all the parts we used in the installation. We also included some pictures of the 12″ subwoofer next to 10″ subwoofer and a shallow mount 12″ subwoofer.
Typical Installation time is 1 day, however we matted the front, rear doors and the rear wall behind the subwoofer. If we are matting the truck we keep the truck for two days. One audio installation and matting jobs are possible, but require at least 14 hours with the truck.
Below is a detailed listing of the audio products installed in Tobin’s Tundra CrewMax
Juans Toyota Tundra CrewMax Stereo System Upgrade San Antonio TX
Juans Toyota Tundra CrewMax Stereo System Upgrade San Antonio TX
Juans Toyota Tundra CrewMax Stereo System Upgrade San Antonio TX
Juans Toyota Tundra CrewMax Stereo System Upgrade San Antonio TX
Juans Toyota Tundra CrewMax Stereo System Upgrade San Antonio TX
Juans Toyota Tundra CrewMax Stereo System Upgrade San Antonio TX
Juans Toyota Tundra CrewMax Stereo System Upgrade San Antonio TX
Juans Toyota Tundra CrewMax Stereo System Upgrade San Antonio TX
Juans Toyota Tundra CrewMax Stereo System Upgrade San Antonio TX
Juans Toyota Tundra CrewMax Stereo System Upgrade San Antonio TX
Juans Toyota Tundra CrewMax Stereo System Upgrade San Antonio TX
Juans Toyota Tundra CrewMax Stereo System Upgrade San Antonio TX
Juans Toyota Tundra CrewMax Stereo System Upgrade San Antonio TX
Juans Toyota Tundra CrewMax Stereo System Upgrade San Antonio TX
Juans Toyota Tundra CrewMax Stereo System Upgrade San Antonio TX
Juans Toyota Tundra CrewMax Stereo System Upgrade San Antonio TX
Juans Toyota Tundra CrewMax Stereo System Upgrade San Antonio TX
Juans Toyota Tundra CrewMax Stereo System Upgrade San Antonio TX
Juans Toyota Tundra CrewMax Stereo System Upgrade San Antonio TX
Juans Toyota Tundra CrewMax Stereo System Upgrade San Antonio TX
Juans Toyota Tundra CrewMax Stereo System Upgrade San Antonio TX
Juans Toyota Tundra CrewMax Stereo System Upgrade San Antonio TX
Juans Toyota Tundra CrewMax Stereo System Upgrade San Antonio TX
Specs on the audio installation:
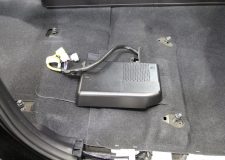
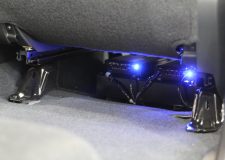
The AMP is hidden under the driver seat. Sound Processor (ReCurve EZQ) is hidden under rear set. The full size Image Dynamics 10” subwoofers fit behind the rear seats. The entire truck appears to be stock and makes the truck appear to e stock and less likely for break ins. Additionally, the gear is setup for Toyota’s so chances of theft are greatly reduced.
Front Door Component Speakers:
Image Dynamics CXS64
Tacotunes.com heavy duty speaker mounts cut to 5.6”
CXS Mid bass Drivers -125 Watts RMS
CXS Crossover
CXS 28M Silk Dome Tweeter
Use Stock Sail Panel for Tweeter mounts.
Rear Door Components:
Image Dynamics CTX65CS
Tacotunes.com heavy duty speaker mounts cut to 5.6”
CTX65CS Mid bass drivers Handles -100 watts RMS
CTX65CS Crossover
CTX Tweeters
Tweeters will fit in stock door location
Sound Processor:
Tacotunes.com ReCurve EZQ
Tacotunes.com JBL Harness
Amp:
Exile Audio 5 channel amp
100 watts x 4 to each speaker and 800 x 1 (subwoofer)
Subwoofer(s):
Subwoofer Box & Subwoofers
Tacotunes.com dual 12” subwoofer enclosure 2.0” cu feet
Jason has had audio systems in most of his past vehicles. He has wife and two young kids. Wanted a really nice sound system without breaking the bank. He really wanted to go with our Image Dynamics SQ1 package, but he wanted to stick to his original budget. After he came to pick up his truck . . yea he was really happy!
Toyota Tundra CrewMax TRD Pro Complete Audio System
Toyota Tundra CrewMax TRD Pro Complete Audio System
Toyota Tundra CrewMax TRD Pro Complete Audio System
Toyota Tundra CrewMax TRD Pro Complete Audio System
Toyota Tundra CrewMax TRD Pro Complete Audio System
Toyota Tundra CrewMax TRD Pro Complete Audio System
Toyota Tundra CrewMax TRD Pro Complete Audio System
Toyota Tundra CrewMax TRD Pro Complete Audio System
Toyota Tundra CrewMax TRD Pro Complete Audio System
Toyota Tundra CrewMax TRD Pro Complete Audio System
Toyota Tundra CrewMax TRD Pro Complete Audio System
Toyota Tundra CrewMax TRD Pro Complete Audio System
Toyota Tundra CrewMax TRD Pro Complete Audio System
Toyota Tundra CrewMax TRD Pro Complete Audio System
Toyota Tundra CrewMax TRD Pro Complete Audio System
Toyota Tundra CrewMax TRD Pro Complete Audio System
Toyota Tundra CrewMax TRD Pro Complete Audio System
Toyota Tundra CrewMax TRD Pro Complete Audio System
Toyota Tundra CrewMax TRD Pro Complete Audio System
Toyota Tundra CrewMax TRD Pro Complete Audio System
Toyota Tundra CrewMax TRD Pro Complete Audio System
Toyota Tundra CrewMax TRD Pro Complete Audio System
Toyota Tundra CrewMax TRD Pro Complete Audio System
Toyota Tundra CrewMax TRD Pro Complete Audio System
Toyota Tundra CrewMax TRD Pro Complete Audio System
Toyota Tundra CrewMax TRD Pro Complete Audio System
Toyota Tundra CrewMax TRD Pro Complete Audio System
Toyota Tundra CrewMax TRD Pro Complete Audio System
Toyota Tundra CrewMax TRD Pro Complete Audio System
Toyota Tundra CrewMax TRD Pro Complete Audio System
Toyota Tundra CrewMax TRD Pro Complete Audio System
Toyota Tundra CrewMax TRD Pro Complete Audio System
Below you will find a detailed listing of all the parts we used in the installation.
Typical Installation time is 1 day for a system installation. A seasoned installer can probably have it done in 4 hours. New installer, take your time and plan for 8 hours. If matting the truck add at least 1 hour per door and 1.5 hour for rear wall.
Below is a detailed listing of the audio products installed in Chris Tundra CrewMax
Front Door Component Speakers:
Image Dynamics CTX65CS
Tacotunes.com heavy duty speaker mounts cut to 5.6”
CXS Mid bass Drivers -100 Watts RMS
CTX65CS Crossover
CTX65CS Tweeters
Use Stock Sail Panel for Tweeter mounts.
Rear Door Components:
Image Dynamics CTX65CS
Tacotunes.com heavy duty speaker mounts cut to 5.6”
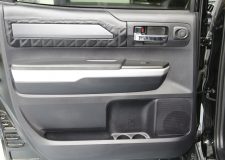
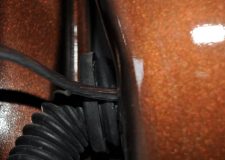
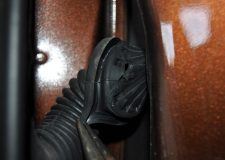
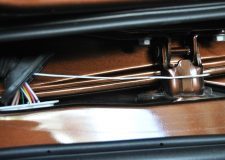
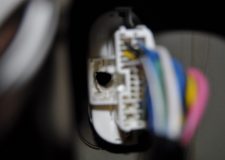
Toyota Tundra Audio System Best Solution for your CrewMax
For the last 10 years we have specialized in Toyota audio equipment. No other company designs and manufactures high end products geared directly for your Toyota Tundra. We have installed over 100 3rd Generation (2014+) Toyota Tundras right here in San Antonio. Over 3,000 Toyota Tundra owners have installed our ReCurve EZQ sound processor. Below we have links to just a handful of installations we have completed for Toyota Tundra owners. Like our Facebook page to see many more Toyota Installations. No other company will provide the detailed videos, pictures and instructions to obtain the best audio system in your Toyota Tundra. Over the years many have attempted to copy our solutions and products. However, they are just piece milling equipment in hopes to provide good sound quality. Our systems provide amazing sound quality by design. These products were designed for your Toyota.
The installations below are for the discerning customer base looking for amazing sound quality. Click the pictures below for detailed installation pictures. Many of our customers install the system themselves over a weekend.
Click the pictures below to see detailed installation photos:
Chris’s Toyota Tundra 1794 audio Installation pics
2015 Toyota Tundra Crew Max Audio Installation San Antonio TX
Toyota Tundra CrewMax 1794 Edition 2015 San Antonio Installation
William’s Toyota Tundra MakeoverTundra CrewMax 1794 Stereo Installer San Antonio TX
2015 Toyota Tundra Crew Max Audio Installation San Antonio TX
If these systems are out of your budget, we have introduced some new plug and play amps that will allow you easily upgrade your speakers and add a sub with a lot less effort and significantly lower cost.
Tony B Toyota Tundra CrewMax 1794 Full Audio System self install
Tony B’s Toyota Tundra CrewMax Platinum Stereo System Upgrade San Antonio TX
Installation Summary / History:
Customer Name: Tony B.
Toyota Year / Model: 2015 Toyota Tundra CrewMax 4×4 1794 Edition
Head Unit: JBL Equipped
Color: Sunset Bronze Mica
Installed by: Tony B.
Tony has had audio systems in most of his vehicles. Fortunate for us, he is familiar and has owned Image Dynamics equipment in the past. After hearing a couple of options he decided to go with our Image Dynamics SQ1 package.
Toyota Tundra CrewMax 1794 Complete Audio System
Toyota Tundra CrewMax 1794 Complete Audio System
Toyota Tundra CrewMax 1794 Complete Audio System
Toyota Tundra CrewMax 1794 Complete Audio System
Toyota Tundra CrewMax 1794 Complete Audio System
Toyota Tundra CrewMax 1794 Complete Audio System
Toyota Tundra CrewMax 1794 Complete Audio System
Toyota Tundra CrewMax 1794 Complete Audio System
Toyota Tundra CrewMax 1794 Complete Audio System
Toyota Tundra CrewMax 1794 Complete Audio System
Toyota Tundra CrewMax 1794 Complete Audio System
Toyota Tundra CrewMax 1794 Complete Audio System
Toyota Tundra CrewMax 1794 Complete Audio System
Toyota Tundra CrewMax 1794 Complete Audio System
Toyota Tundra CrewMax 1794 Complete Audio System
Toyota Tundra CrewMax 1794 Complete Audio System
Toyota Tundra CrewMax 1794 Complete Audio System
Toyota Tundra CrewMax 1794 Complete Audio System
Toyota Tundra CrewMax 1794 Complete Audio System
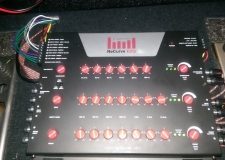
Tacotunes ReCurve EZQ Toyota Tundra
Toyota Tundra CrewMax 1794 Complete Audio System
Toyota Tundra CrewMax 1794 Complete Audio System
Tacotunes ReCurve EZQ Toyota Tundra
Toyota Tundra CrewMax 1794 Complete Audio System
Toyota Tundra CrewMax 1794 Complete Audio System
Toyota Tundra CrewMax 1794 Complete Audio System
Toyota Tundra CrewMax 1794 Complete Audio System
Toyota Tundra CrewMax 1794 Complete Audio System
Toyota Tundra CrewMax 1794 Complete Audio System
Toyota Tundra CrewMax 1794 Complete Audio System
Toyota Tundra CrewMax 1794 Complete Audio System
Toyota Tundra CrewMax 1794 Complete Audio System
Toyota Tundra CrewMax 1794 Complete Audio System
Toyota Tundra CrewMax 1794 Complete Audio System
Toyota Tundra CrewMax 1794 Complete Audio System
Toyota Tundra CrewMax 1794 Complete Audio System
Toyota Tundra CrewMax 1794 Complete Audio System
Toyota Tundra CrewMax 1794 Complete Audio System
Toyota Tundra CrewMax 1794 Complete Audio System
Toyota Tundra CrewMax 1794 Complete Audio System
Toyota Tundra CrewMax 1794 Complete Audio System
Toyota Tundra CrewMax 1794 Complete Audio System
Toyota Tundra CrewMax 1794 Complete Audio System
Toyota Tundra CrewMax 1794 Complete Audio System
Toyota Tundra CrewMax 1794 Complete Audio System
Toyota Tundra CrewMax 1794 Complete Audio System
Toyota Tundra CrewMax 1794 Complete Audio System
Toyota Tundra CrewMax 1794 Complete Audio System
Toyota Tundra CrewMax 1794 Complete Audio System
Toyota Tundra CrewMax 1794 Complete Audio System
Toyota Tundra CrewMax 1794 Complete Audio System
Toyota Tundra CrewMax 1794 Complete Audio System
Toyota Tundra CrewMax 1794 Complete Audio System
Toyota Tundra CrewMax 1794 Complete Audio System
Toyota Tundra CrewMax 1794 Complete Audio System
Toyota Tundra CrewMax 1794 Edition 2015 San Antonio Installation
Front Door Component Speakers:
Image Dynamics CXS64
Tacotunes.com heavy duty speaker mounts cut to 5.6”
CXS Mid bass Drivers -125 Watts RMS
CXS Crossover
CXS 28M Silk Dome Tweeter
NOTE: JBL Yes / No ?
Use Stock Sail Panel for Tweeter mounts.
Rear Door Components:
Image Dynamics CTX65CS
Tacotunes.com heavy duty speaker mounts cut to 5.6”
CTX65CS Mid bass drivers Handles -100 watts RMS
CTX65CS Crossover
CTX Tweeters
Tweeters will fit in stock door location
Sound Processor:
Tacotunes.com ReCurve EZQ
Tacotunes.com JBL Harness
Amp:
Exile Audio 5 channel amp
100 watts x 4 to each speaker and 800 x 1 (subwoofer)
Subwoofer(s):
Subwoofer Box & Subwoofers
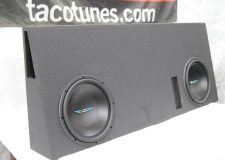
Tacotunes.com dual 10” subwoofer enclosure 2.0” cu feet
Howdy Parters! We are currently sprucing up our ticket system to better serve you! If you need immediate assistance please text us at 210-472-0000. Dismiss