No products in the cart.
How to set the High Low Pass Filter (HPF) crossover on Exile Javelin 5 Channel Amplifier
How to set the crossover on Exile Javelin Amp
A common question that we get is, how to set the crossover on Exile Javelin Amp. Many of our customers are first time installers and some of this information can be a bit overwhelming. To keep it simple, the example below is the most common steps that we use to set up an audio system. . . . for you gear heads that want to dig a lot deeper, my long winded explanation will follow. 🙂 along with other options.
Tools you will need:
- Digital Multimeter / Voltmeter
- Small Screwdriver that will fit in amp knobs.
- Test Tones – same tones used to set the gain on your amp.
Steps you should have already completed:
- Set the head unit to maximum unclipped volume. (Speaker Wires Should NOT be hooked up!)
- All internal EQs, adjustments on the head unit should be set flat. Not boosted or lowered.
- Set the gain(s) on your amp before you setup the crossovers.
- Decide on your crossover point and acquire the test tones you will need. The most common crossover point is 80Hz. – Click here for link to test tones and requirements.
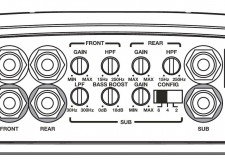
- Turn both High Pass Filter (HPF) knobs all the way to 15Hz (as far left as possible)
- Turn Low Pass Filter (LPF) knob all the way to 300Hz (as far right as possible)
Setting High Pass Filters (Speakers):
- Remove all speaker wiring from the amplifier. (label your speaker wiring)
- Set the multi-meter to ACV (Alternating Current Voltage)
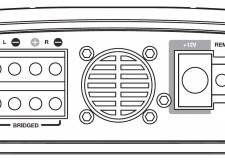
- Insert the multimeter leads into channel 1 and screw down gently (See picture below for channel layout and explanation)
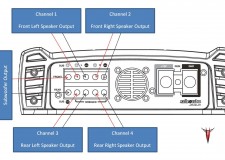
- Turn on vehicle and play test tone at roughly half of the maximum volume (does not need to be exact)
- Enter the voltage displaying on your multi-meter into field “Voltage 1”
- Turn the Front HPF knob to the right until it matches as closely as possible to “Crossover Voltage”.
- Repeat the same steps for channel 3 – turn the Rear HPF knob to the right until it matches as closely as possible to “Crossover Voltage”.
Setting Low Pass Filter (Subwoofer)
- Insert the multimeter leads into channel 5 and screw down gently (See picture above for channel layout and explanation)
- Turn on vehicle and play test tone at roughly half of the maximum volume (does not need to be exact)
- Enter the voltage displaying on your multi-meter into field “Voltage 1”
- Turn the LPF knob to the left until it matches as closely as possible to “Crossover Voltage”.
The crossovers are now set at desired crossover setting. NOTE: It is NOT uncommon for amps to be marked incorrectly there are many factors and most manufactures provide the numbers as a guide.
