Will my subwoofer fit?
The Tacotunes 2022+ Hybrid Subwoofer Enclosure is designed to accommodate a variety of subwoofer sizes.
To ensure compatibility with your preferred subwoofer, please review the following information. This will help you select the right subwoofer to maximize your sound system’s potential.
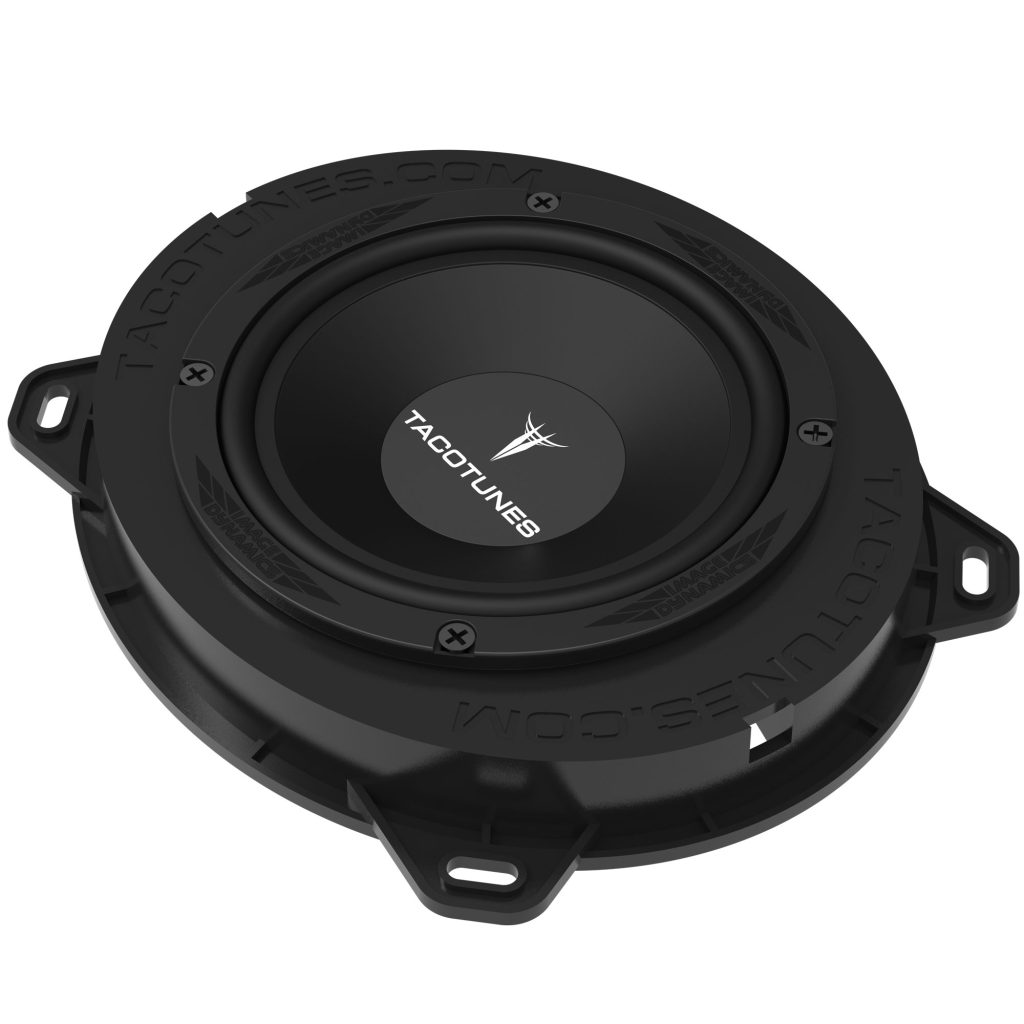
MOUNTING DEPTH
What is mounting depth?
Mounting depth is how “deep” a subwoofer magnet sits inside an enclosure.
This enclosure has a maximum mounting depth of 5 inches, accommodating most 8 and 10-inch full-size subwoofers, as well as many shallow-mount 12-inch subwoofers.
See the example below.

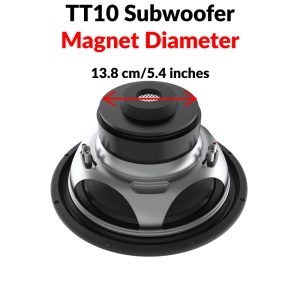
MAGNET DIAMETER
Due to the unique design of the rear wall in these trucks, space is limited. We’ve optimized our enclosure’s design to accommodate these constraints and provide our customers with as much air space, and mounting depth as possible.
Tacotunes 2022+ Hybrid Tundra enclosure offers a mounting depth of 5 inches. If your subwoofer’s magnet diameter exceeds 5.4 inches, compatibility is not guaranteed.
See the example below.
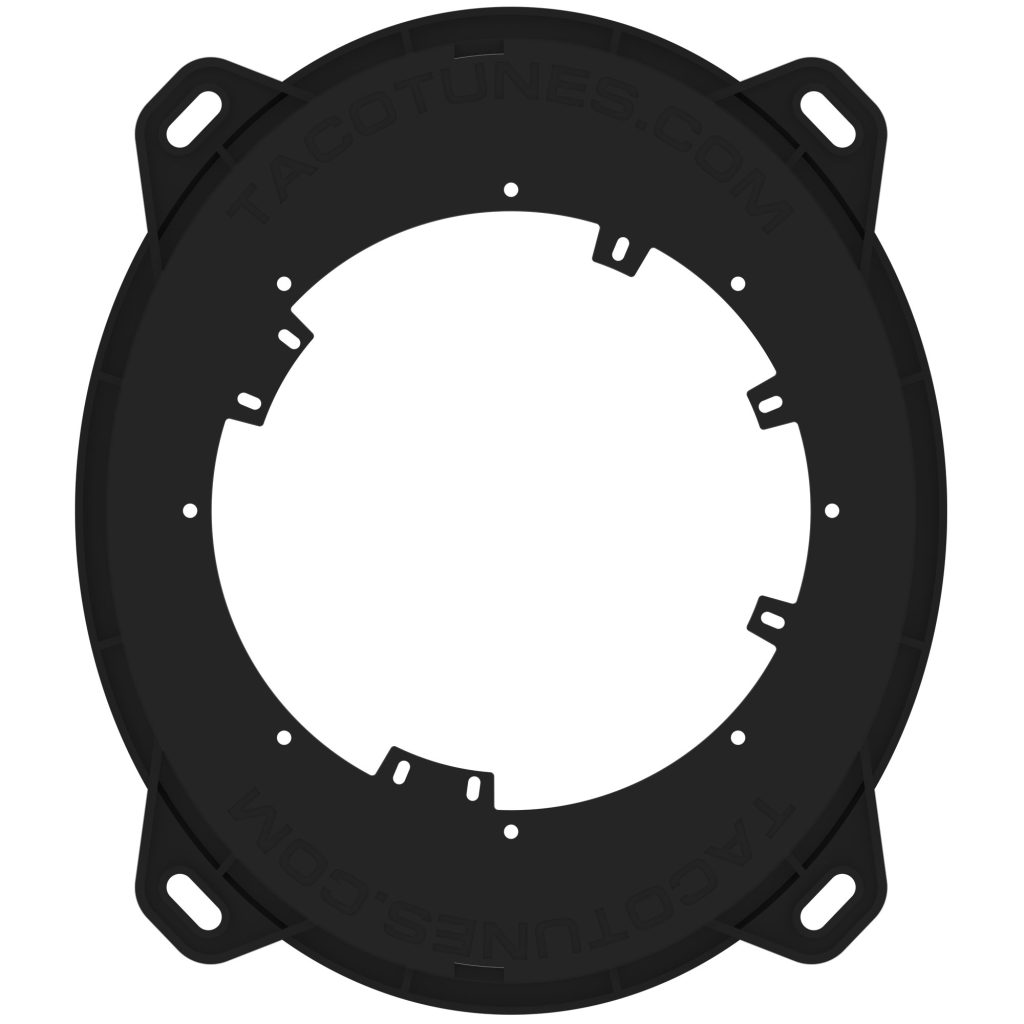
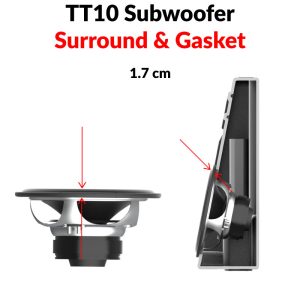
SURROUND & GASKET
To maximize air space and mounting depth, we’ve meticulously designed this enclosure for precision fitment. This precision not only minimizes vibrations but also optimizes sound quality.
With fitment of this enclosure being so precise, subwoofer fitment must also have the same precise qualities.
In order protect your subwoofer(s) and prevent contact with the rear seats, we strongly recommend using speaker grills.
See the example below.
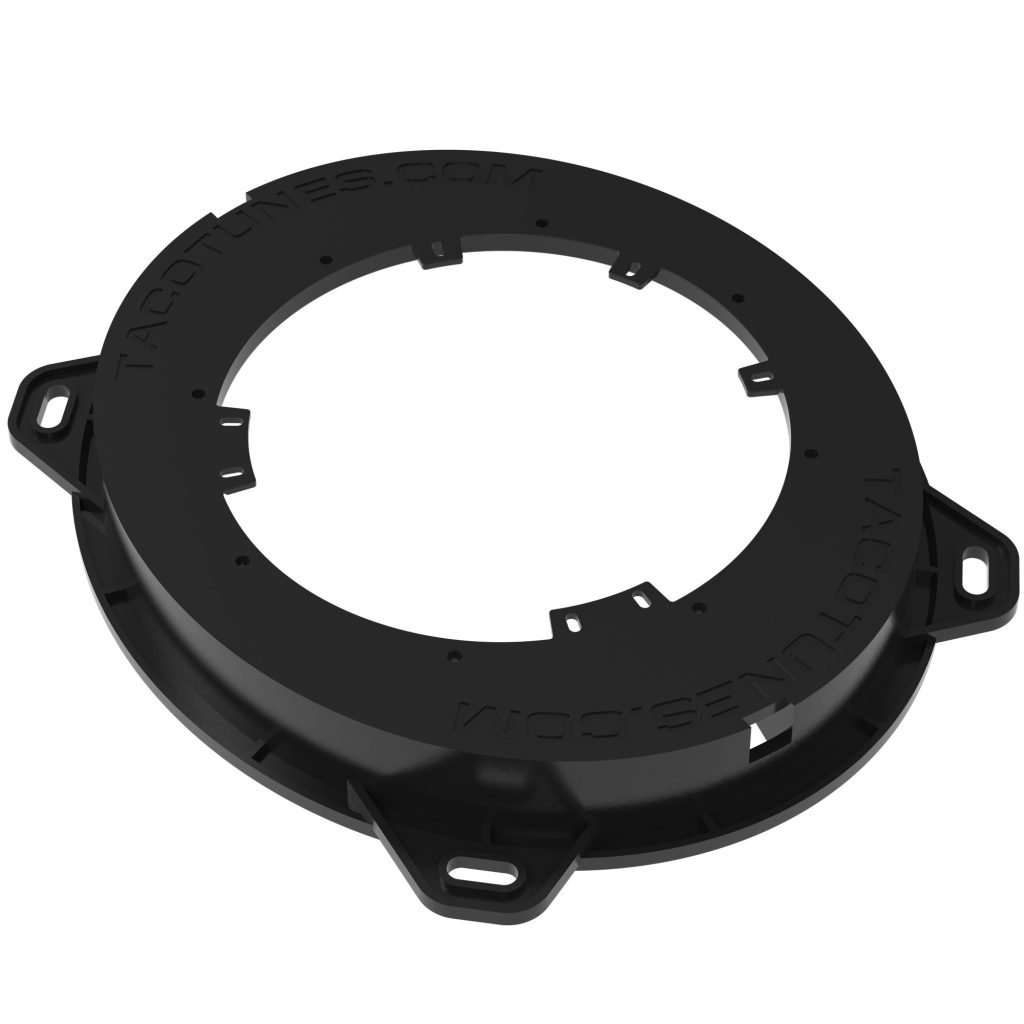
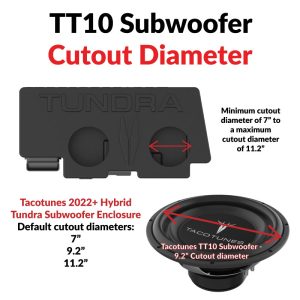
CUTOUT DIAMETER
The customizable cutout diameter of this enclosure allows it to accommodate a wide range of 8, 10, and 12-inch subwoofers, with minimum and maximum cutouts of 7 inches and 11.2 inches, respectively. This flexibility ensures a personalized listening experience tailored to your specific preferences.
NOTE: If your subwoofer has a cutout diameter within a certain range of our default or “minimum” cutouts sizes, our default cutout(s) may still work for you!
EXAMPLE – If the cutout diameter of your preferred subwoofer is 6 15/16 (6.94) your subwoofer will still be compatible with a 7″ cutout.
IMPORTANT NOTE – The average cutout diameter for a 12-inch subwoofer is 11.2”
See the example below.
BASKET ANGLE
Due to the unique design of the 2022+ Hybrid Tundra’s rear wall, subwoofers with specific dimensions are compatible with this enclosure.
Tacotunes subwoofers, with a 5-inch mounting depth and specific angles meet these requirements. Subwoofers exceeding these measurements may not be compatible with the enclosure.
See the example below.

Our TT series subwoofers are a proven fit for your 2022+ Hybrid Tundra, rigorously tested to deliver top-notch sound quality.
List of other brand subwoofers that fit here
If you’re unsure about the compatibility of your preferred subwoofer, consider exploring our complete subwoofer upgrade kits specifically designed for the 2022+ Hybrid Toyota Tundra.