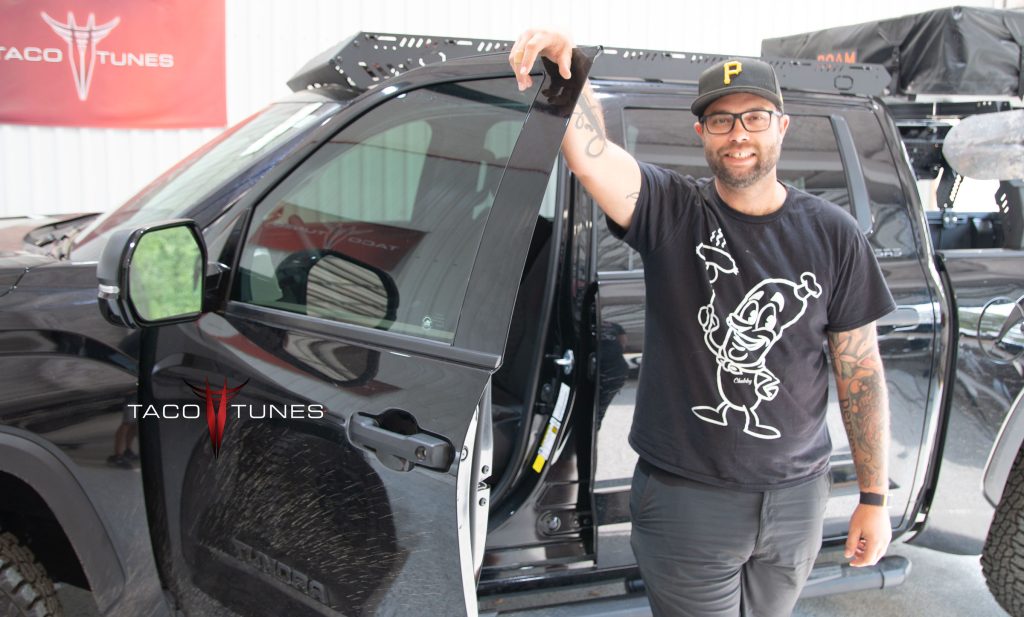
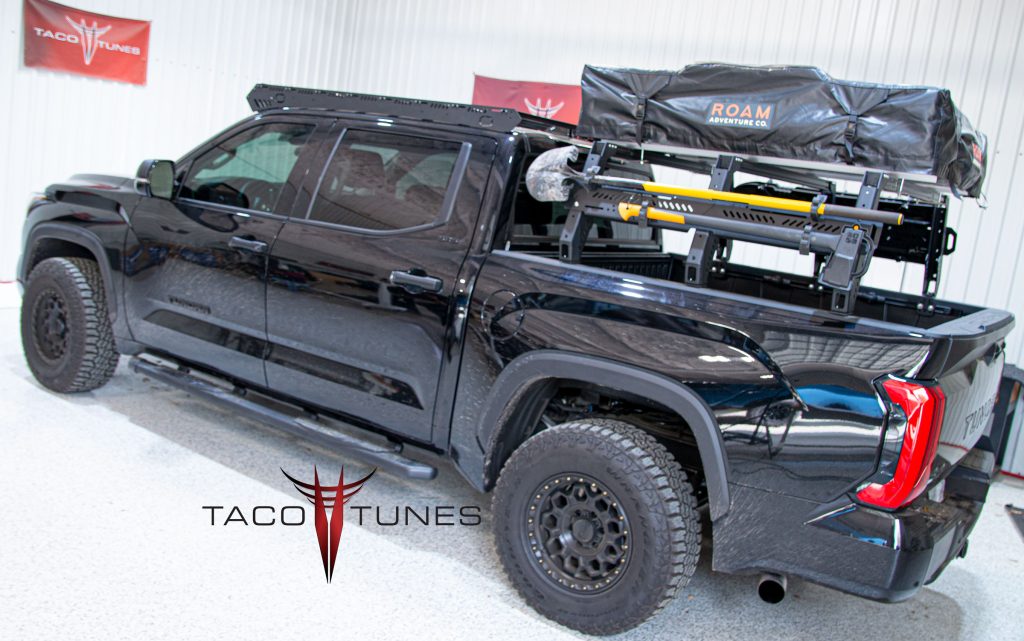
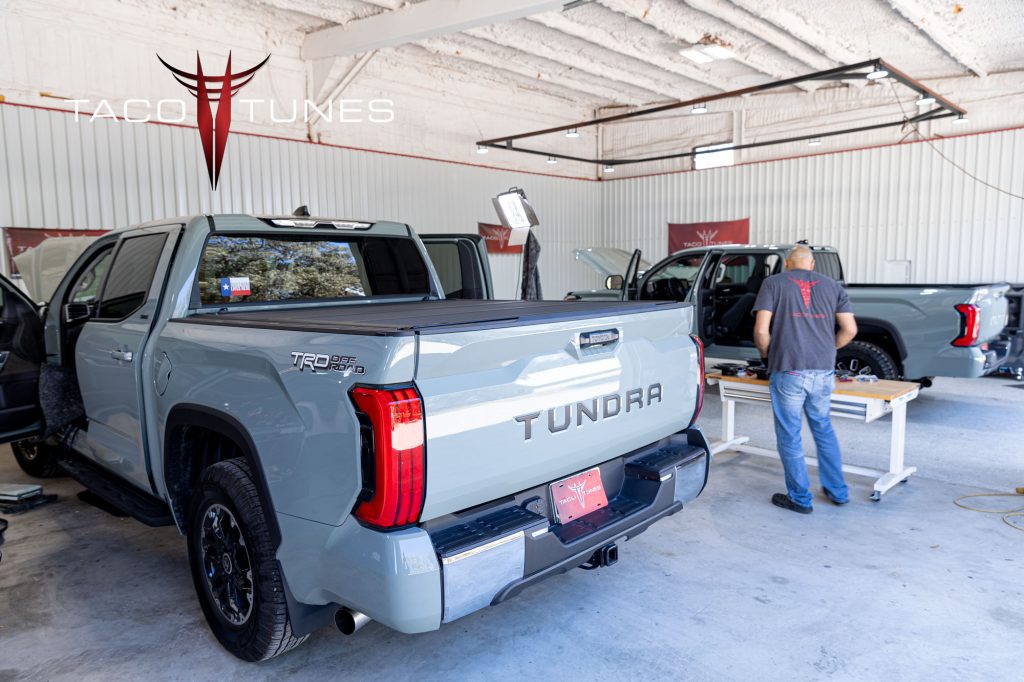
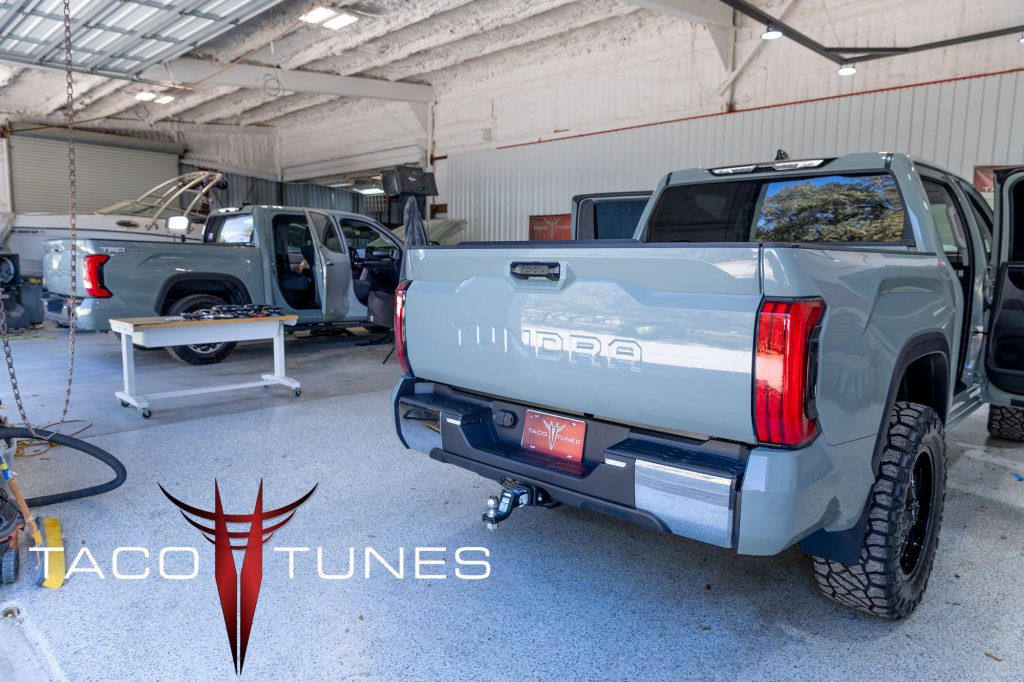
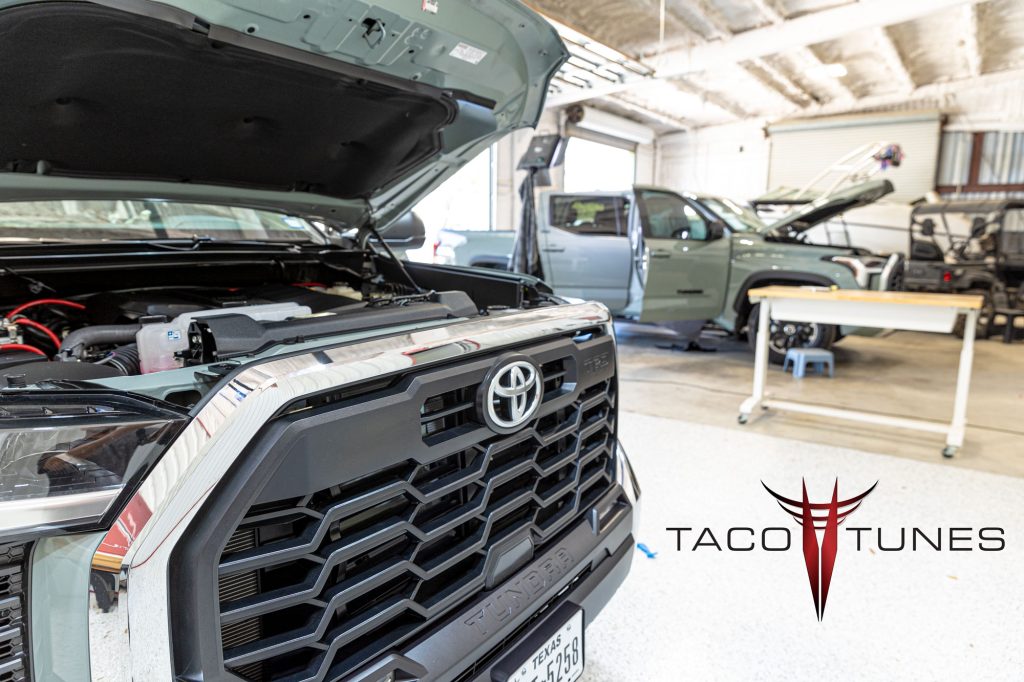
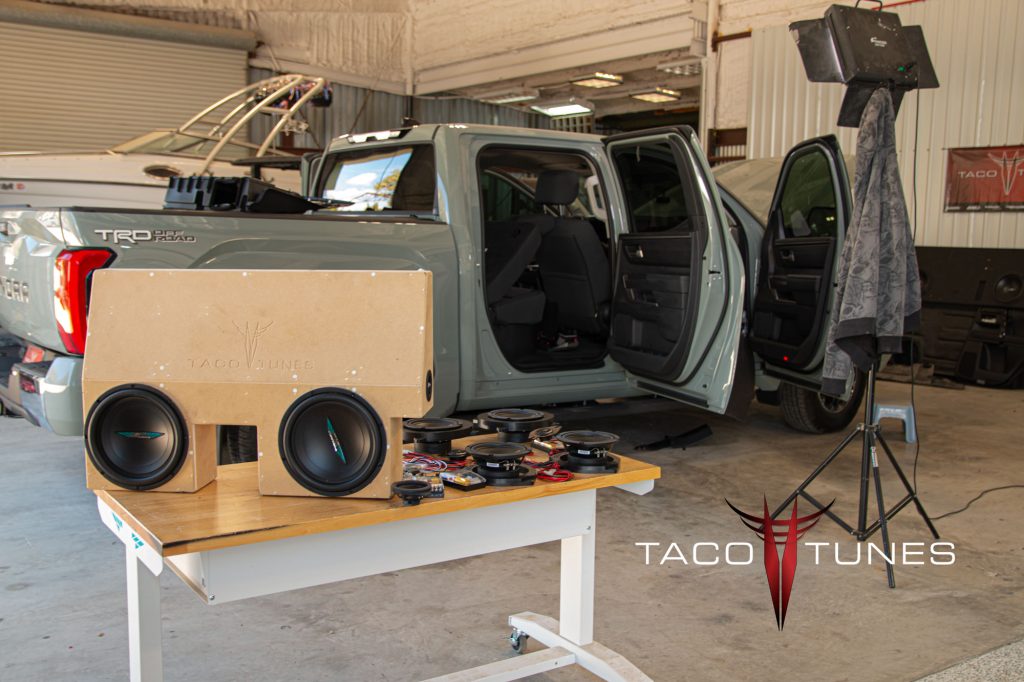
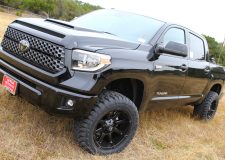
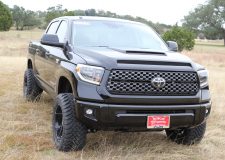
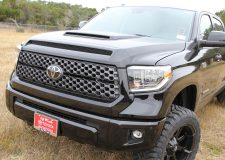
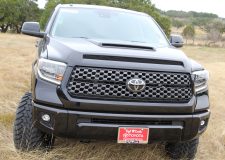
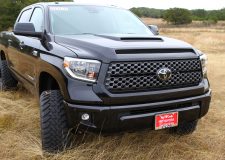
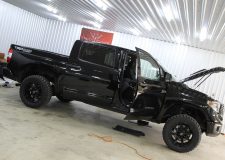
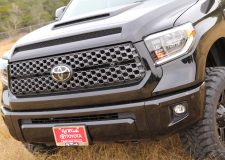
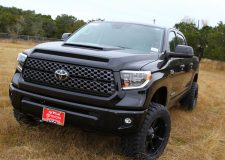
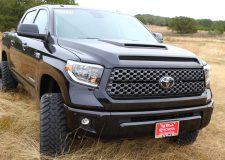
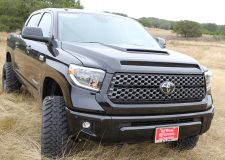
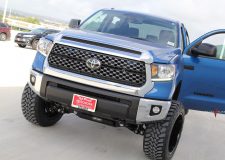
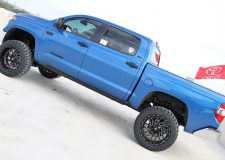
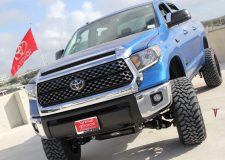
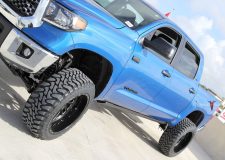
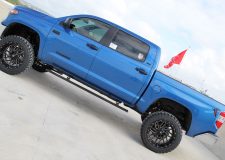
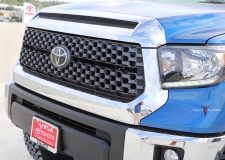
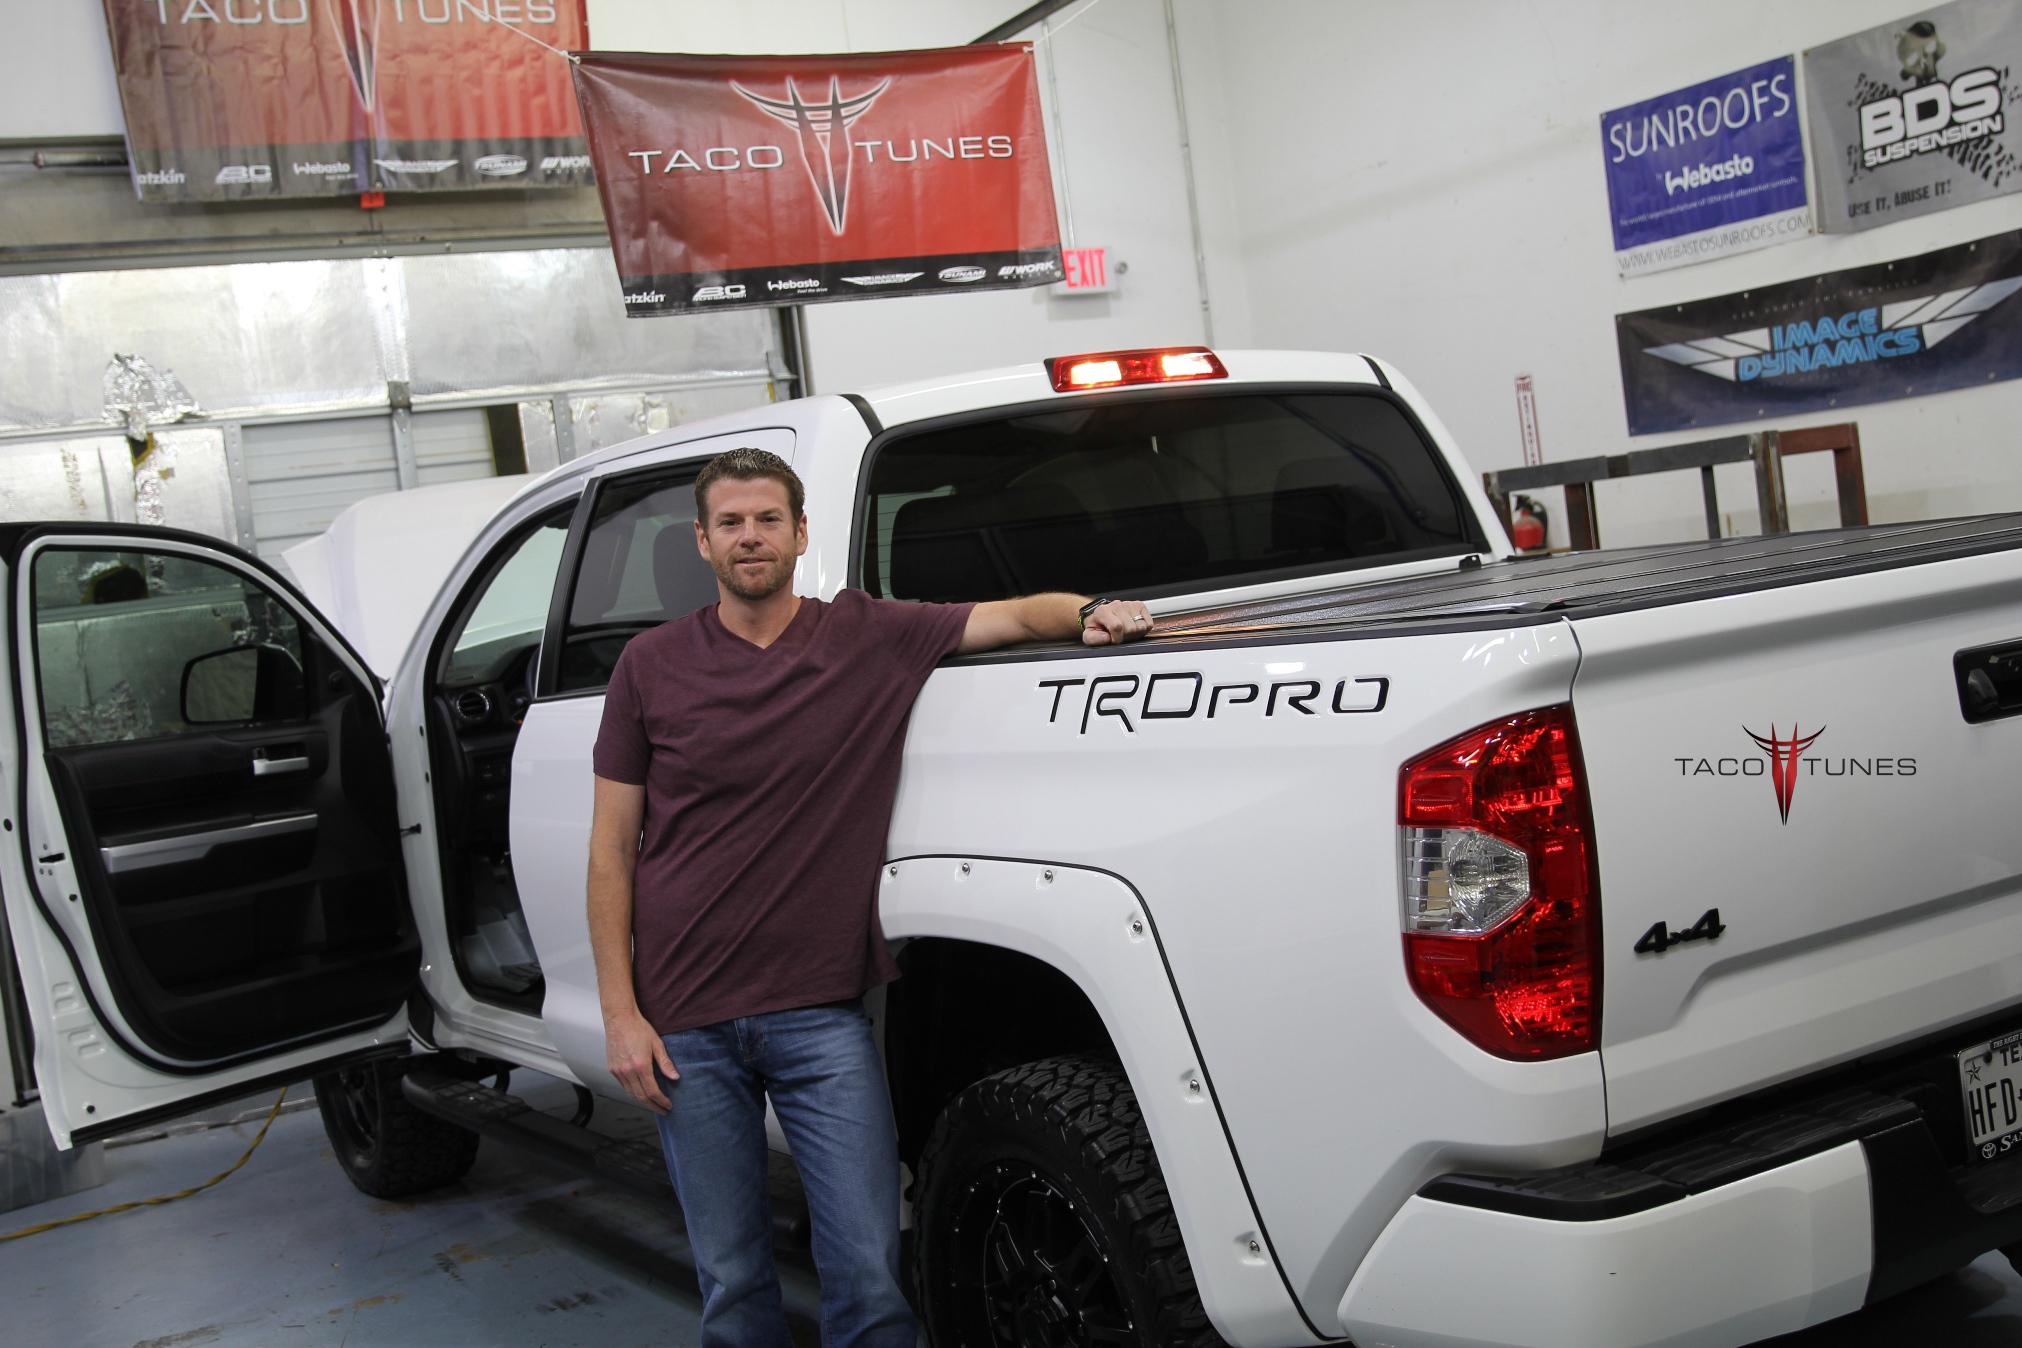
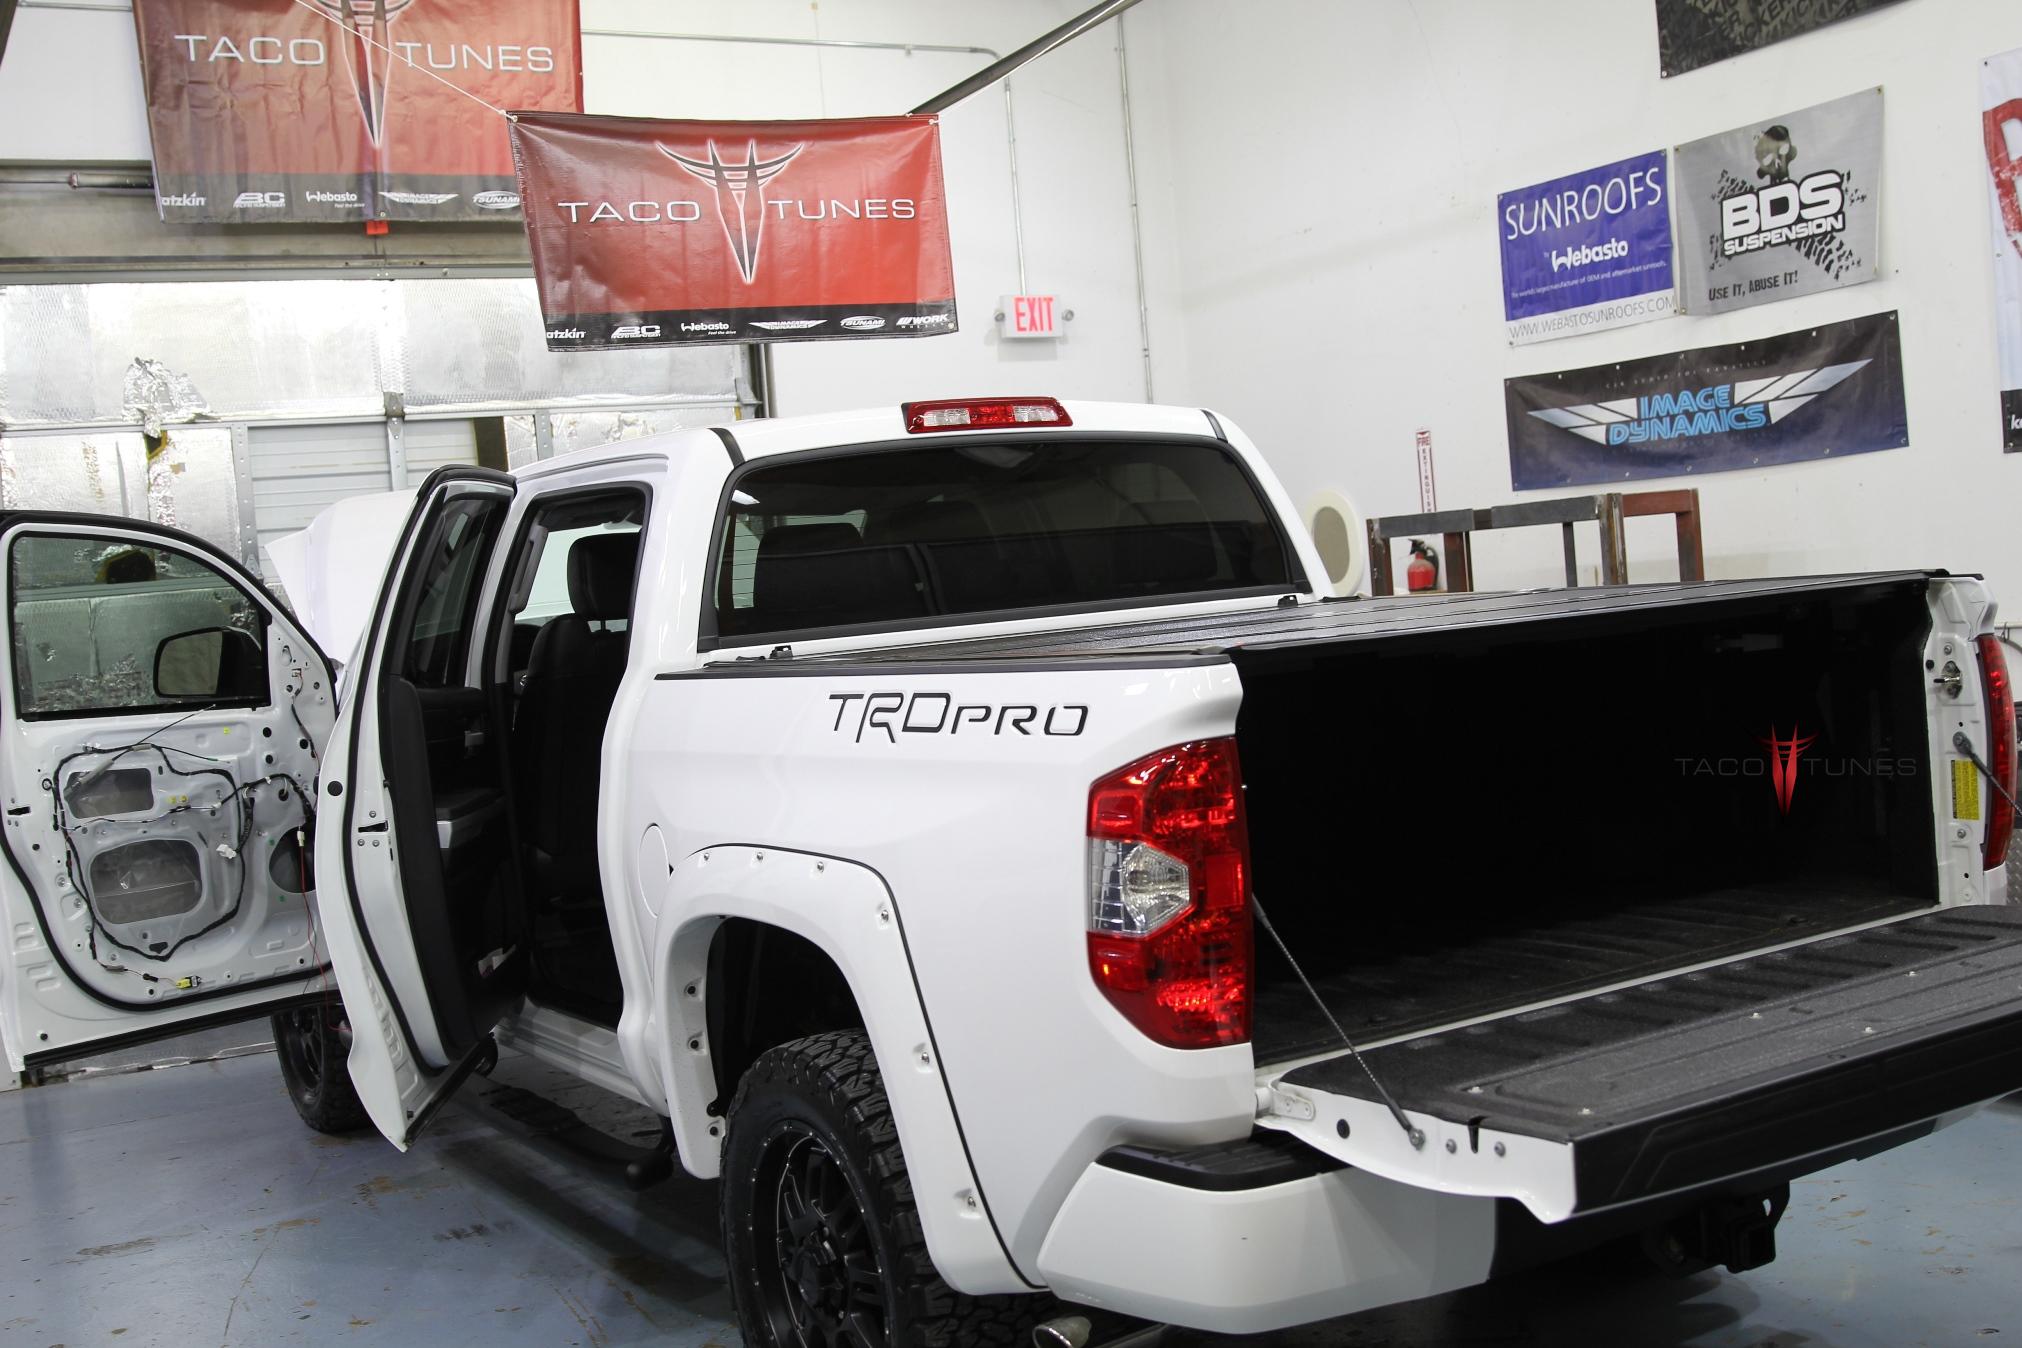
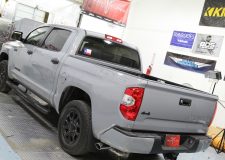
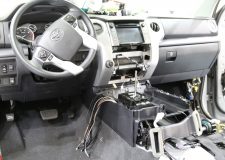
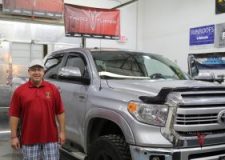
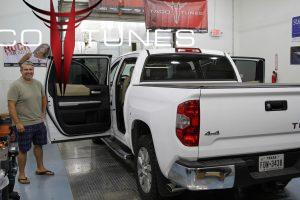
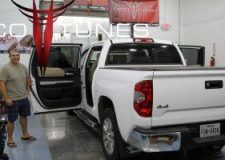
Huge thank you to Tristan for allowing us to install a System 1B into his 2022 Toyota Tundra. Tristan travels 200 days a year . . . AND the stock stereo system was driving him nuts! 🙂 He wanted to keep the stock head unit (radio/stereo) BUT wanted to upgrade his speakers and add subwoofer. He choose to go with our System 1B. Detailed listing below:
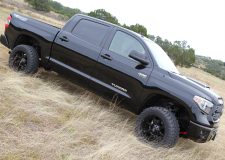
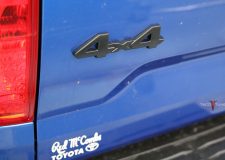
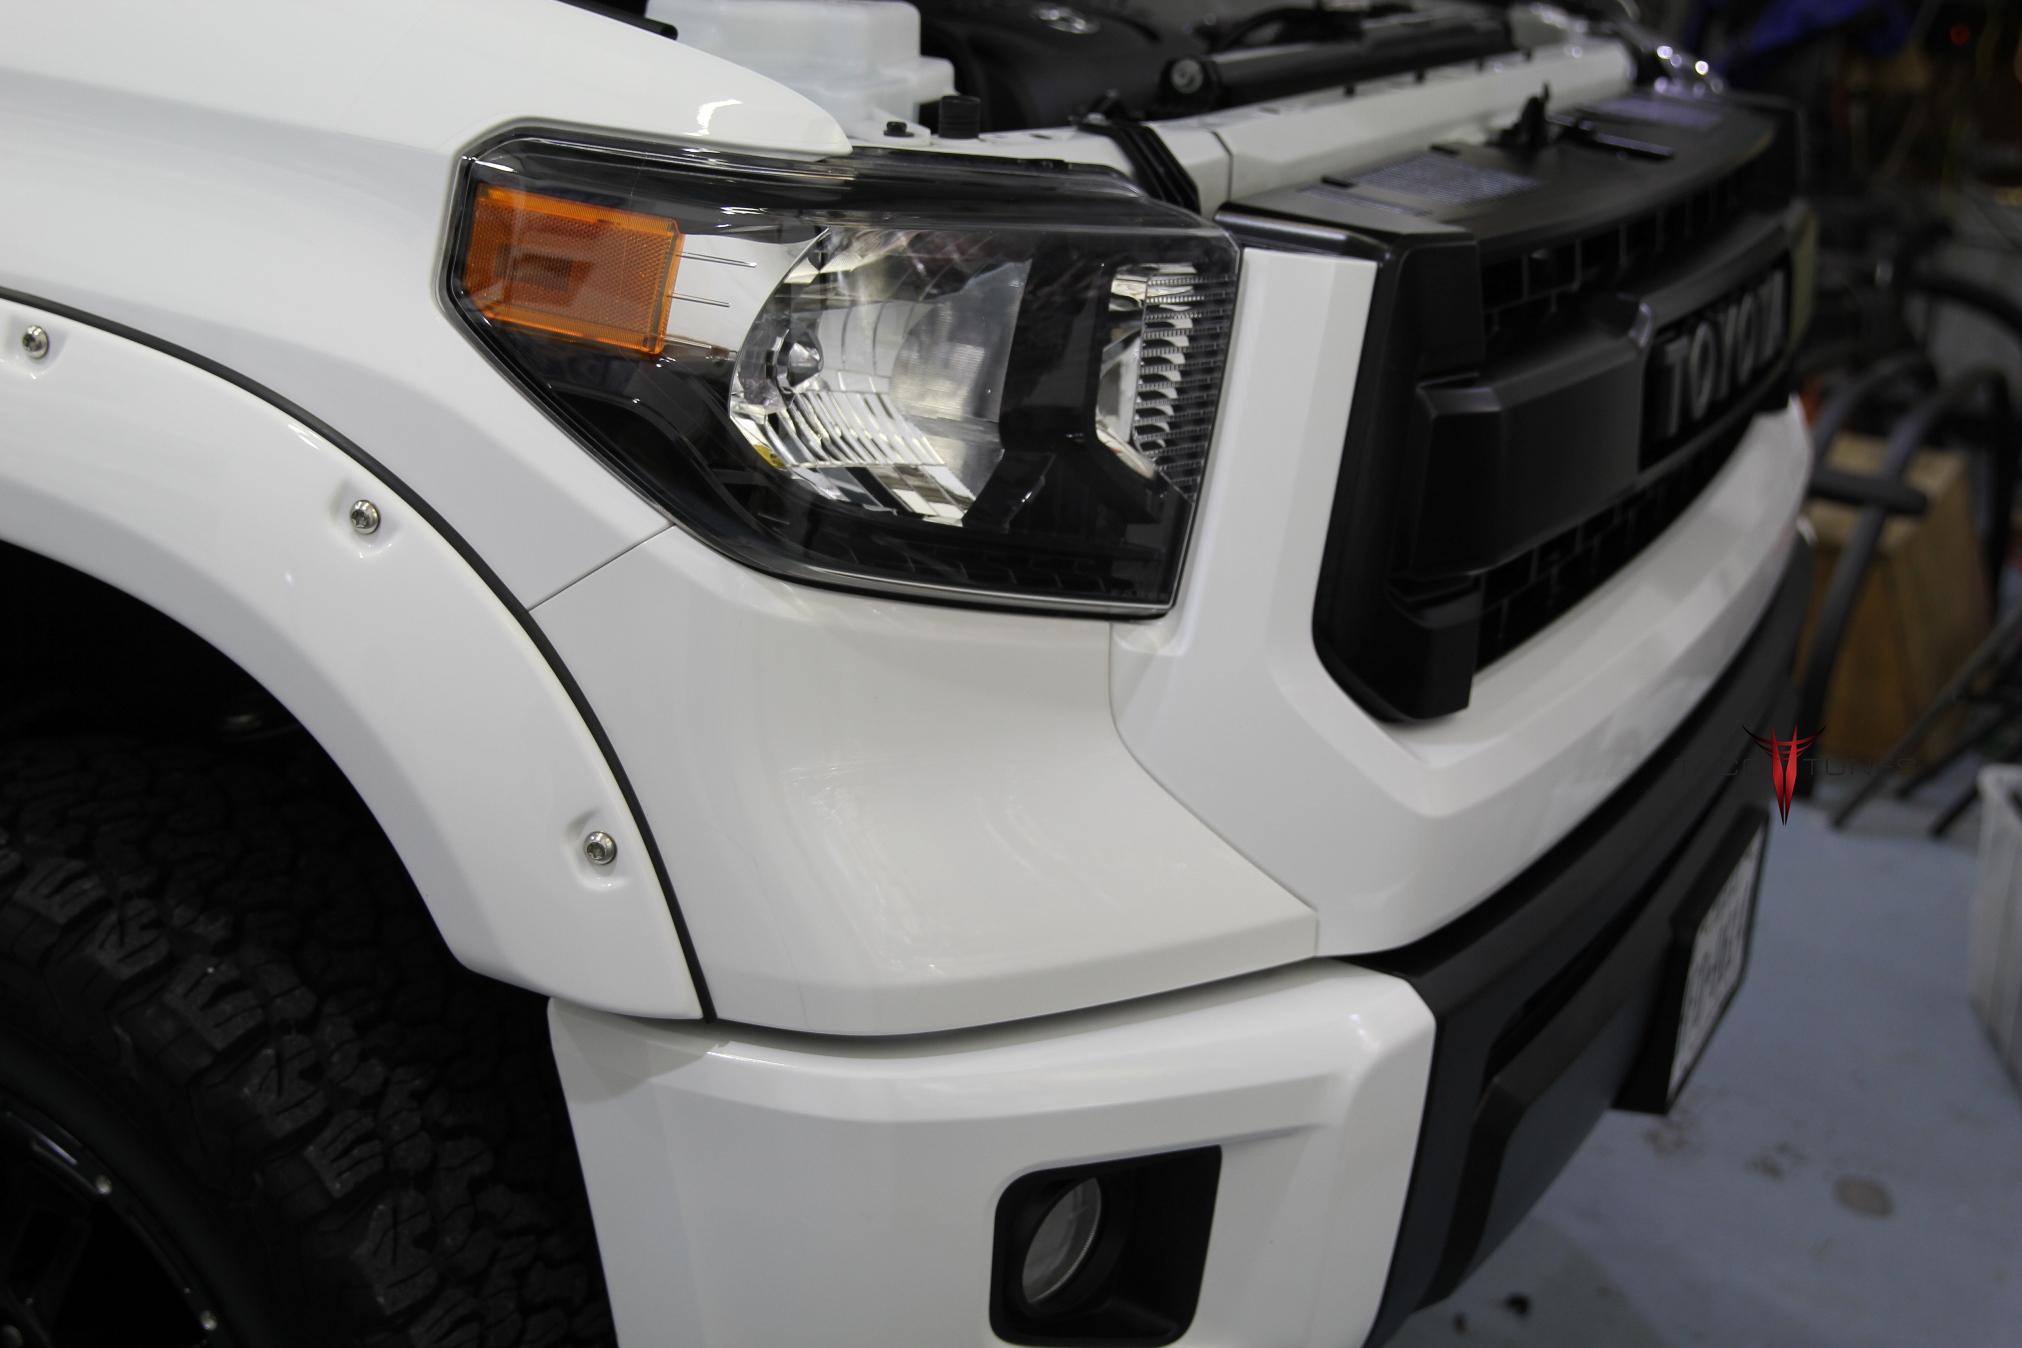
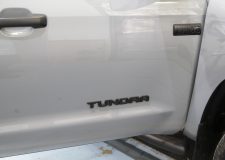
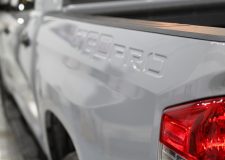
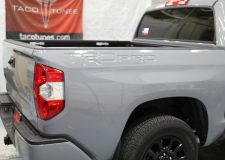
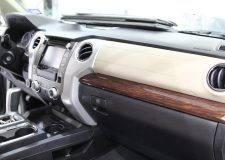
2022 Toyota Tundra Crewmax
Color: Midnight Black
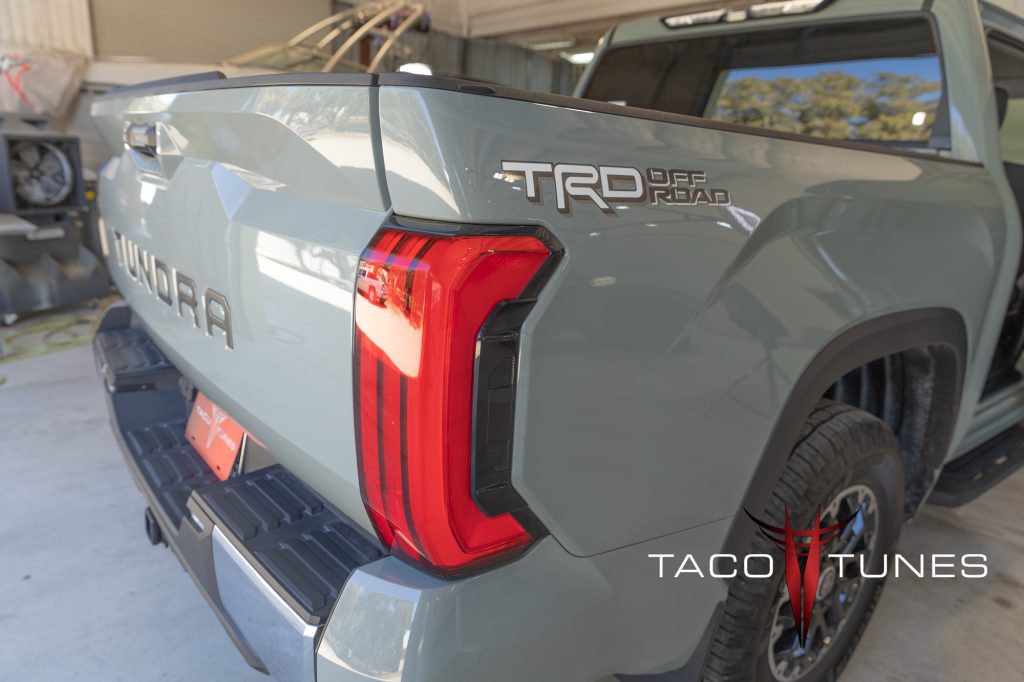
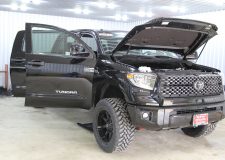
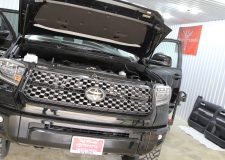
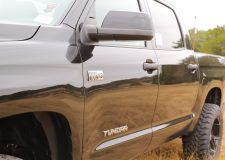
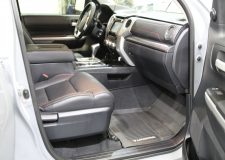
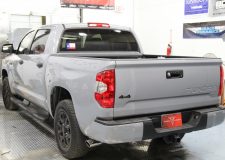
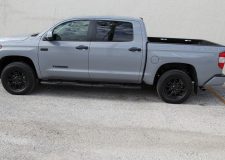
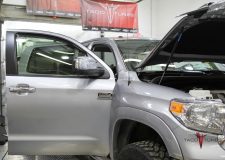
Tristan’s 2022 Toyota Tundra – in for audio system upgrade.
Tristan – ready to head out on his next road trip! Big smiles after upgrading his audio system!
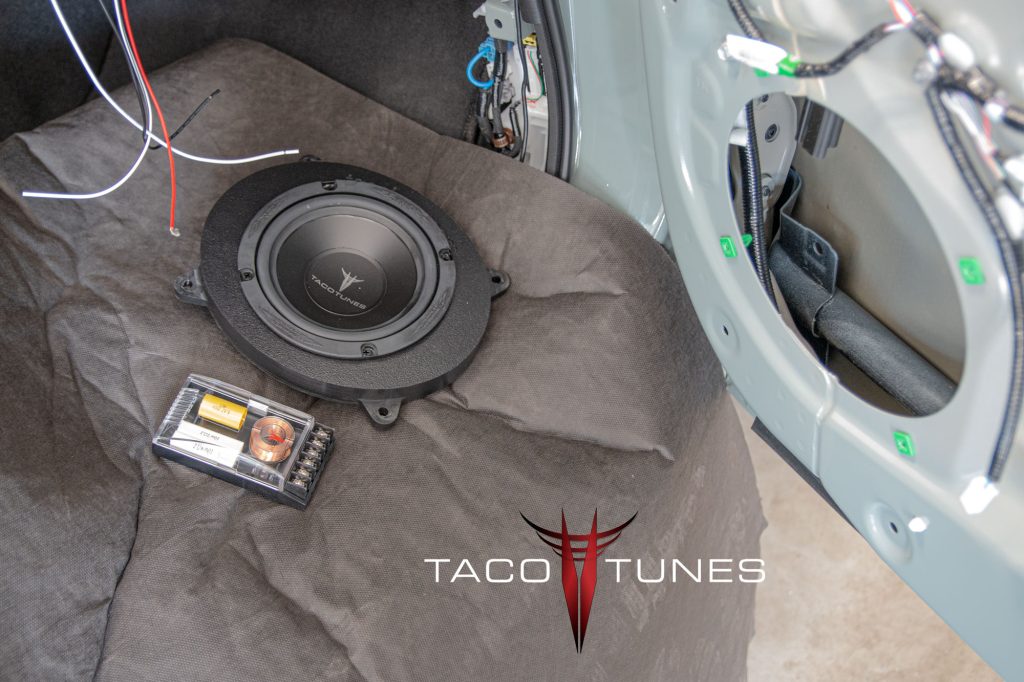
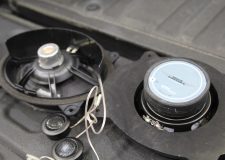
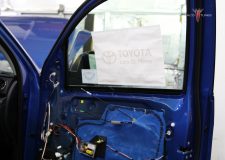
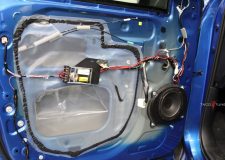
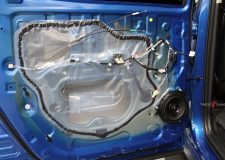
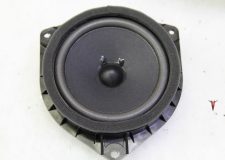
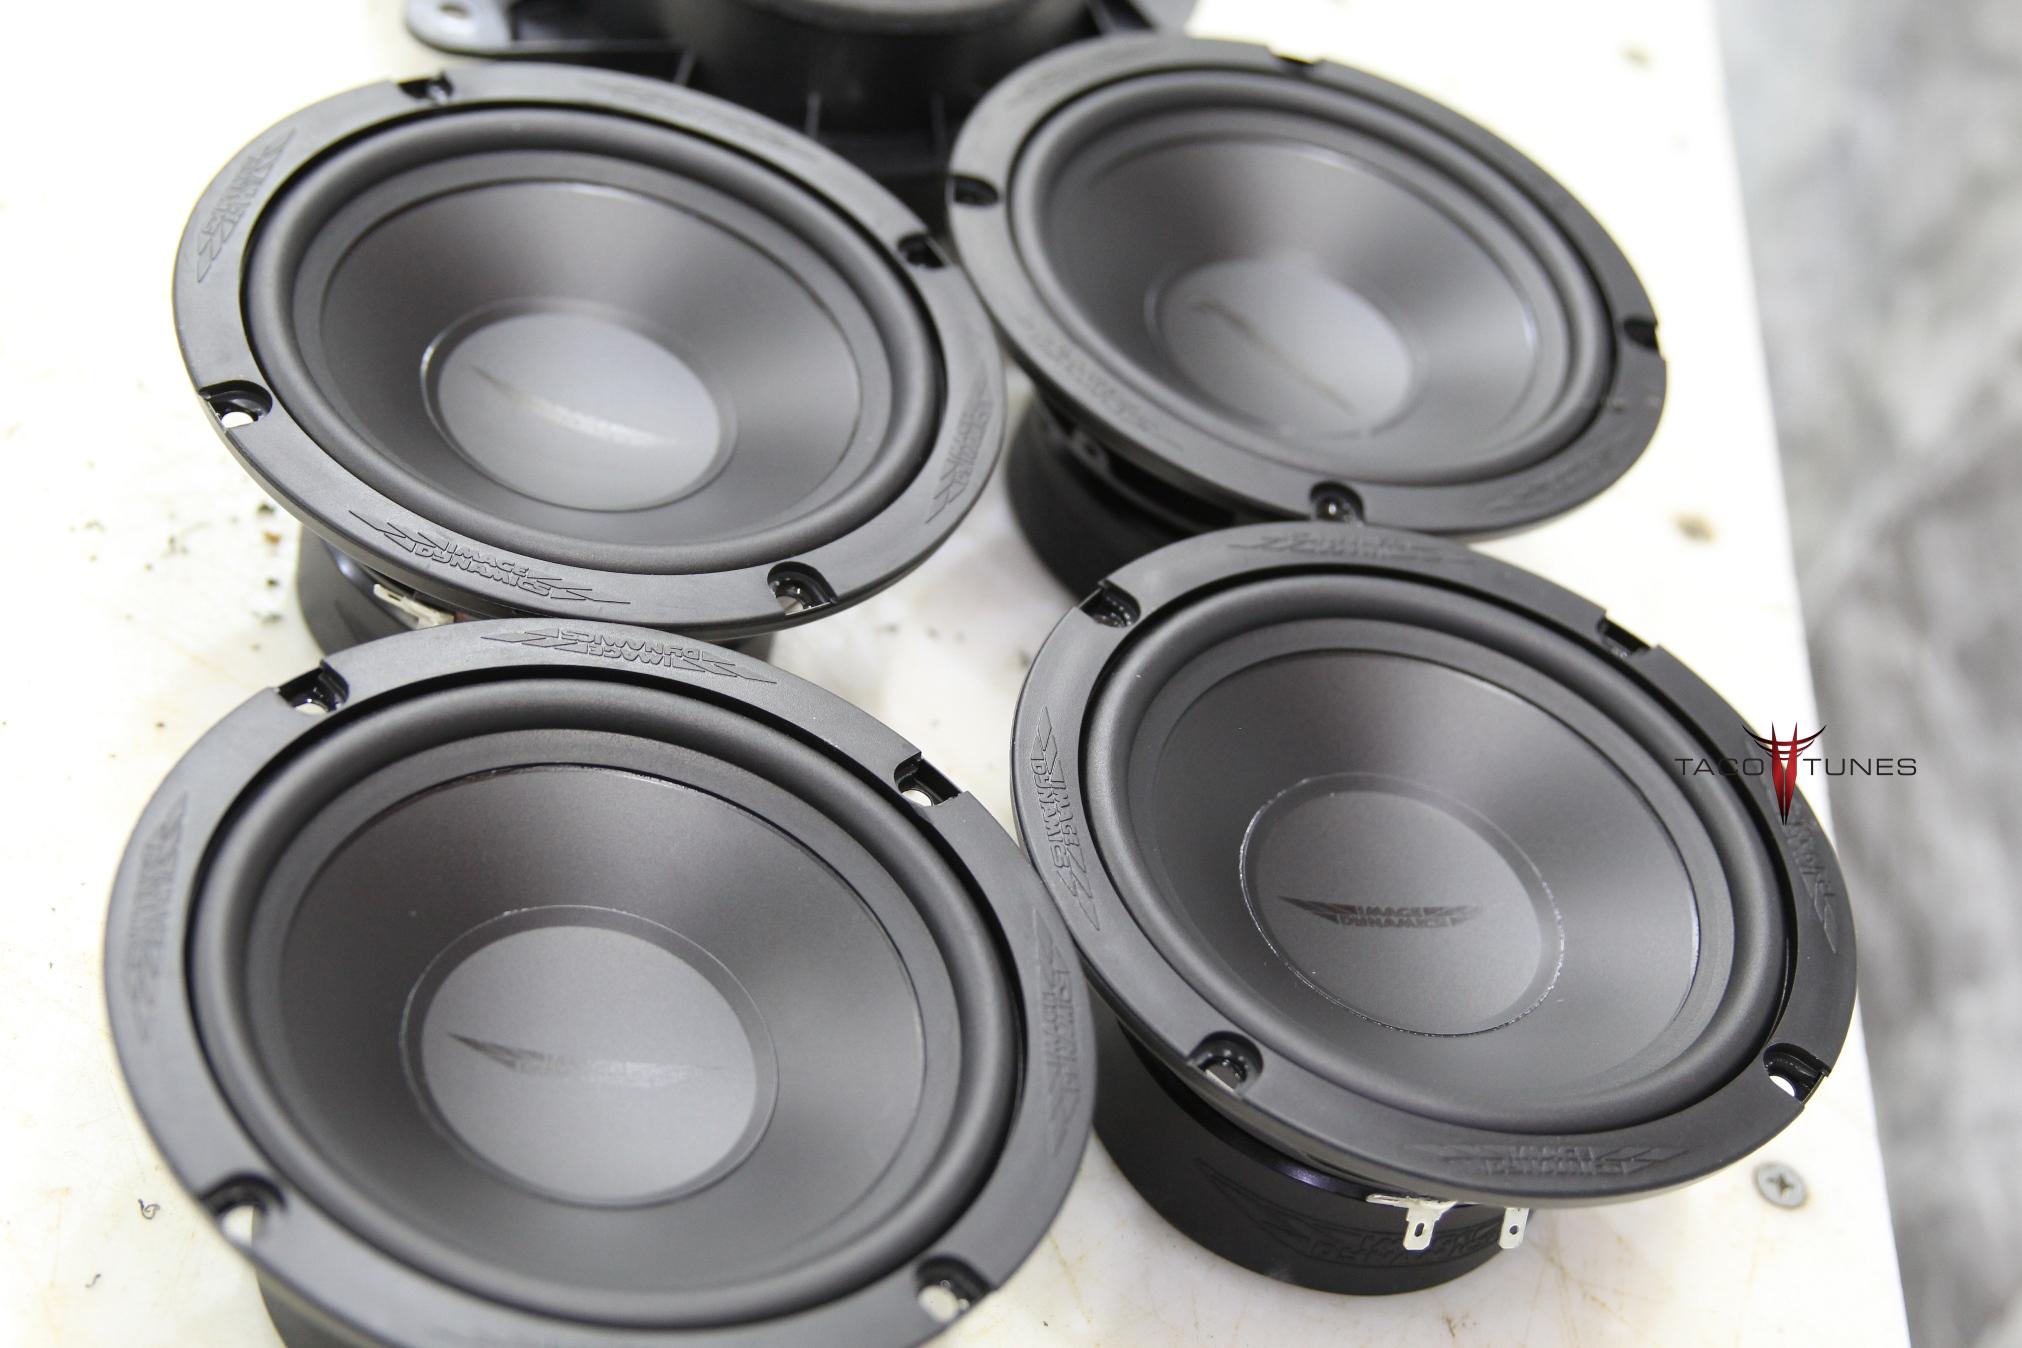
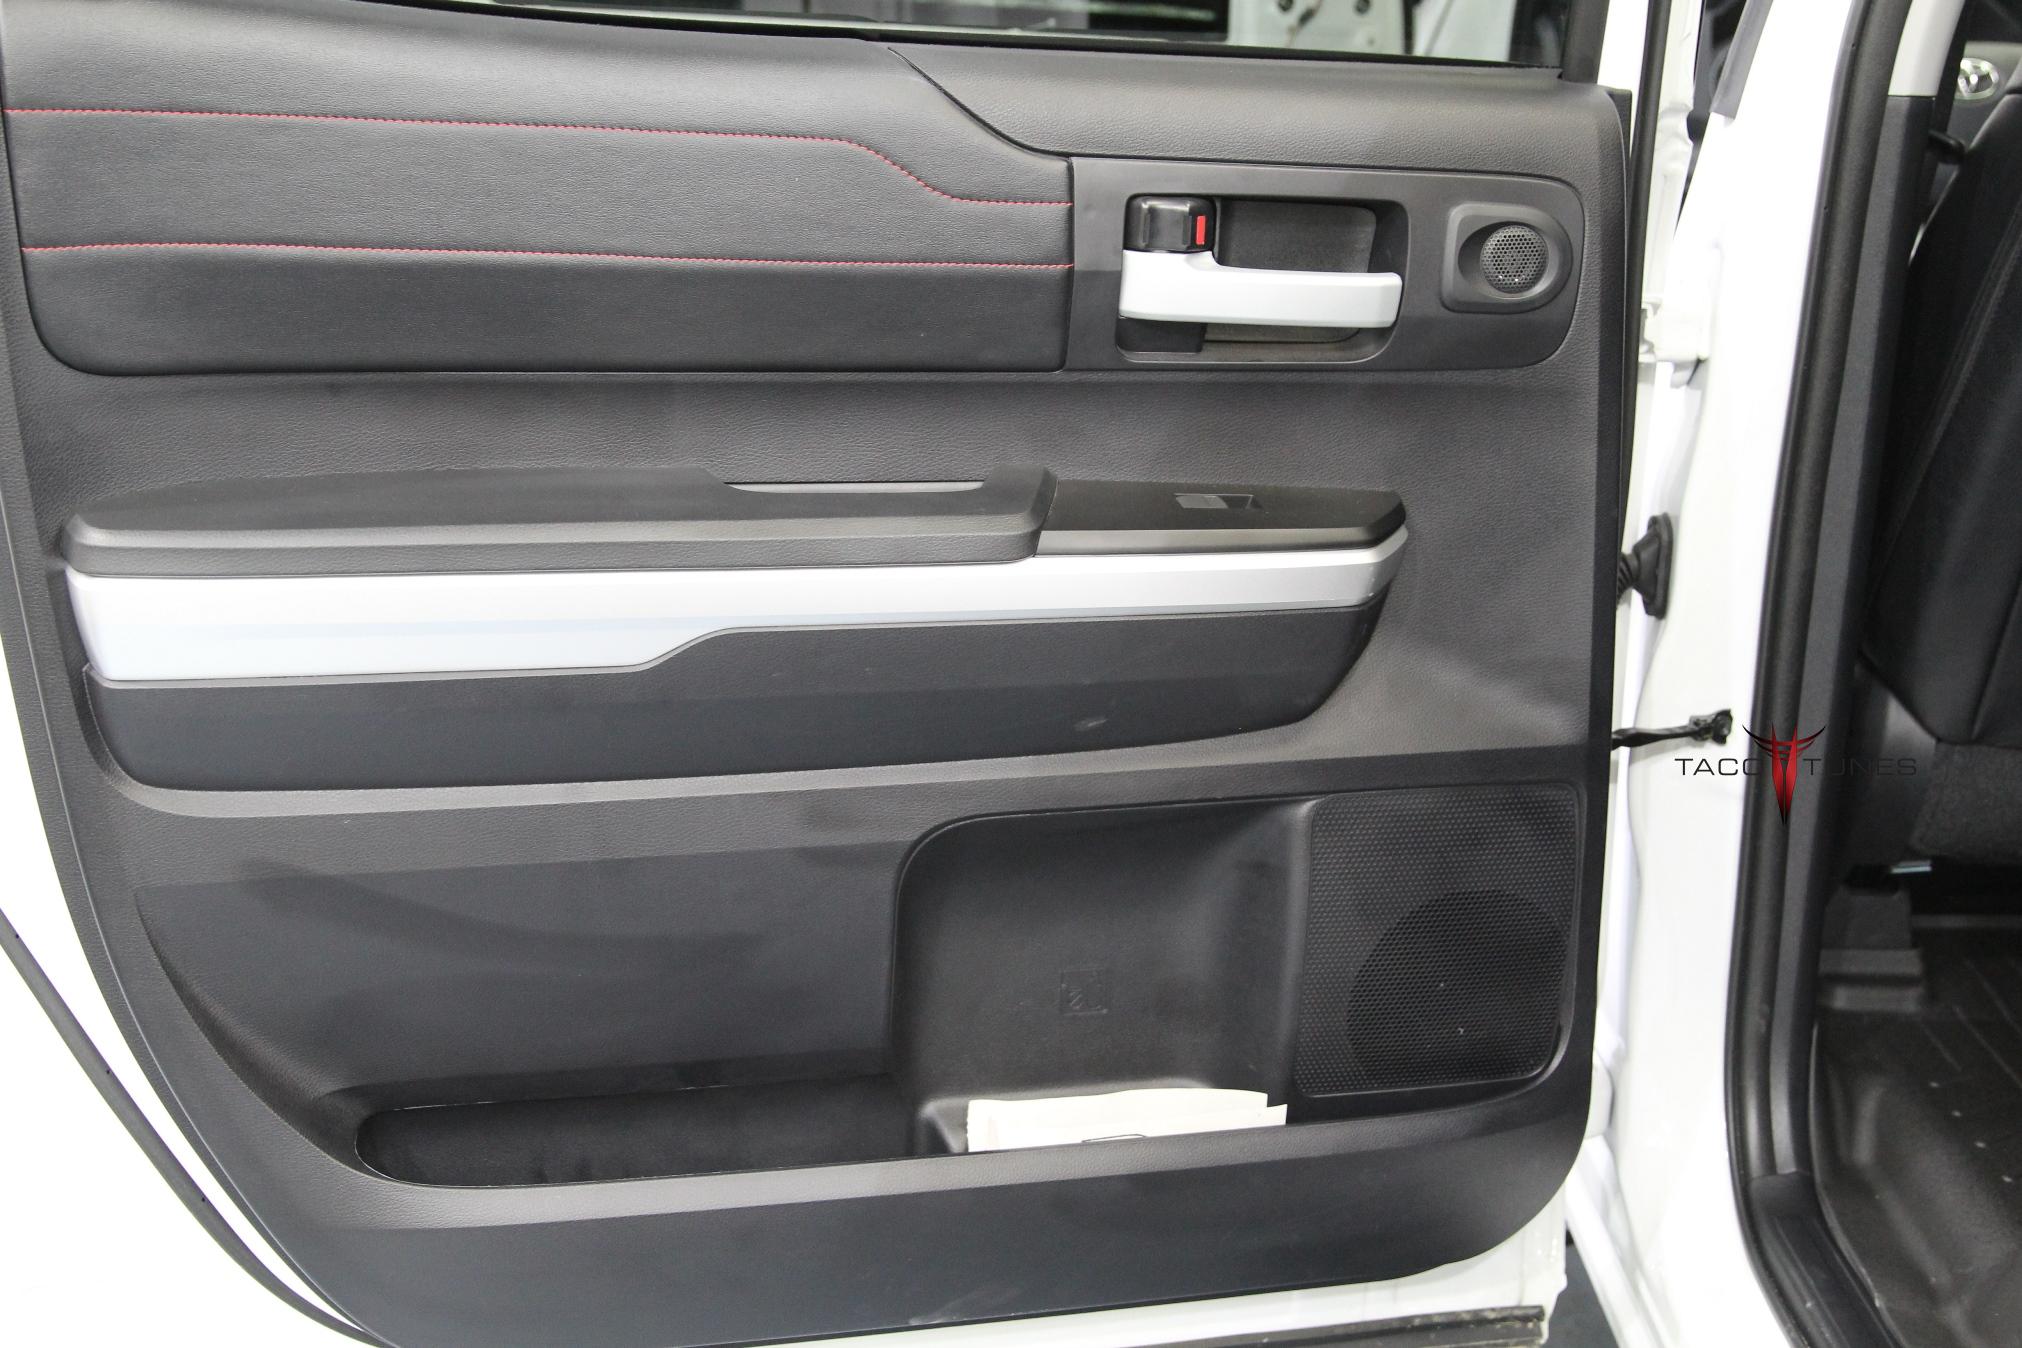
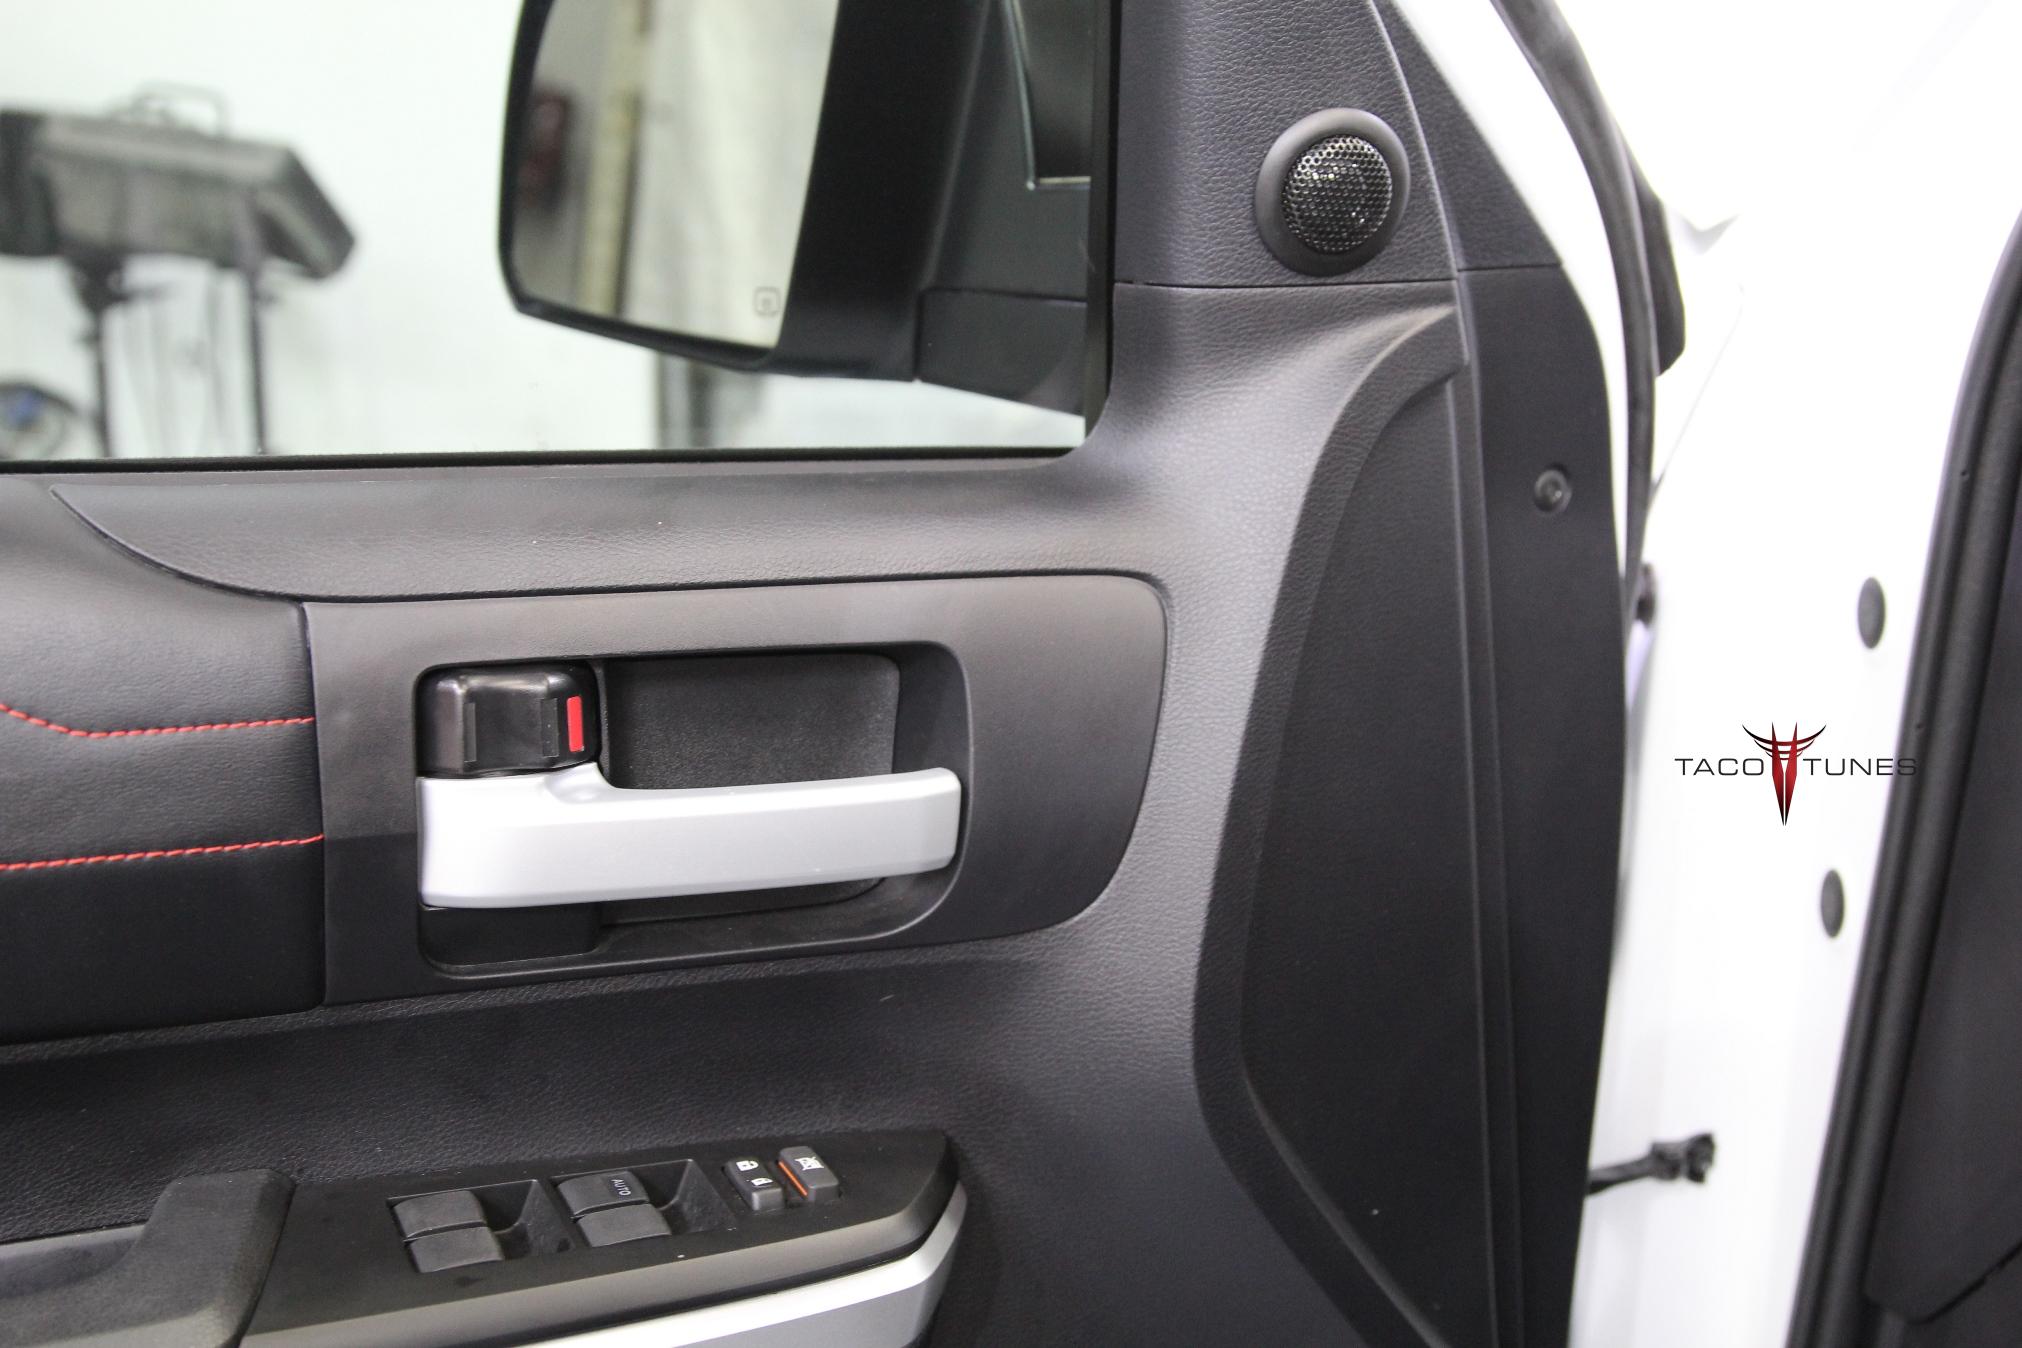
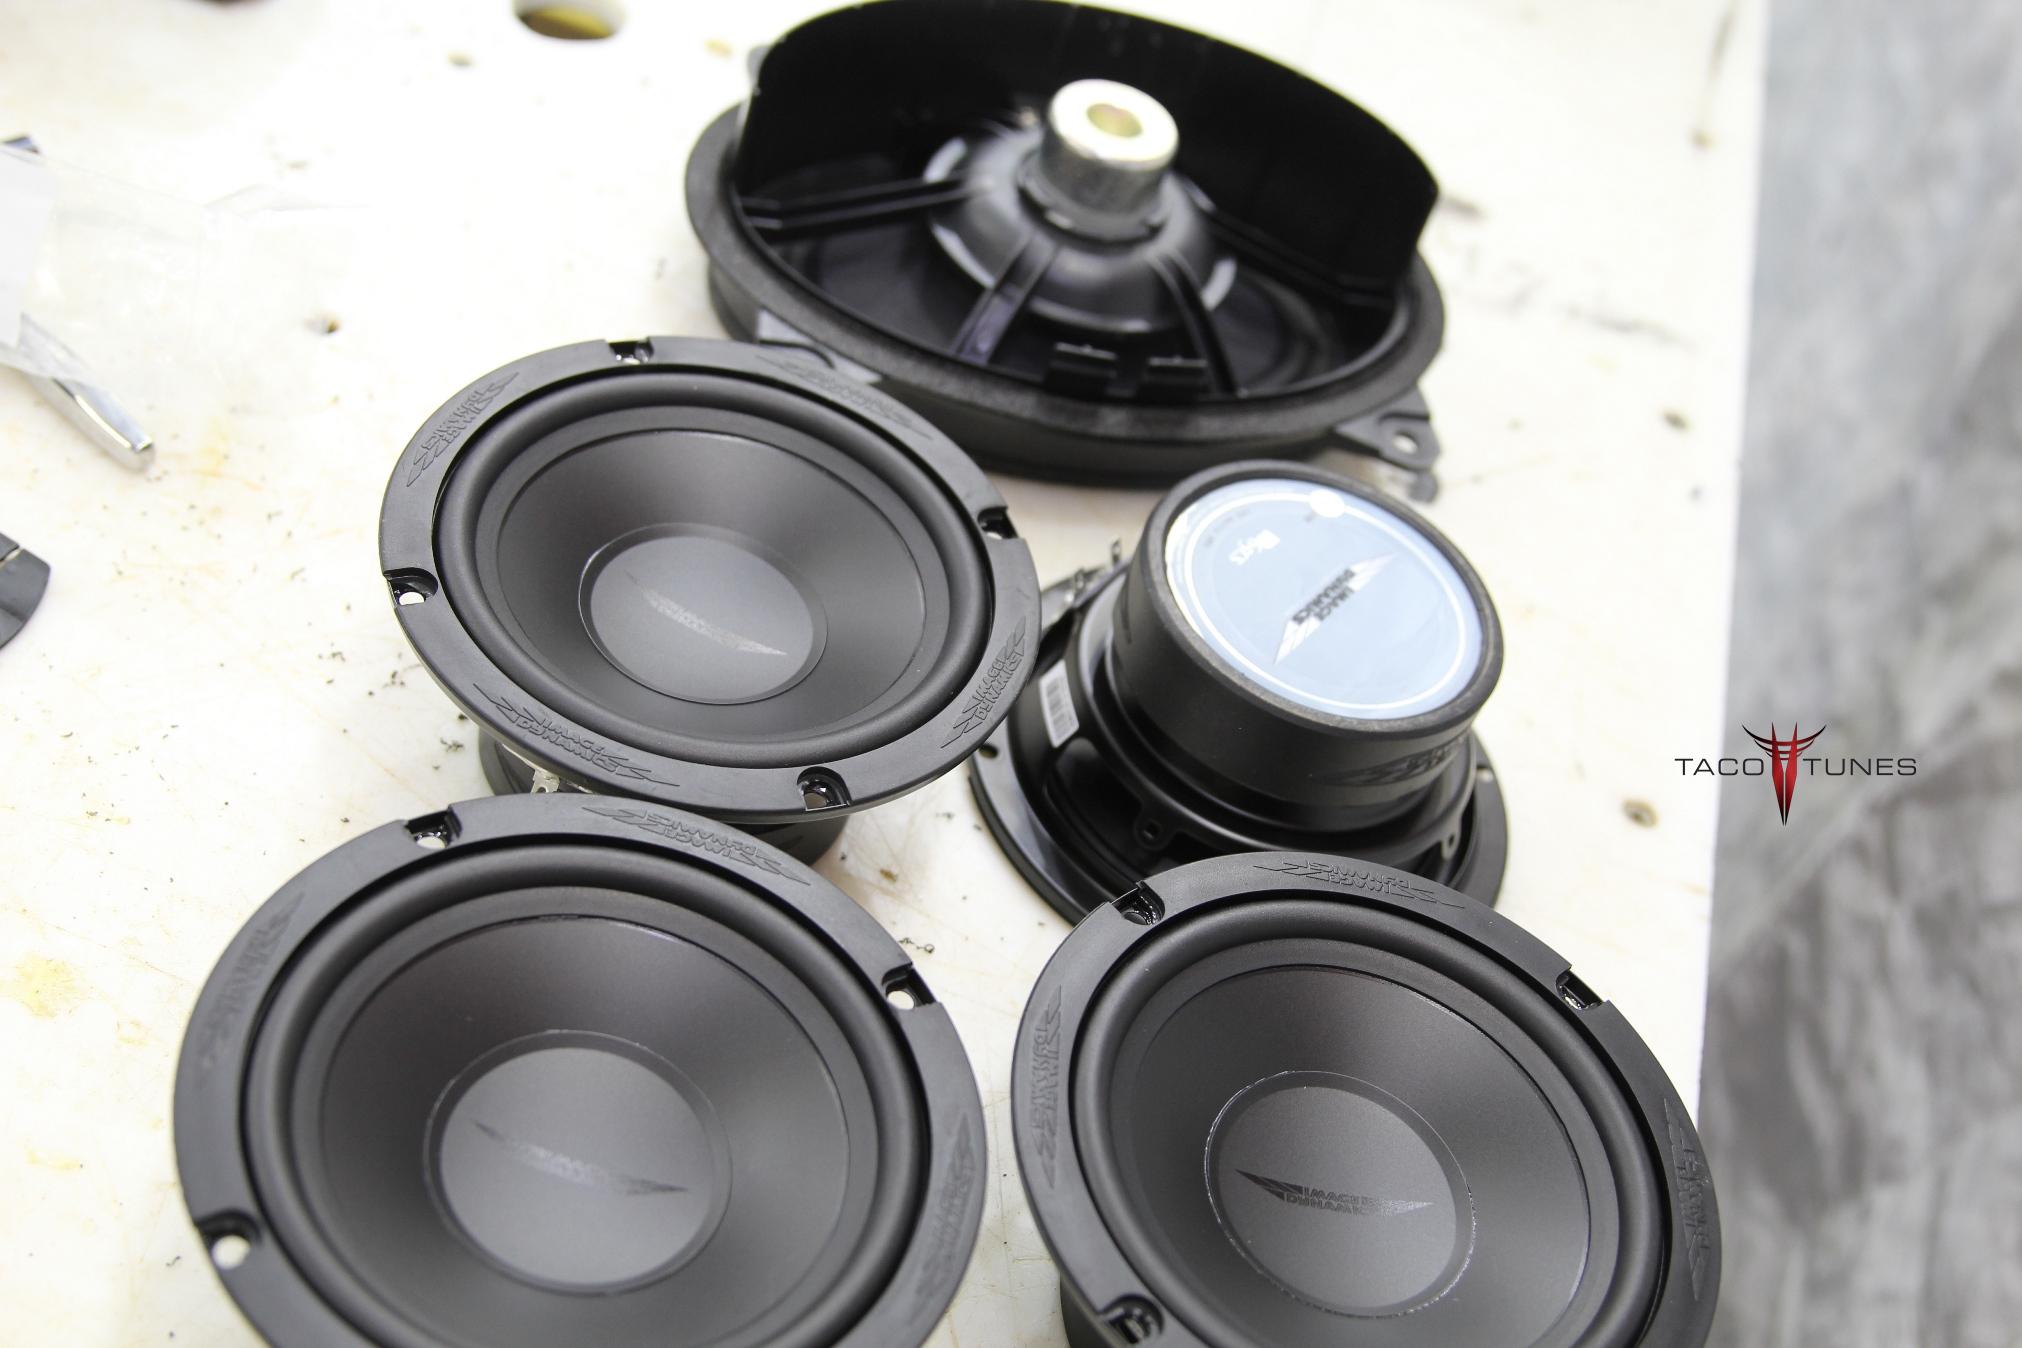
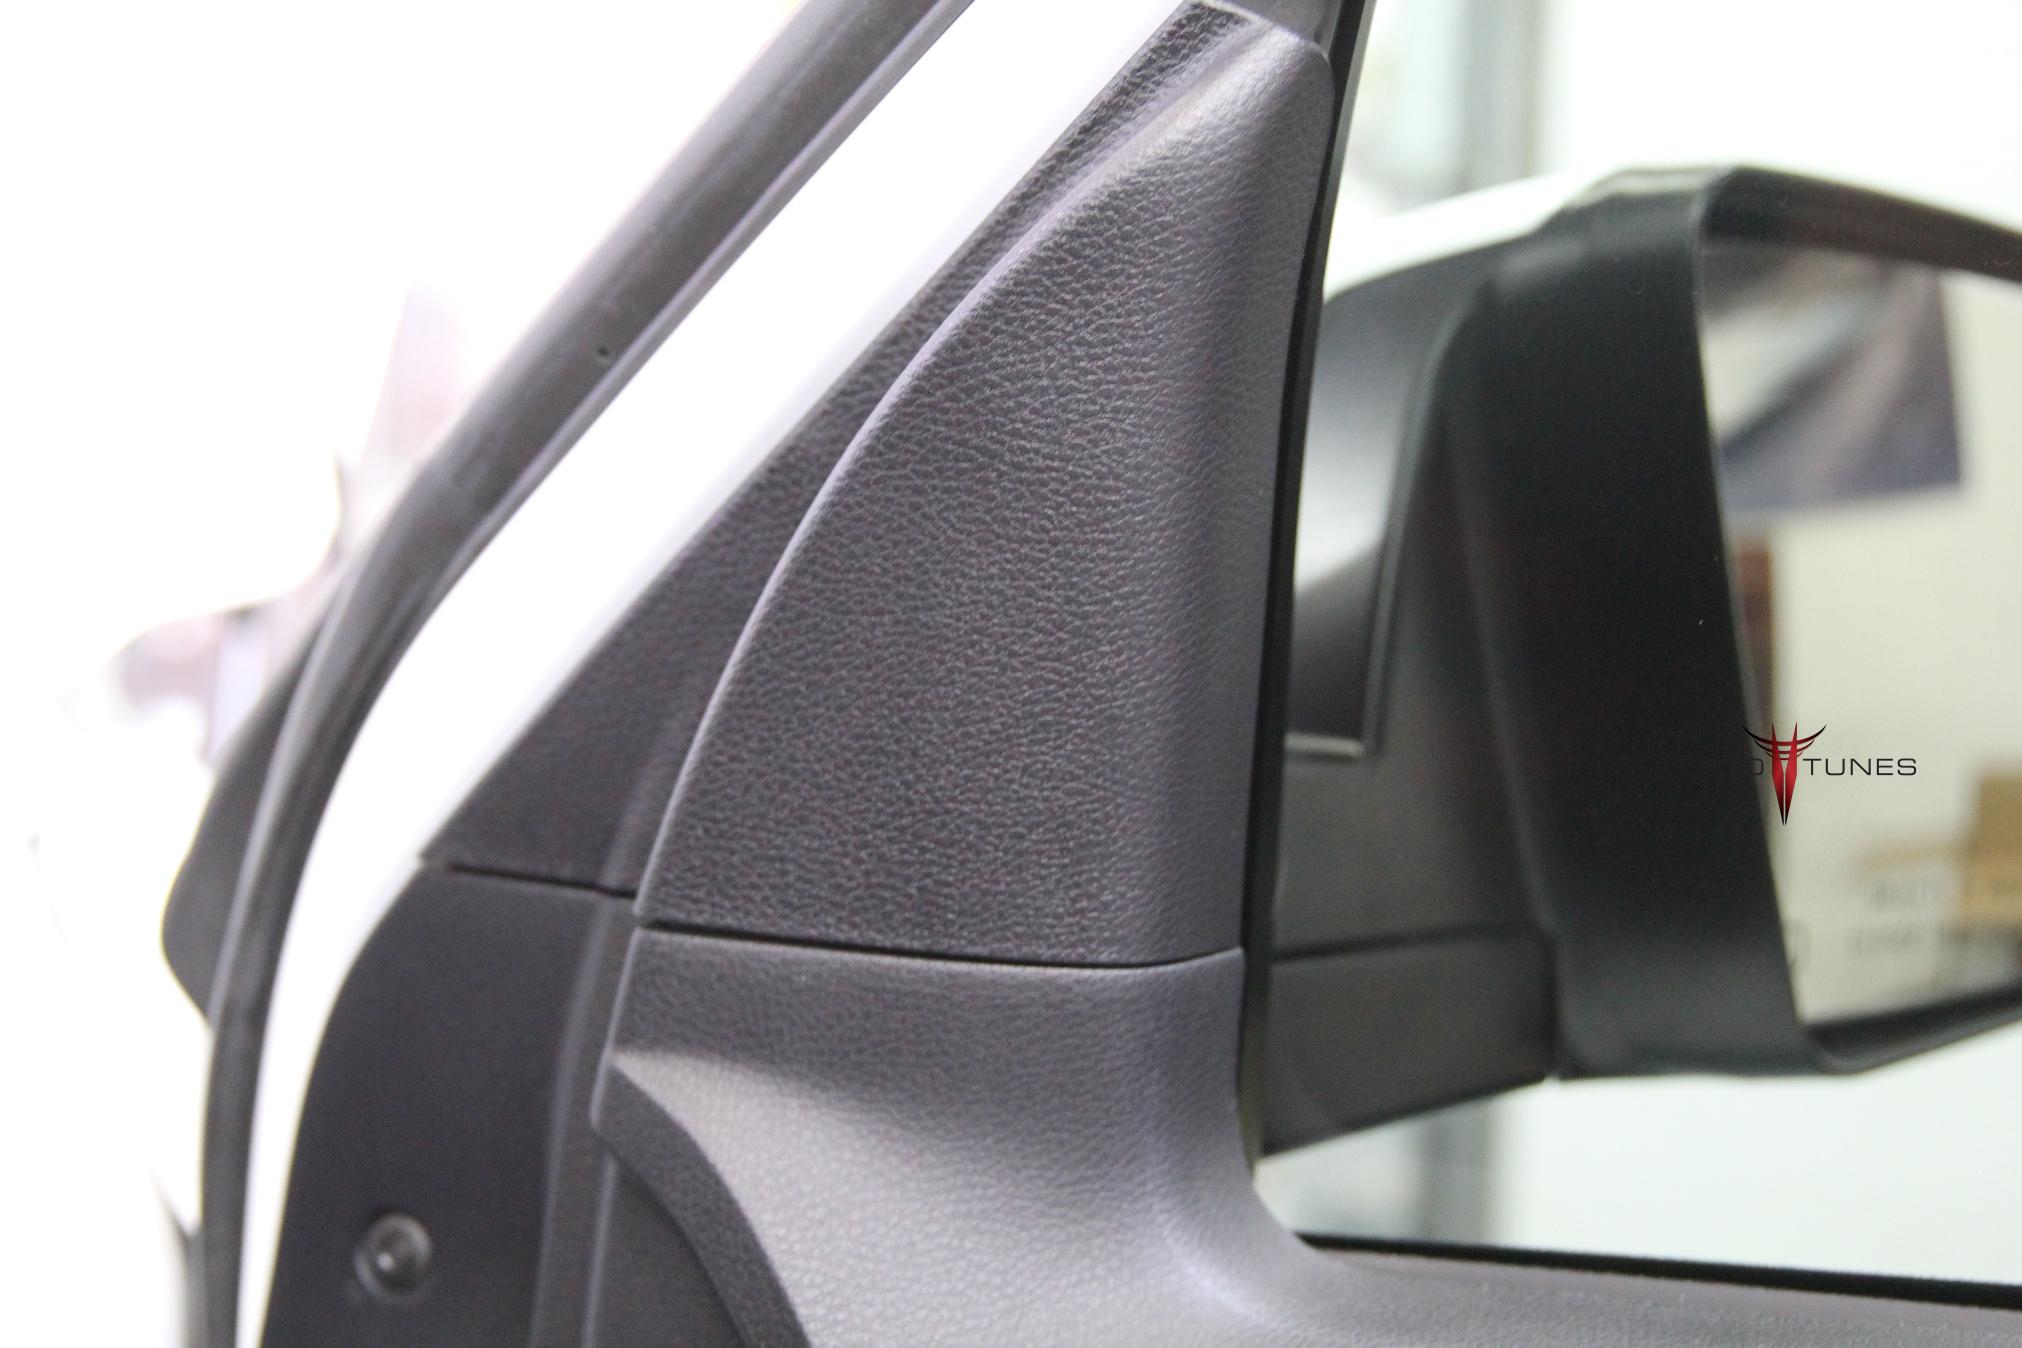
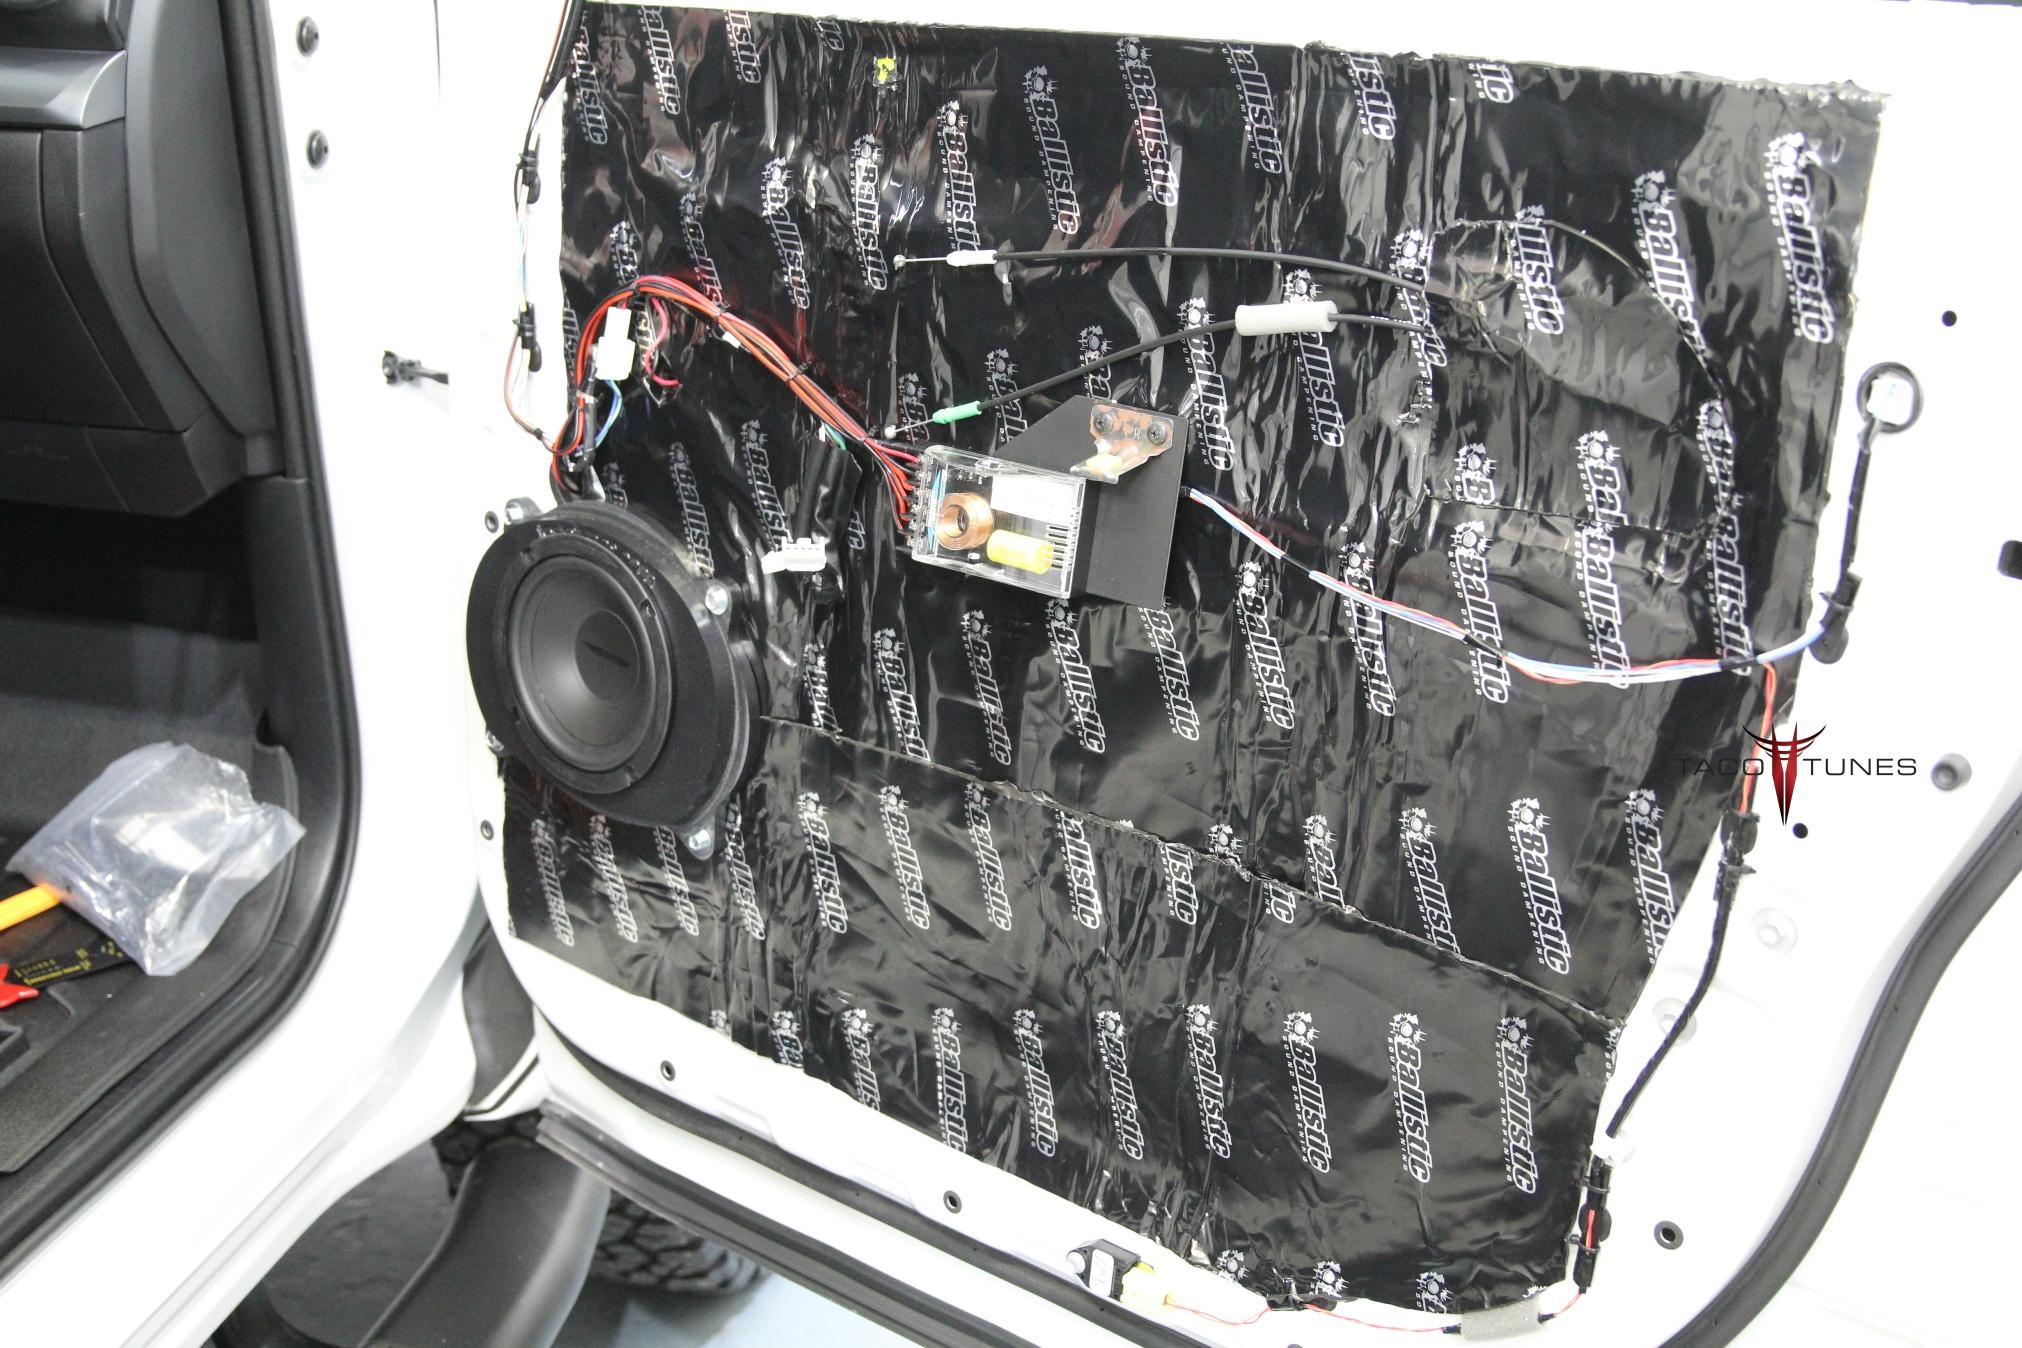
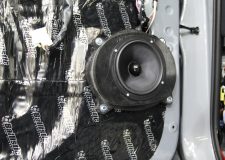
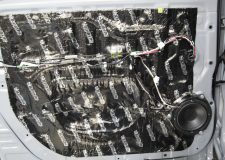
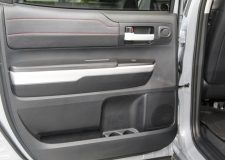
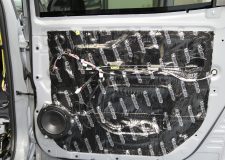
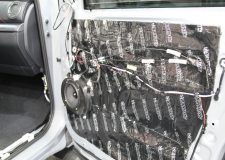
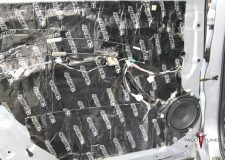
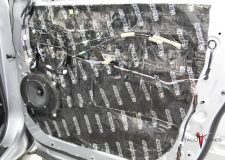
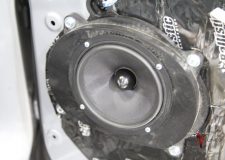
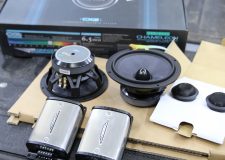
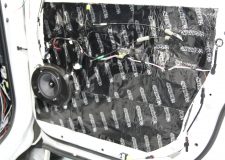
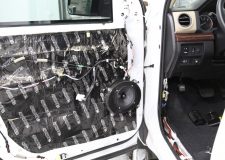
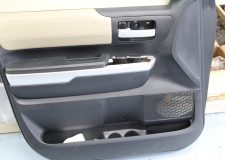
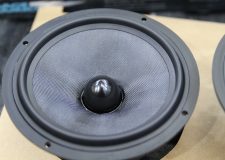
Front Door Component Speakers
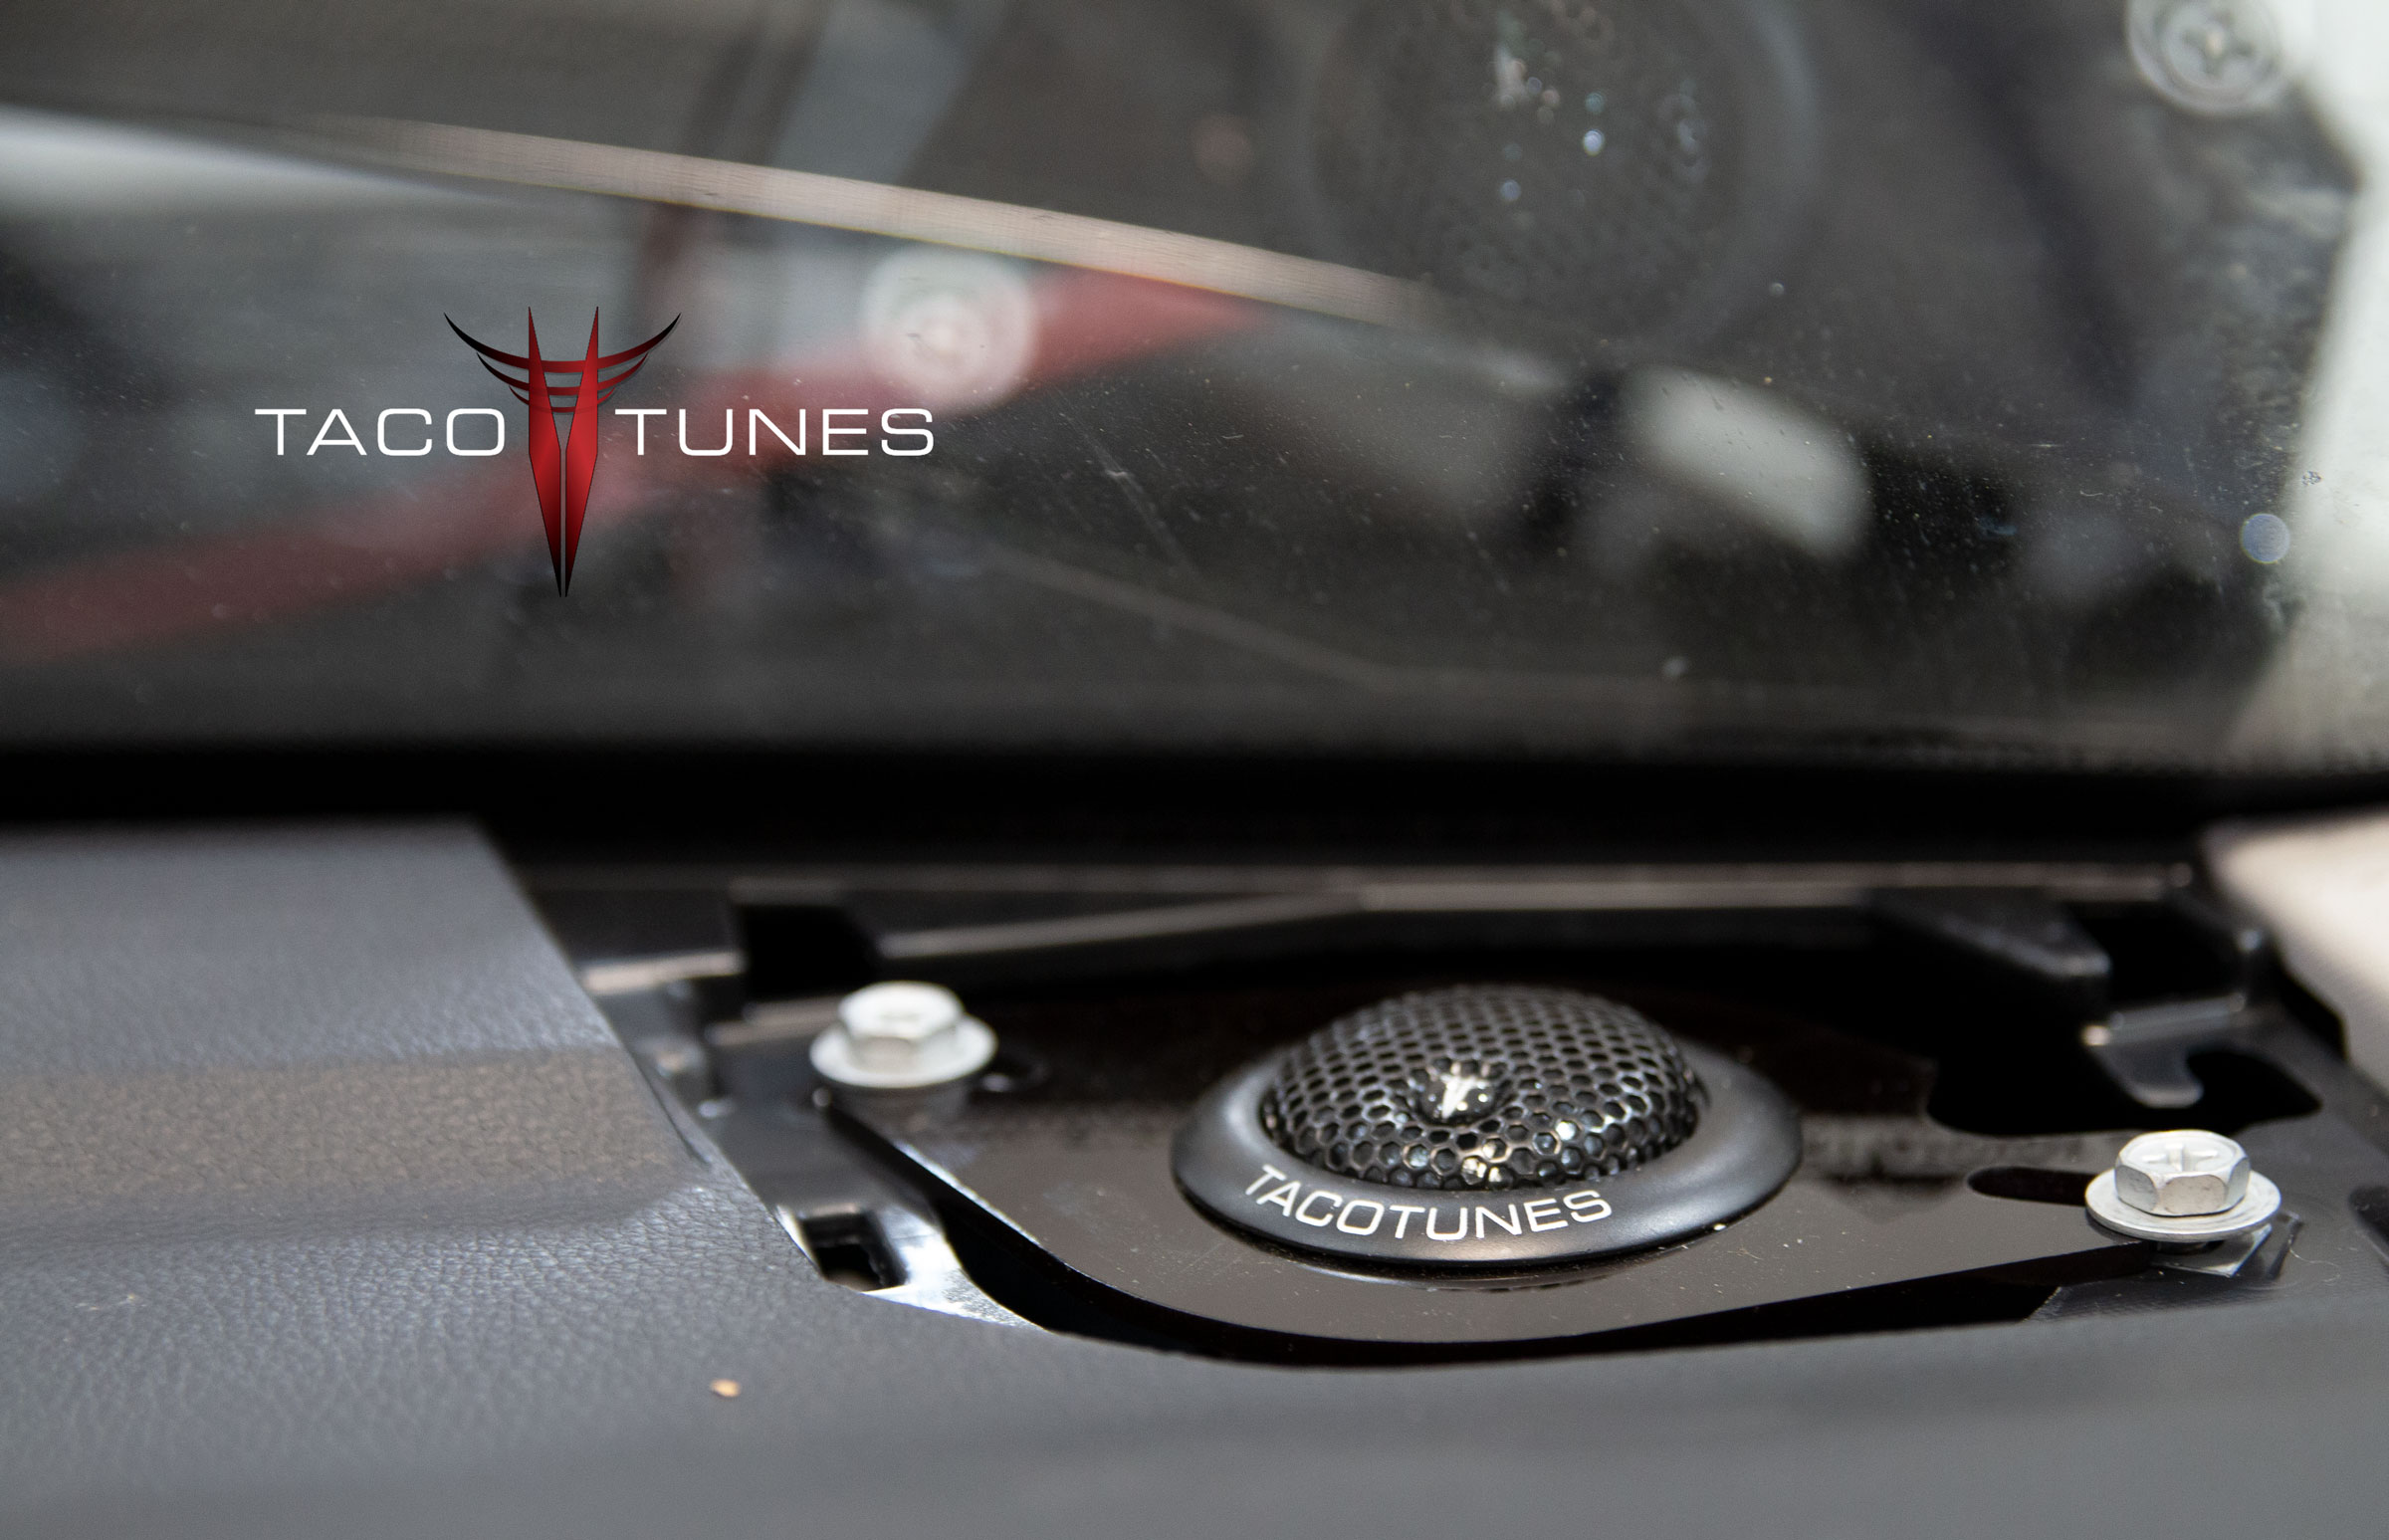
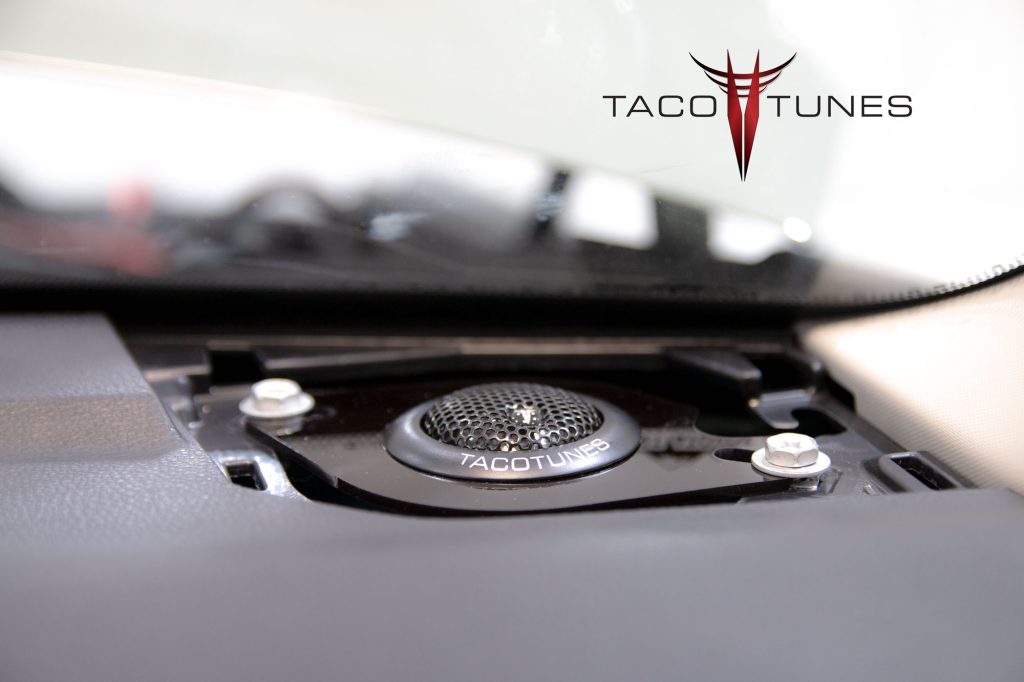
Dash Tweeter Replacement with True Component Speaker Sets
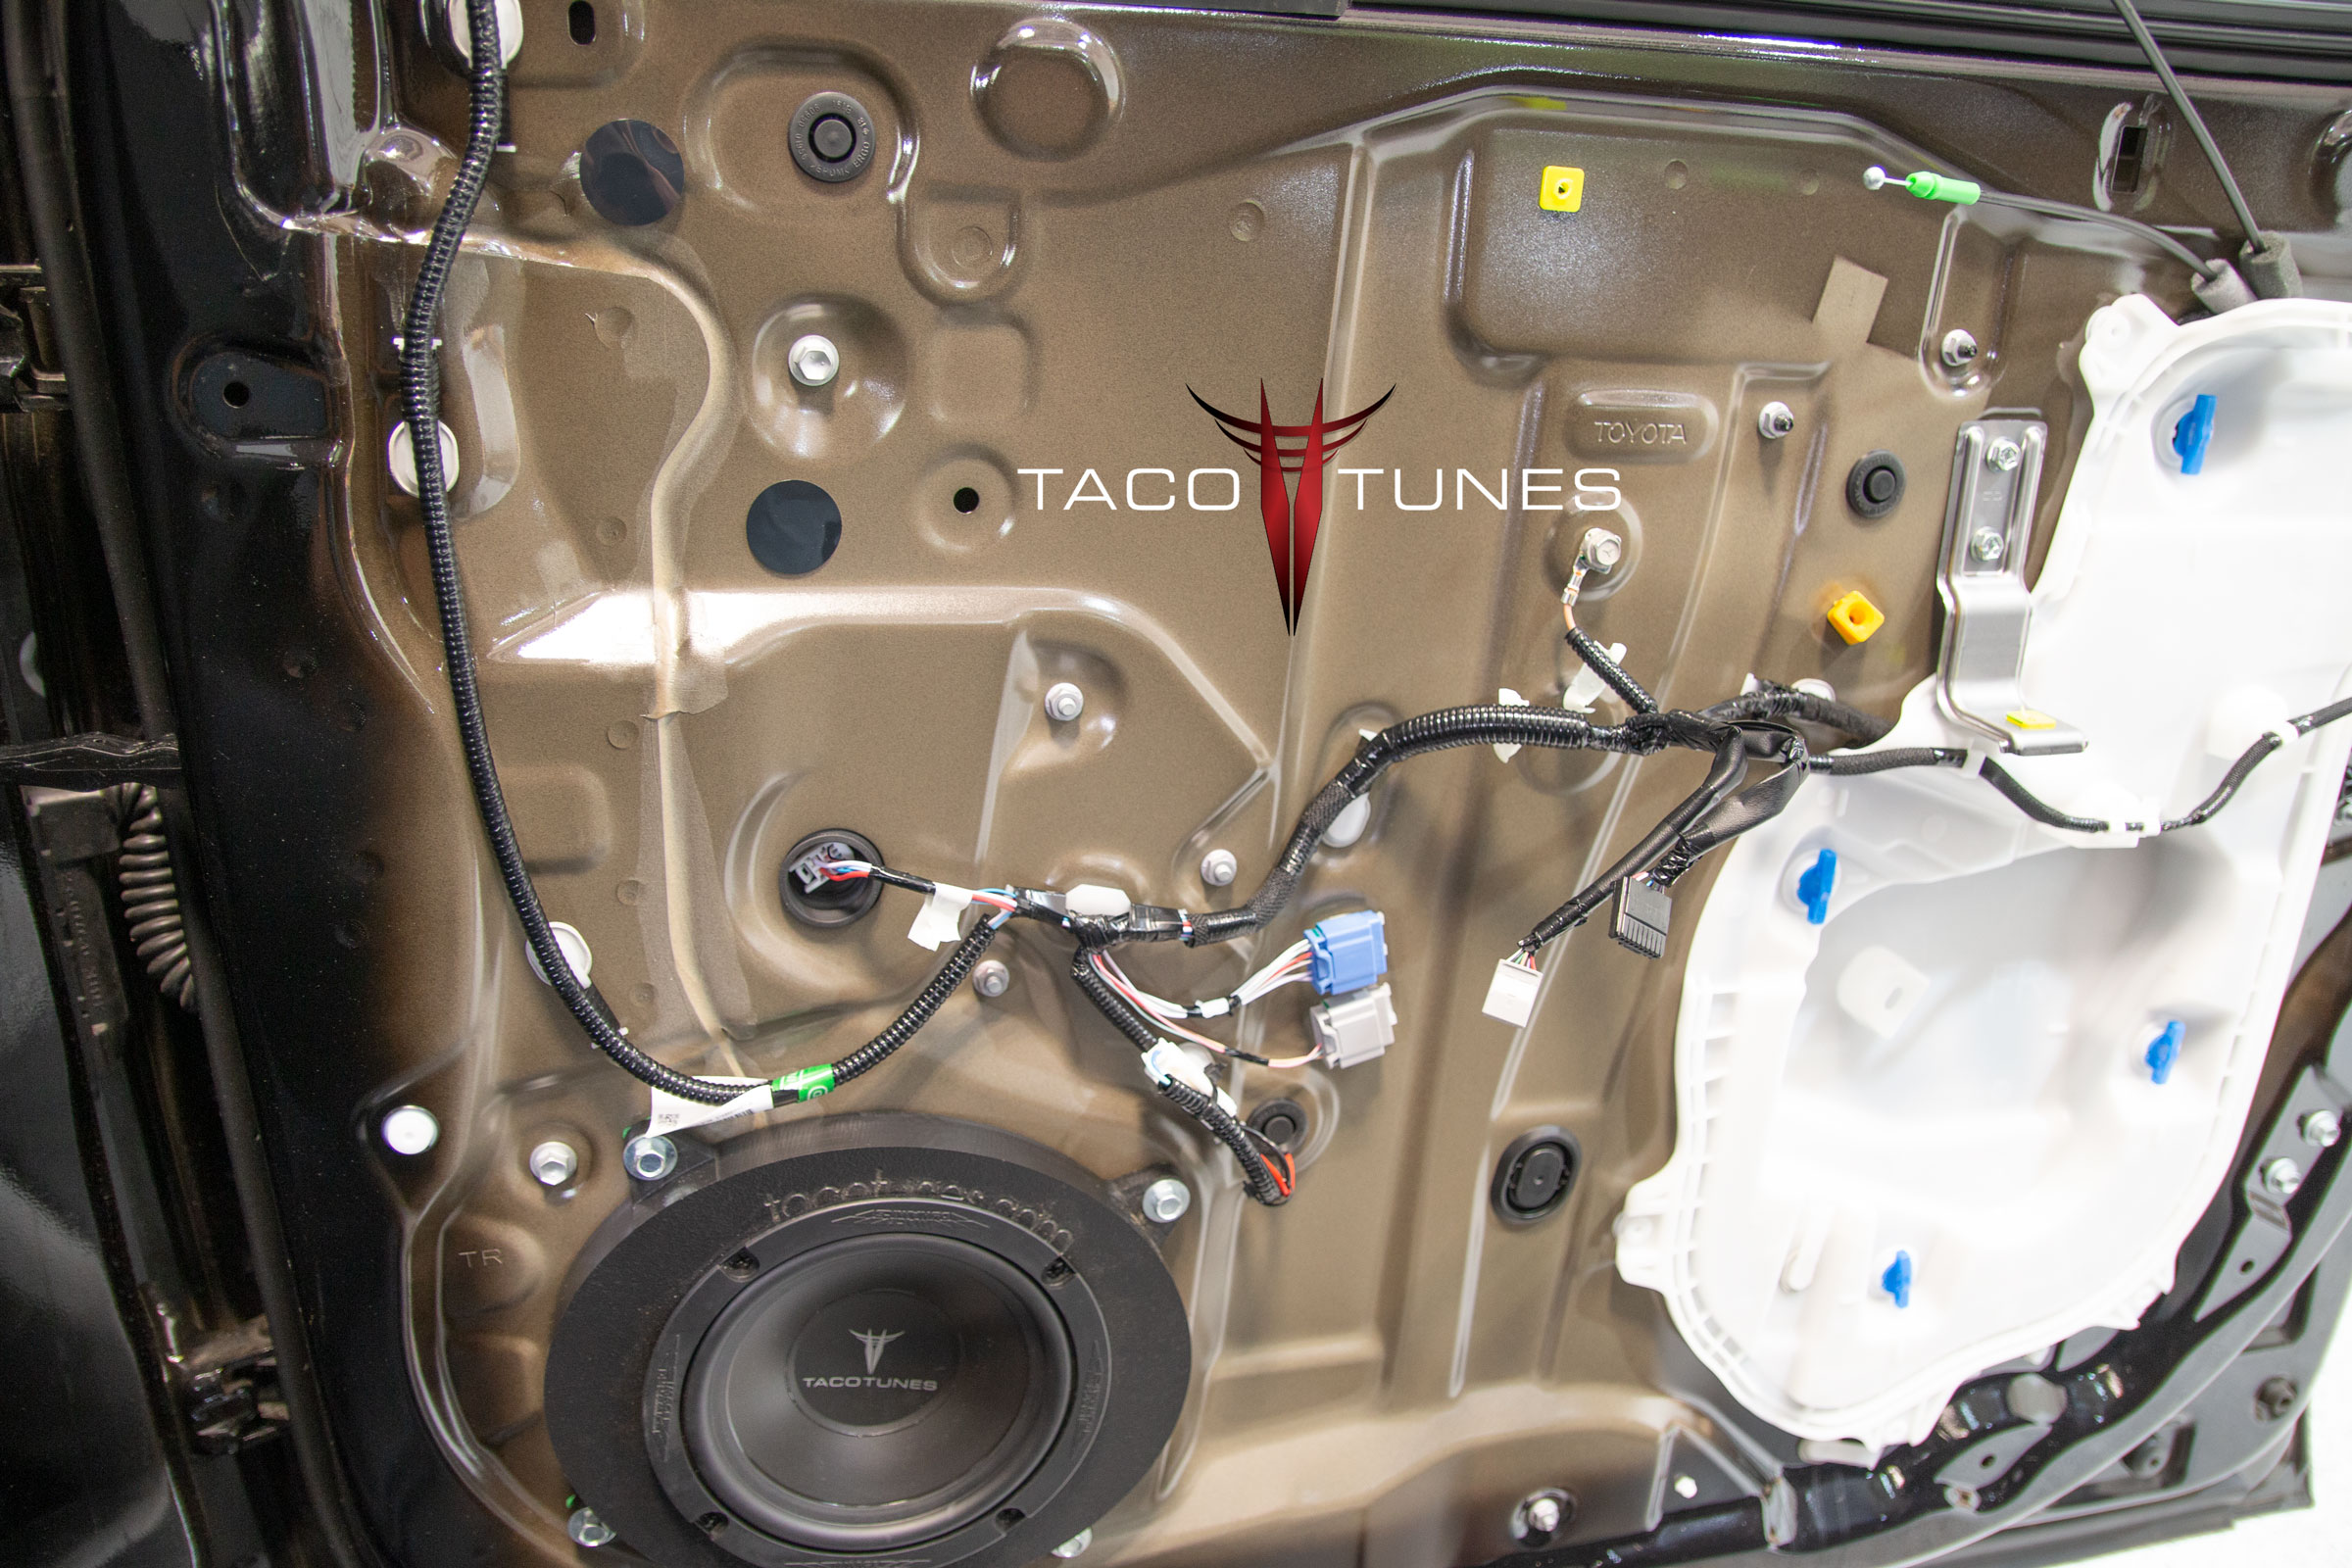
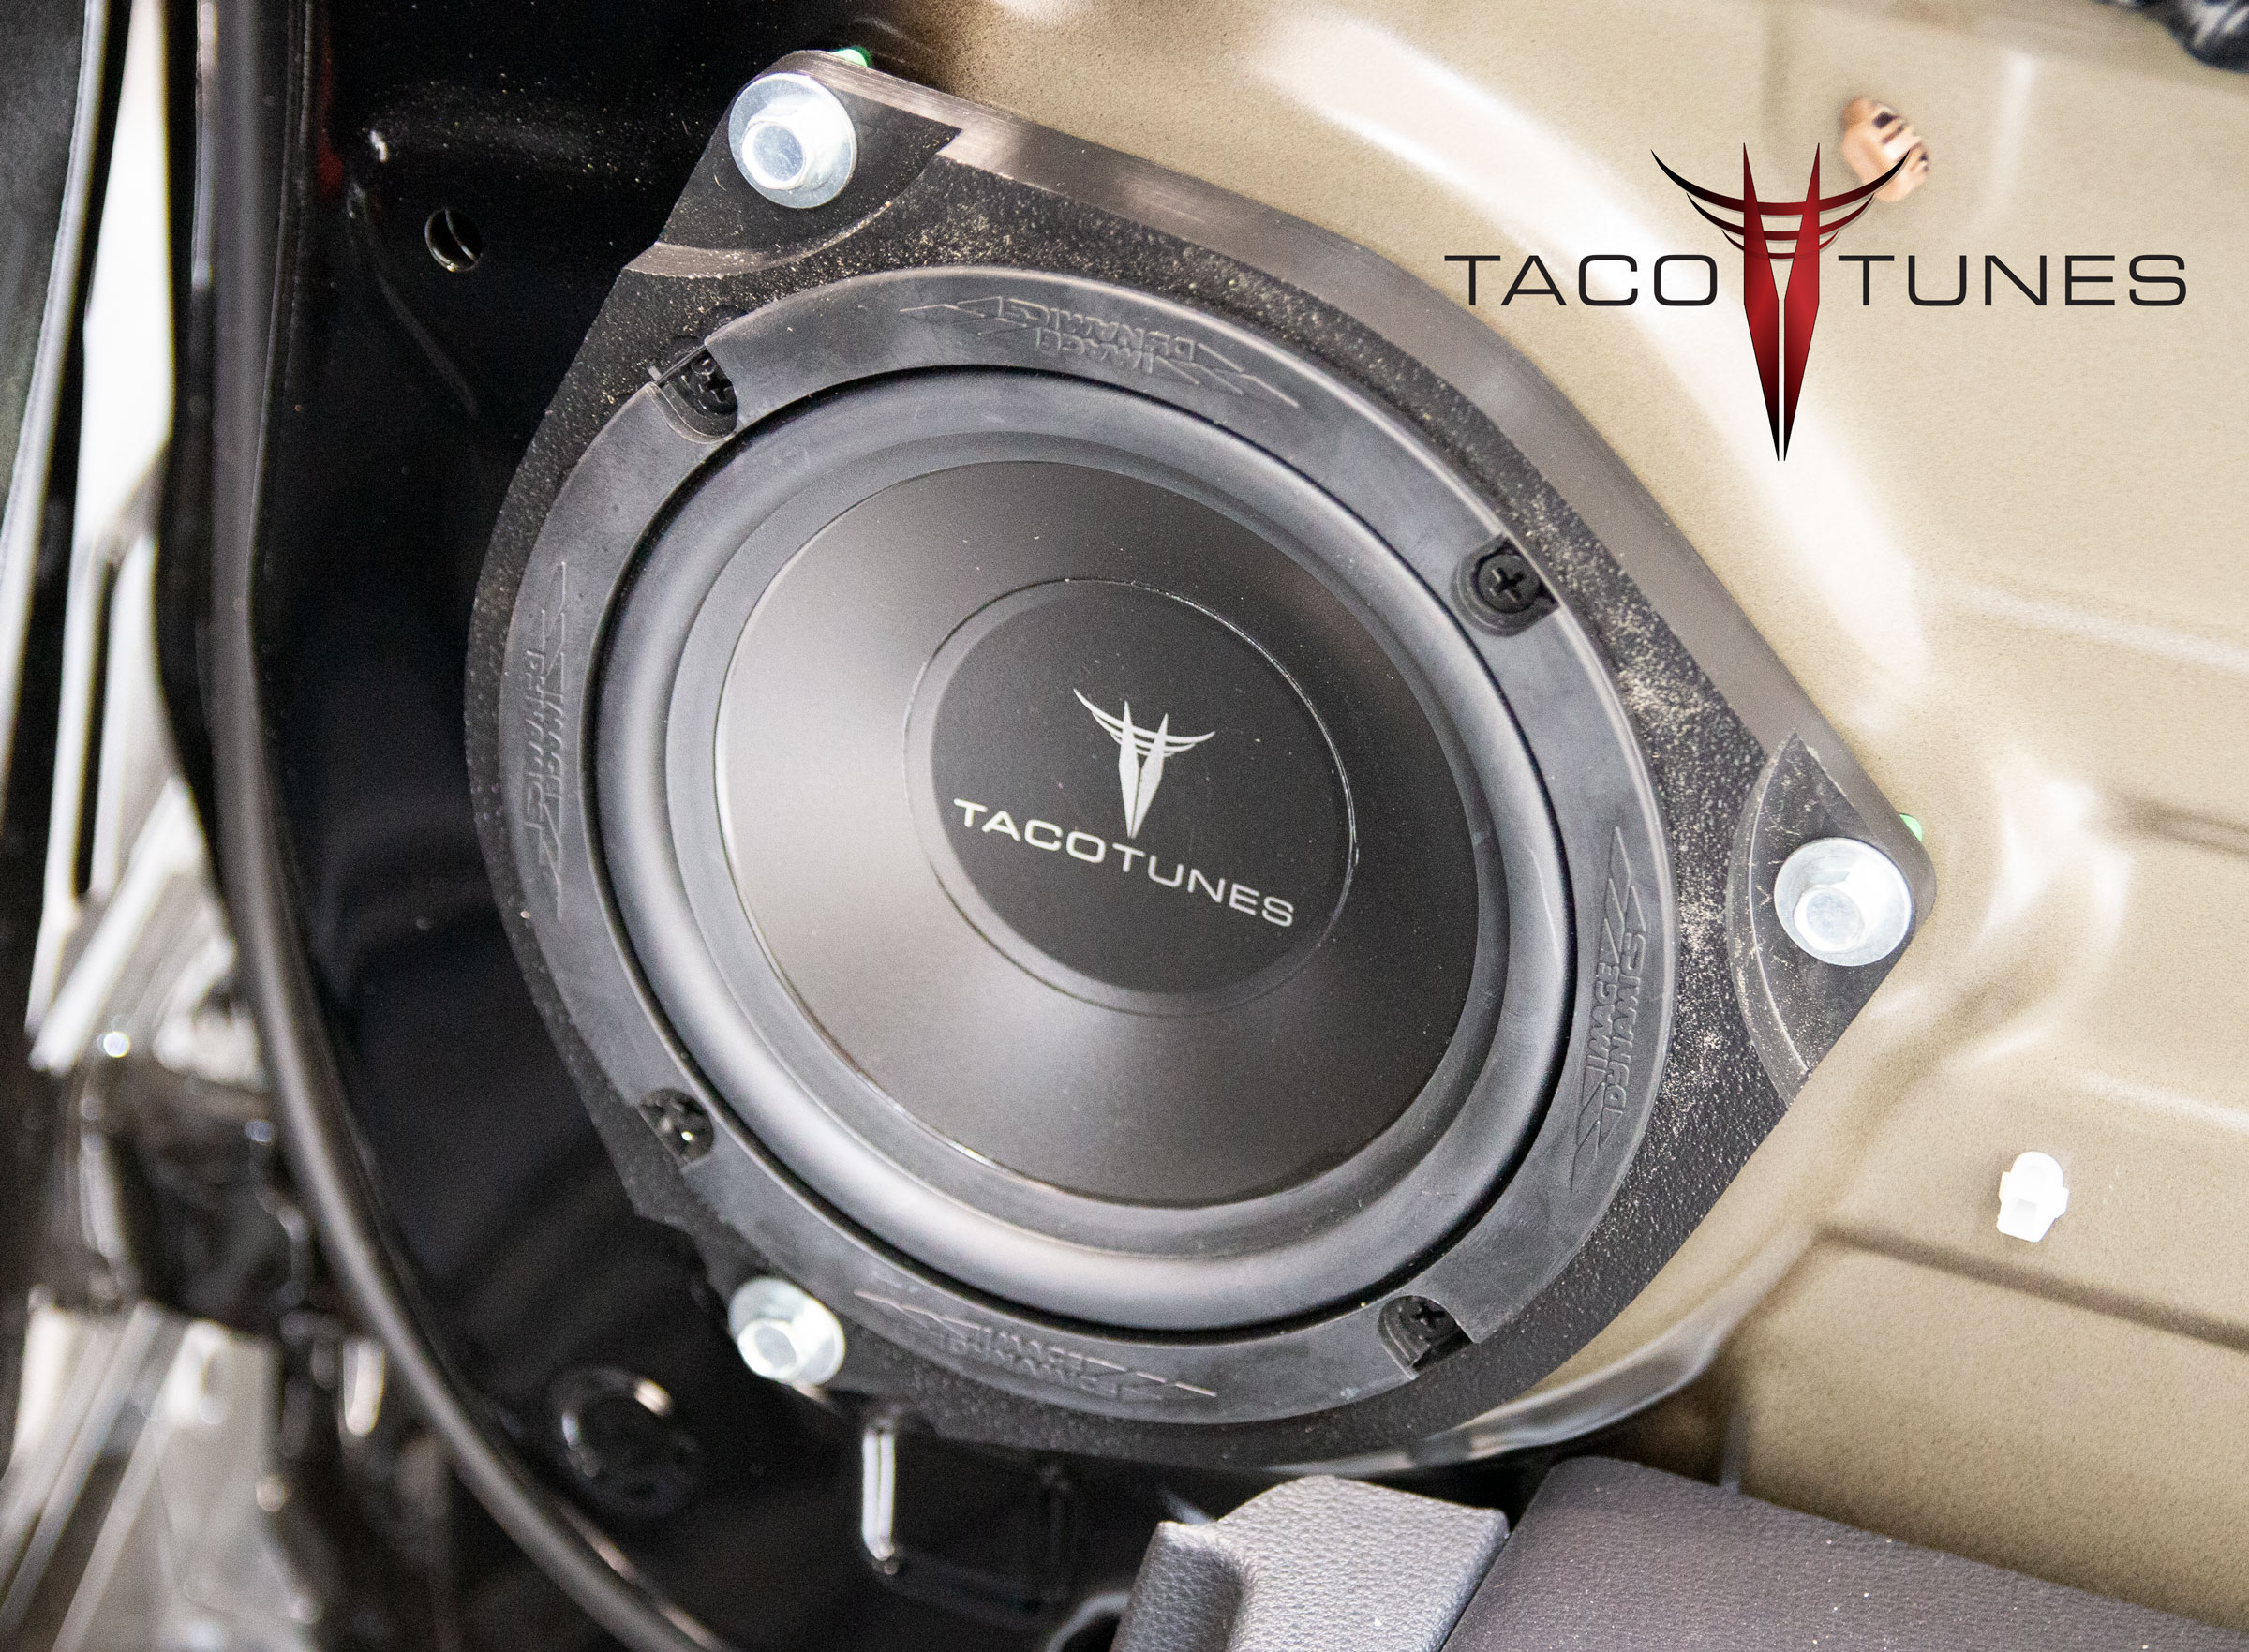
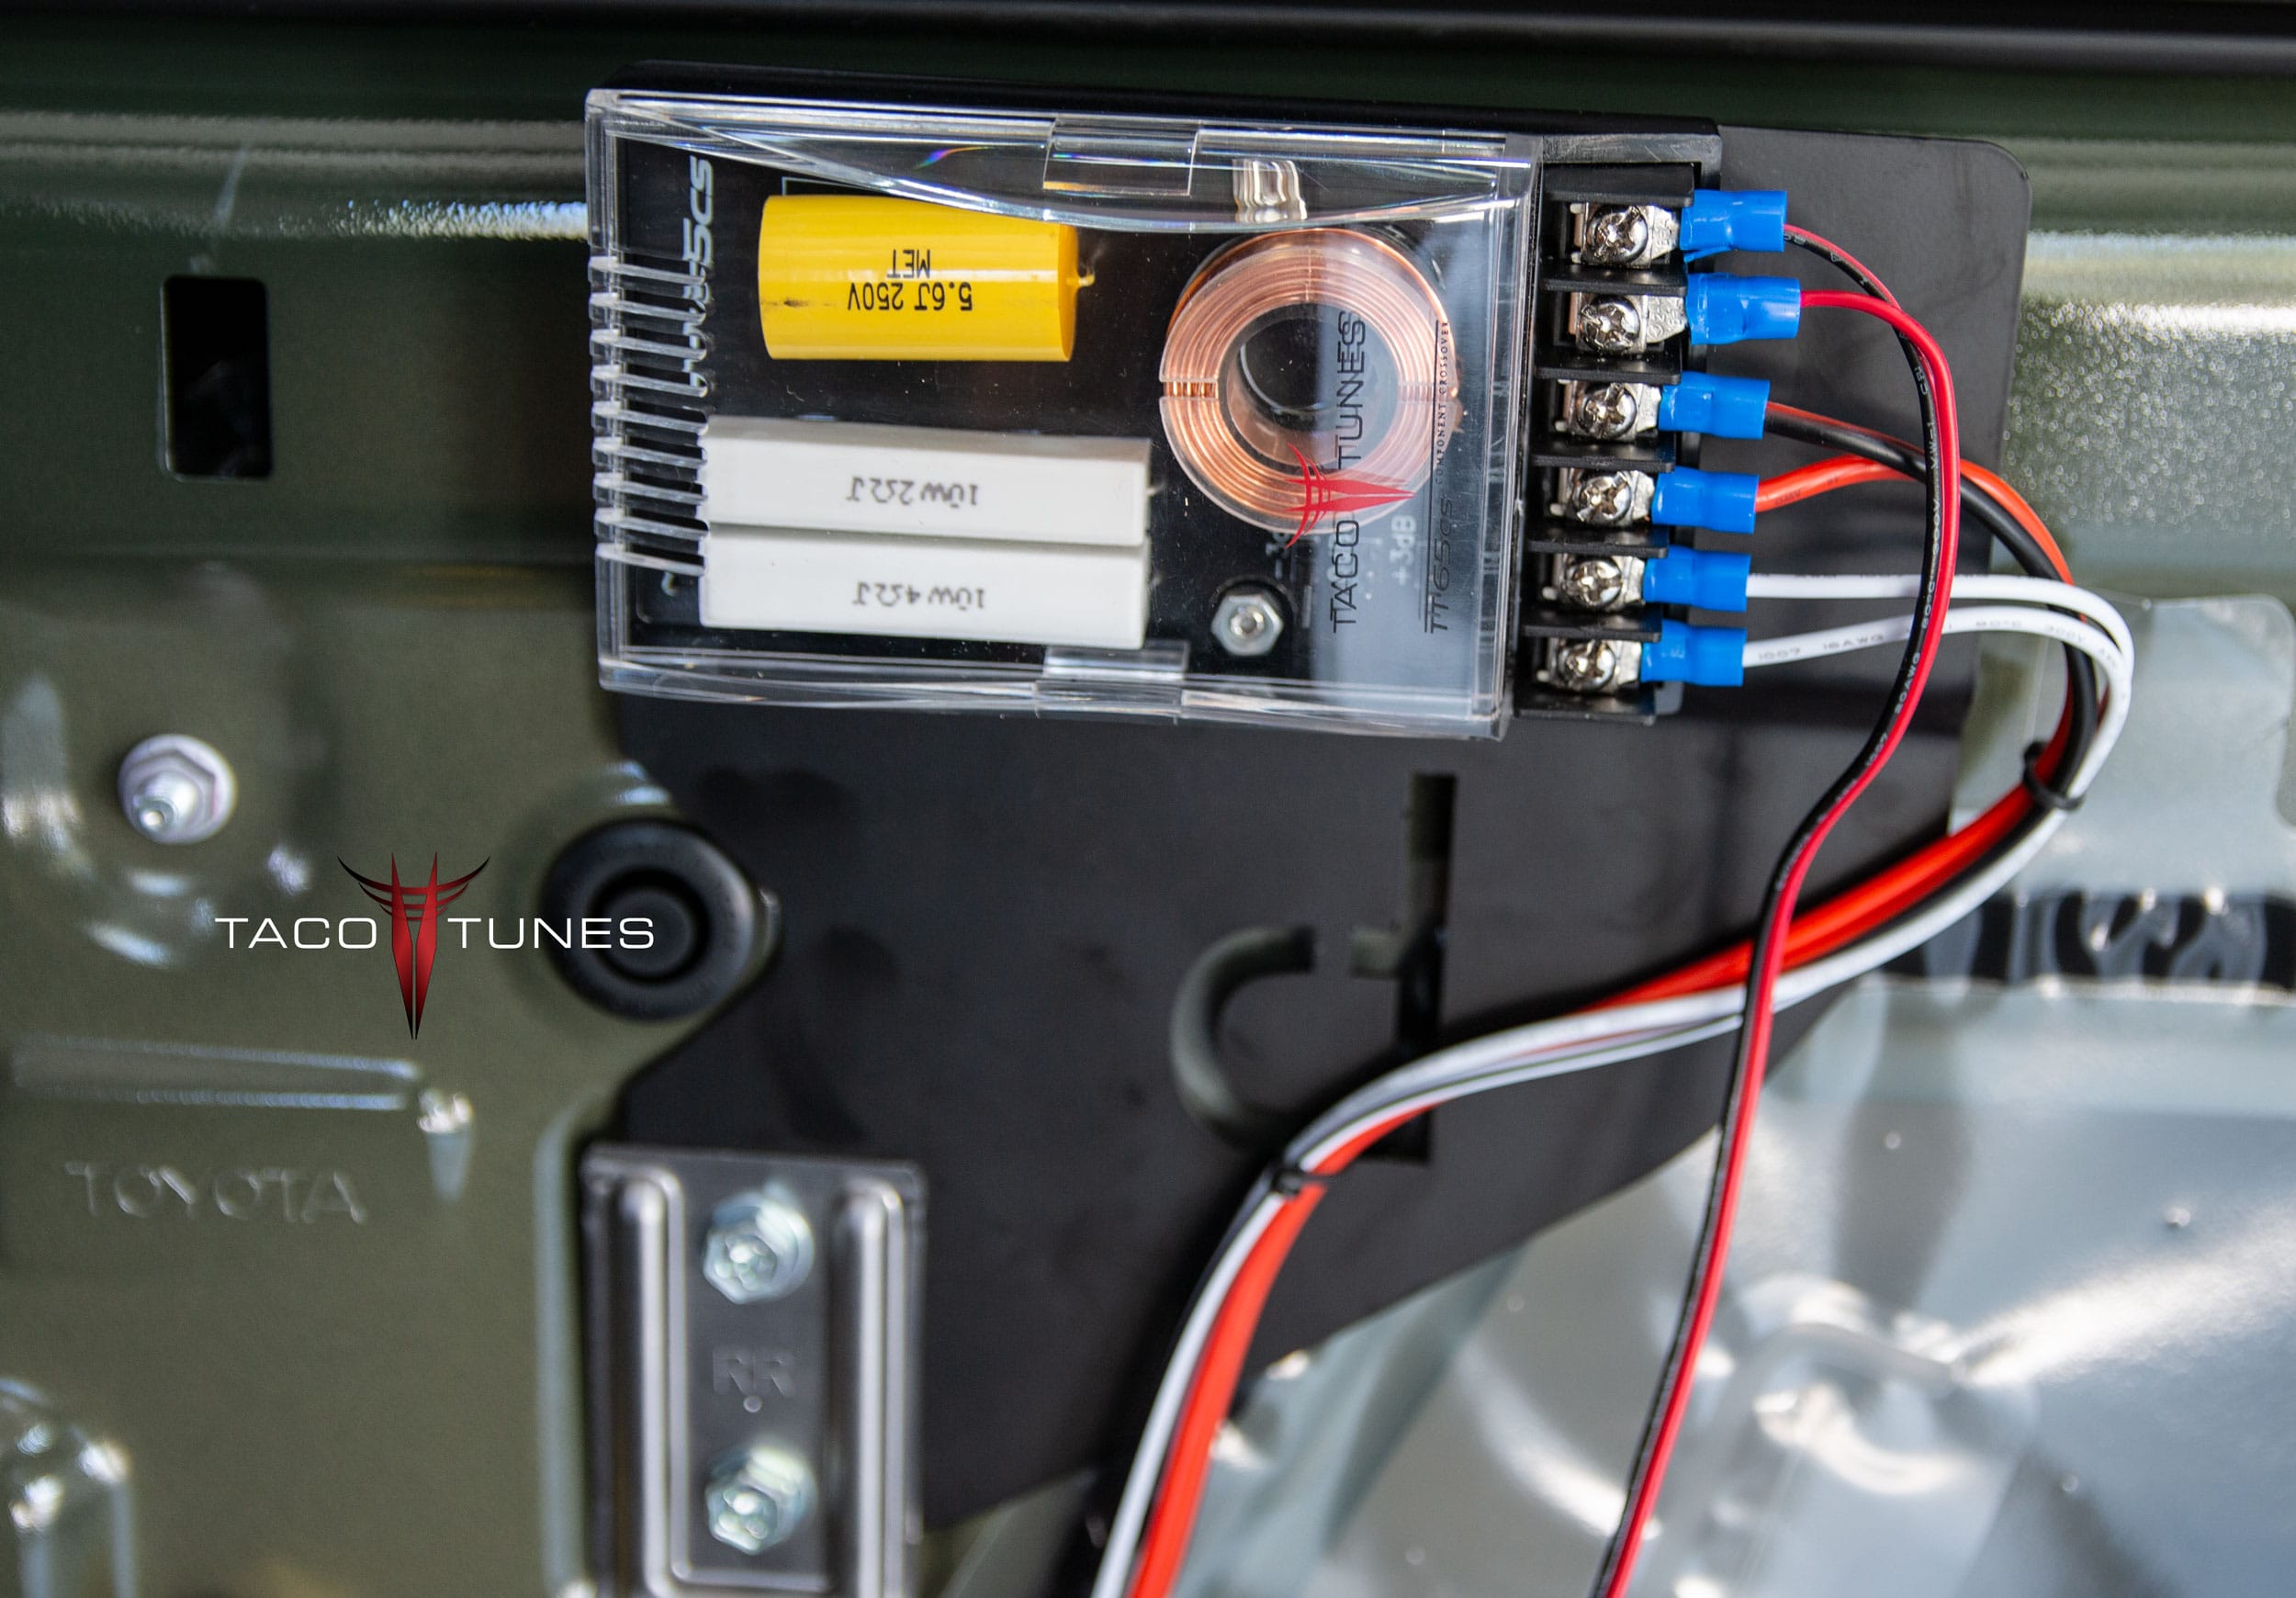
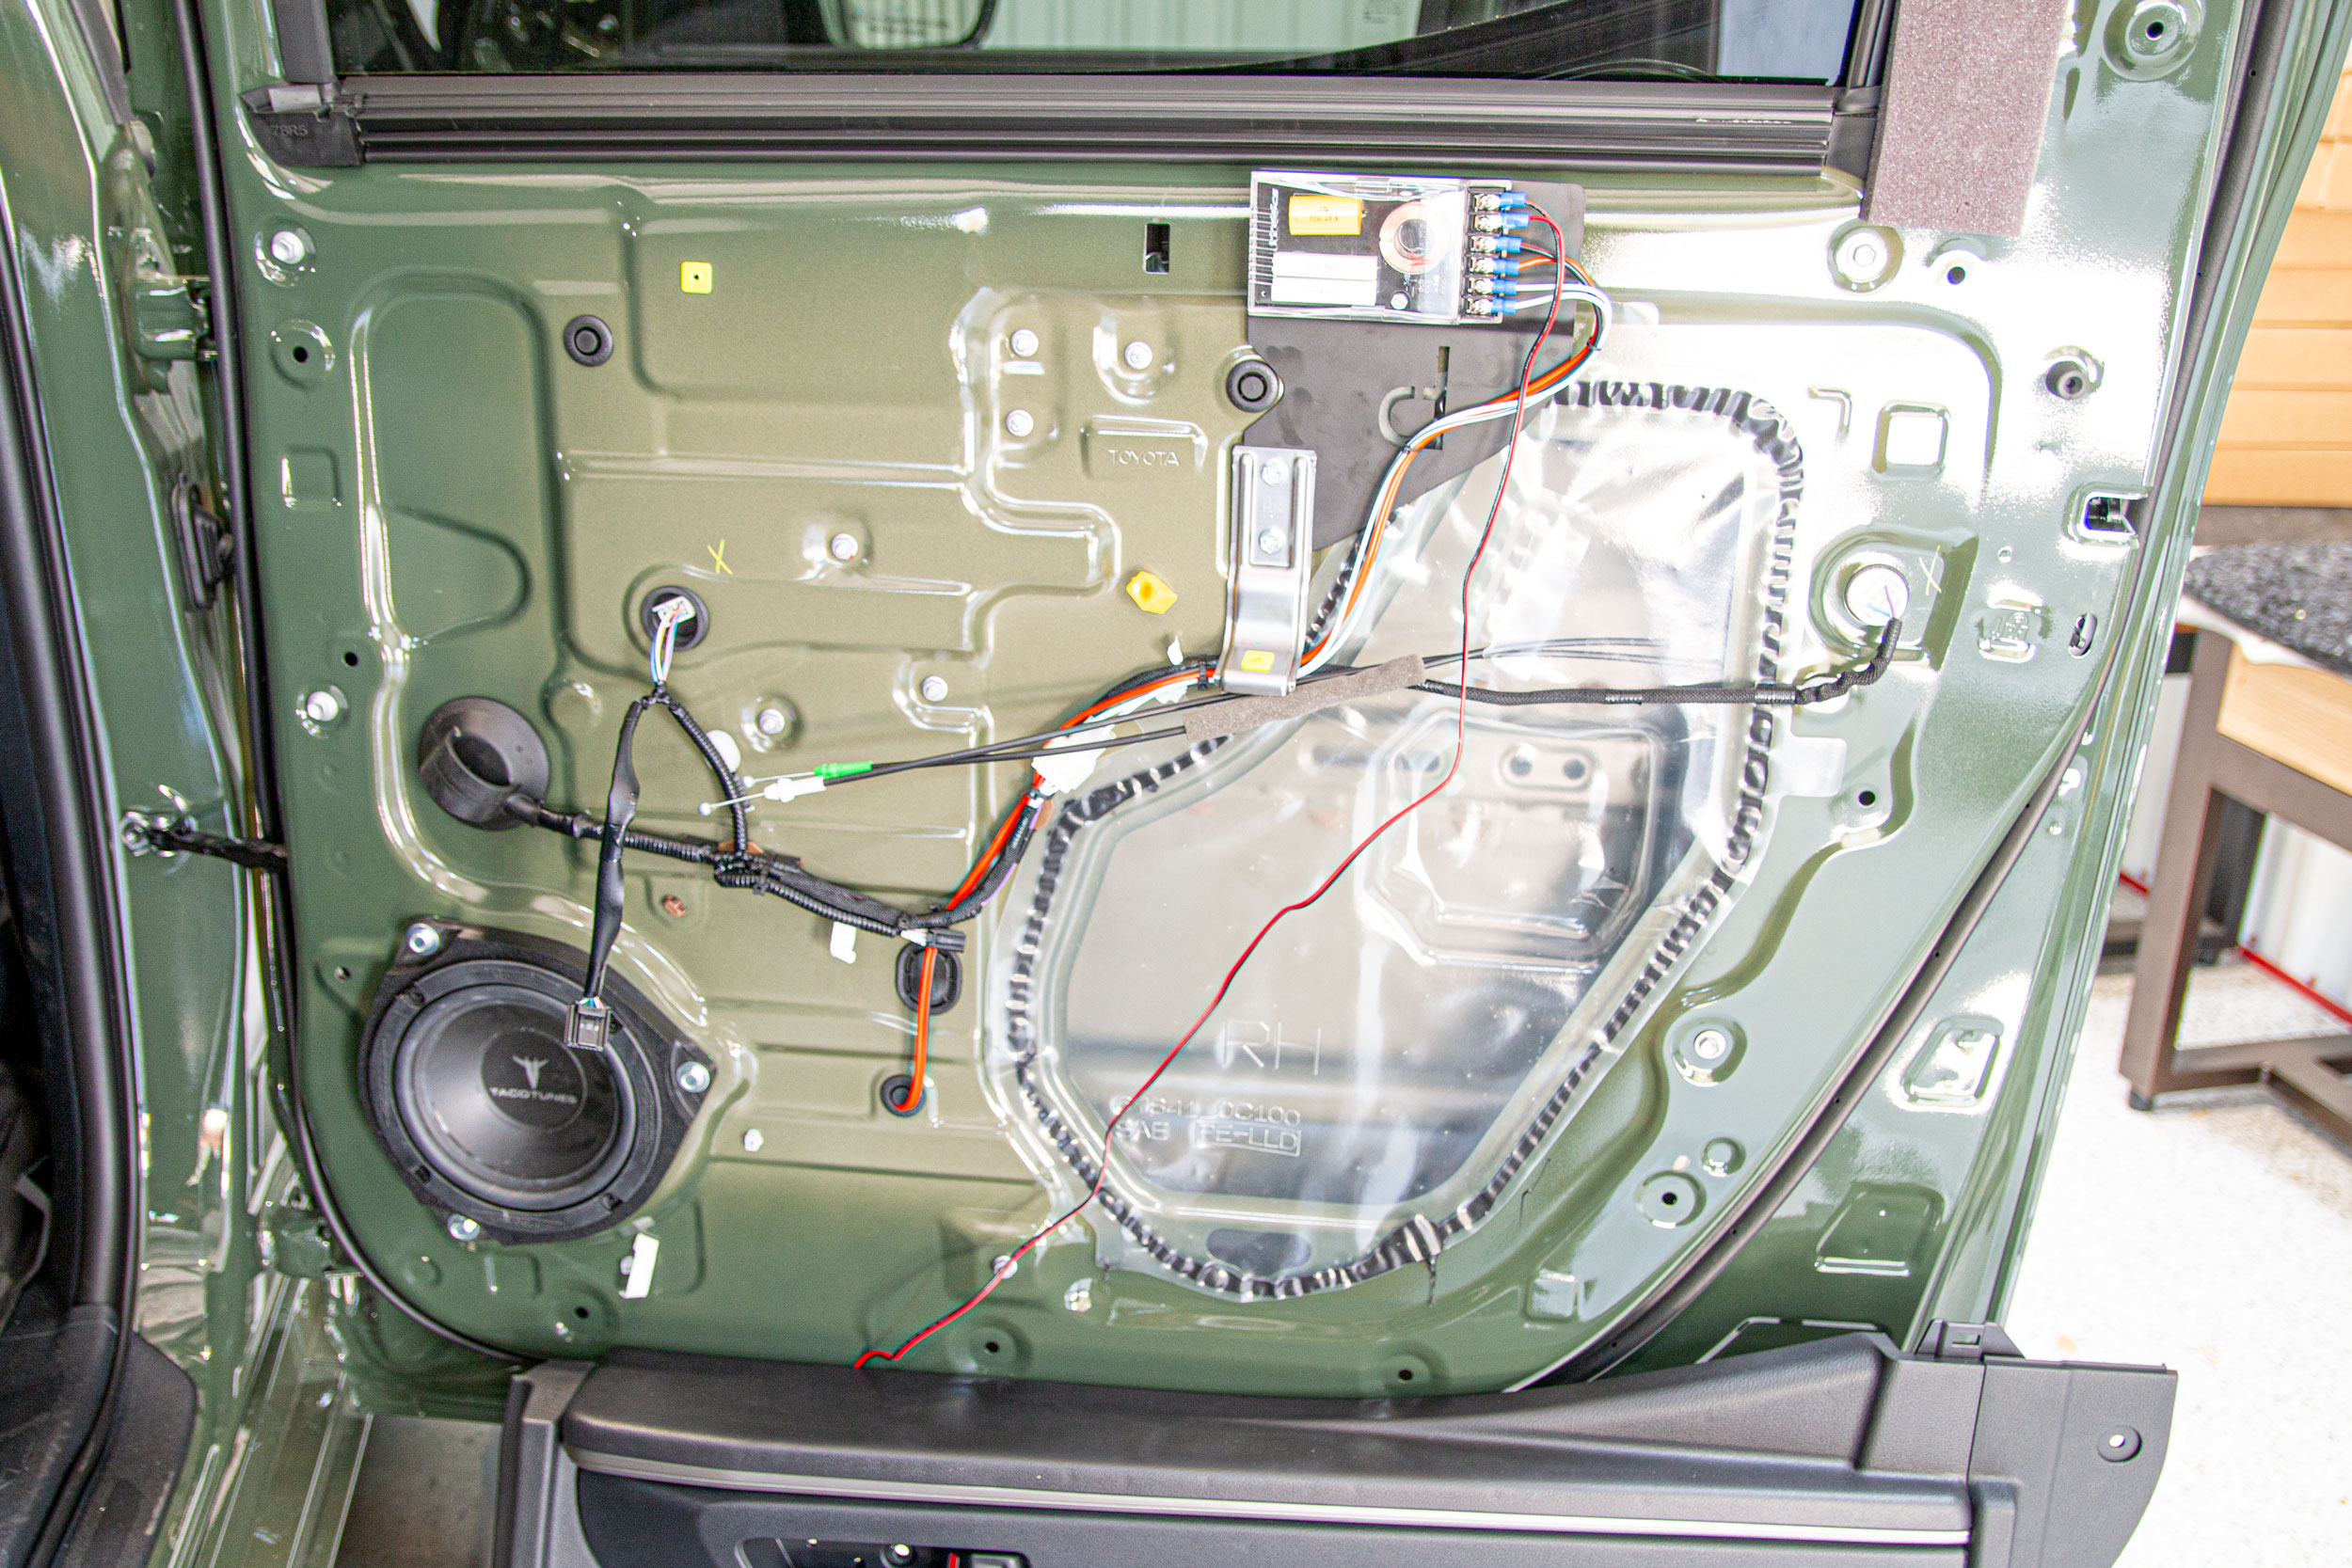
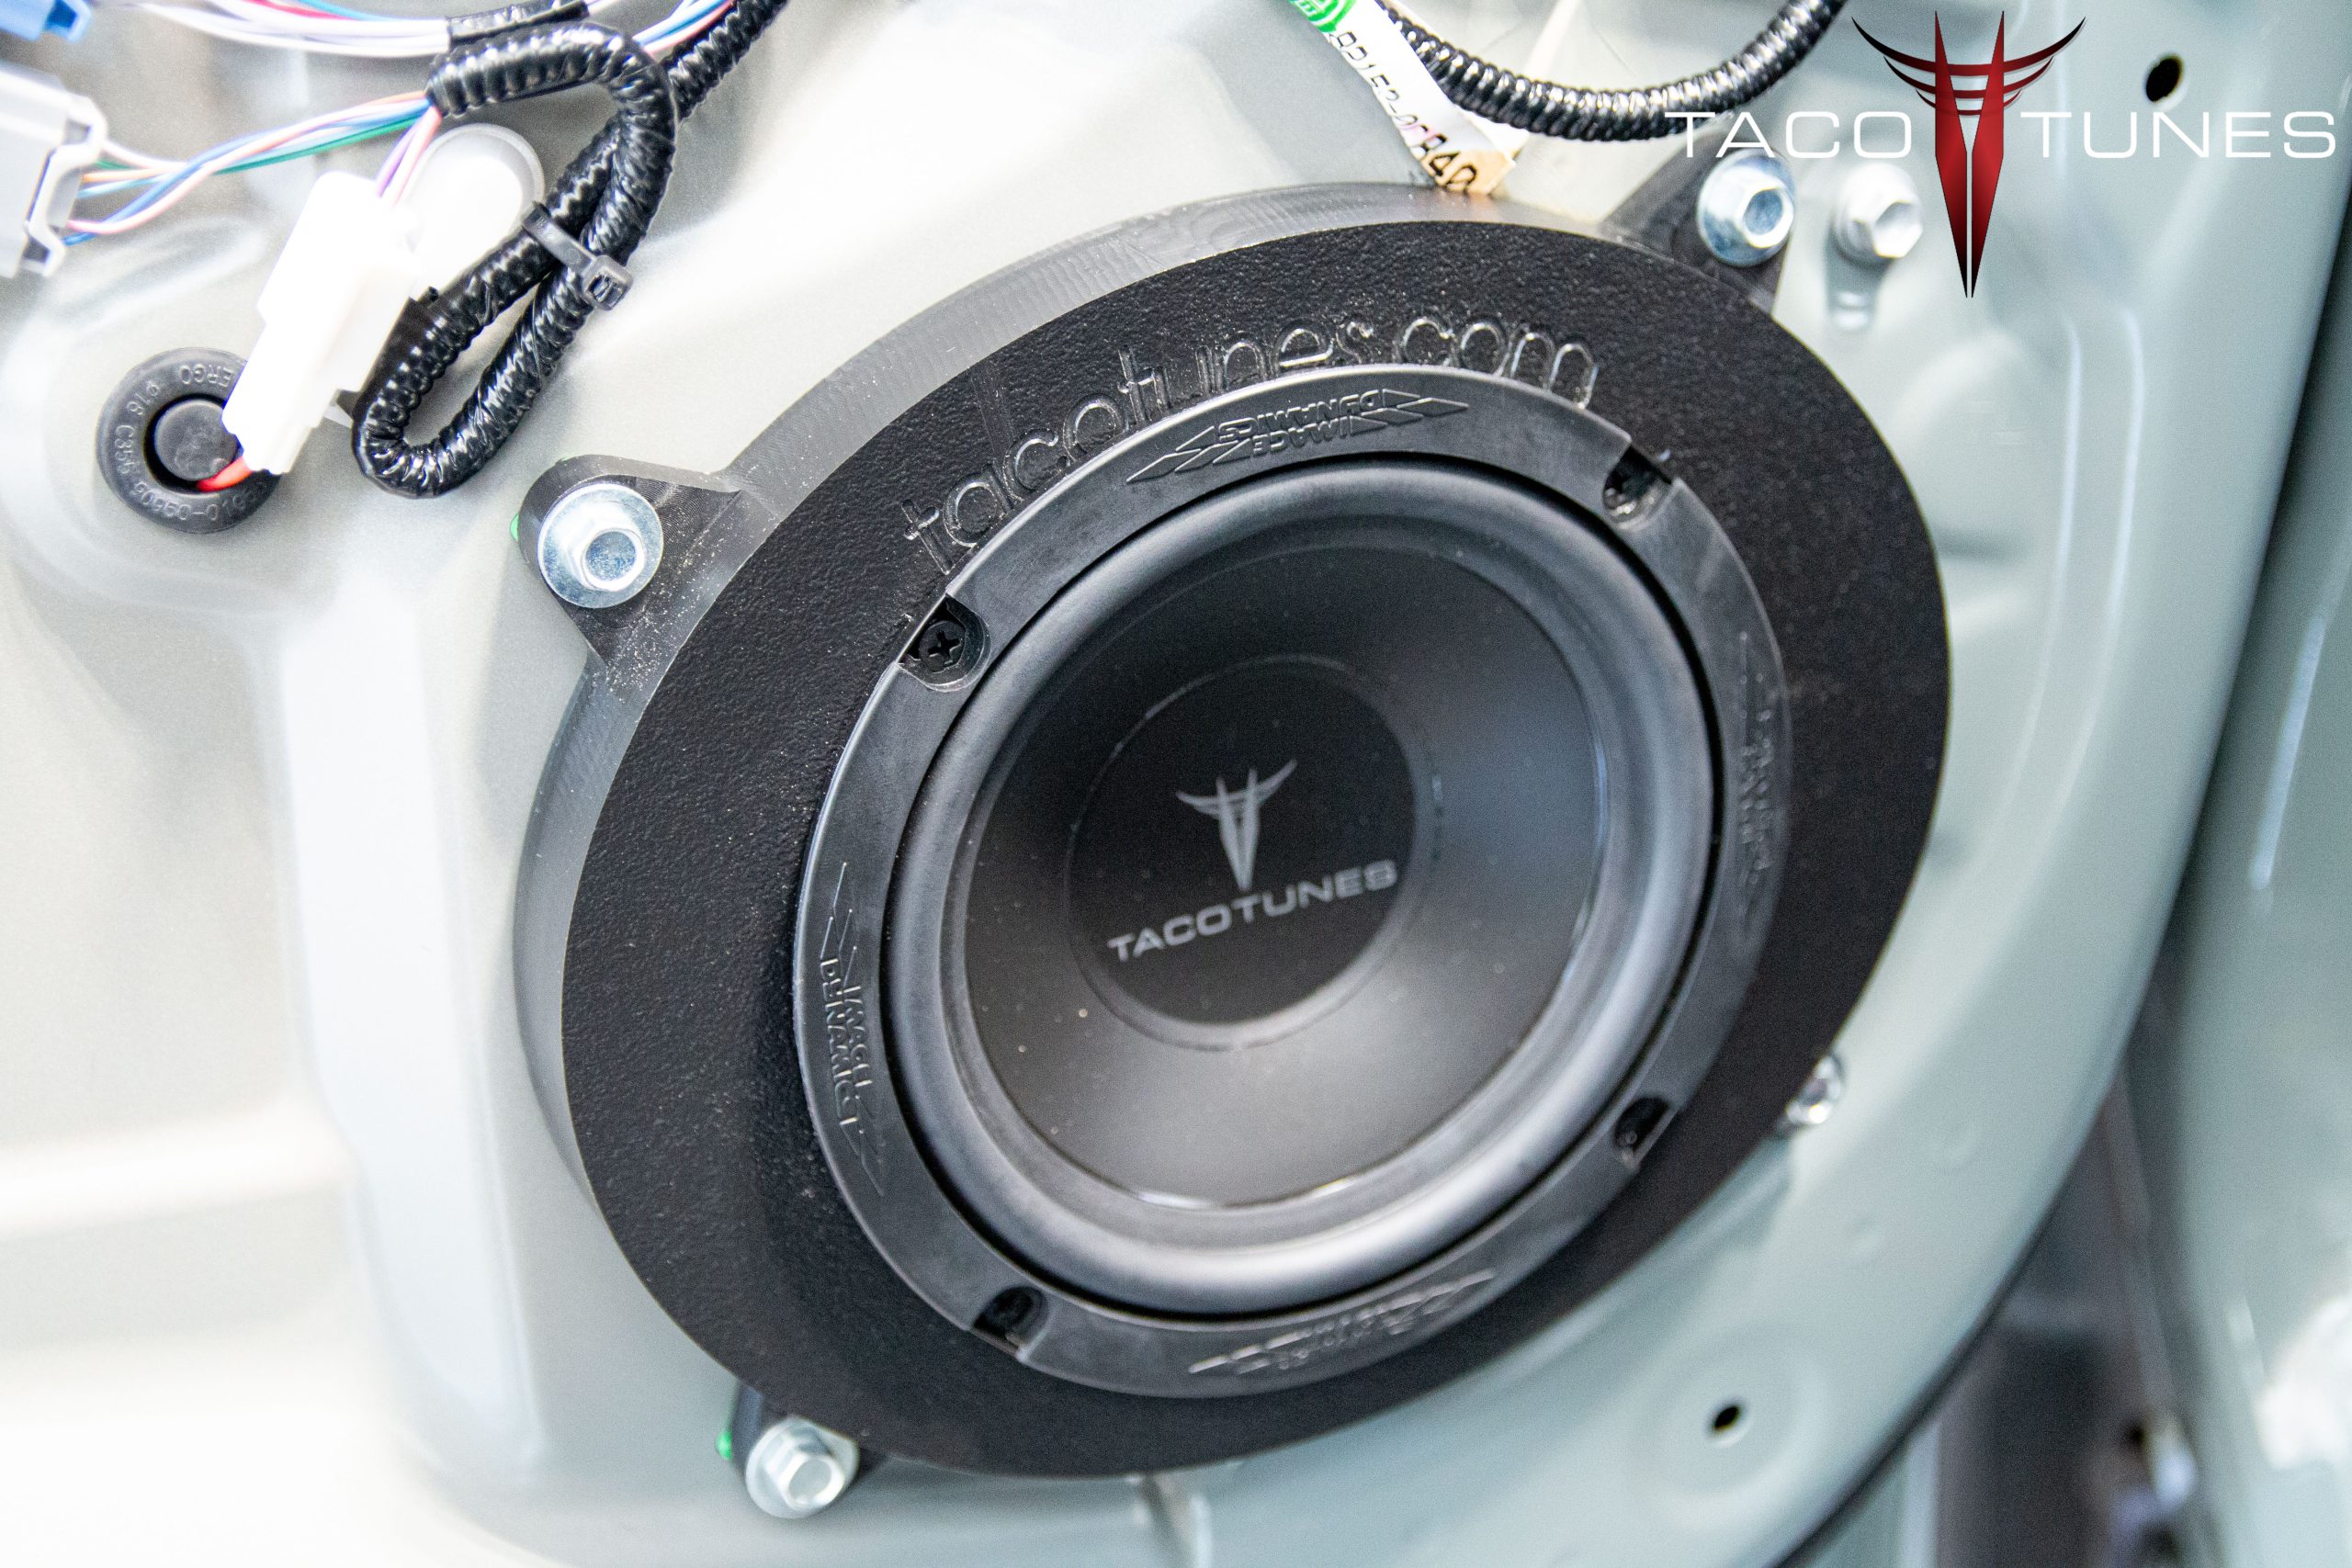
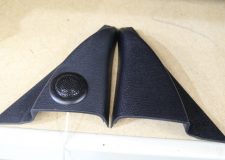
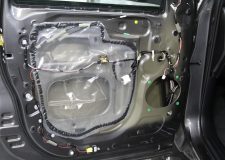
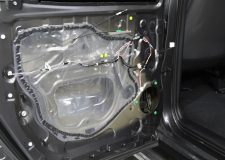
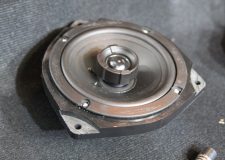
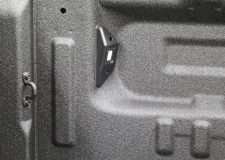
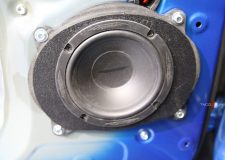
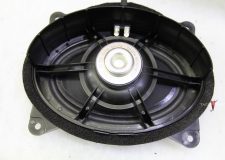
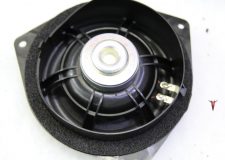
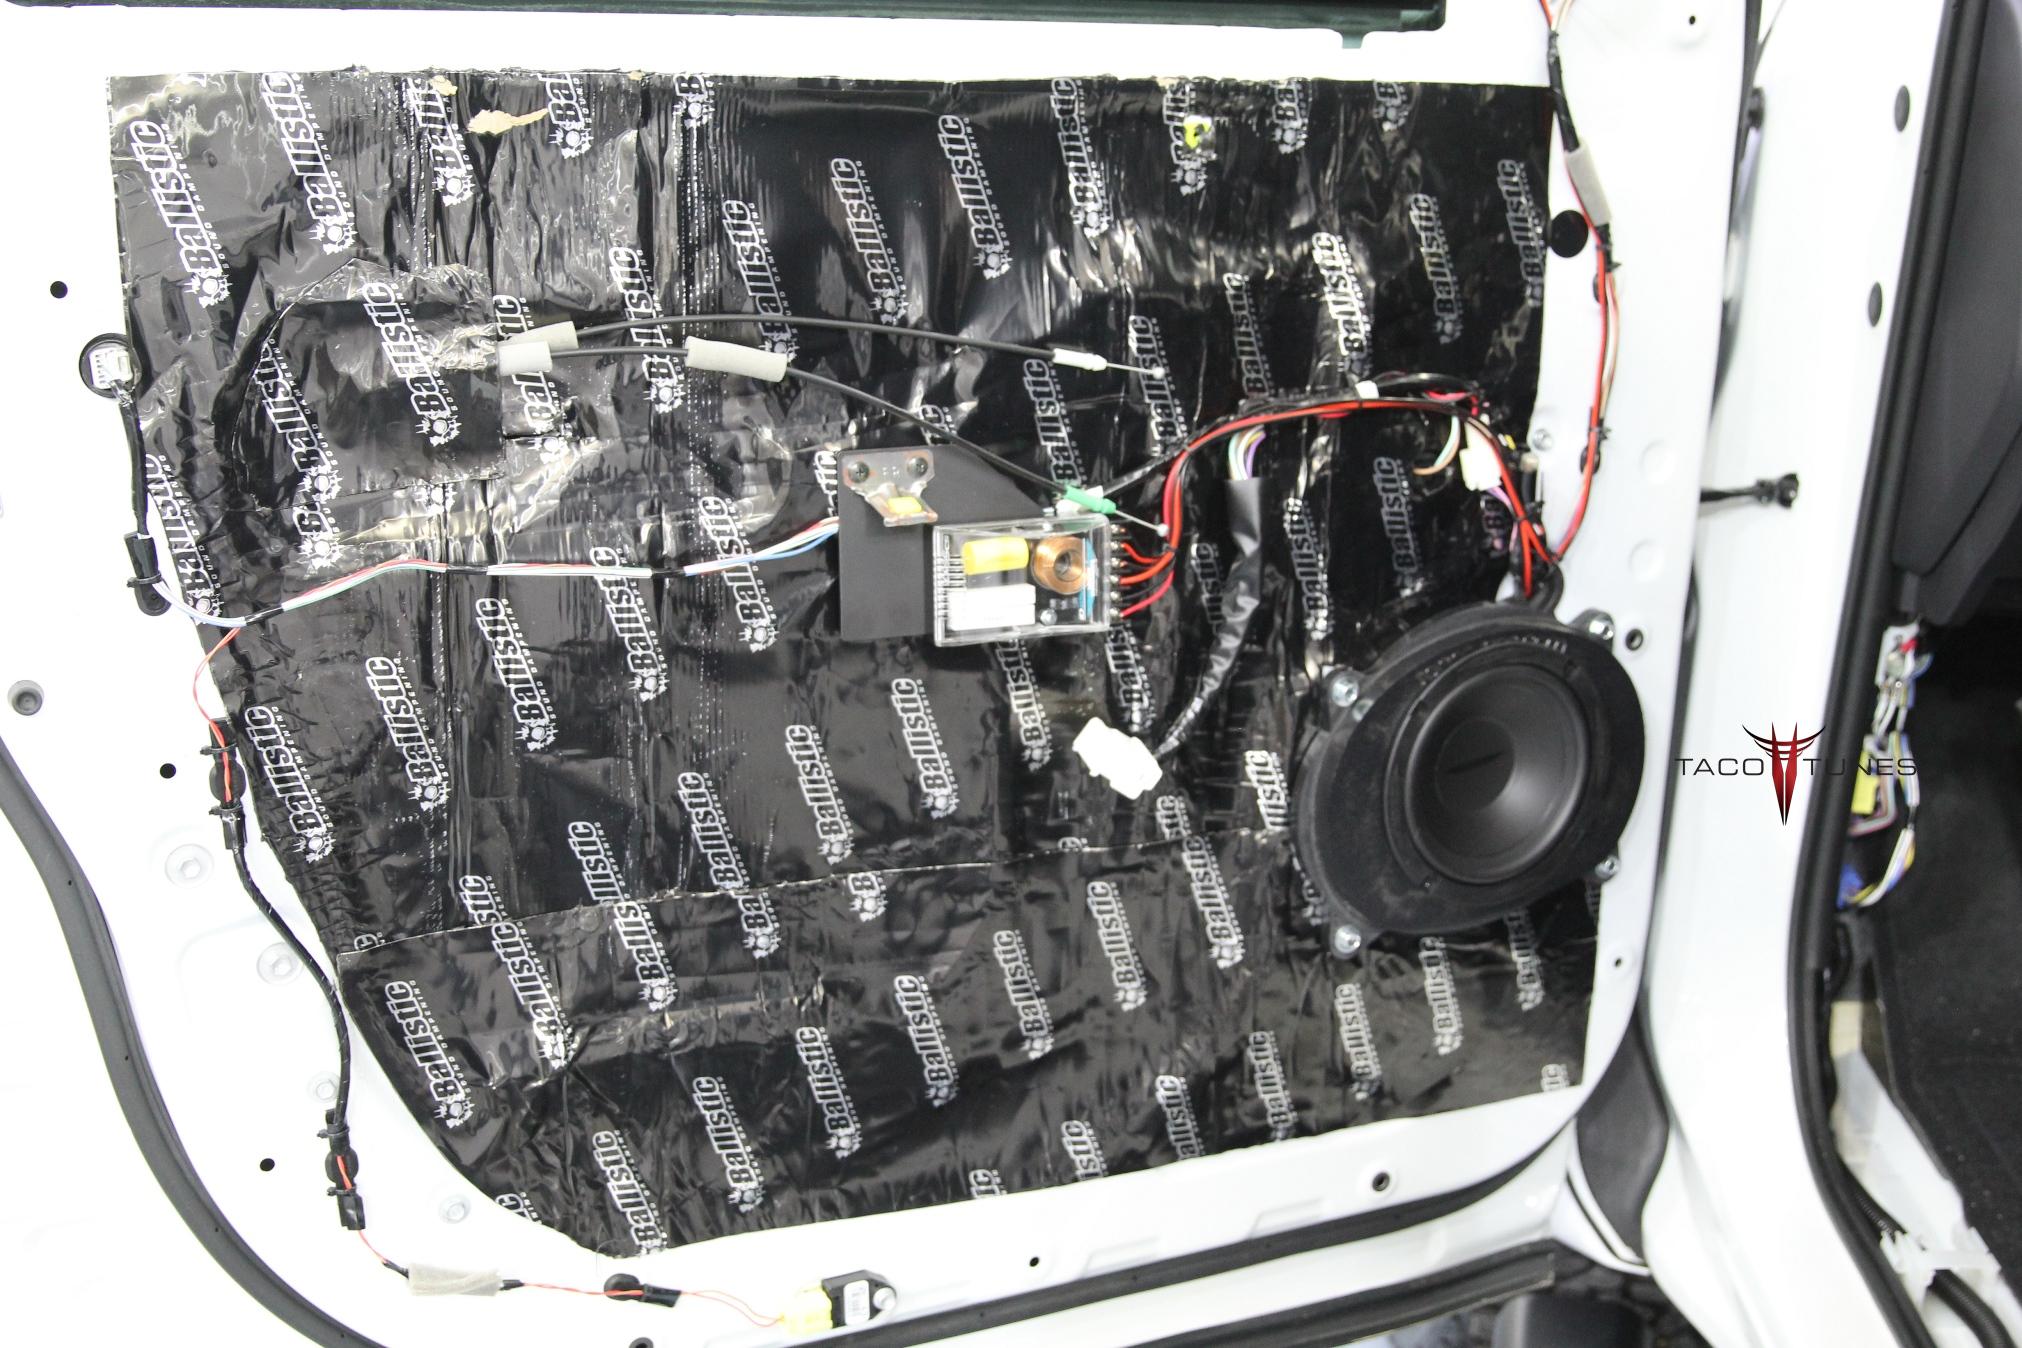
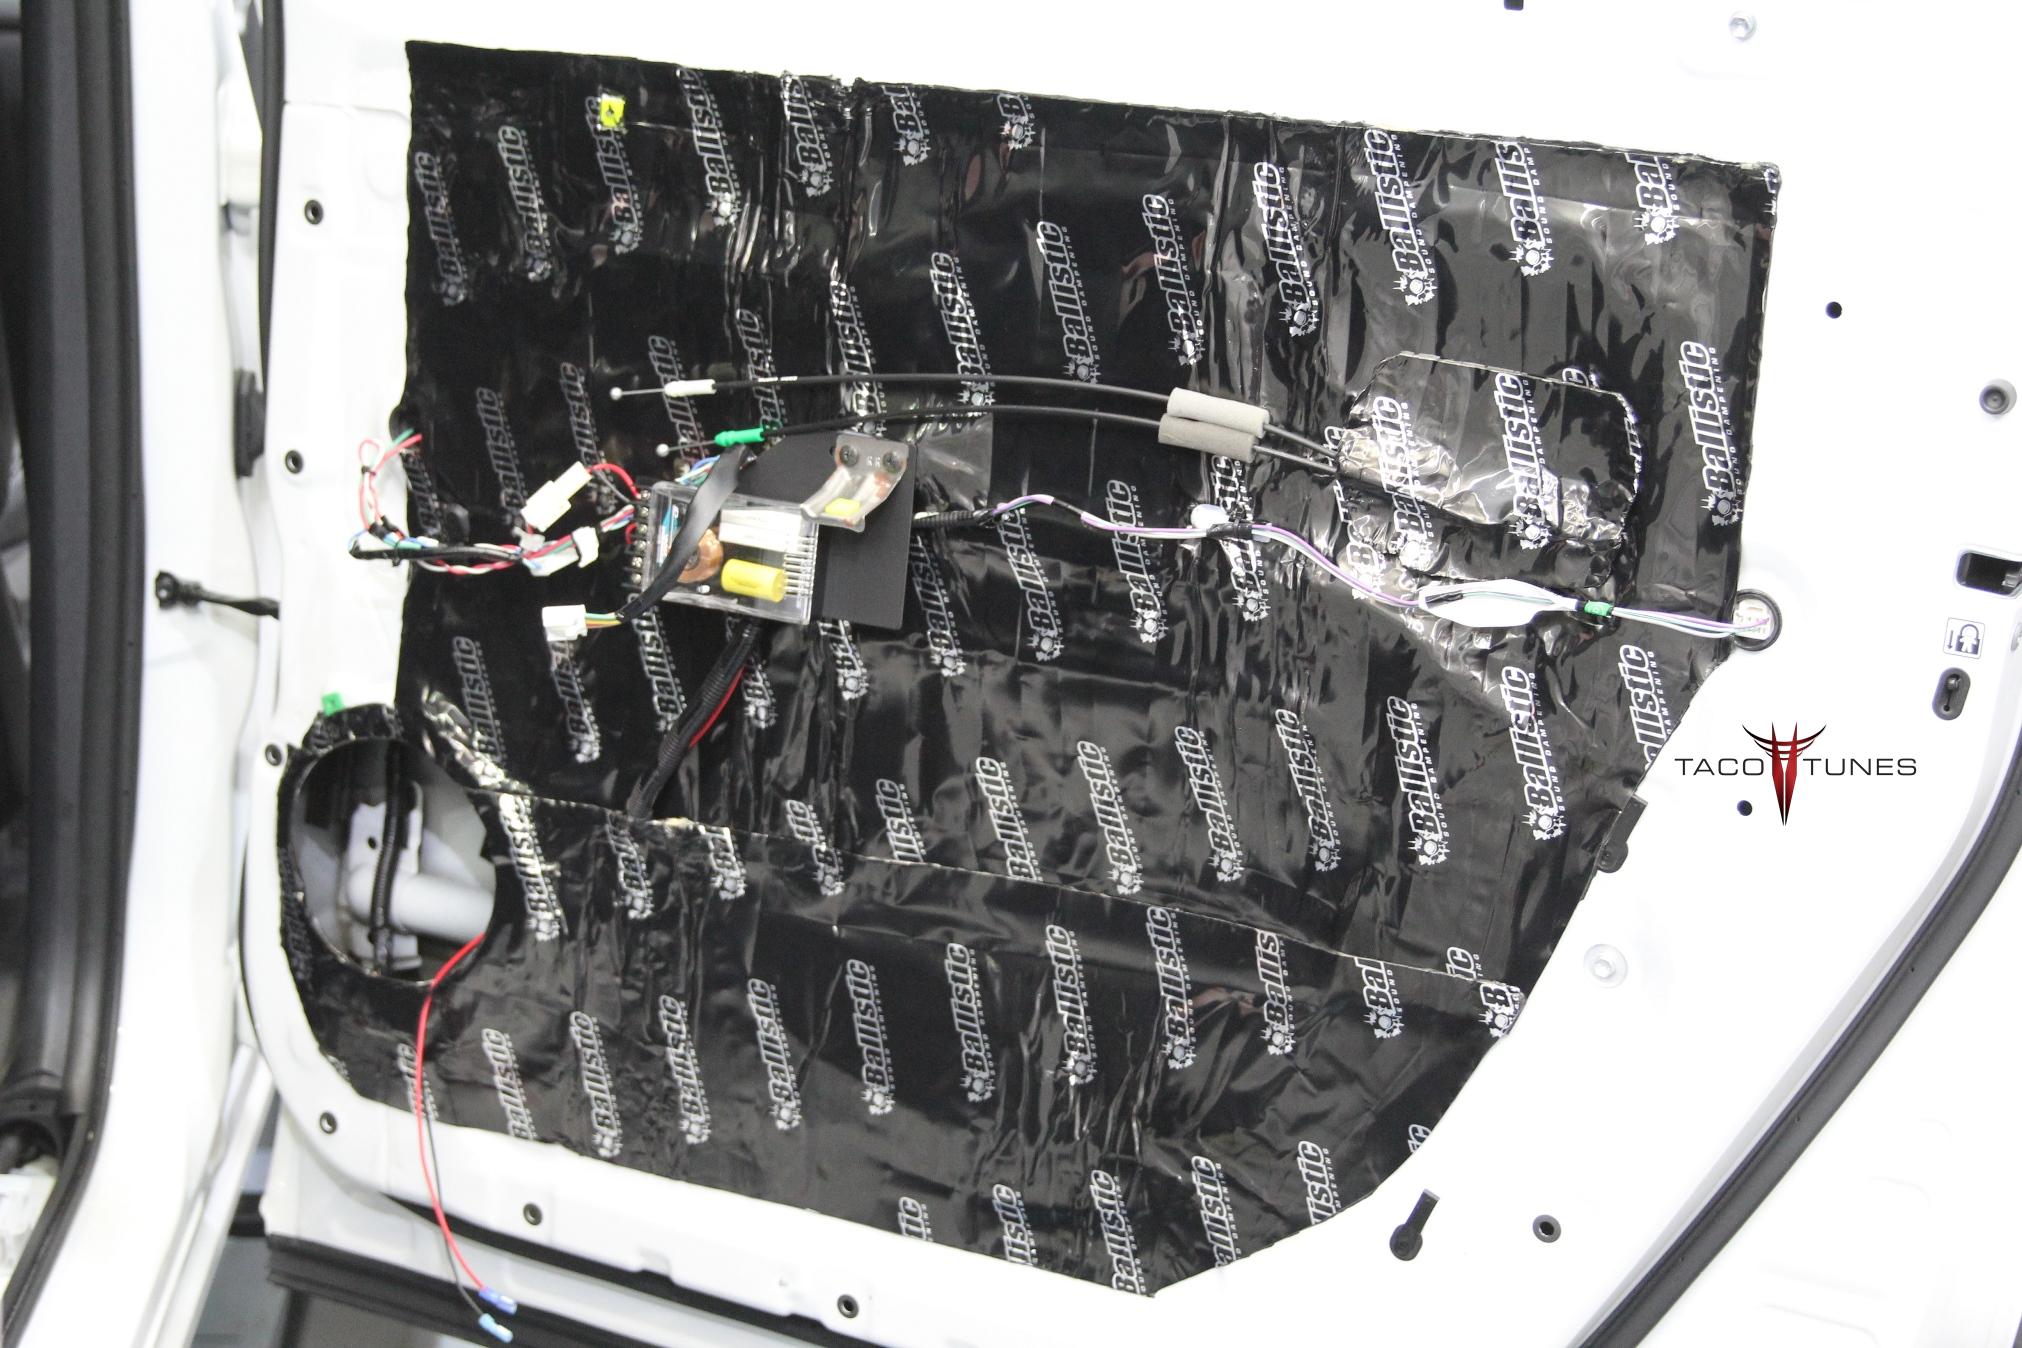
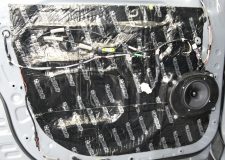
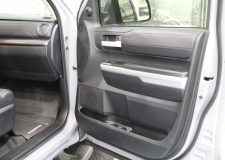
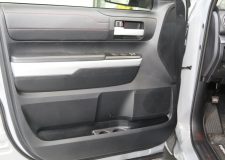
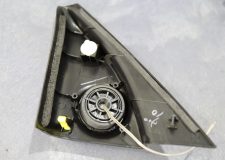
Tundra rear door crossover mount, mid bass driver & tweeter
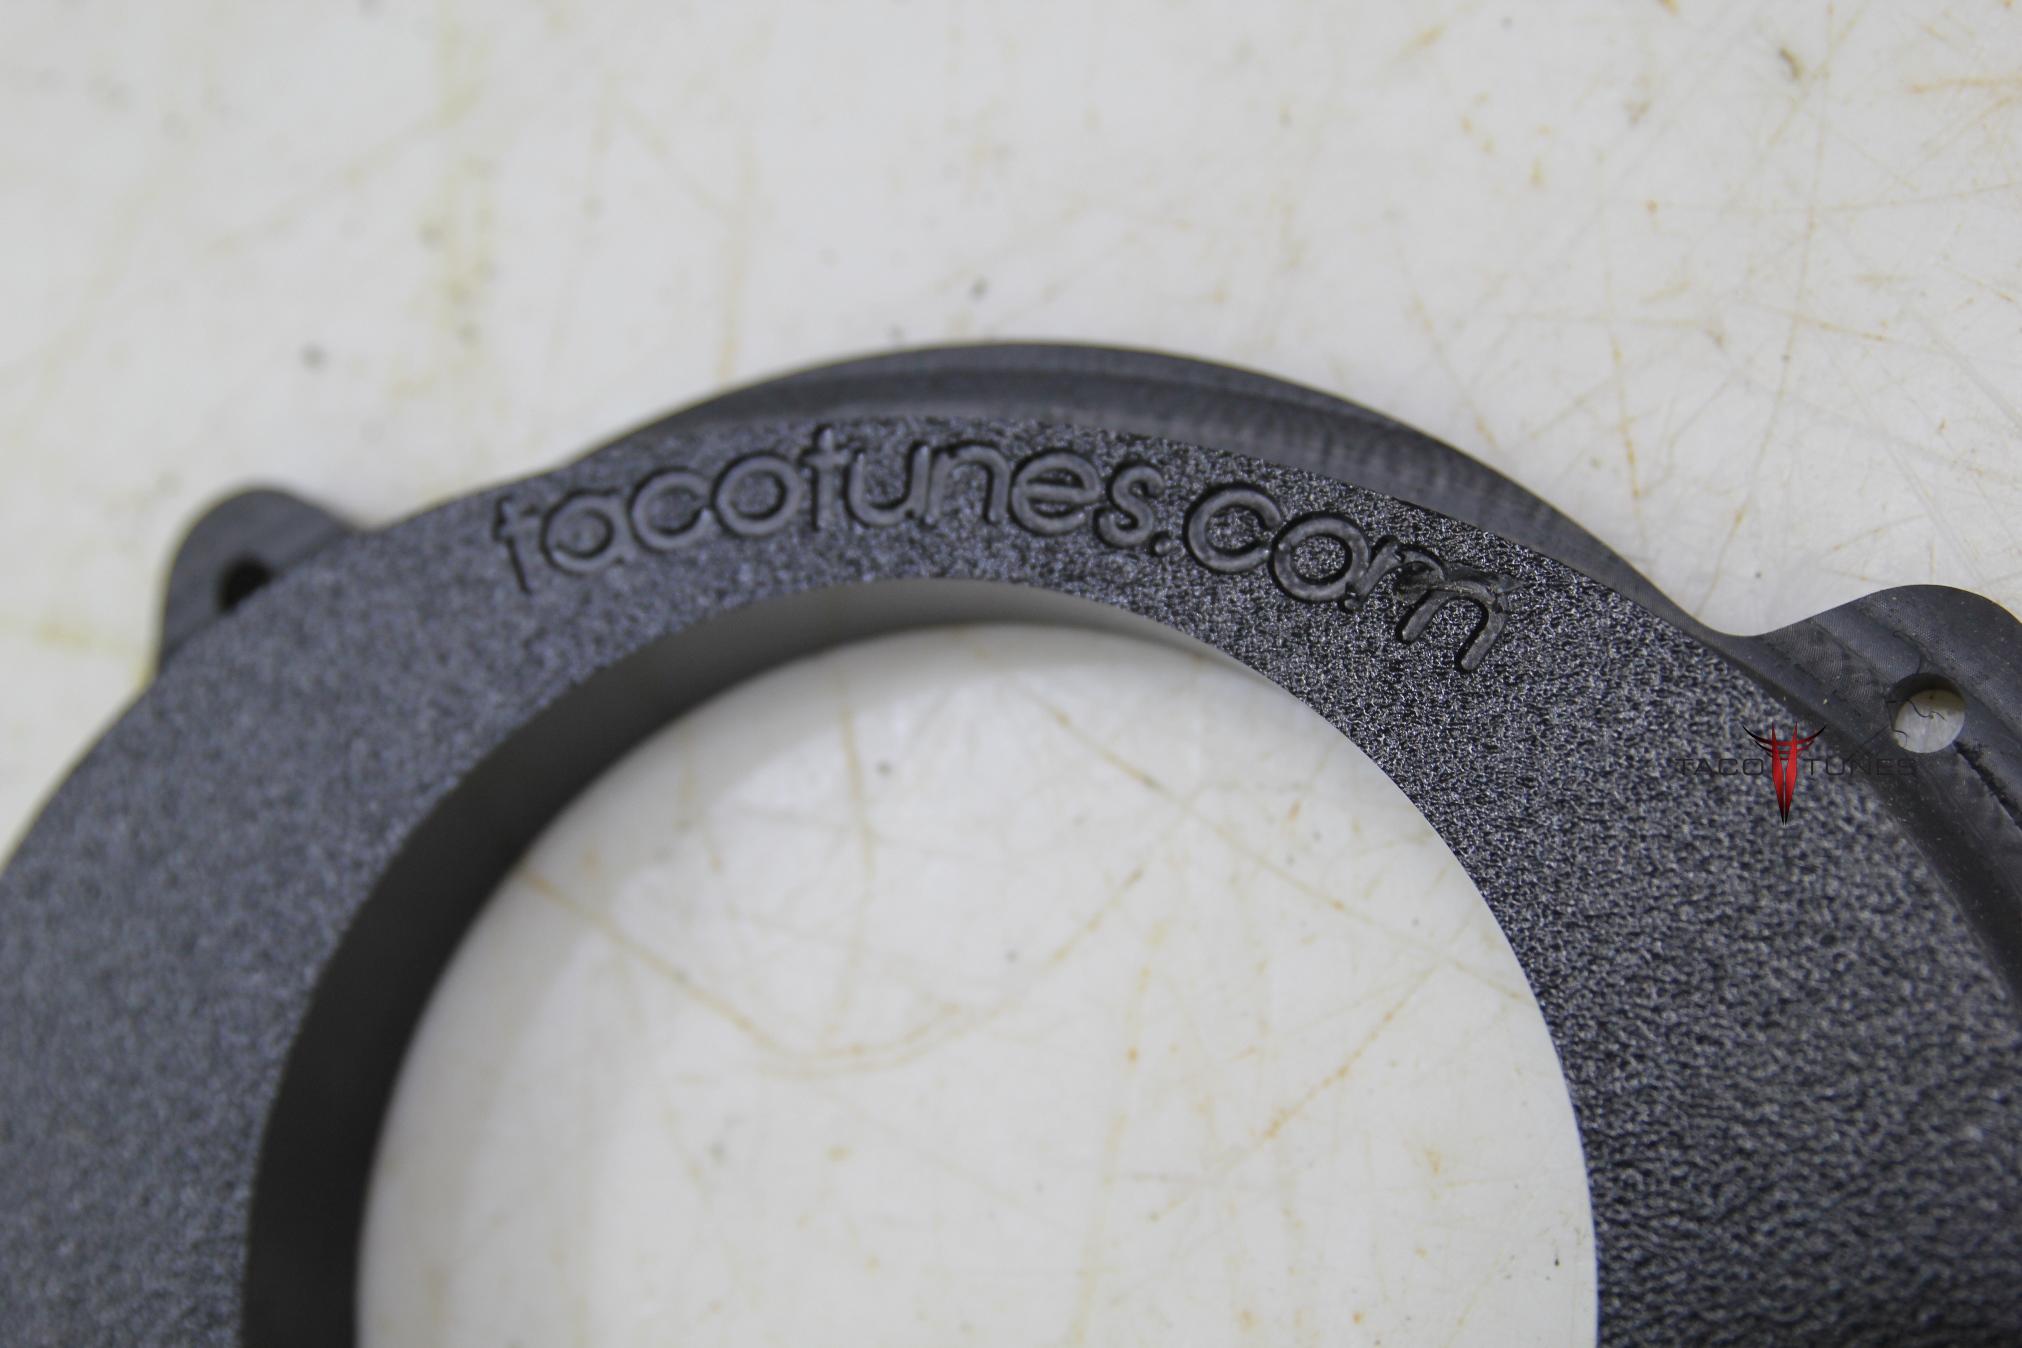
tacotunes true component speakers for your 2022+ Toyota Tundra
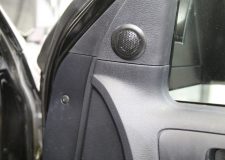
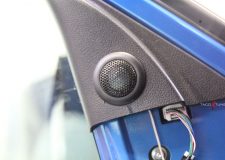
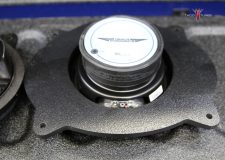
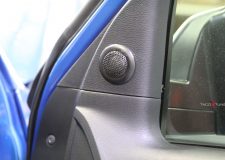
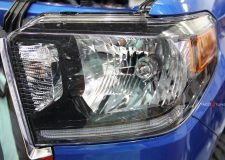
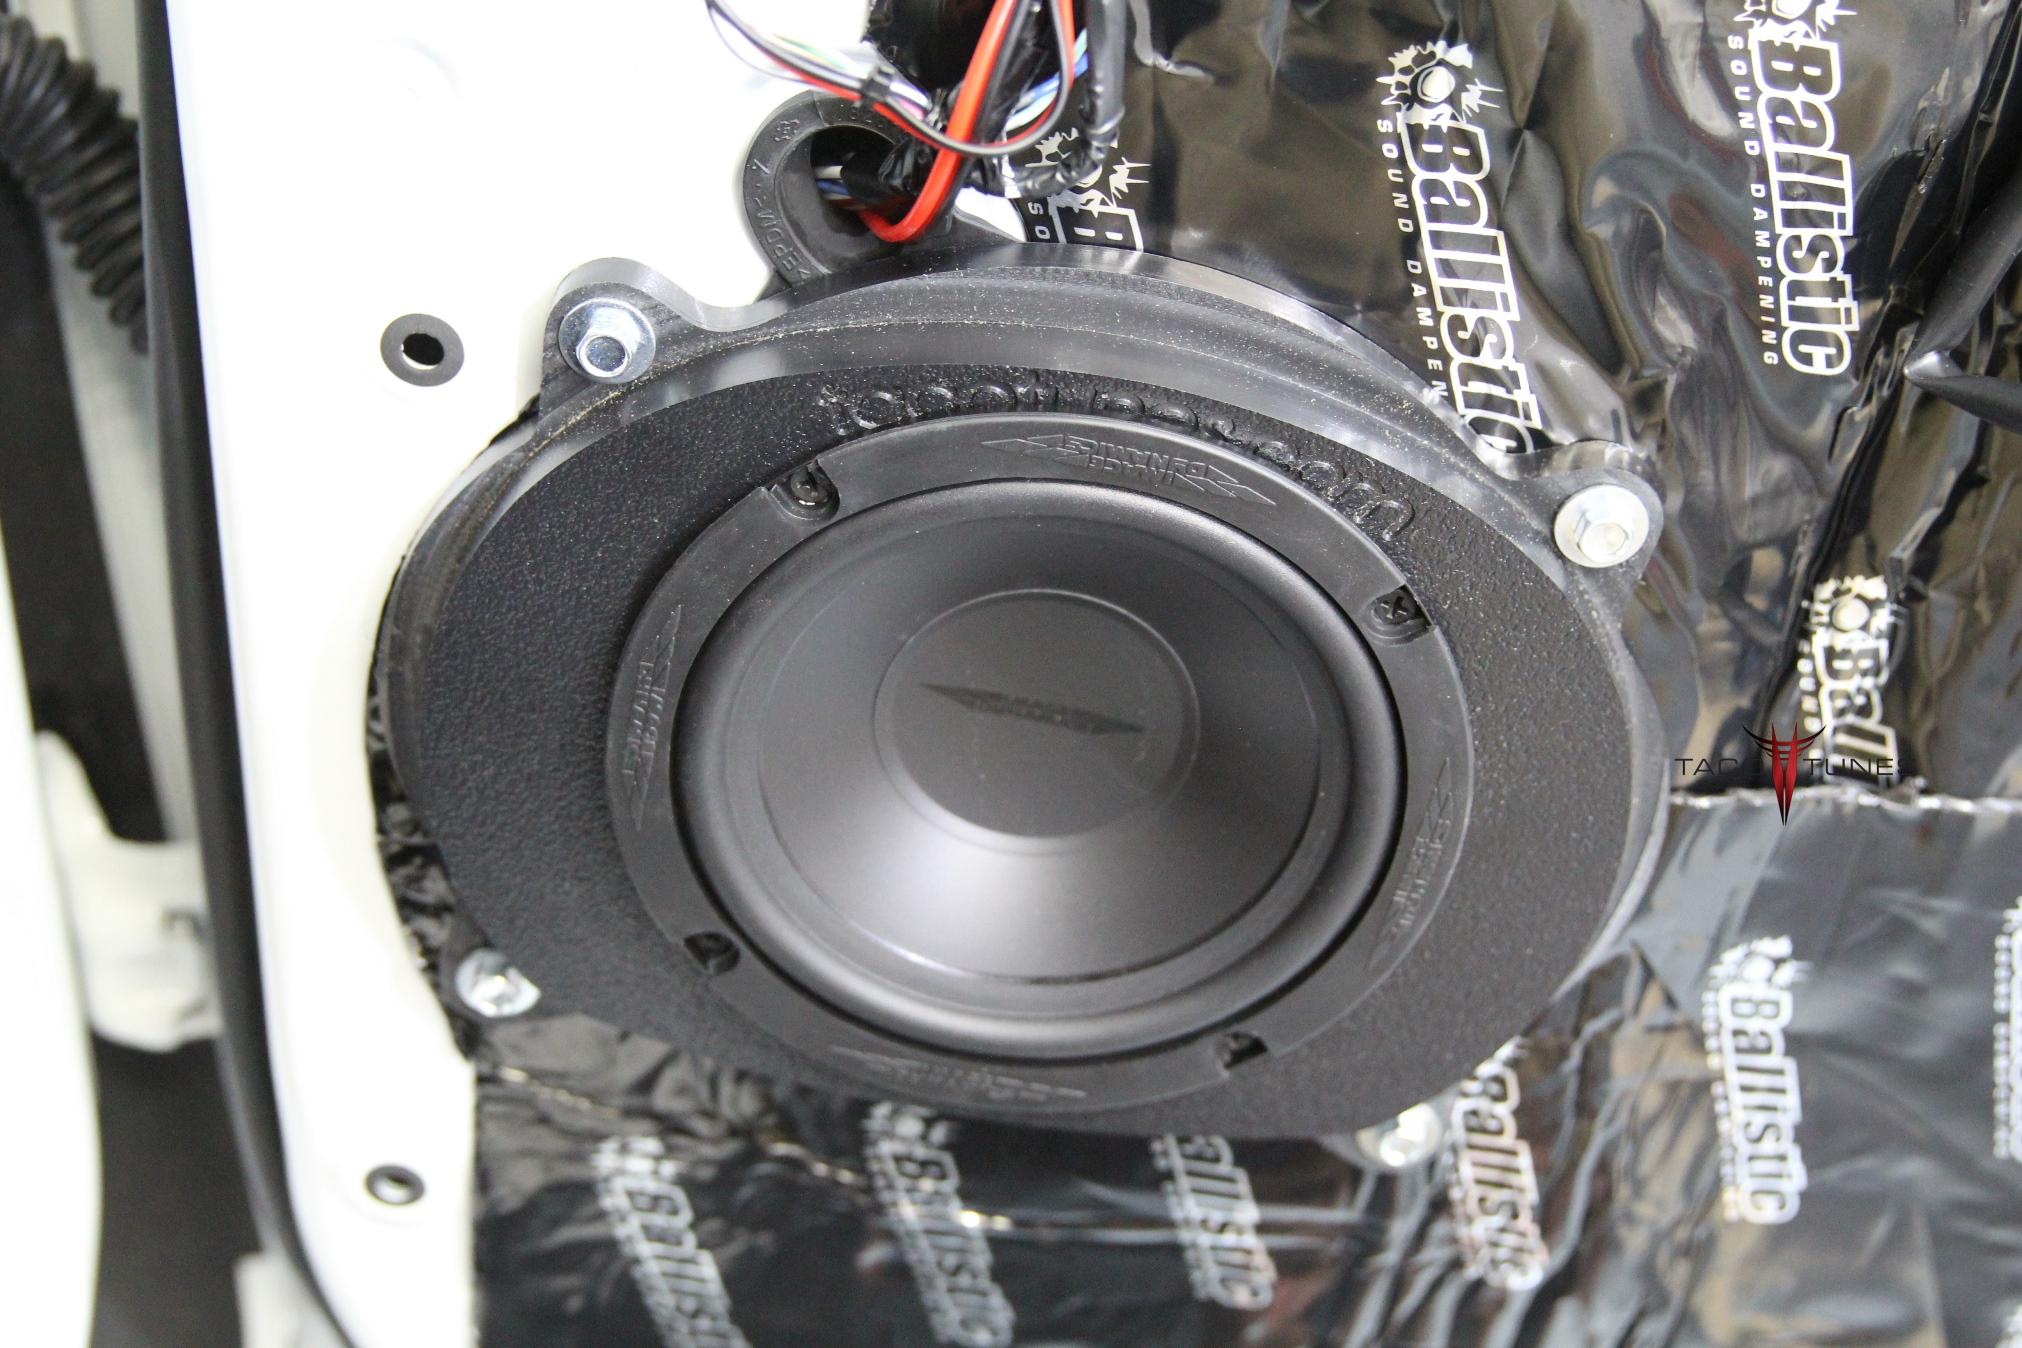
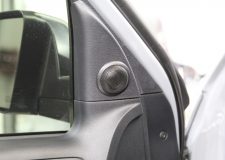
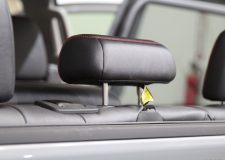
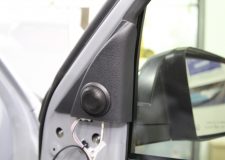
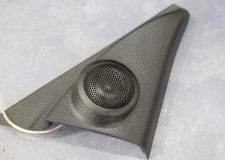
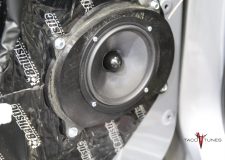
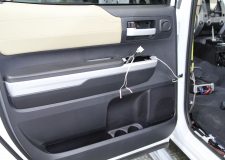
New Tweeters installed on door panel.
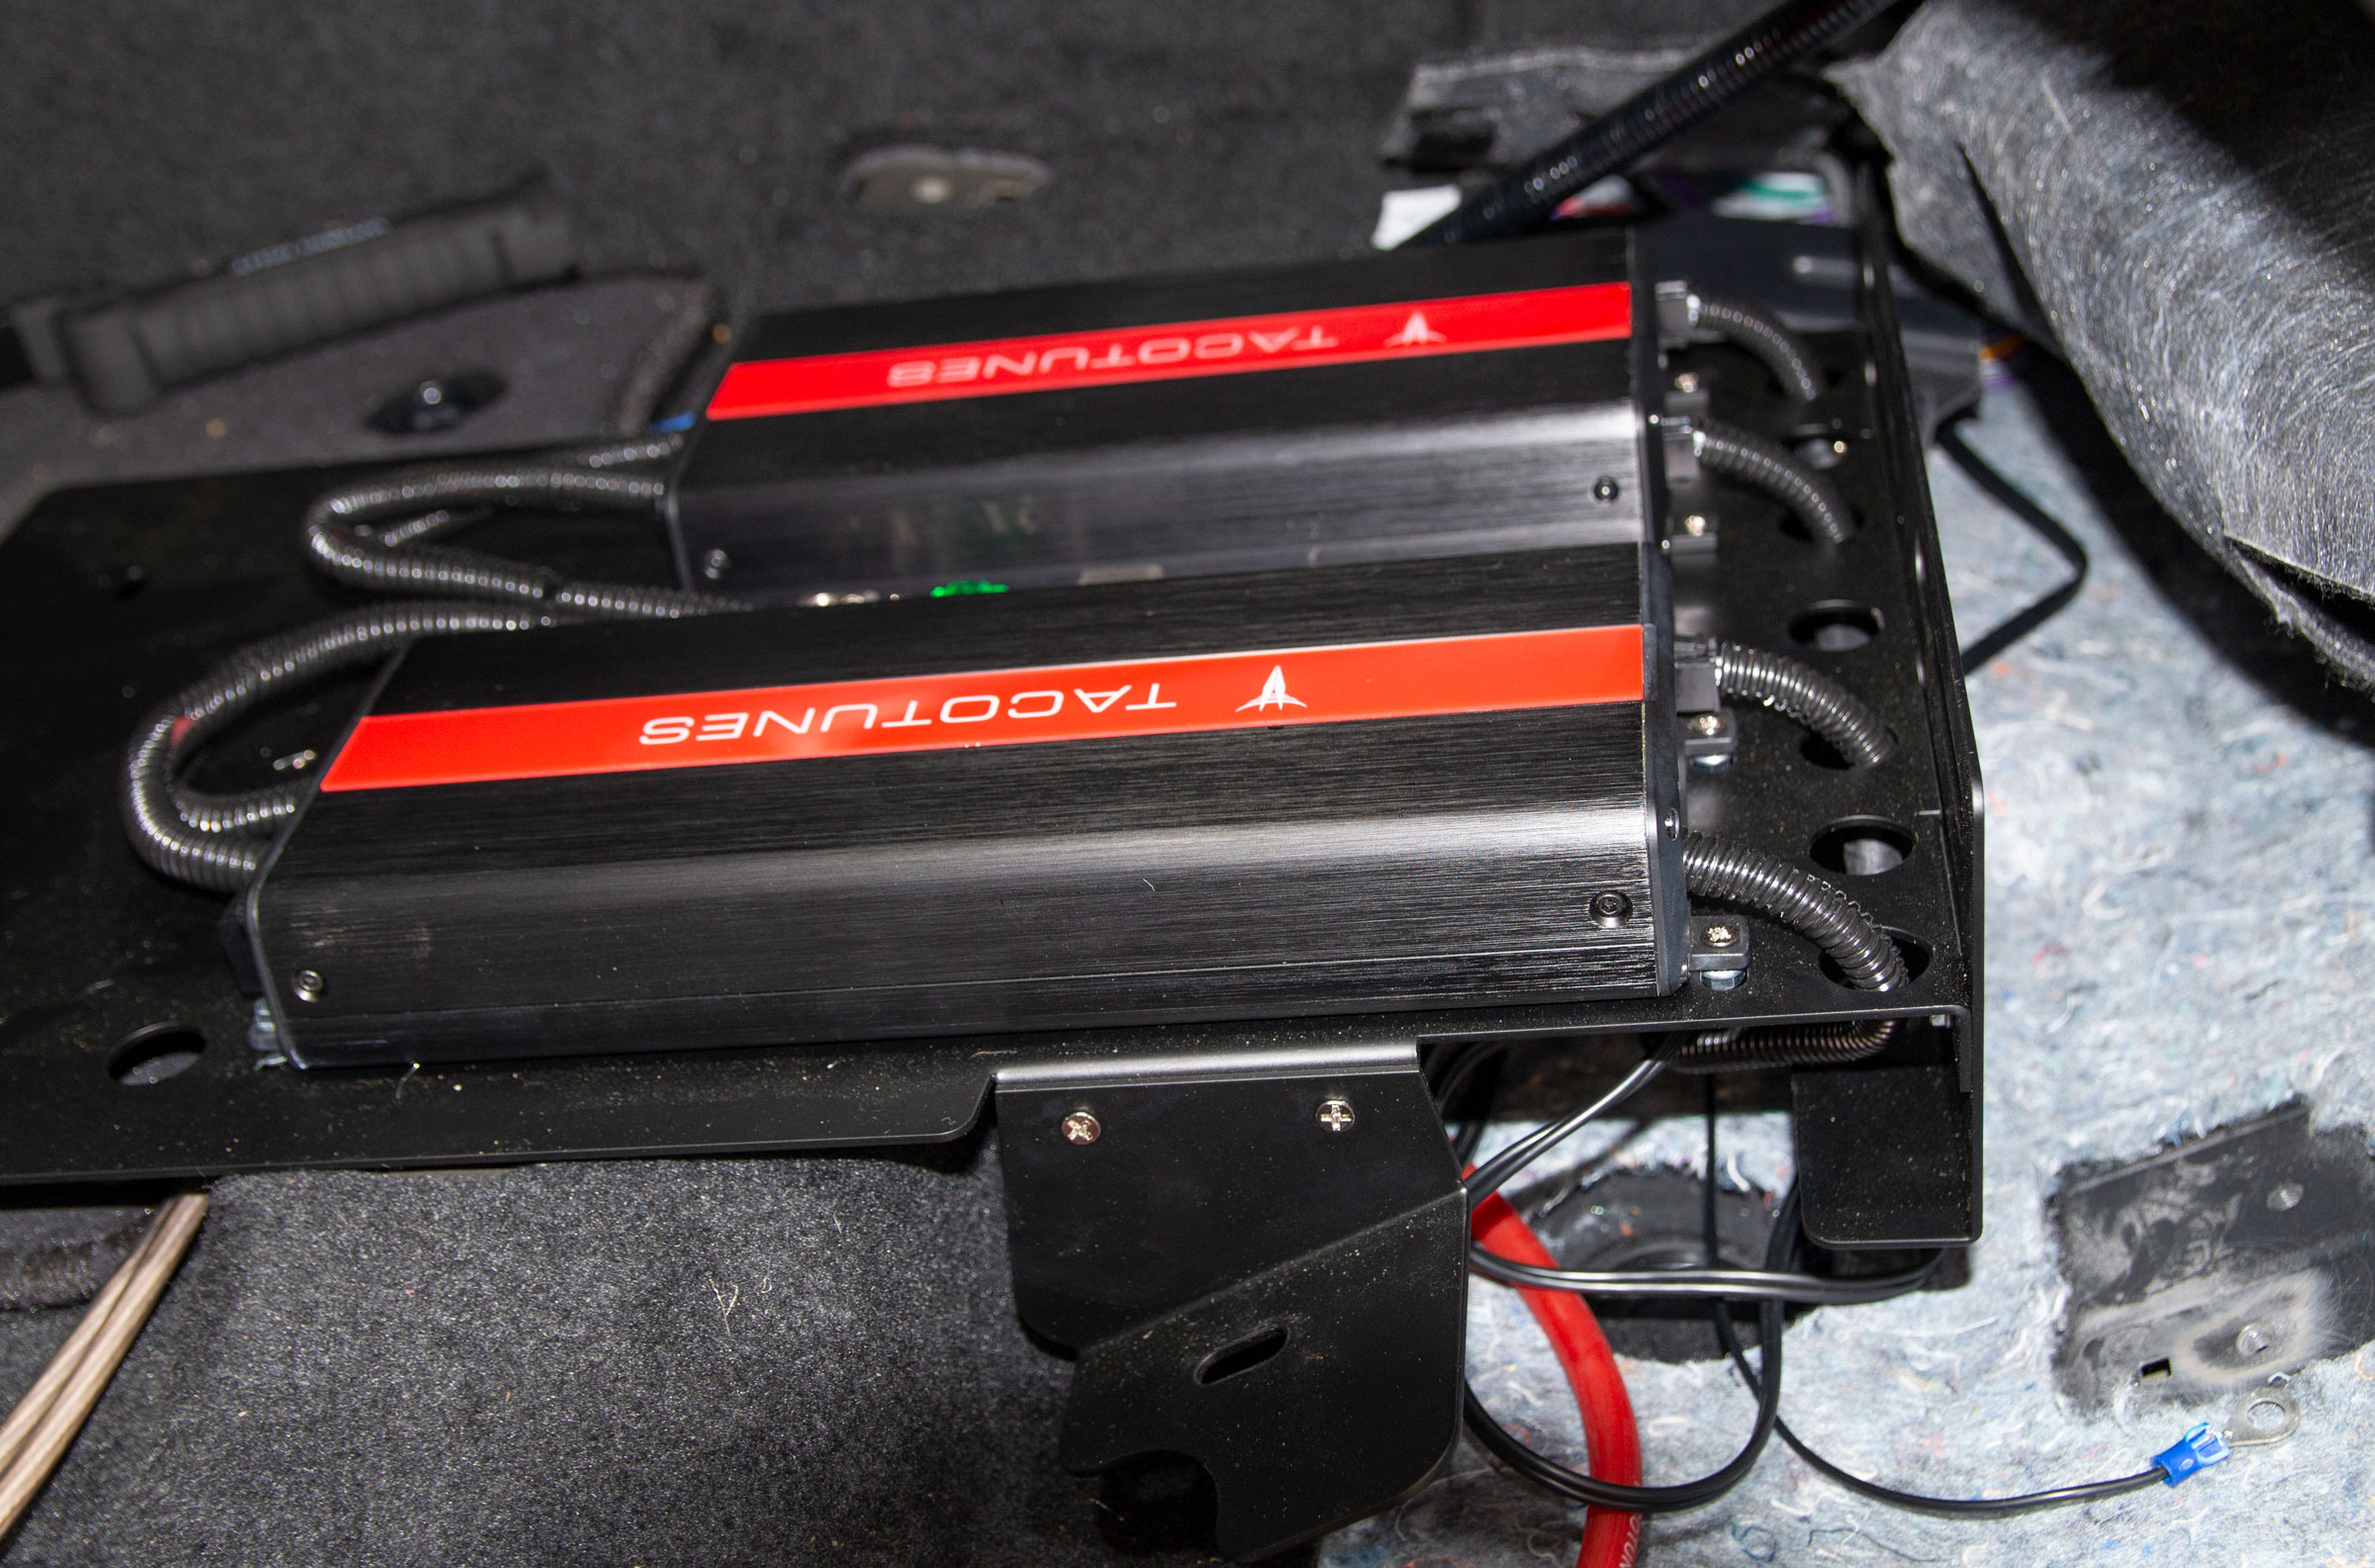
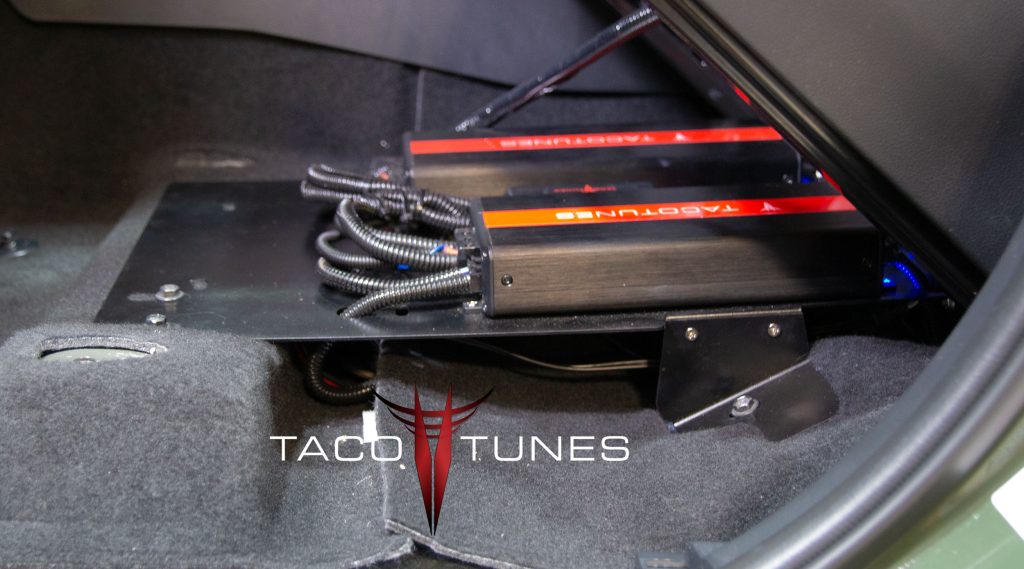
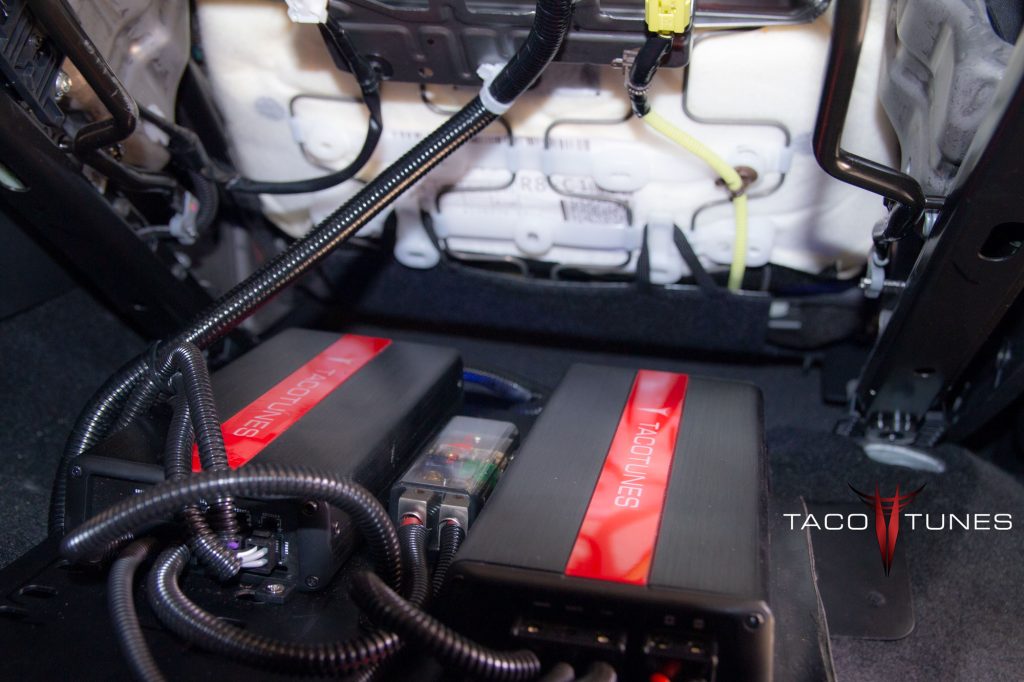
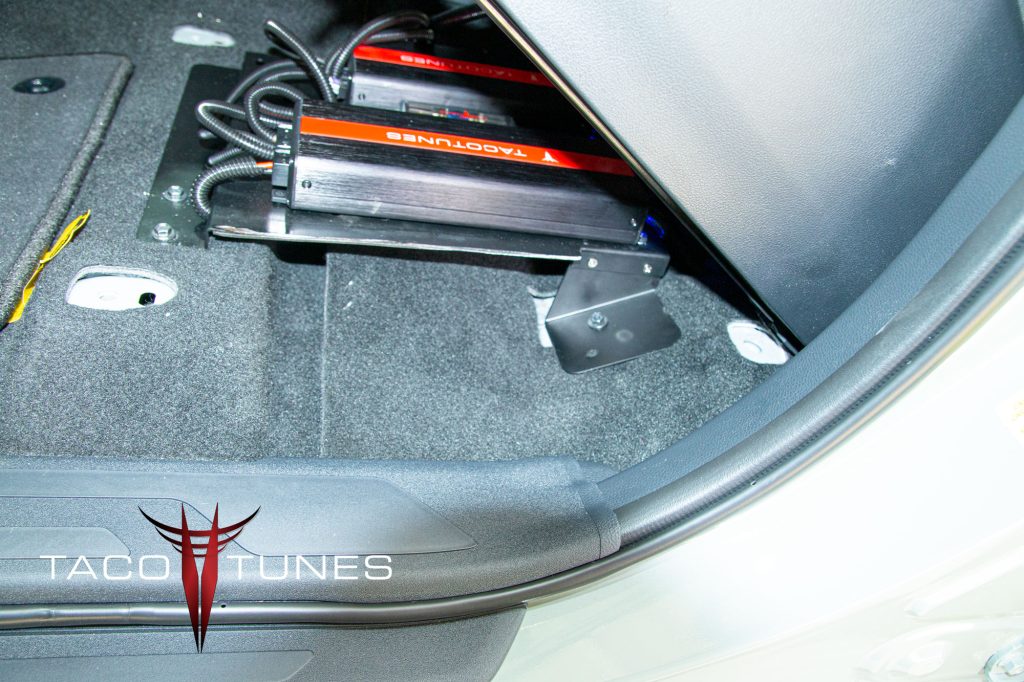
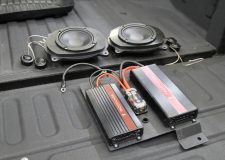
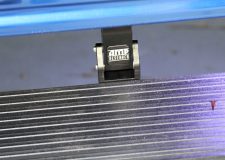
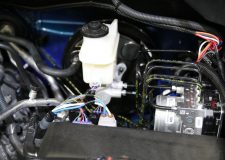
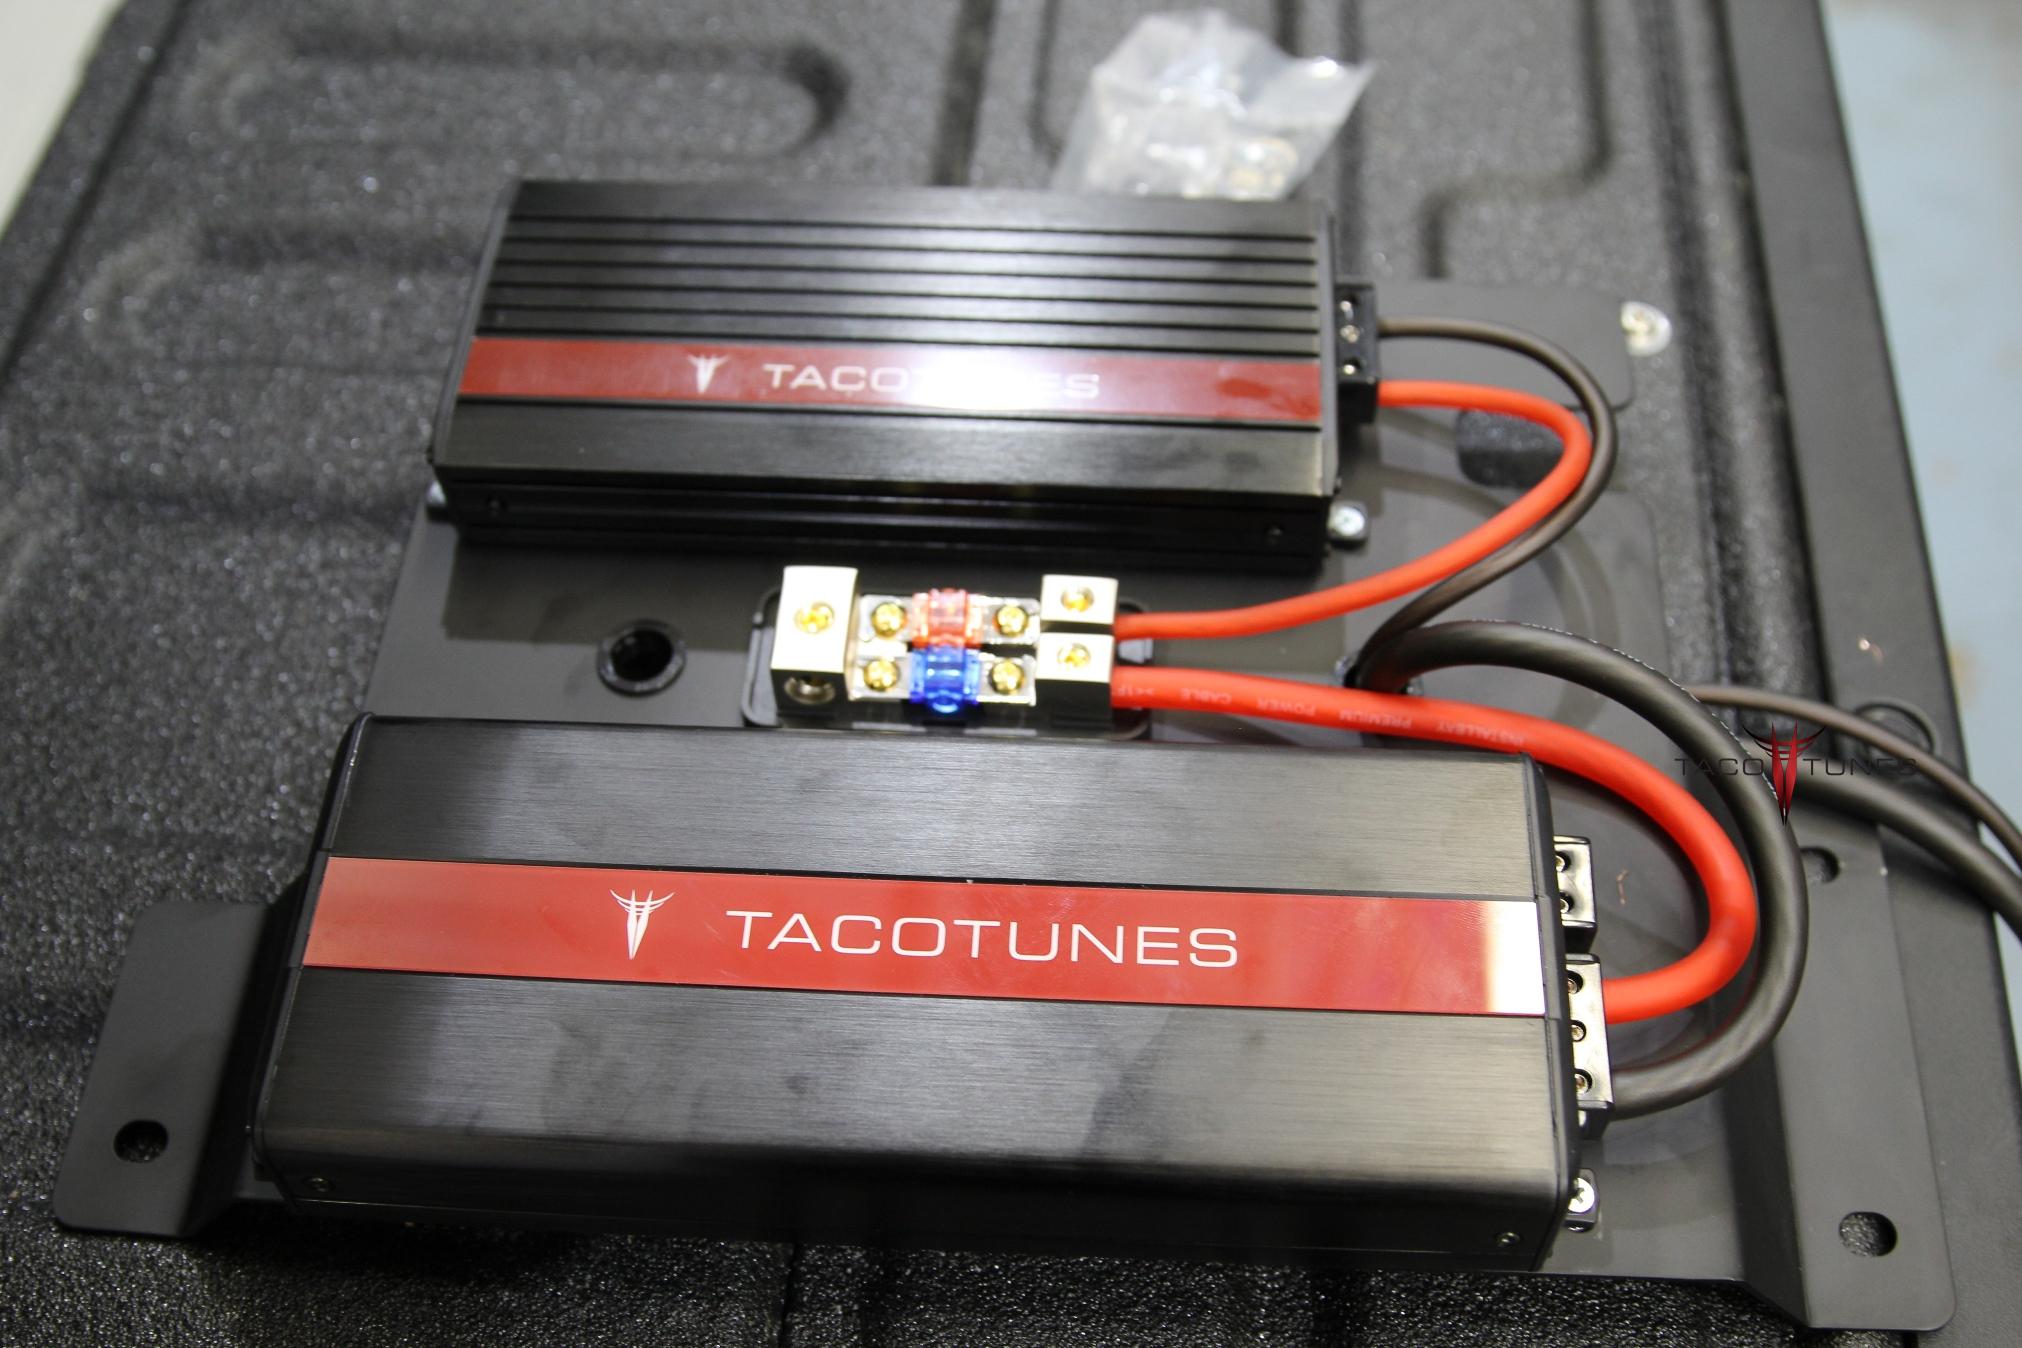
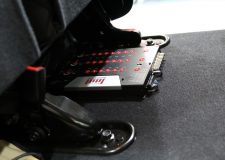
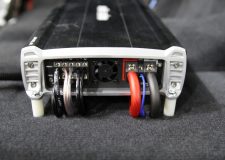
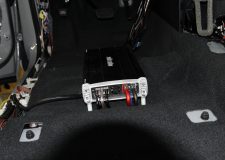
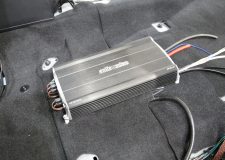
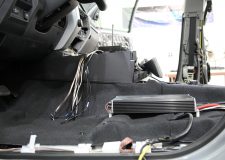
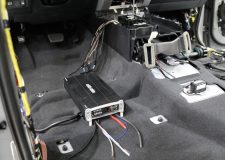
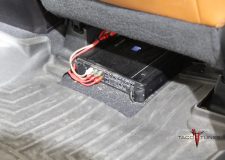
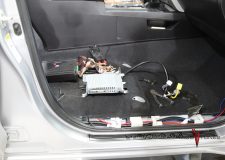
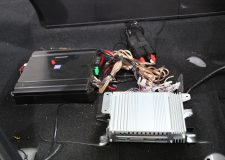
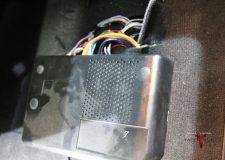
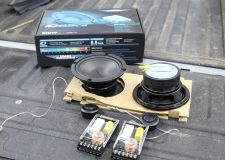
tacotunes TXD10001 and TXD3204 Amps mounted to laser cut amp rack – during the installation process
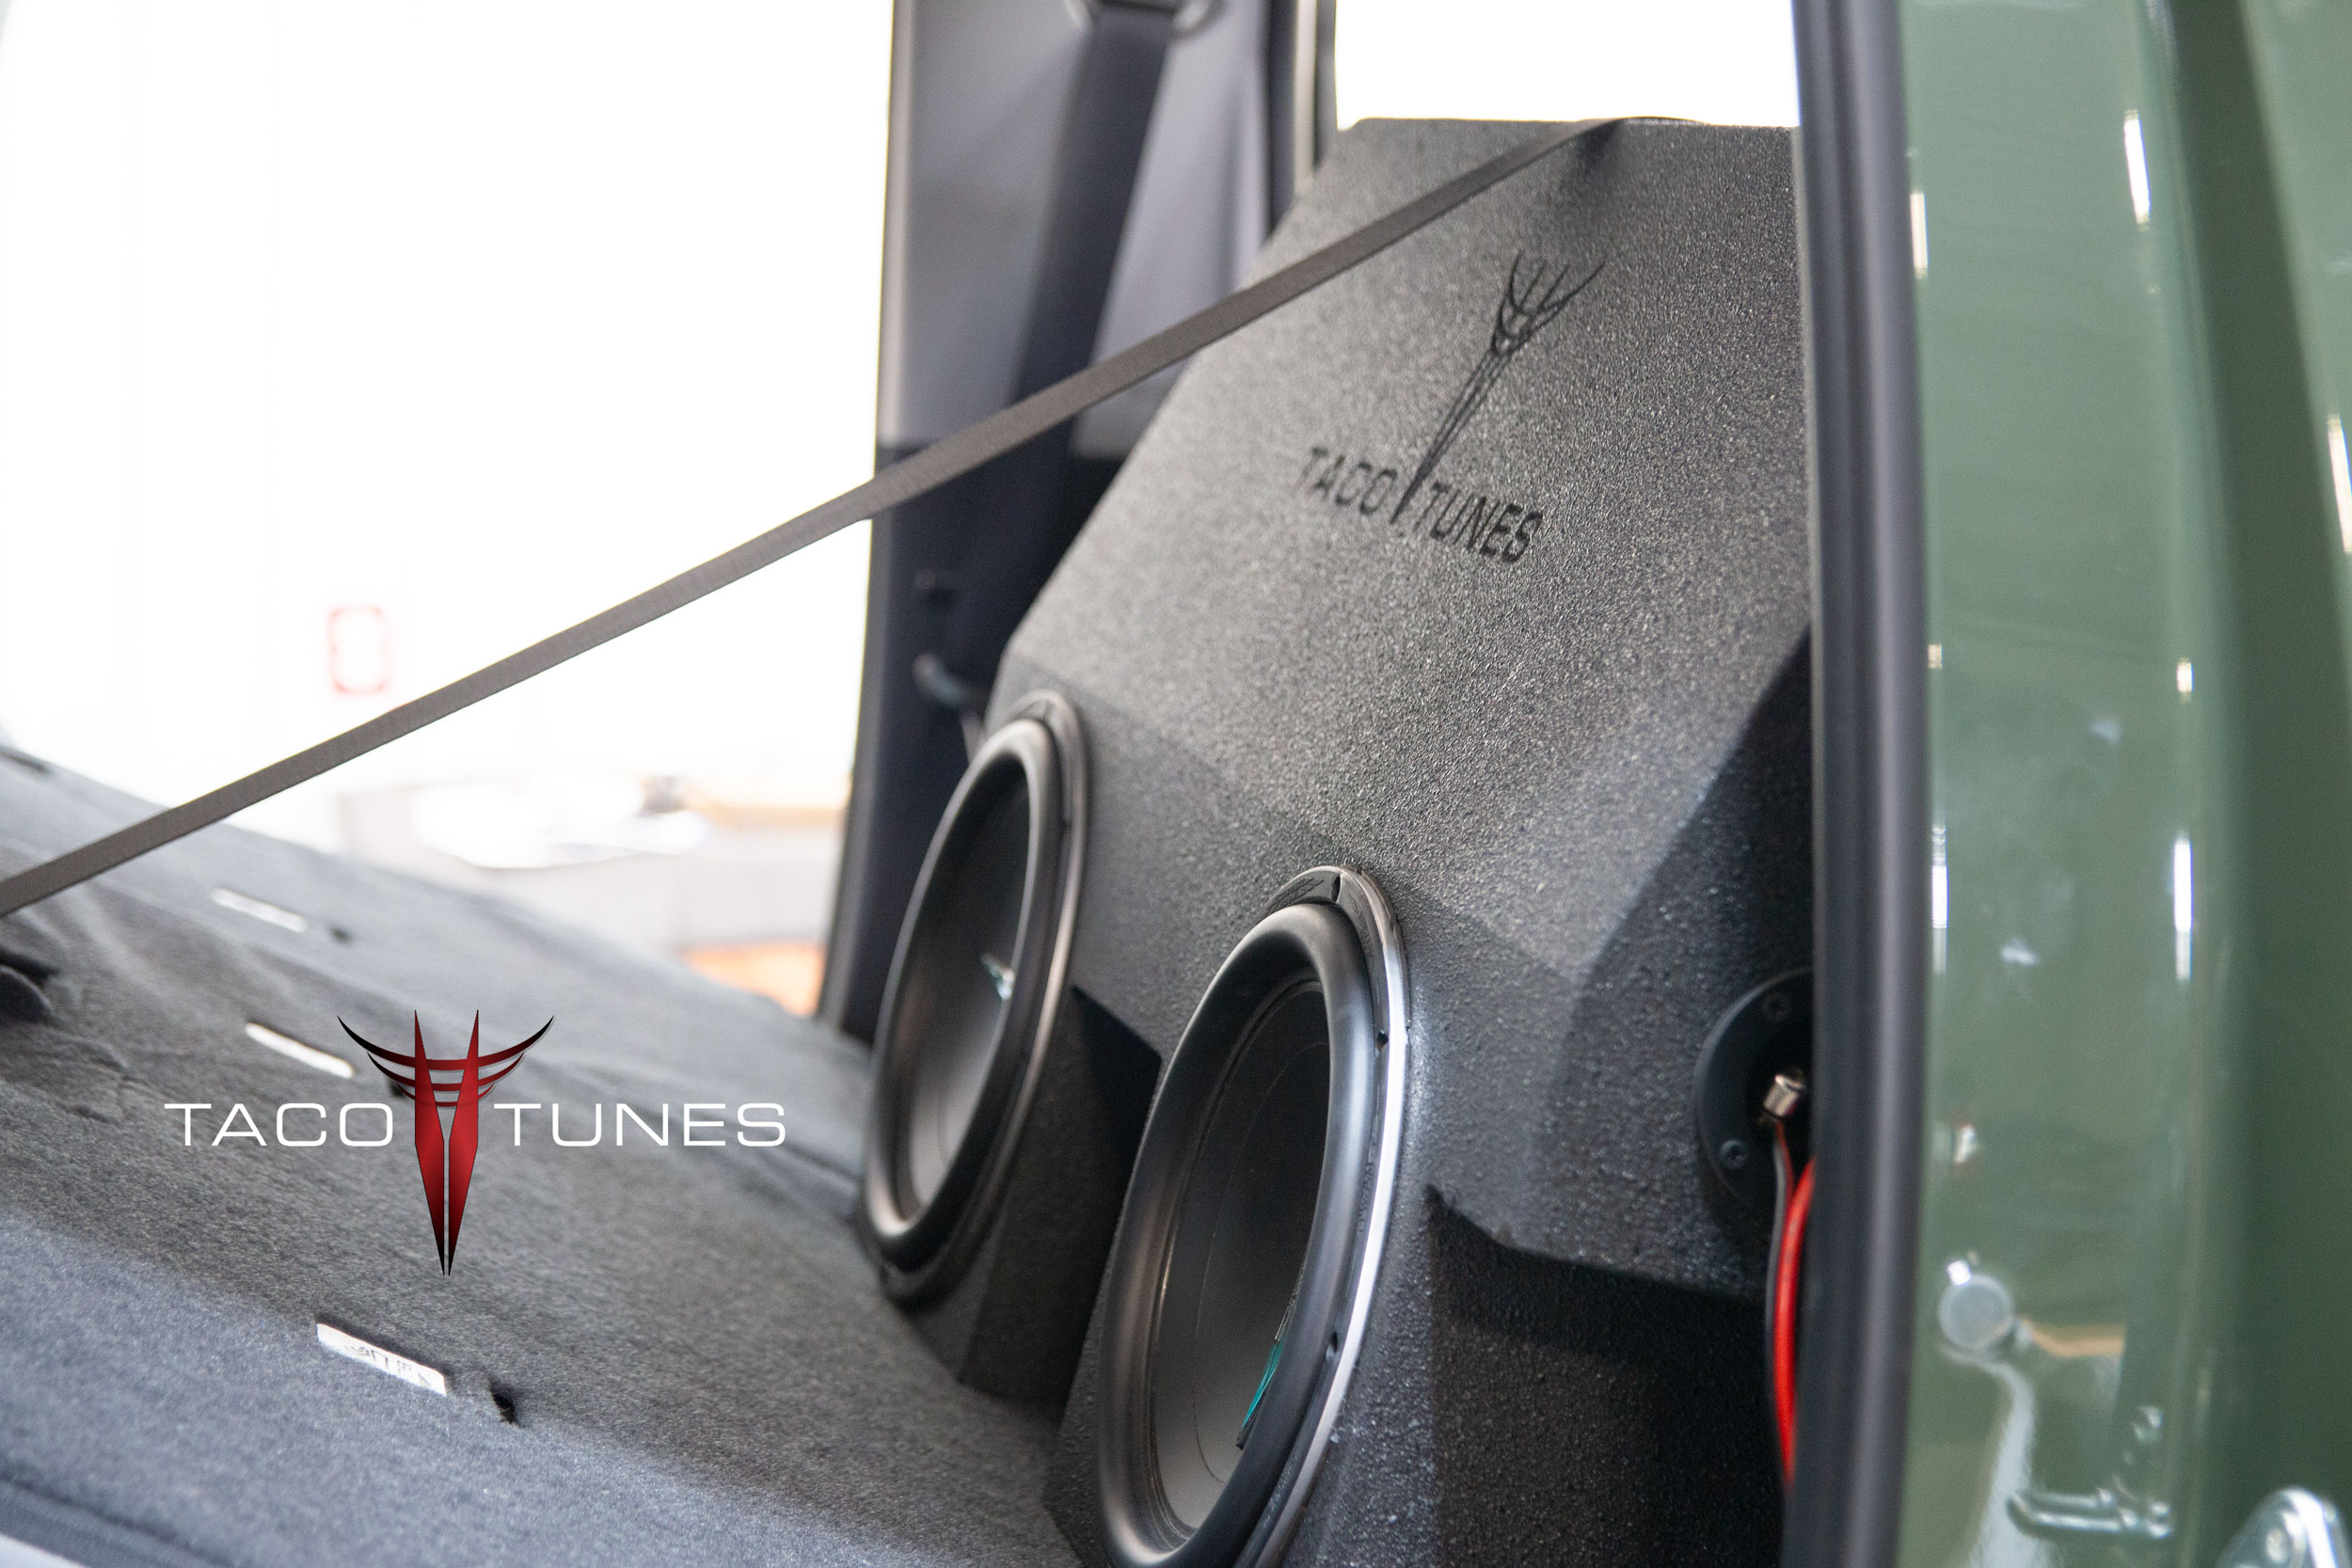
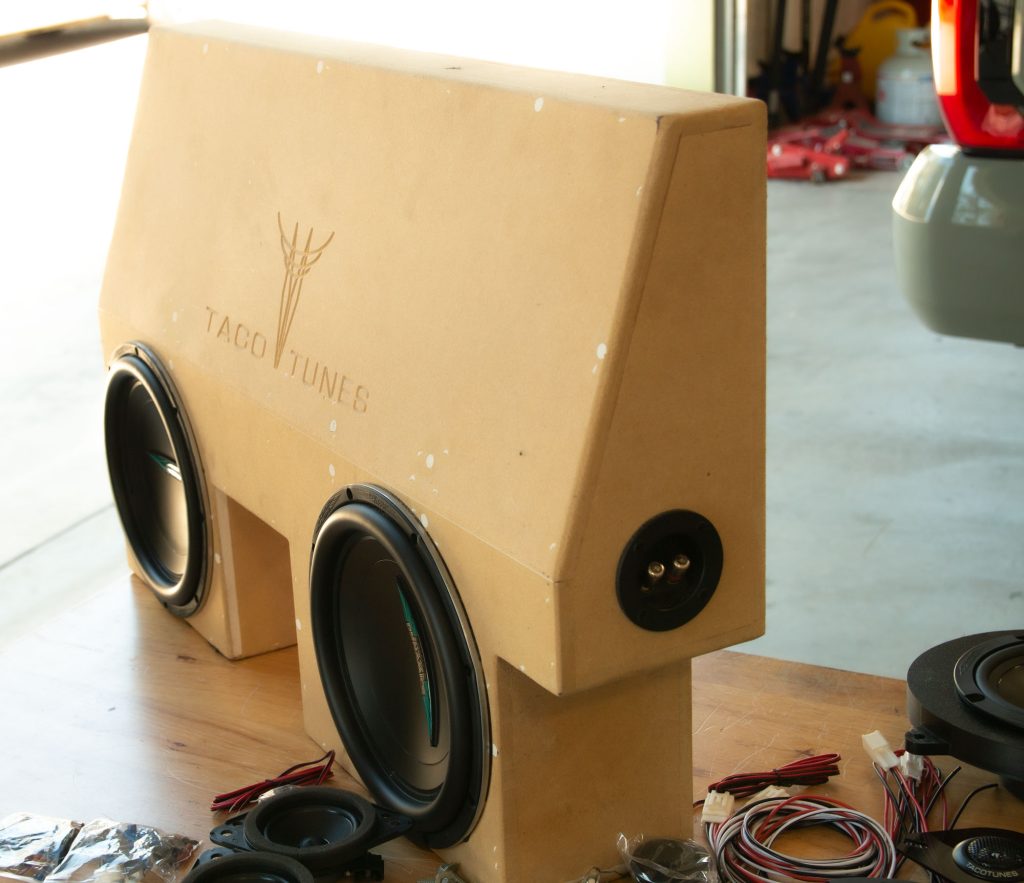
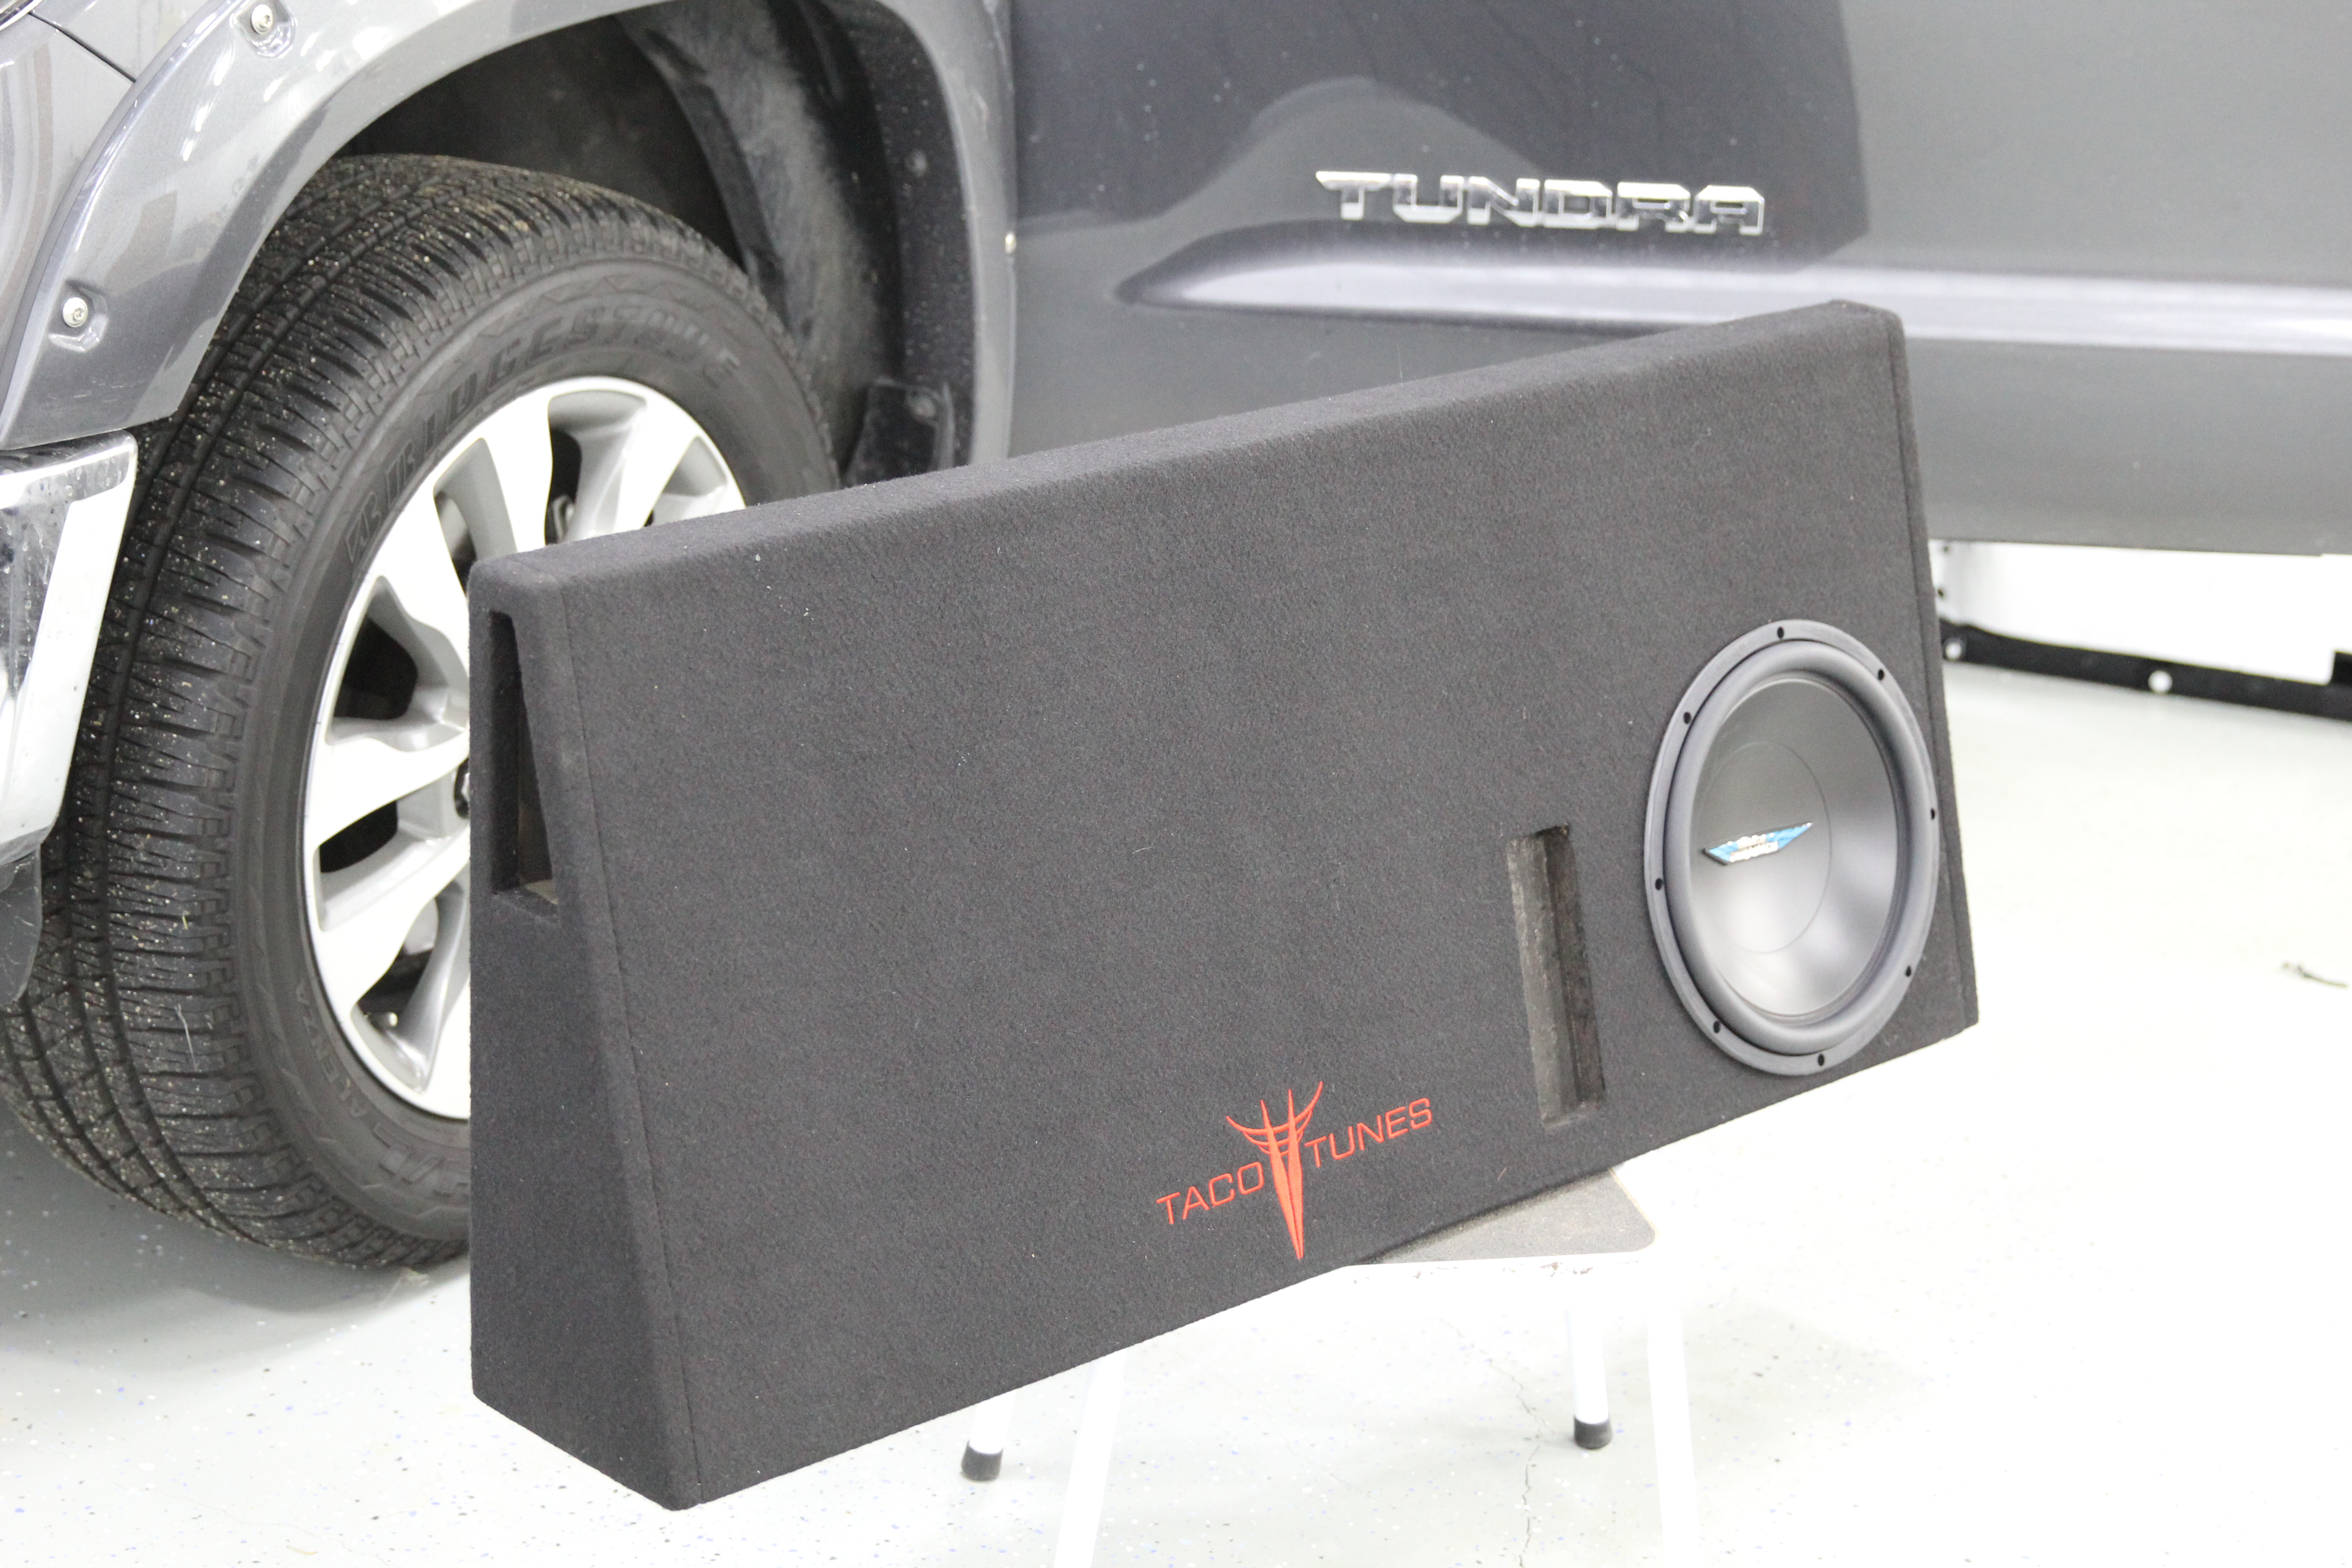
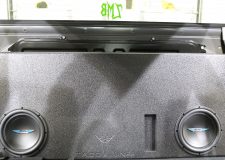
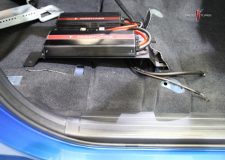
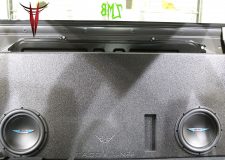
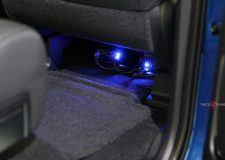
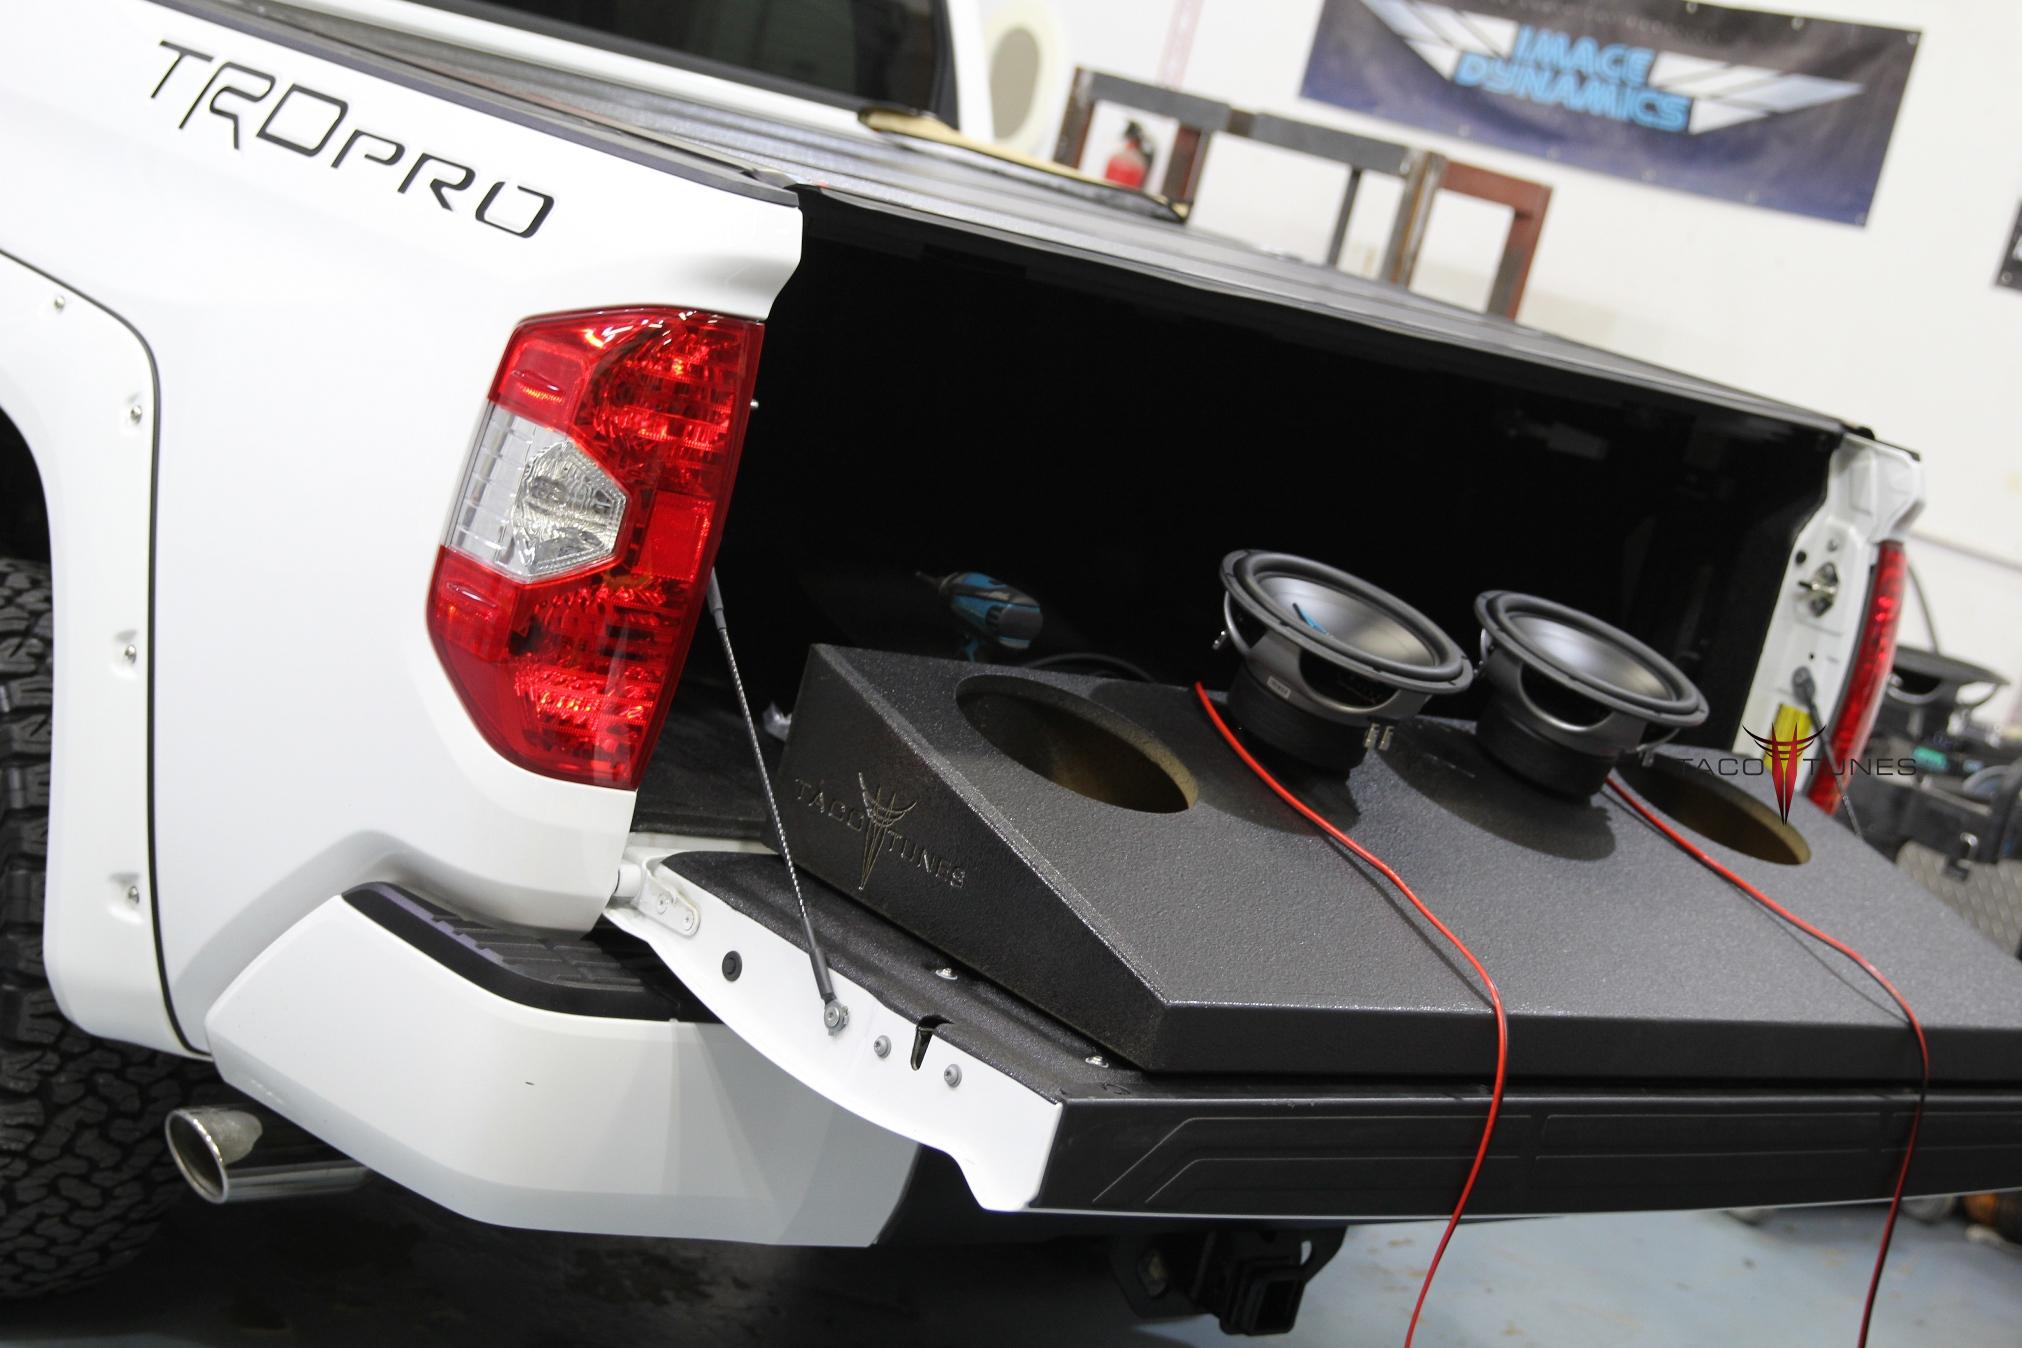
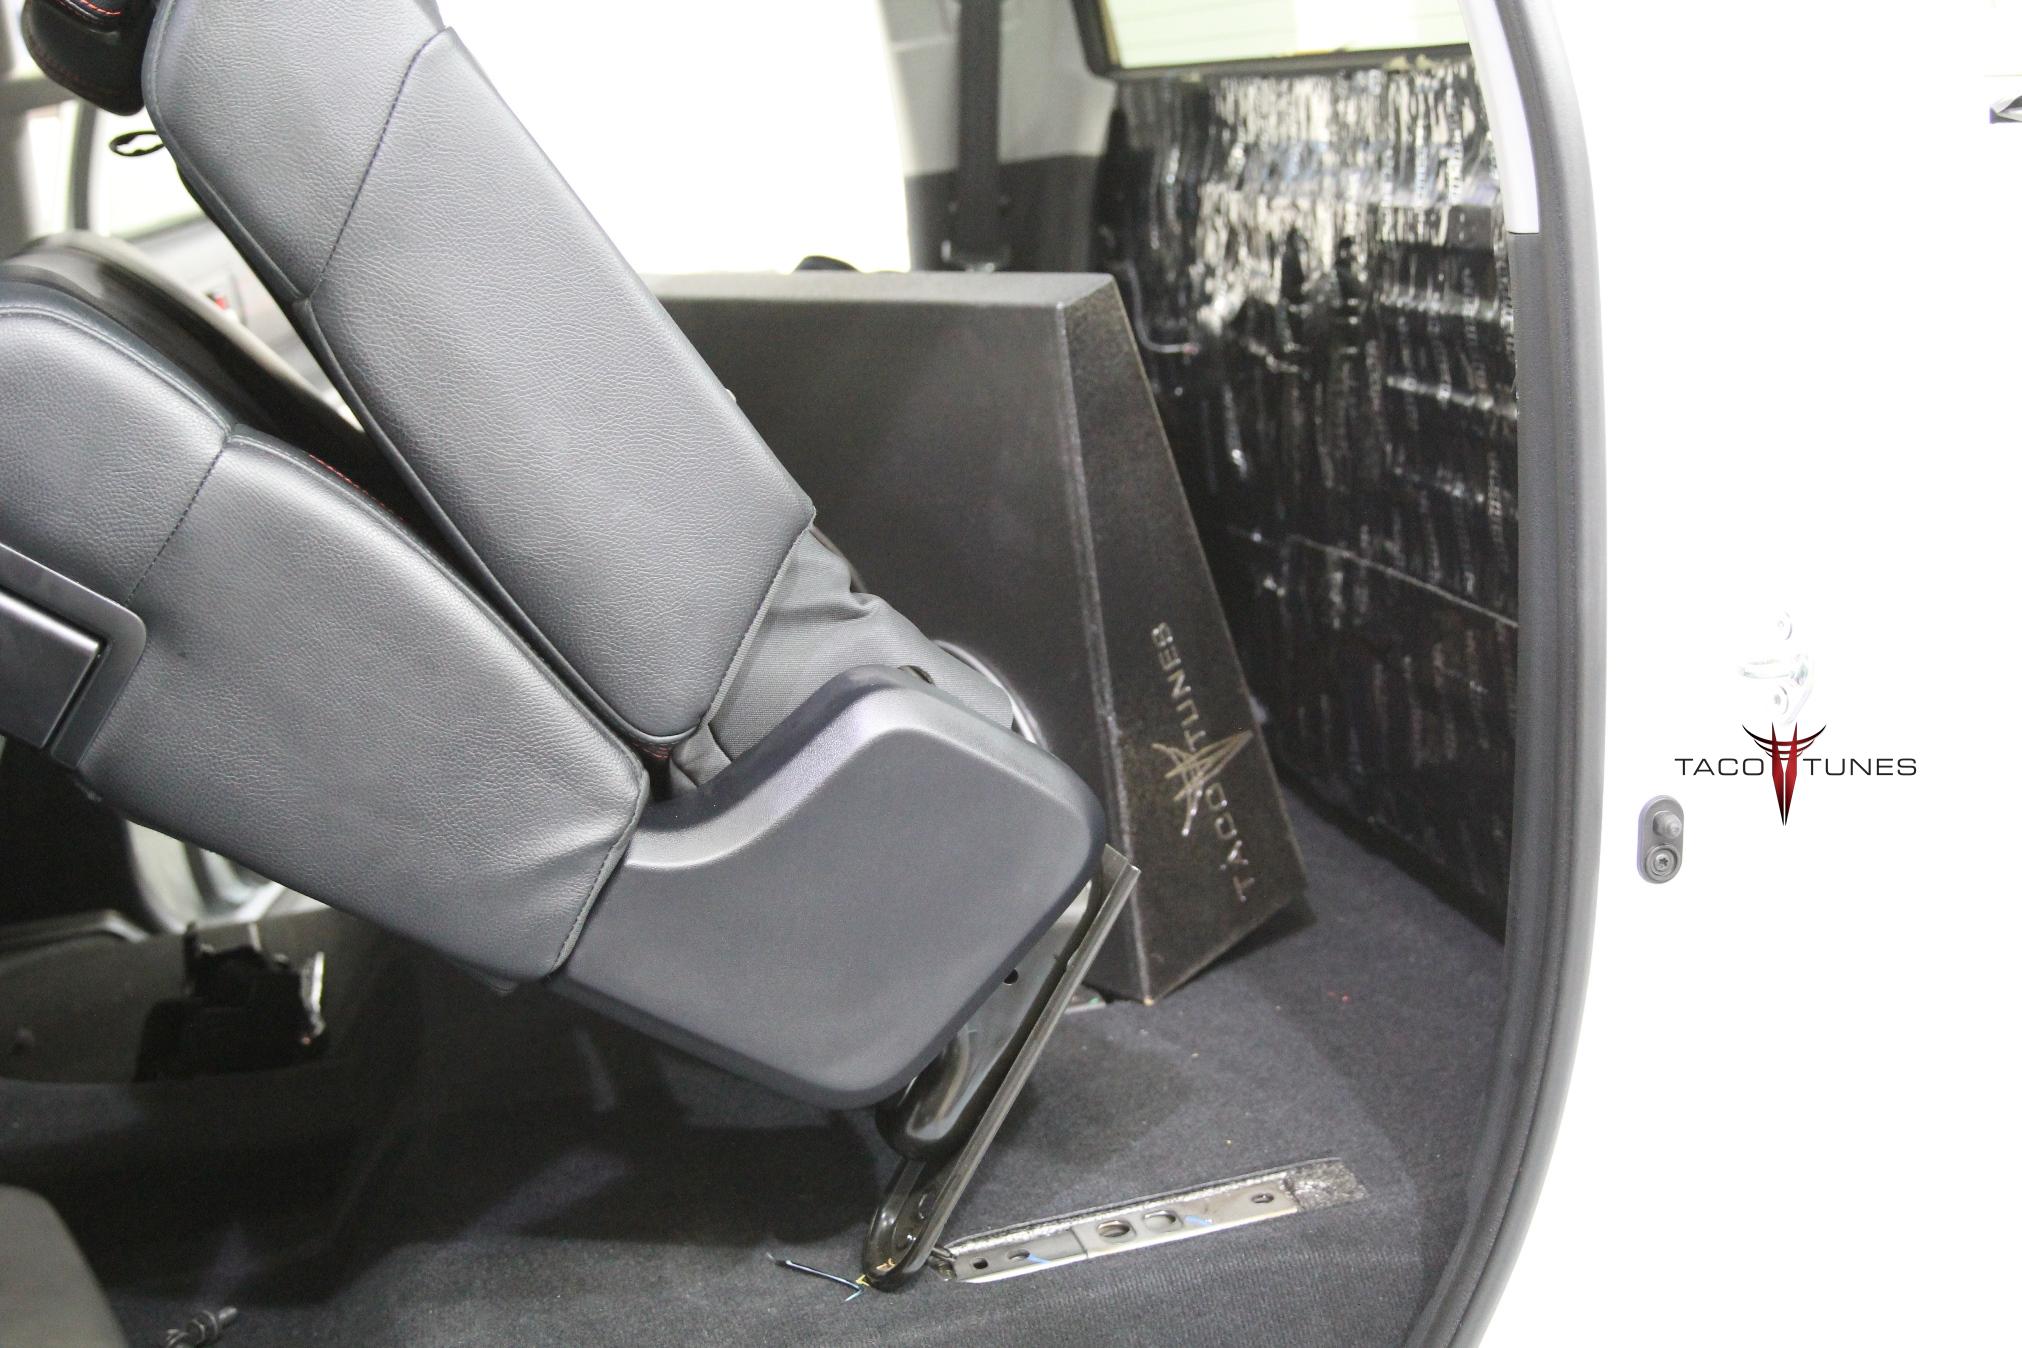
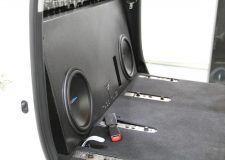
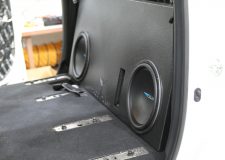
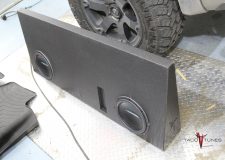
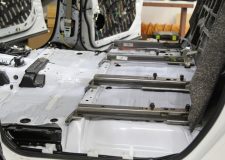
2022 Toyota Tundra Dual Subwoofer box holds 2 inch subwoofers.
2022+ Toyota Tundra Subwoofer Box Installation being installed.
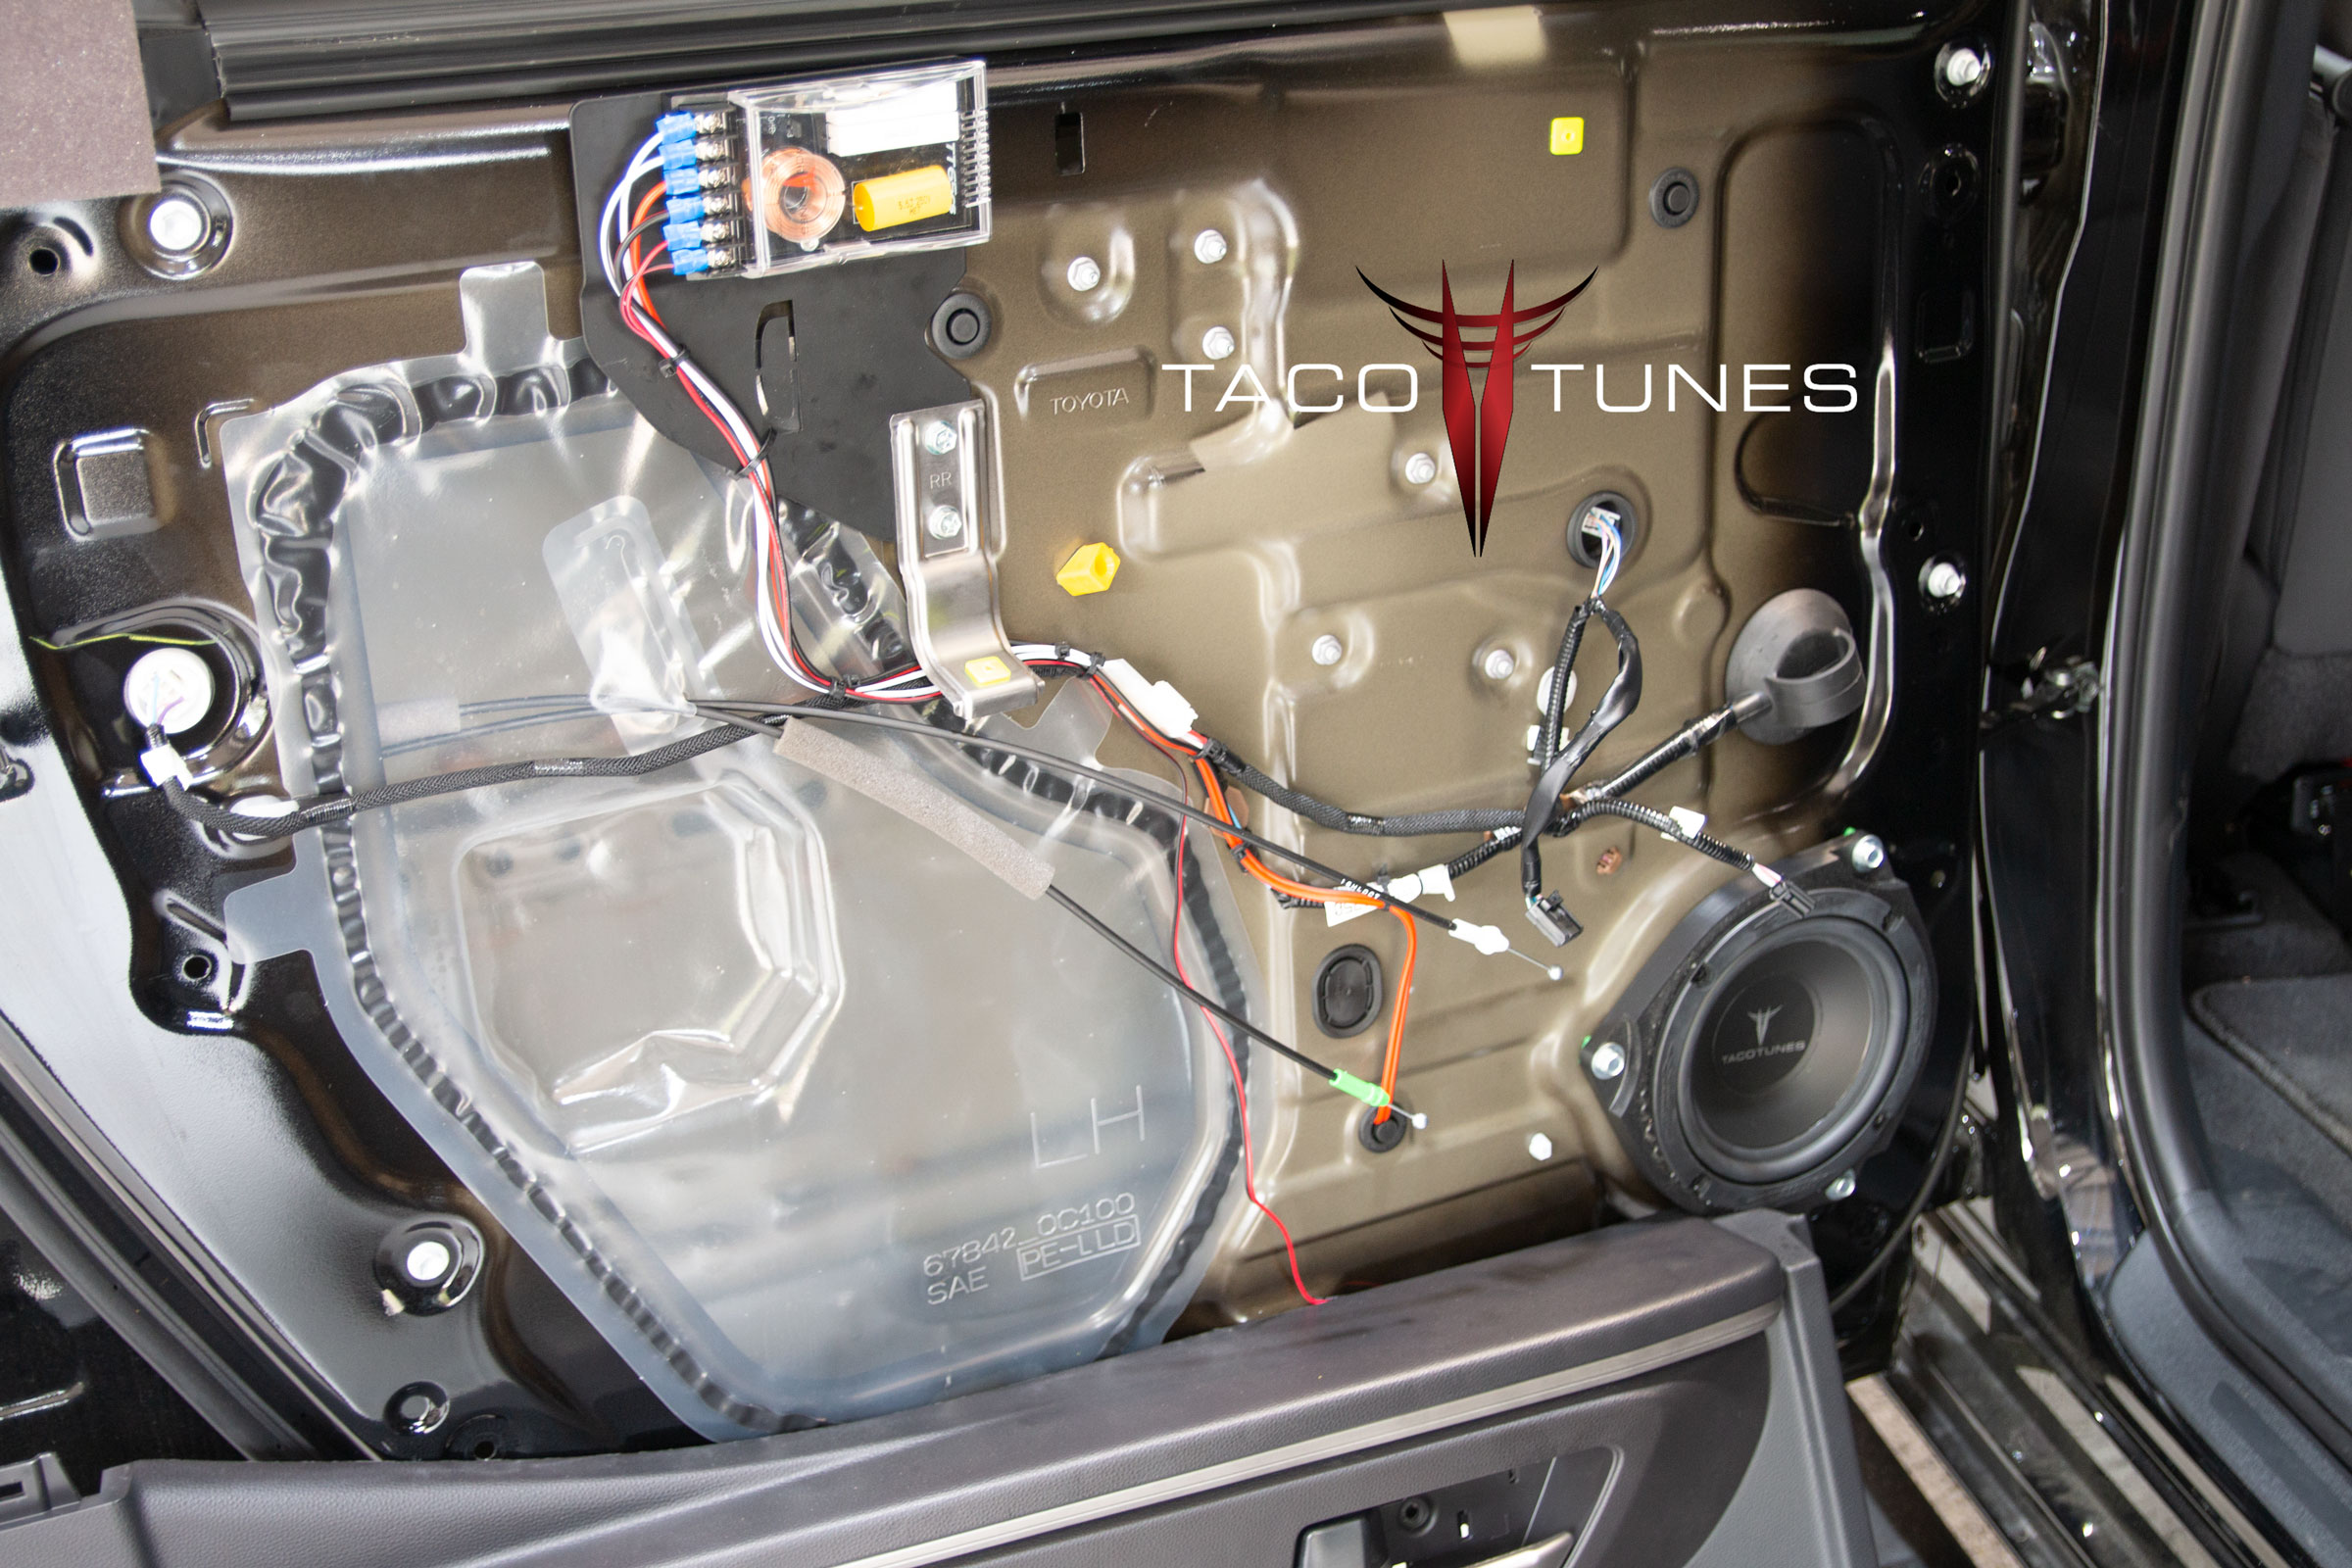
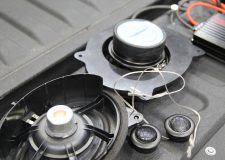
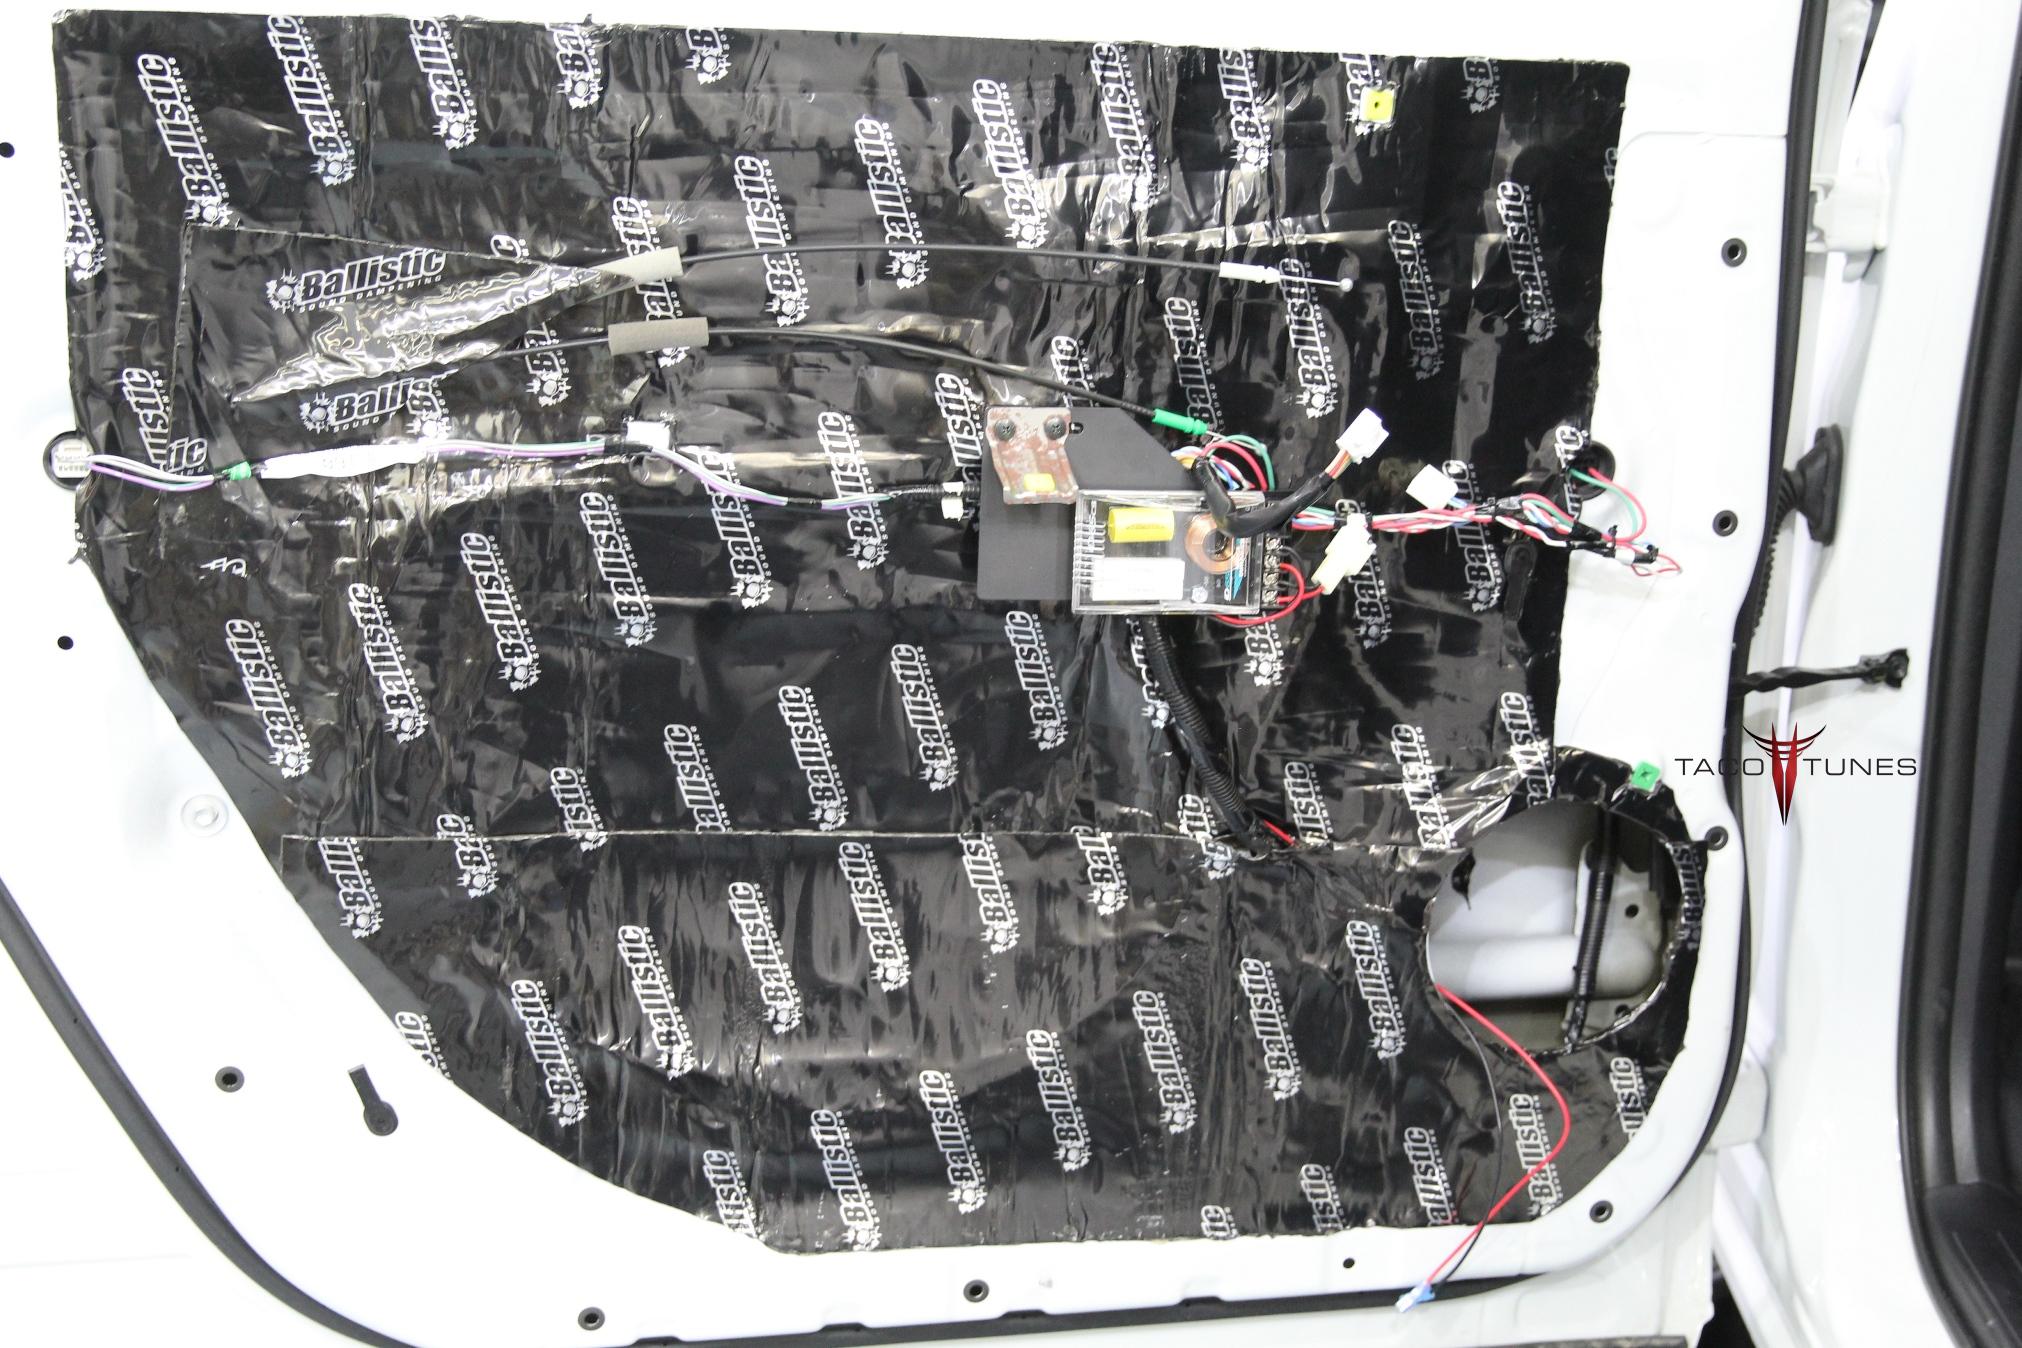
2022 Toyota Tundra Rear Door Component Speakers passive crossover and crossover mount
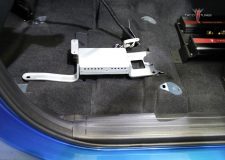
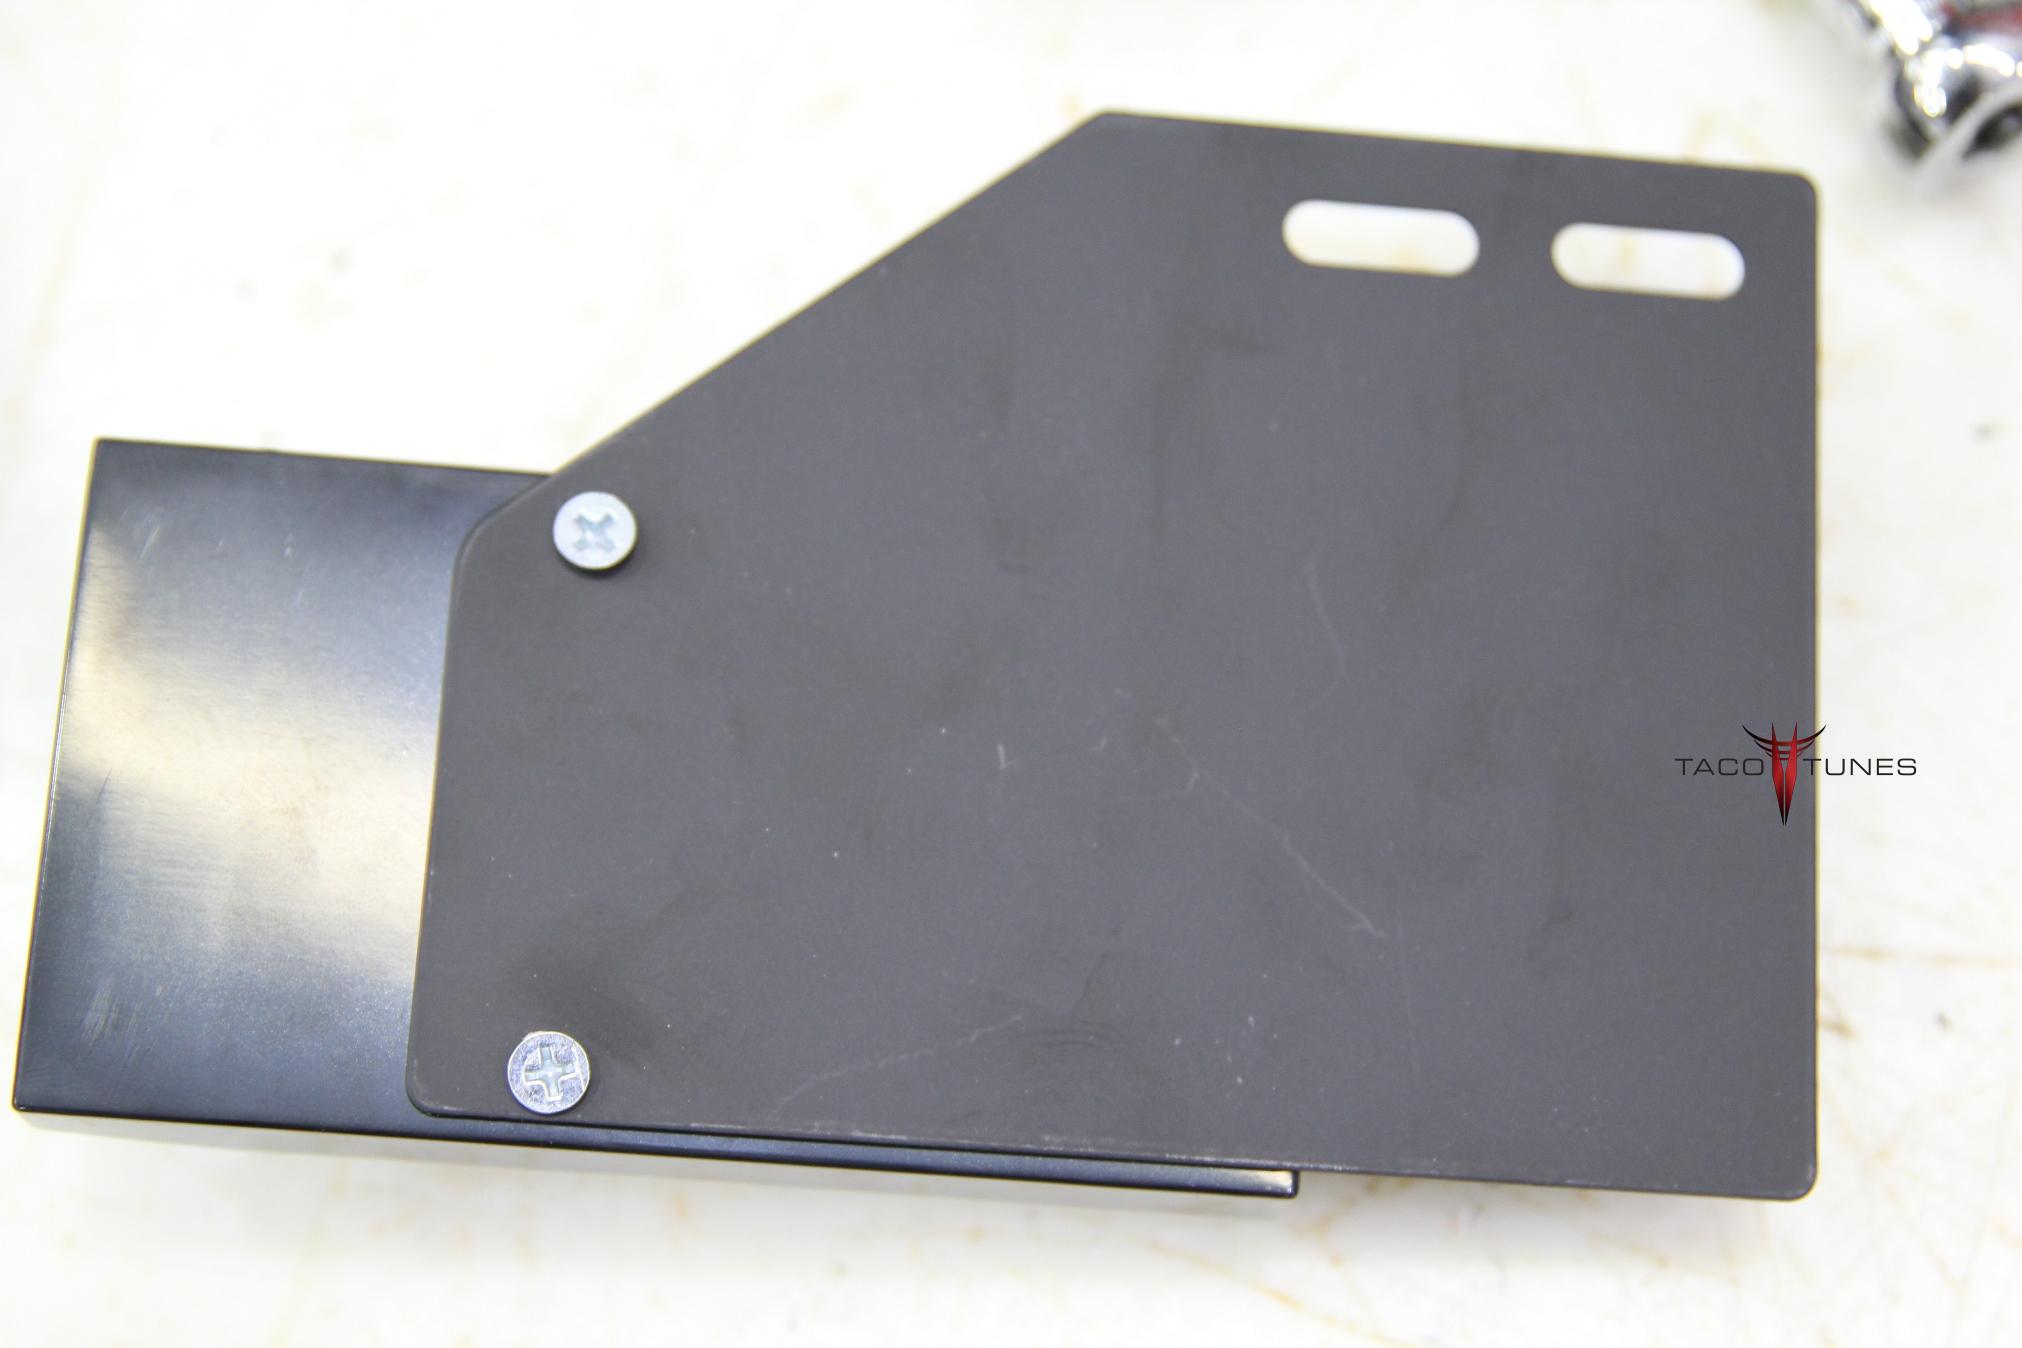
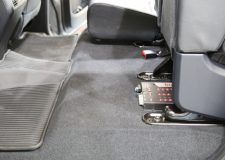
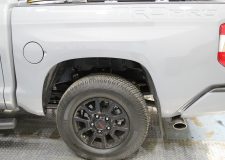
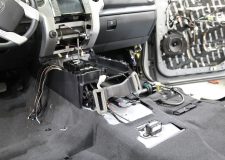
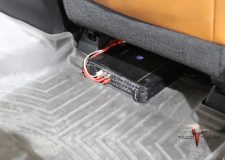
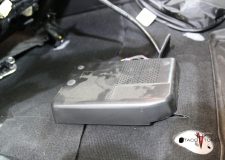
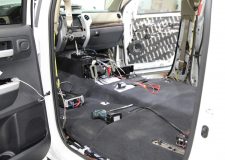
2022 Toyota Tundra Laser Cut Amp Rack bolts directly to stock mounting location. Don’t let audio shops drill holes in your Tundra!
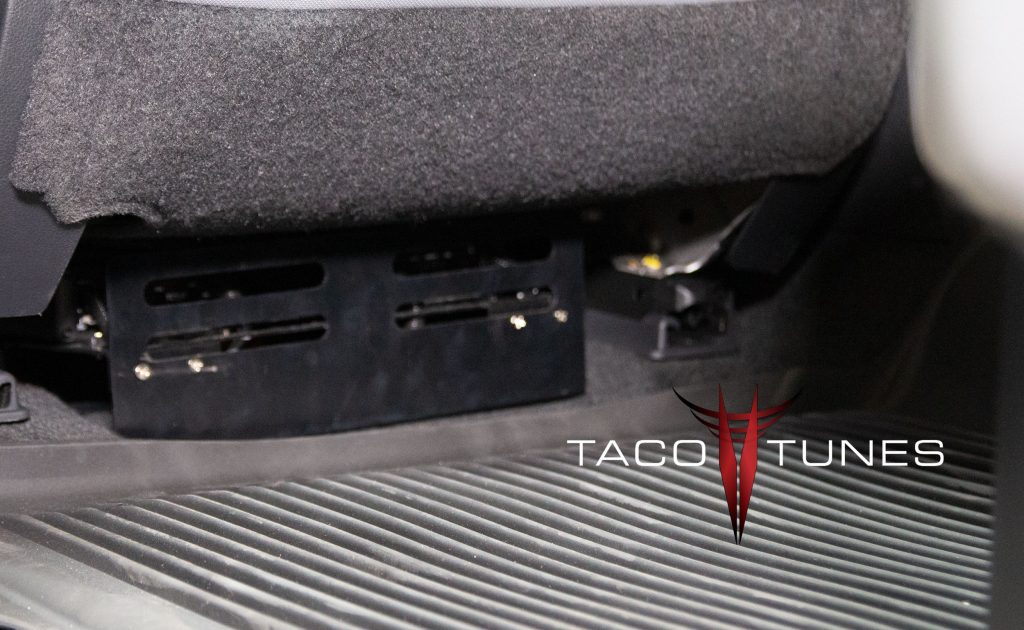
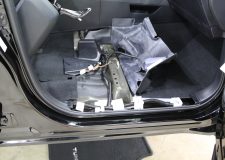
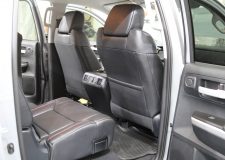
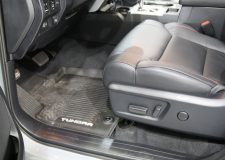
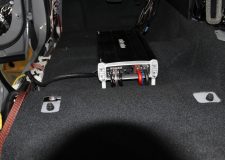
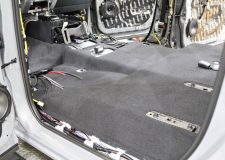
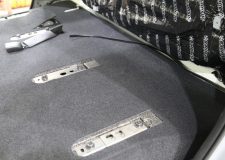
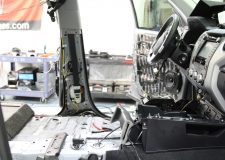
2022 Toyota Tundra Amp Rack with seat pushed all the way forward.
2022 Toyota Tundra Amp Rack with seat at about 5 foot 8 driver. Kick plate protects amps and wiring from passengers.
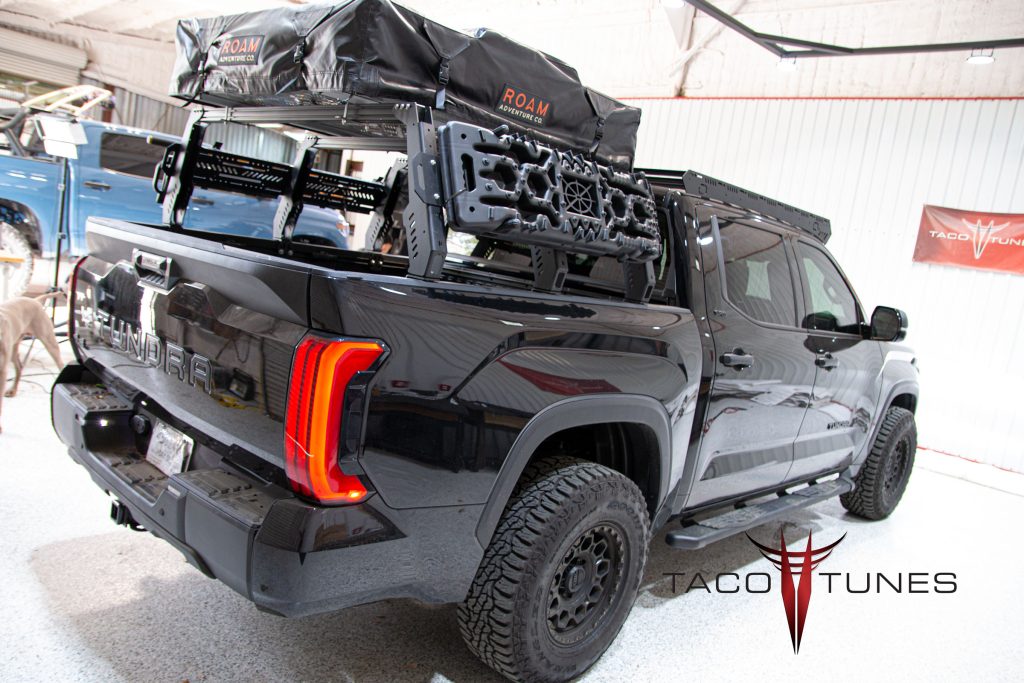
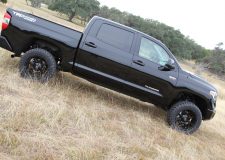
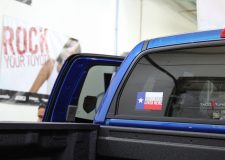
2022 Toyota Tuundra CrewMax Bed Rack and roof tent.
2022 Toyota Tuundra CrewMax Bed Rack and roof tent.
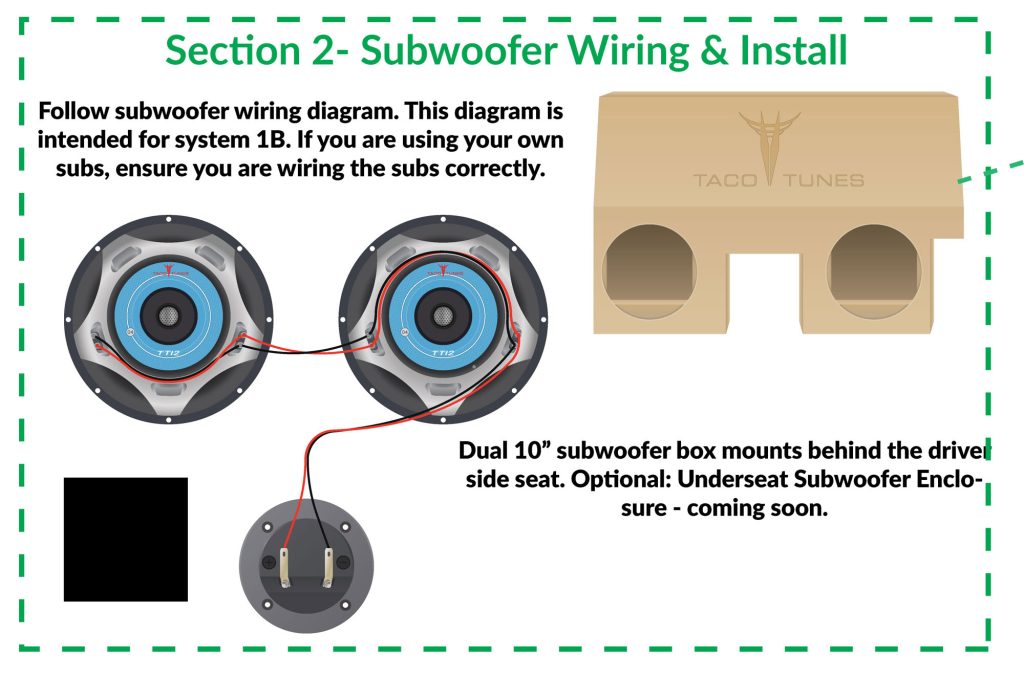
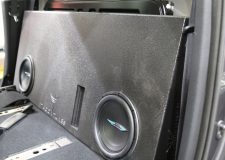
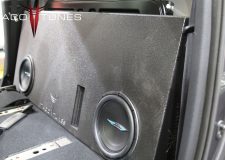
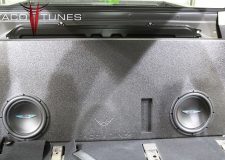
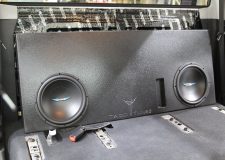
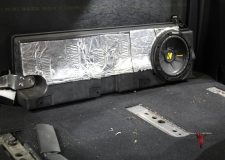
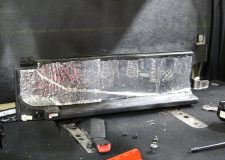
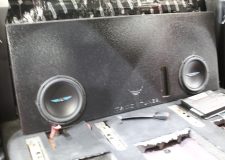
Dual 10″ Subwoofer Box – Ported
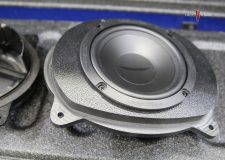
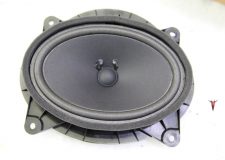
tacotunes.com TT65CS Component Speakers
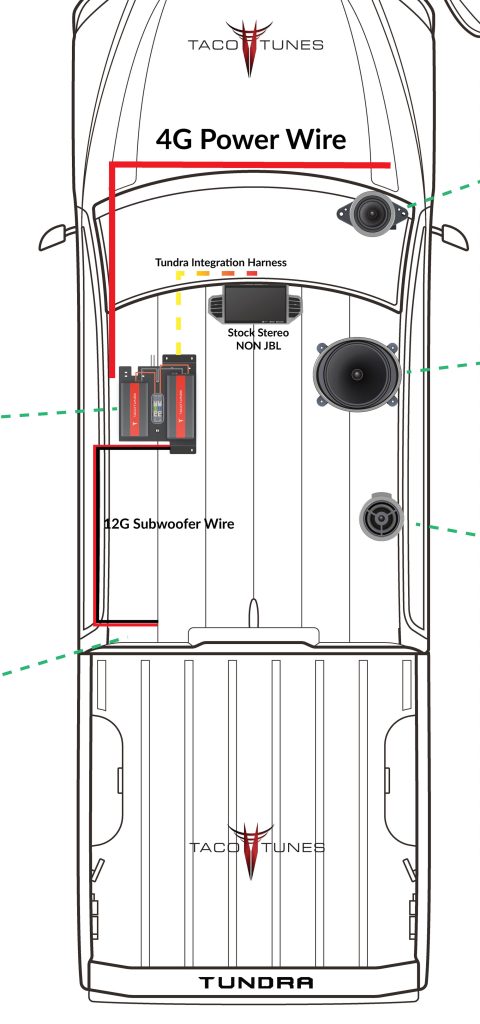
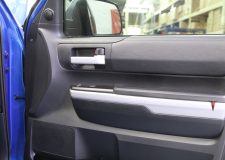
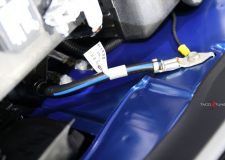
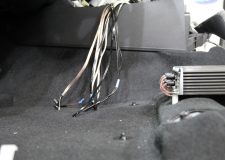
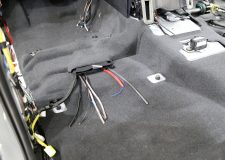
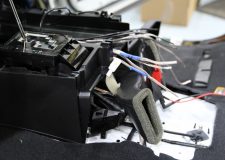
Tundra Direct Integration – no cutting or splicing your factory wires. Amps bolt to stock mounting location.
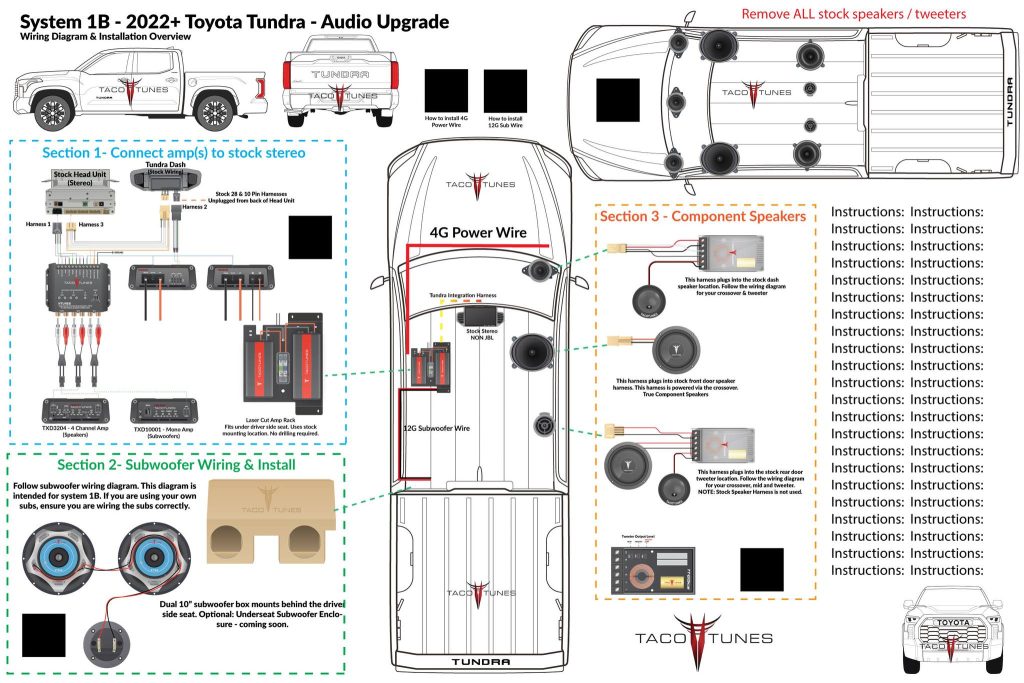
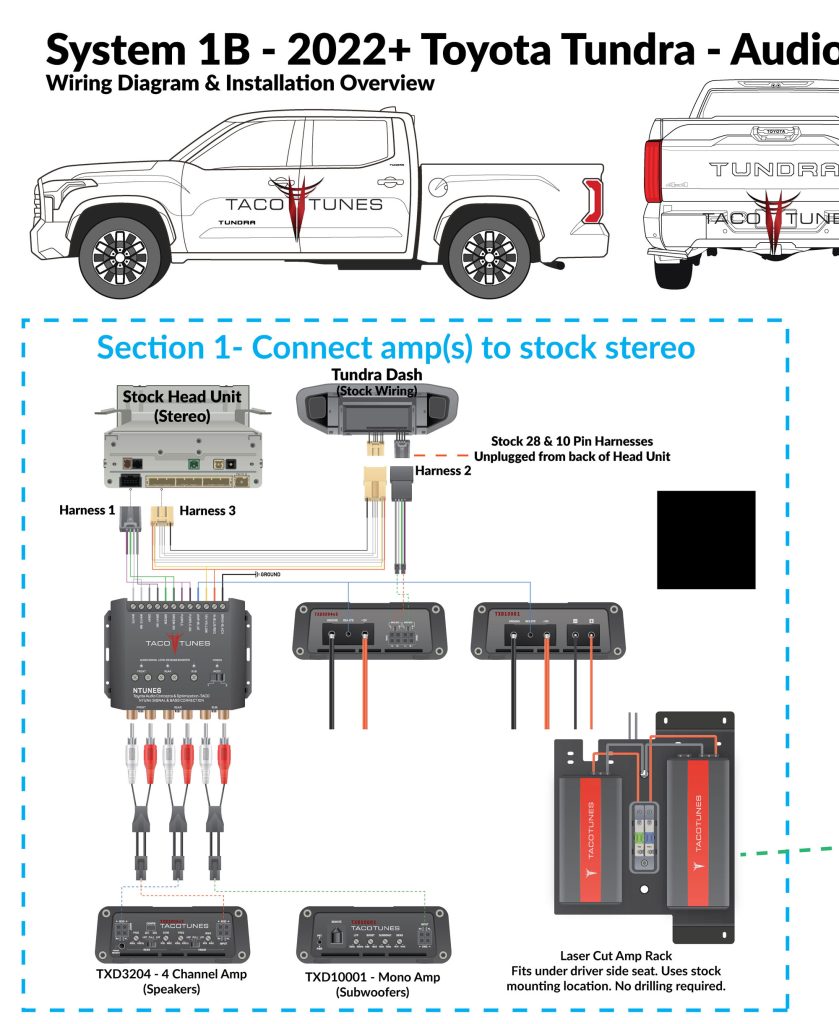
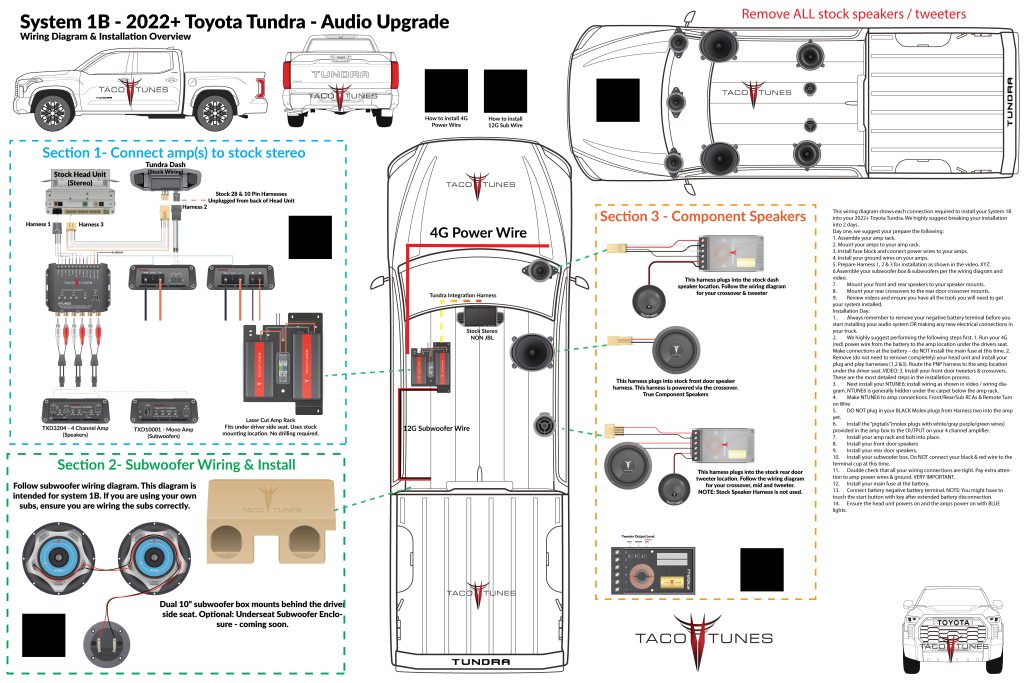
2022 Toyota Tundra Audio Upgrade & Wiring Diagram
How to connect amp to your stock stereo
How to install subwoofer 2022 Tundra.
Component Speakers – no cutting or splicing uses all factory wiring.
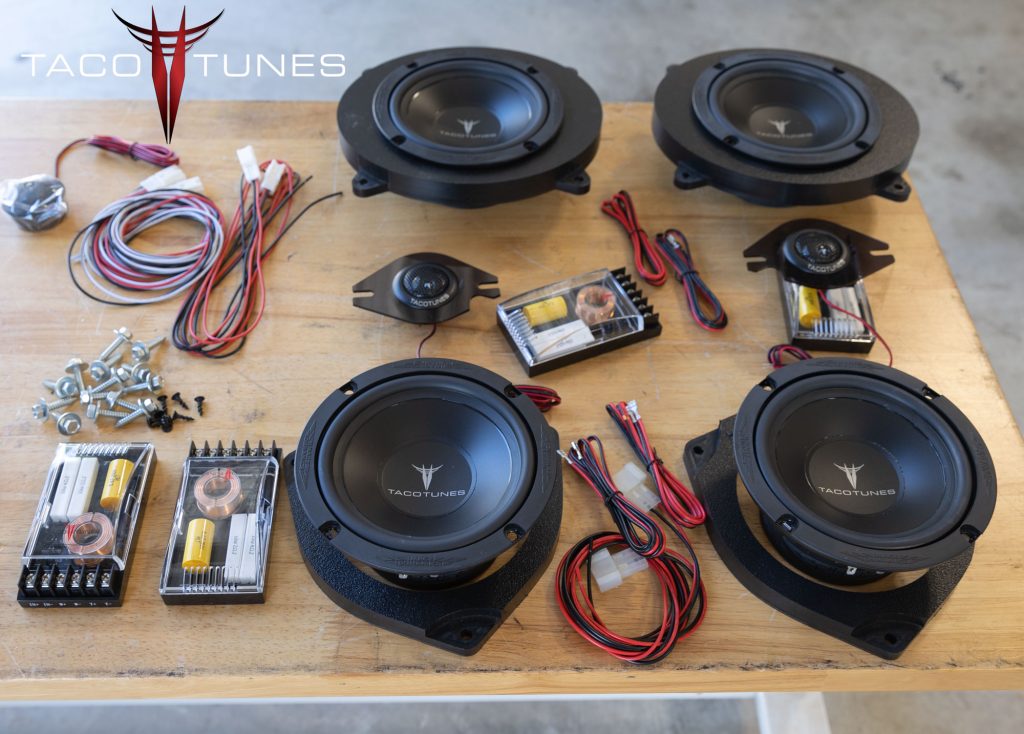
Below you will find a detailed listing of all the parts we used in the installation.
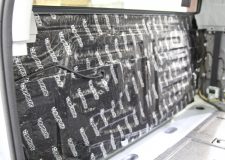
Typical Installation time is 1 day, however if we matt (sound deaden) the front, rear doors and the rear wall behind the subwoofer it adds a day. If we are matting the truck, we keep the truck for two days. One day audio installation and matting jobs are possible, but require at least 12 hours with the truck.
Below is a detailed listing of the audio products installed in Eddie’s Tundra CrewMax
2022 Tundra Factory Integration System:
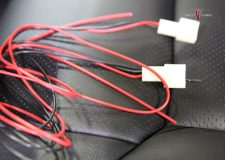
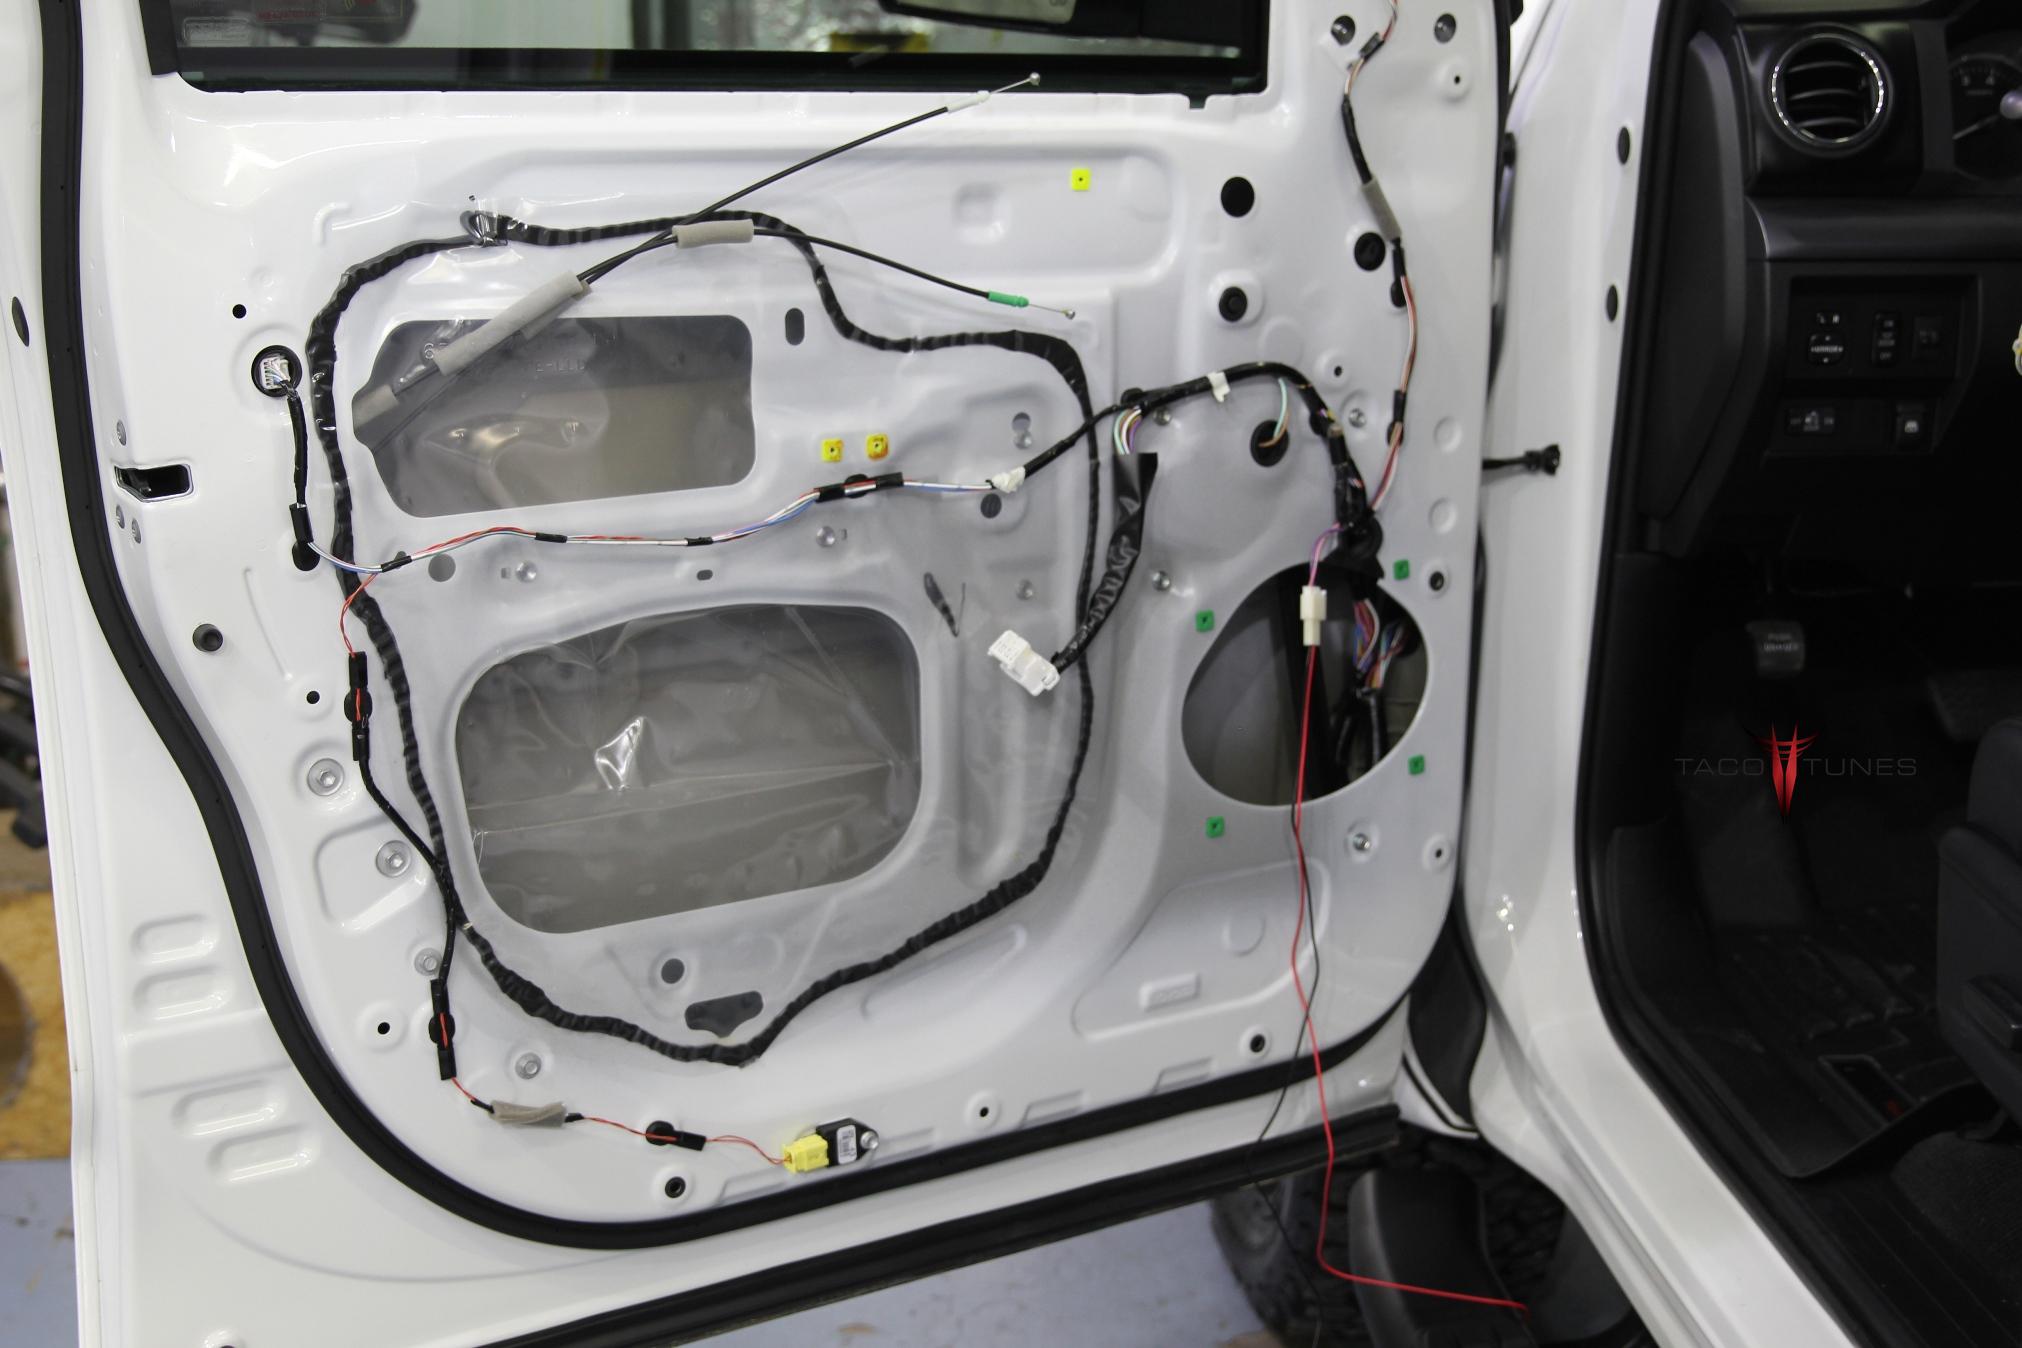
3 Harness Plug and Play system – no cutting or splicing any of your wires in your new Tundra.
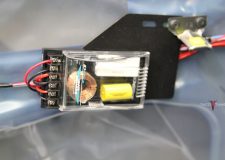
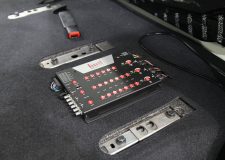
NTUNE6 – LOC / Audio leveler & Bass Enhancement module
Front Door Component Speakers:
Tacotunes.com TT65CS Component Speakers
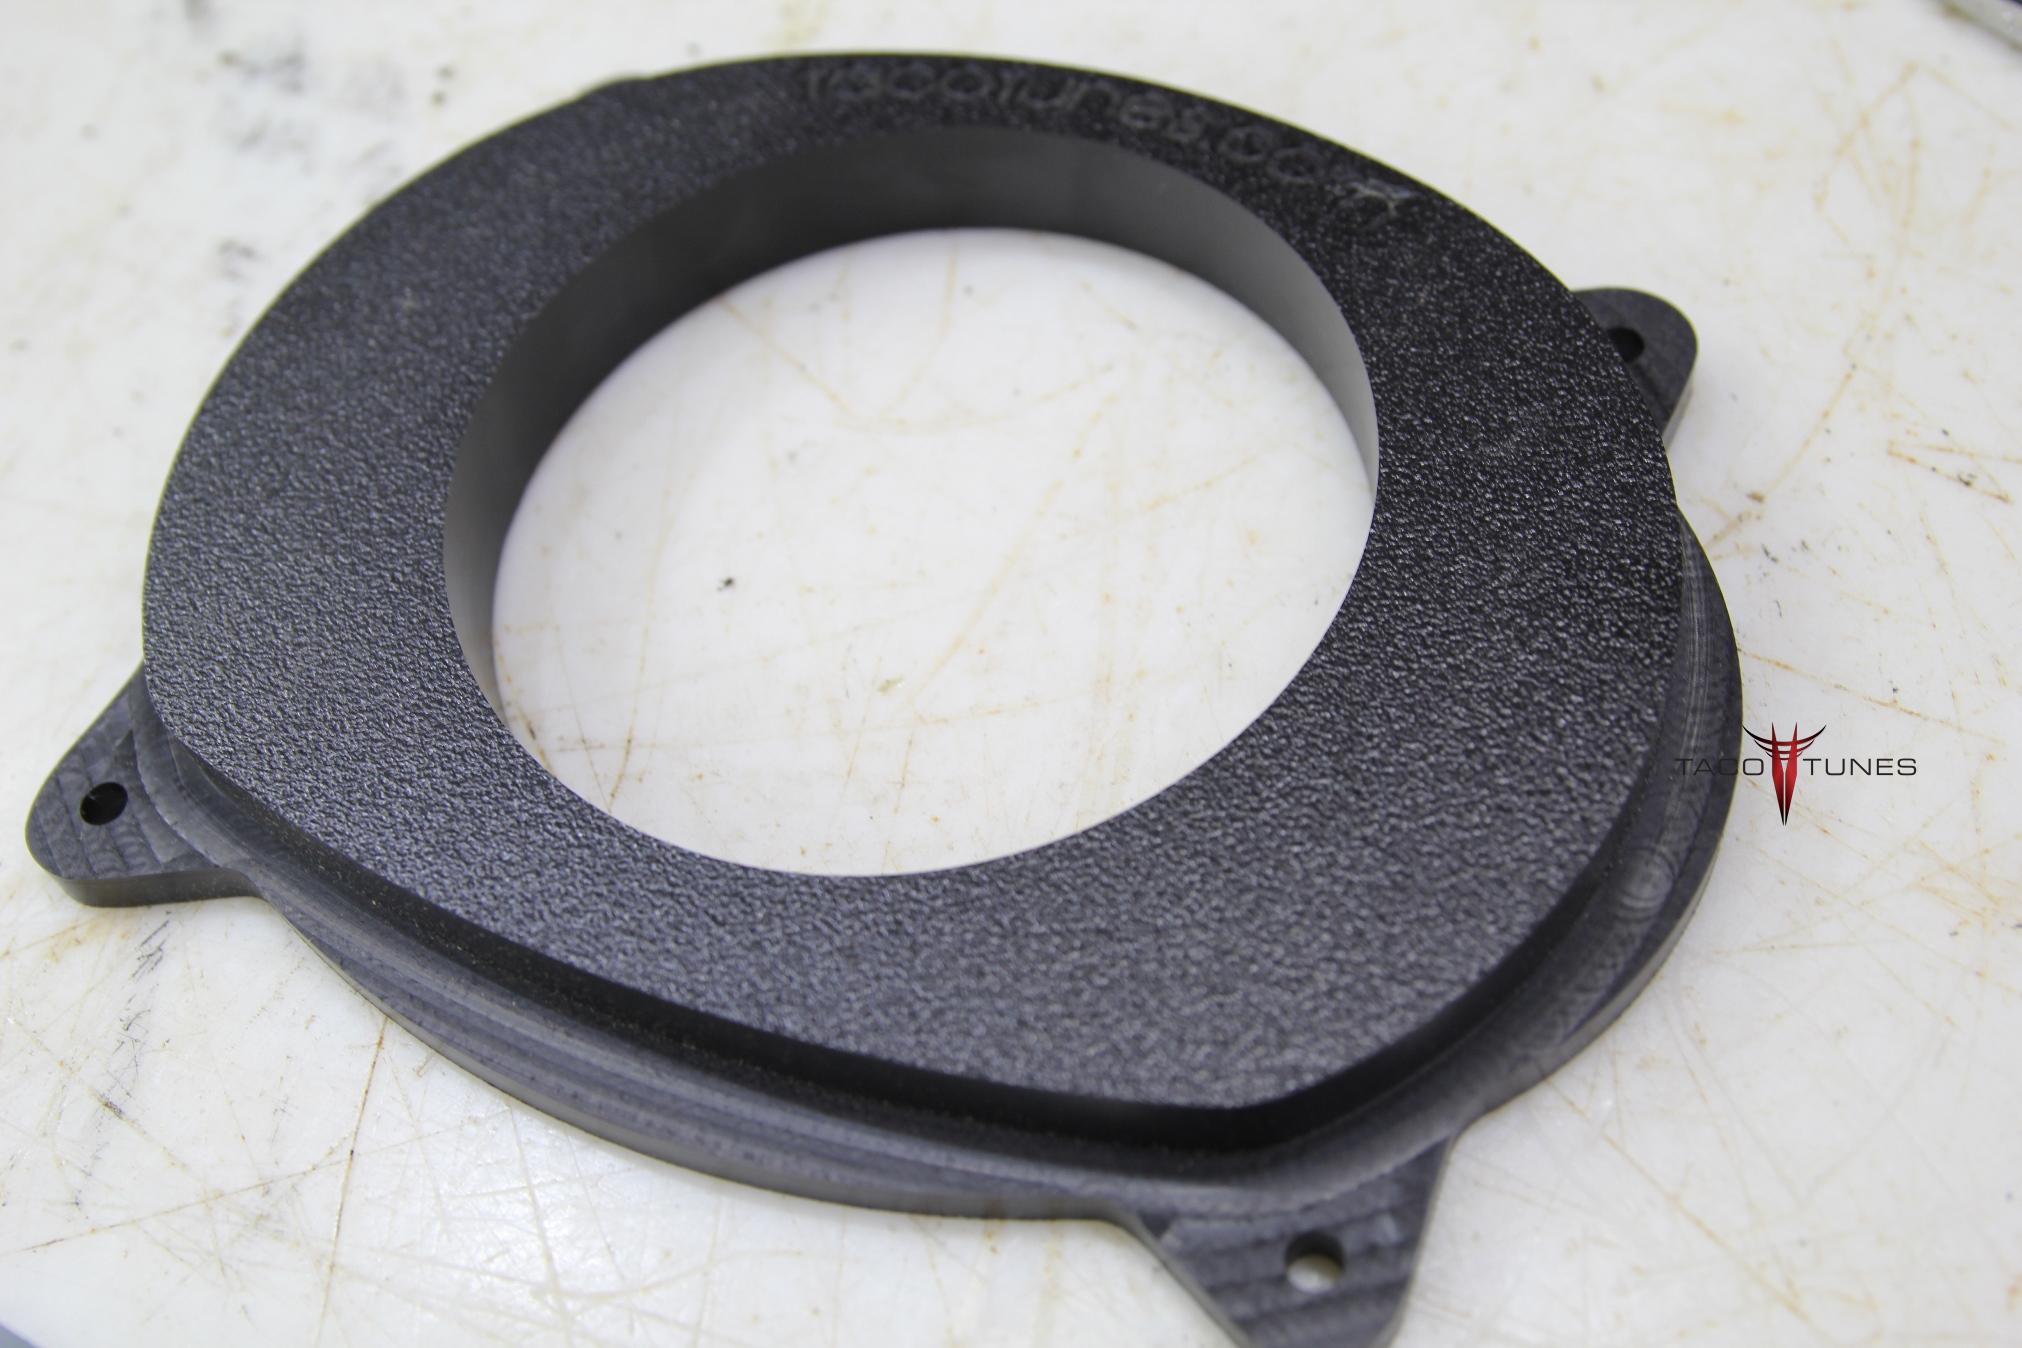
Tacotunes.com heavy duty speaker mounts cut to 5.6”
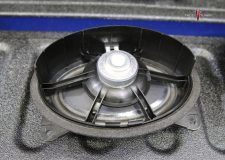
TT65 Mid bass Drivers -100 Watts RMS
TT65 Crossover
TT65 Tweeter
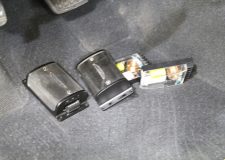
Tacotunes.com Front Door Speaker Wire Harness Adapters
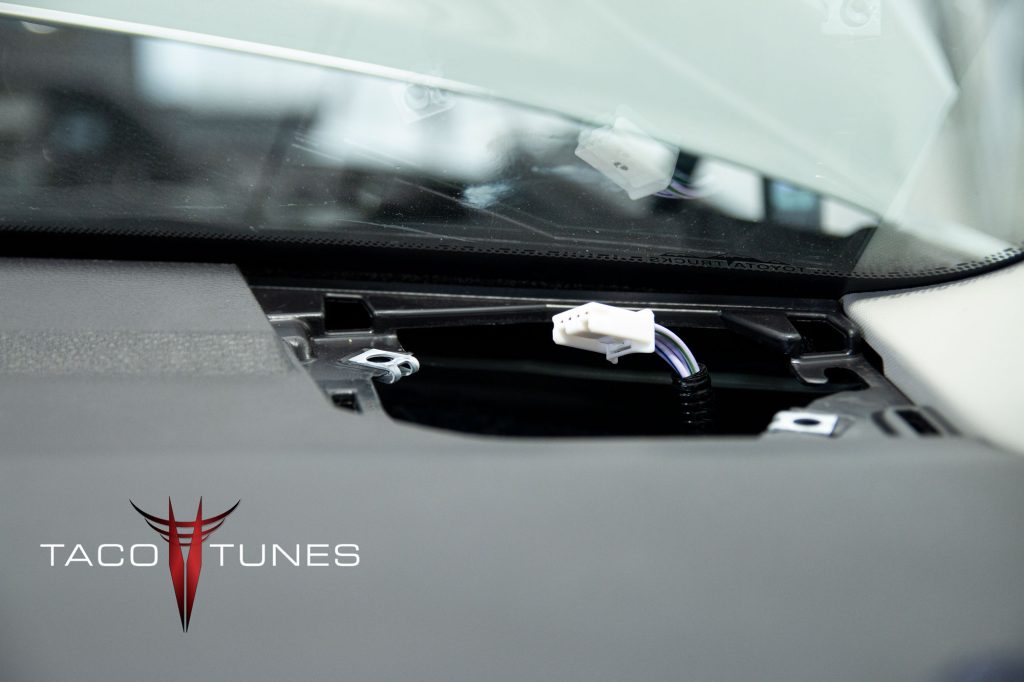
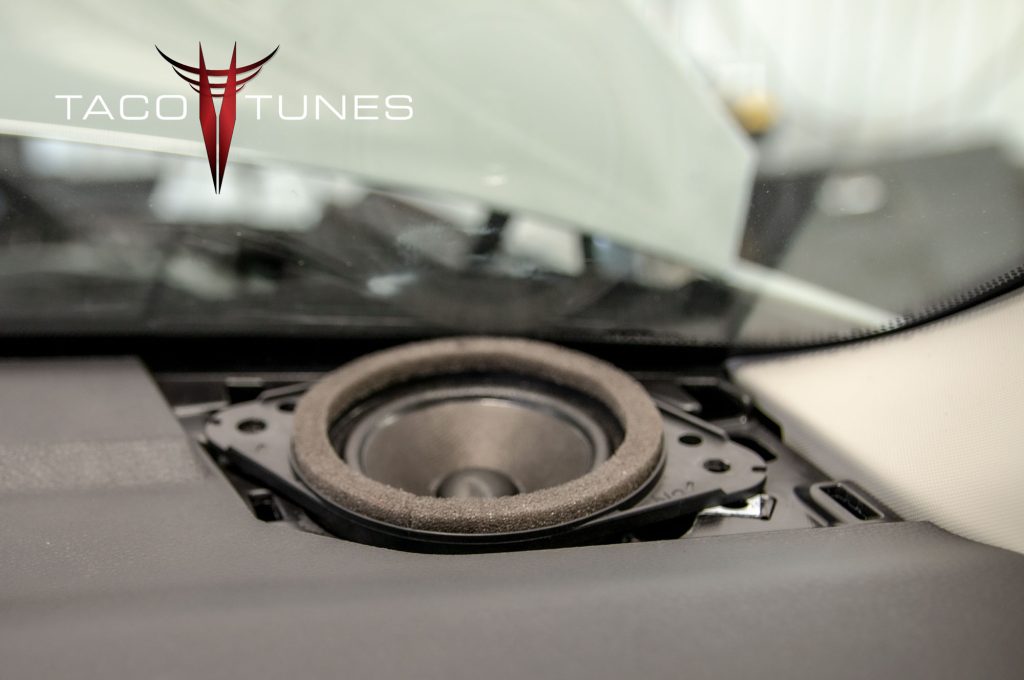
Tacotunes.com Dash Speaker Wire Harness Adapters
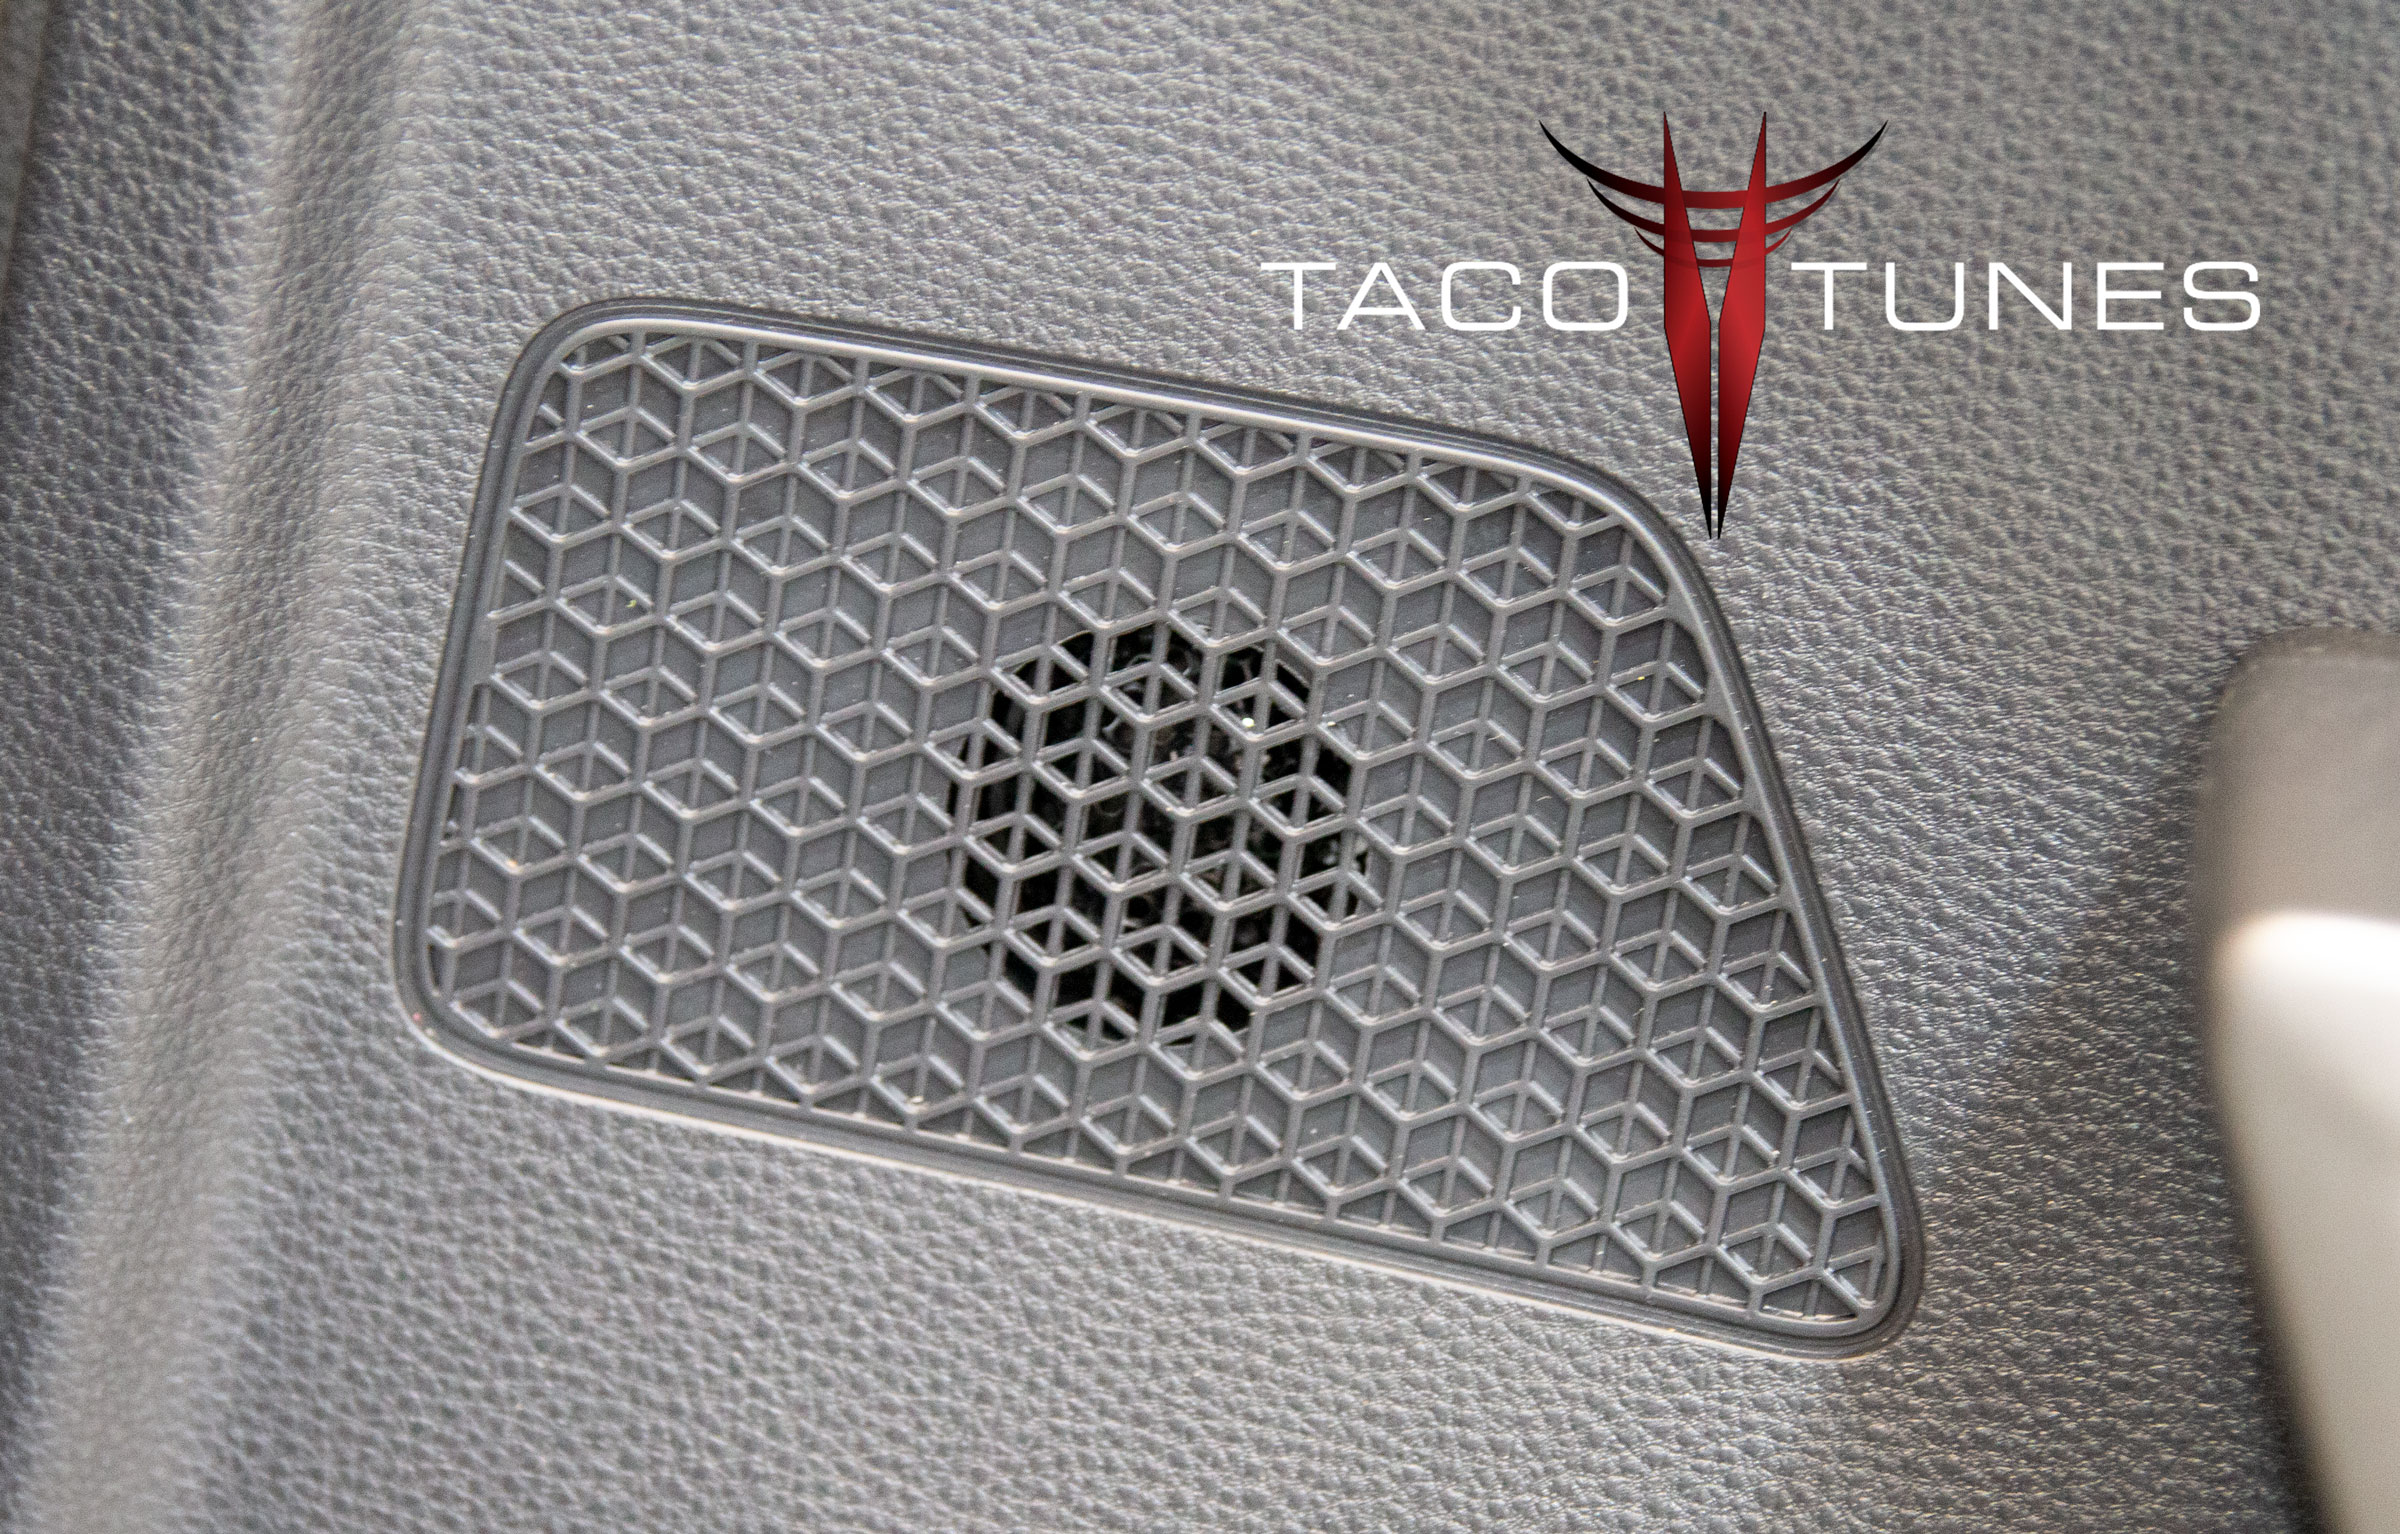
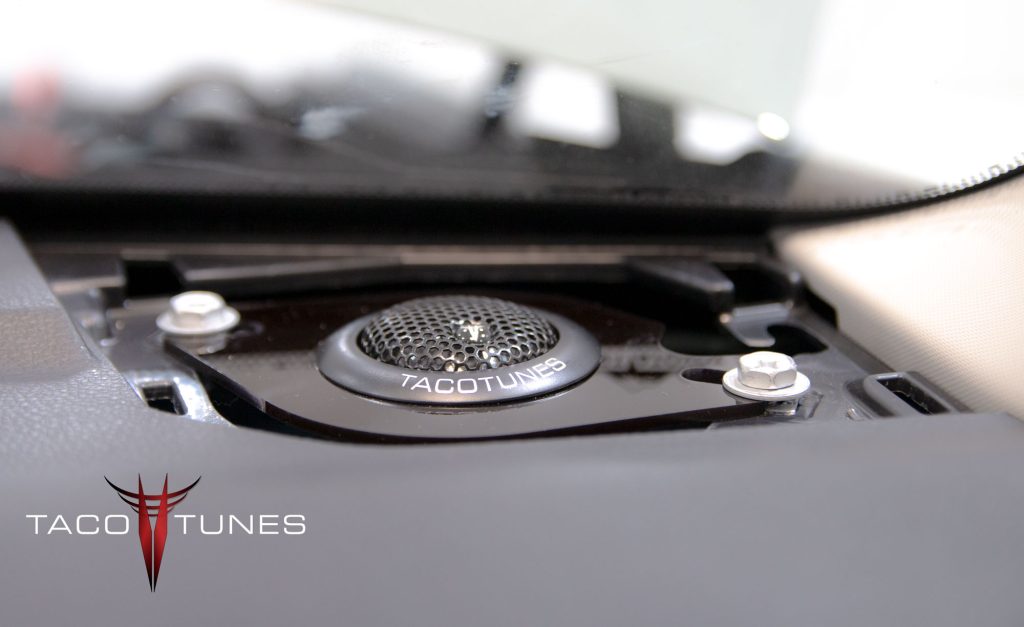
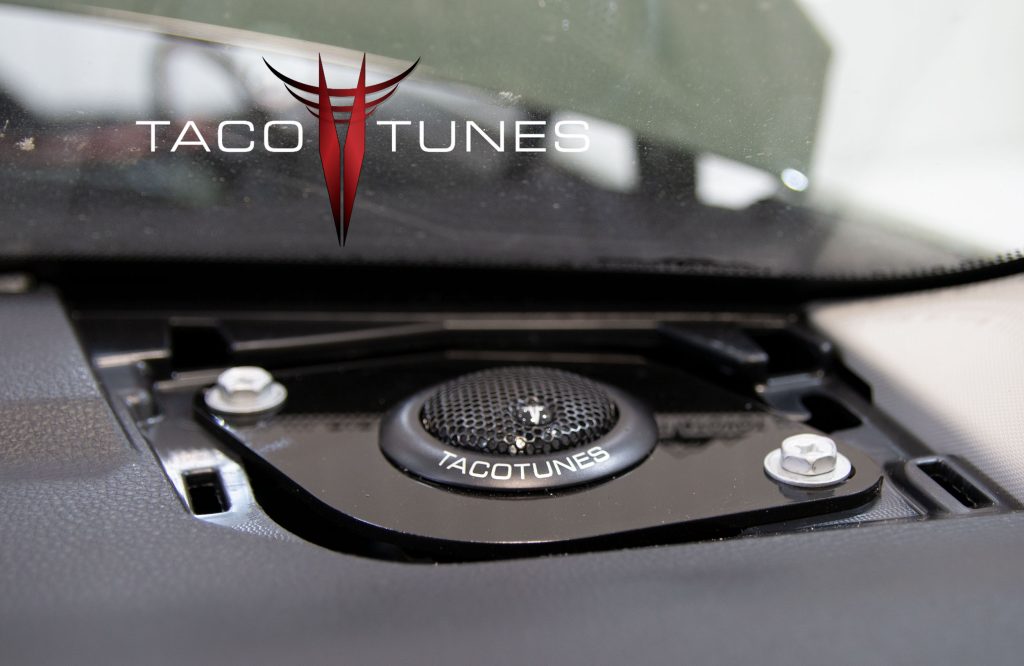
Tweeters Installed in dash location using tweeter adapters.
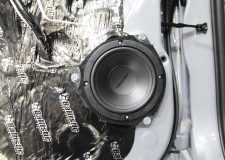
Rear Door Components:
Tacotunes.com TT65CS Component Speakers
Tacotunes.com heavy duty speaker mounts cut to 5.6”
TT65 Mid bass drivers Handles -100 watts RMS
TT65 Crossover
TT65 Tweeter
Tacotunes.com Tweeter Harness Adatpers
Tweeters will fit in stock door location
Amps:
tacotunes.com TXD3204v3 – 4 Channel Amp (100×4)
tacotunes.com TXD10001 – Subwoofer Amp
100 x 4 (Speakers)
800 x 1 (Subwoofer)
Subwoofer(s):
Subwoofer Box & Subwoofers
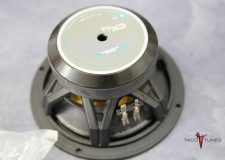
Tacotunes.com Dual 10” subwoofers
NOTE: Keep eye out for our under seat fiberglass subwoofer boxes! These are designed for serious bass lovers! Tons of air space and mounting depth!
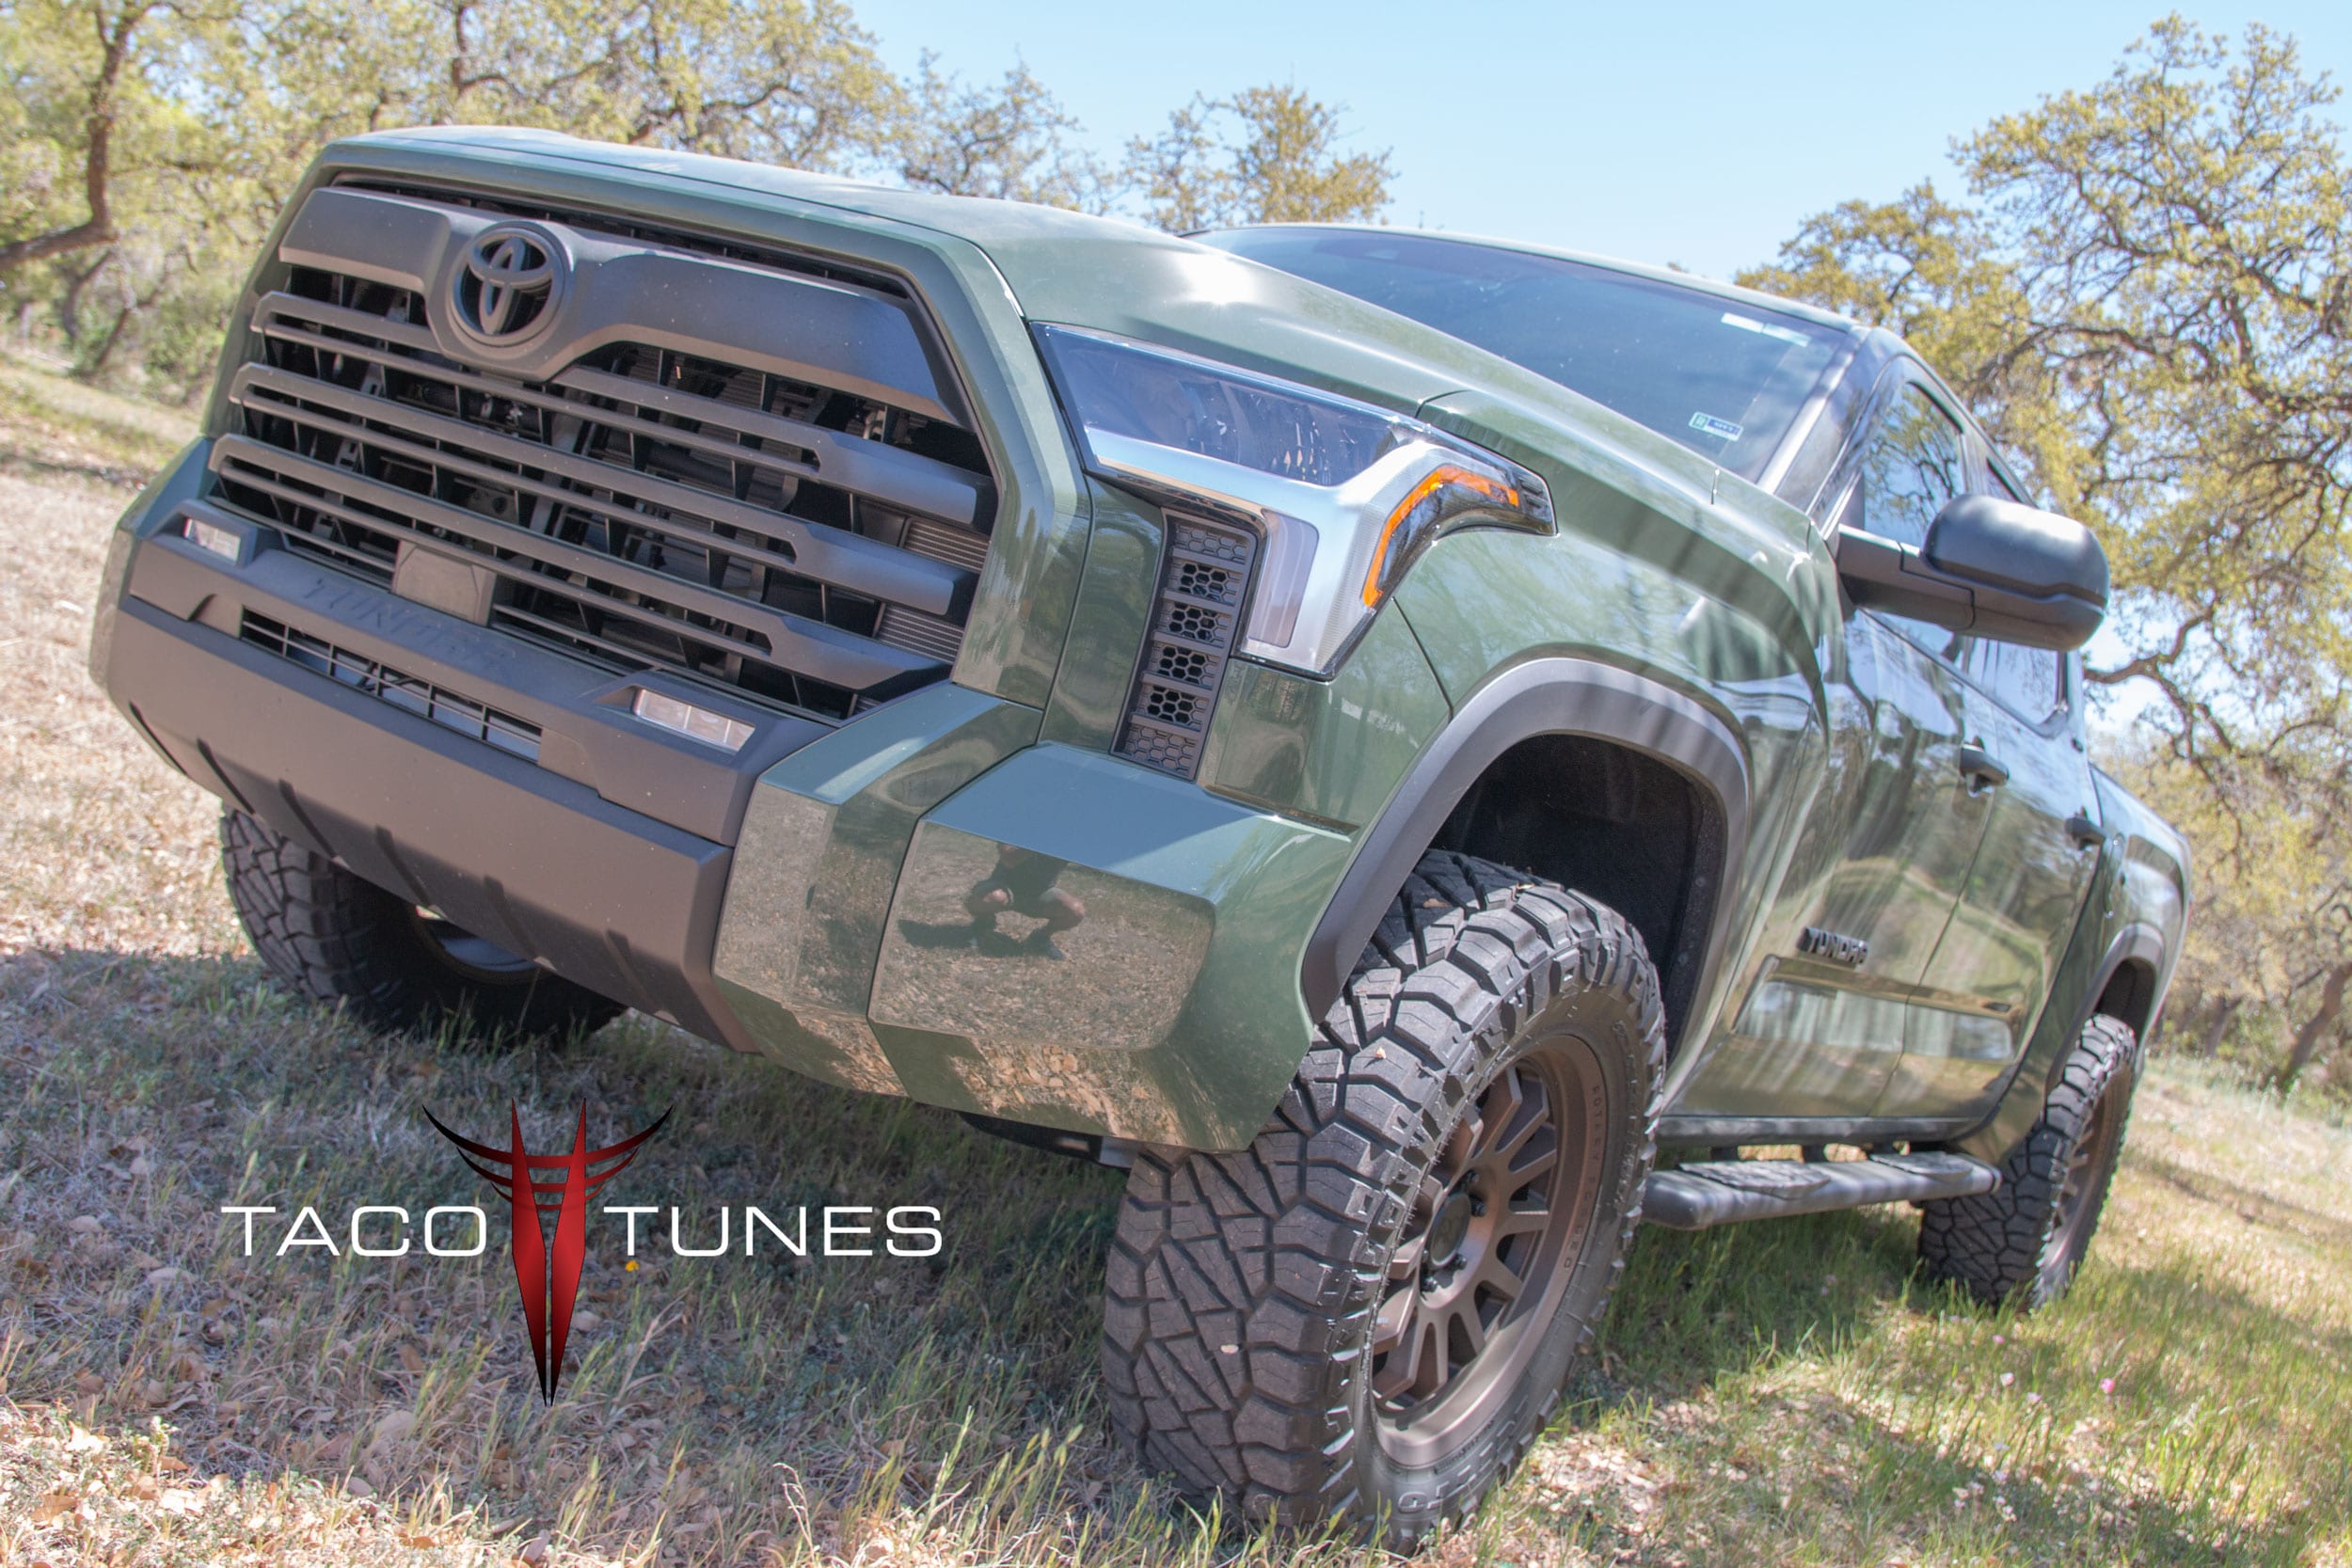
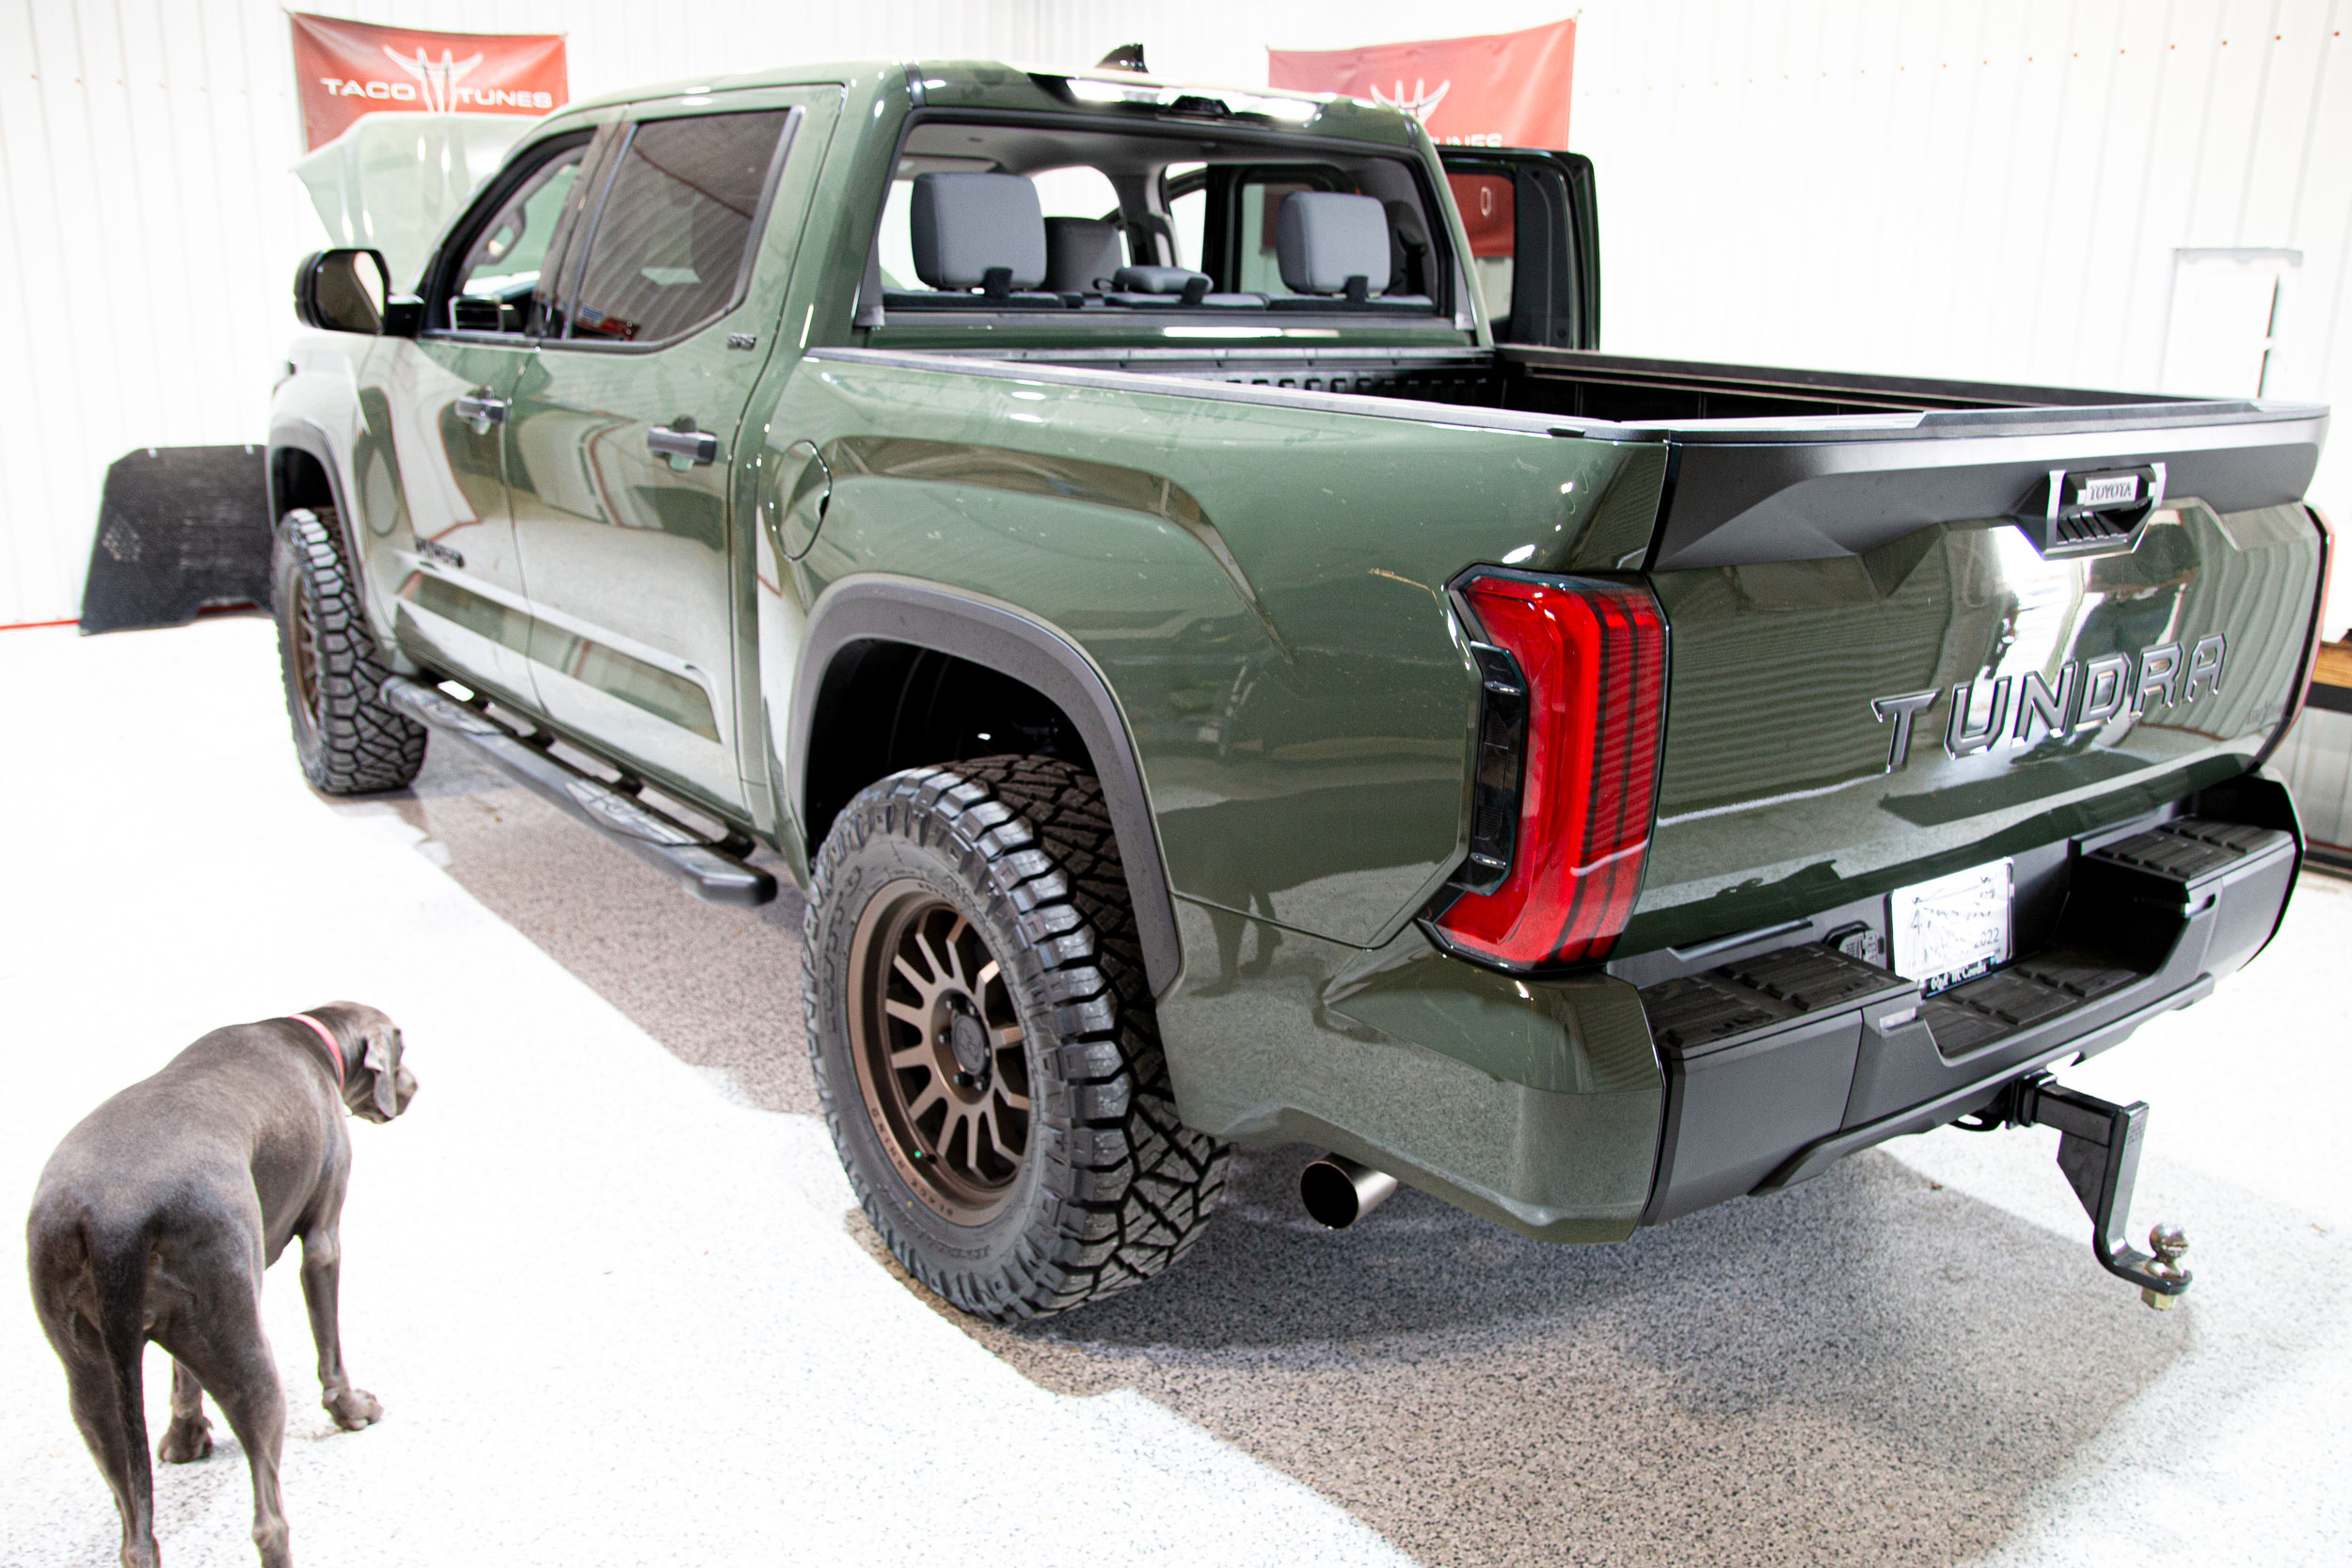
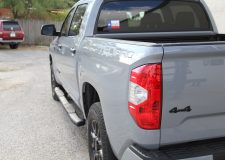
Justice is local here in San Antonio. He had our system 1A installed in his Gen 3 Tundra. He contacted us and asked if we could get him in to replace his stock audio – but keep his stock head unit (radio) – just like we did in his GEN2 Tundra. Of course! Below are a few pictures of his 2022 Army Green Toyota Tundra CrewMax.
Justices’ 2022 Toyota Tundra – in for audio system upgrade.
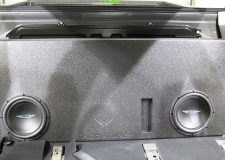
2022 Toyota Tundra Dual Subwoofer box holds 2 inch subwoofers.
2022+ Toyota Tundra Subwoofer Box Installation being installed.
2022 Toyota Tundra Rear Door Component Speakers
2022 Toyota Tundra Rear Door Component Speakers passive crossover and crossover mount
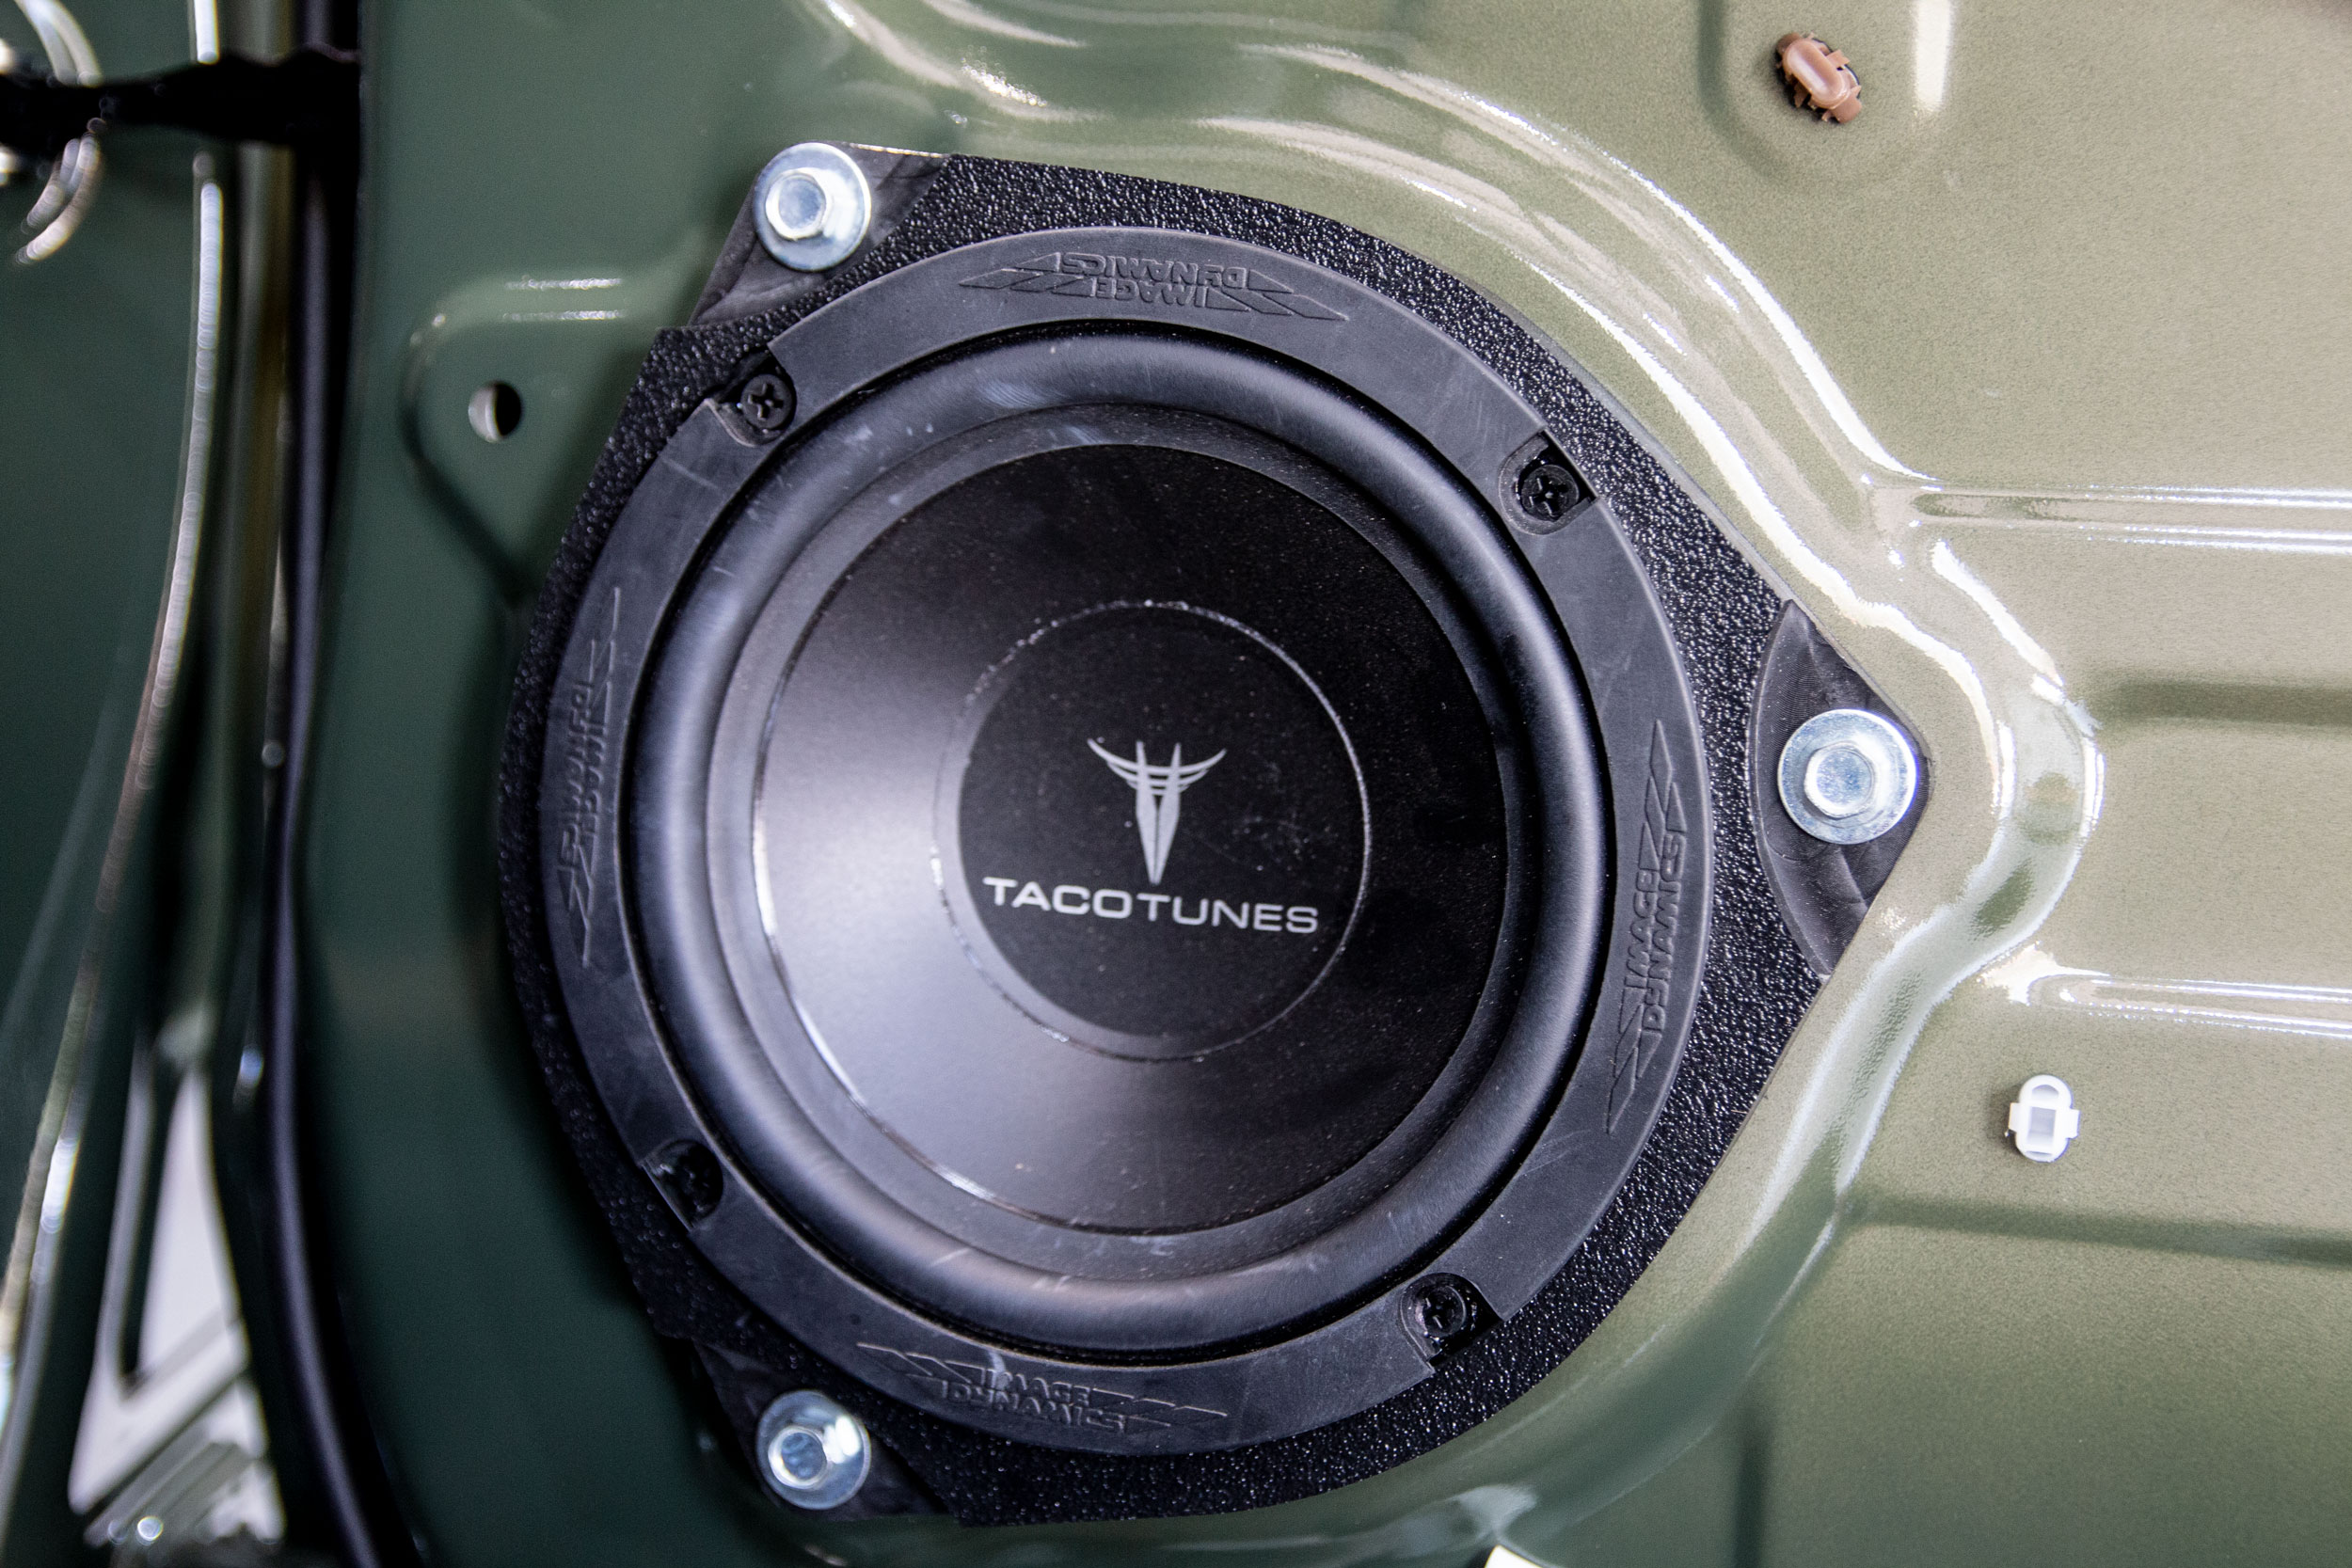
2022 Toyota Tundra Rear Door Component Speakers mid bass driver
2022 Toyota Tundra Laser Cut Amp Rack bolts directly to stock mounting location. Don’t let audio shops drill holes in your Tundra!
2022 Toyota Tundra Amp Rack with seat pushed all the way forward.
2022 Toyota Tundra Amp Rack with seat at about 5 foot 8 driver. Kick plate protects amps and wiring from passengers.
2022+ Toyota Tundra Front Door Component Speakers Dash Tweeters Plug and Play
2022 Toyota Tundra Stereo System Upgrade – Speakers, Subwoofers, Tweeters & Amplifiers
Dual 10″ Subwoofer Box – Ported
tacotunes.com TT65CS Component Speakers
Tundra Direct Integration – no cutting or splicing your factory wires. Amps bolt to stock mounting location.
2022 Toyota Tundra Audio Upgrade & Wiring Diagram
How to connect amp to your stock stereo
How to install subwoofer 2022 Tundra.
Component Speakers – no cutting or splicing uses all factory wiring.
Below you will find a detailed listing of all the parts we used in the installation.
Typical Installation time is 1 day, however if we matt (sound deaden) the front, rear doors and the rear wall behind the subwoofer it adds a day. If we are matting the truck, we keep the truck for two days. One day audio installation and matting jobs are possible, but require at least 12 hours with the truck.
Below is a detailed listing of the audio products installed in Eddie’s Tundra CrewMax
2022 Tundra Factory Integration System:
3 Harness Plug and Play system – no cutting or splicing any of your wires in your new Tundra.
NTUNE6 – LOC / Audio leveler & Bass Enhancement module
Front Door Component Speakers:
Tacotunes.com TT65CS Component Speakers
Tacotunes.com heavy duty speaker mounts cut to 5.6”
TT65 Mid bass Drivers -100 Watts RMS
TT65 Crossover
TT65 Tweeter
Tacotunes.com Front Door Speaker Wire Harness Adapters
Tacotunes.com Dash Speaker Wire Harness Adapters
Tweeters Installed in dash location using tweeter adapters.
Rear Door Components:
Tacotunes.com TT65CS Component Speakers
Tacotunes.com heavy duty speaker mounts cut to 5.6”
TT65 Mid bass drivers Handles -100 watts RMS
TT65 Crossover
TT65 Tweeter
Tacotunes.com Tweeter Harness Adatpers
Tweeters will fit in stock door location
Amps:
tacotunes.com TXD3204v3 – 4 Channel Amp (100×4)
tacotunes.com TXD10001 – Subwoofer Amp
100 x 4 (Speakers)
800 x 1 (Subwoofer)
Subwoofer(s):
Subwoofer Box & Subwoofers
Tacotunes.com Dual 10” subwoofers
NOTE: Keep eye out for our under seat fiberglass subwoofer boxes! These are designed for serious bass lovers! Tons of air space and mounting depth!
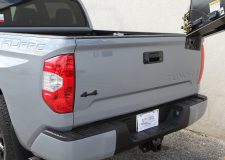
Clifford drove up a few hours to have us install our System 1B into his 2022+ Toyota Tundra. Clifford is the first “private” 2022+ Tundra owner we have installed. We install many audio systems for Red McCombs Toyota here in San Antonio, plus a number of other dealers use our products as well . We install many audio systems in brand new Tundras before they hit the dealer lot.
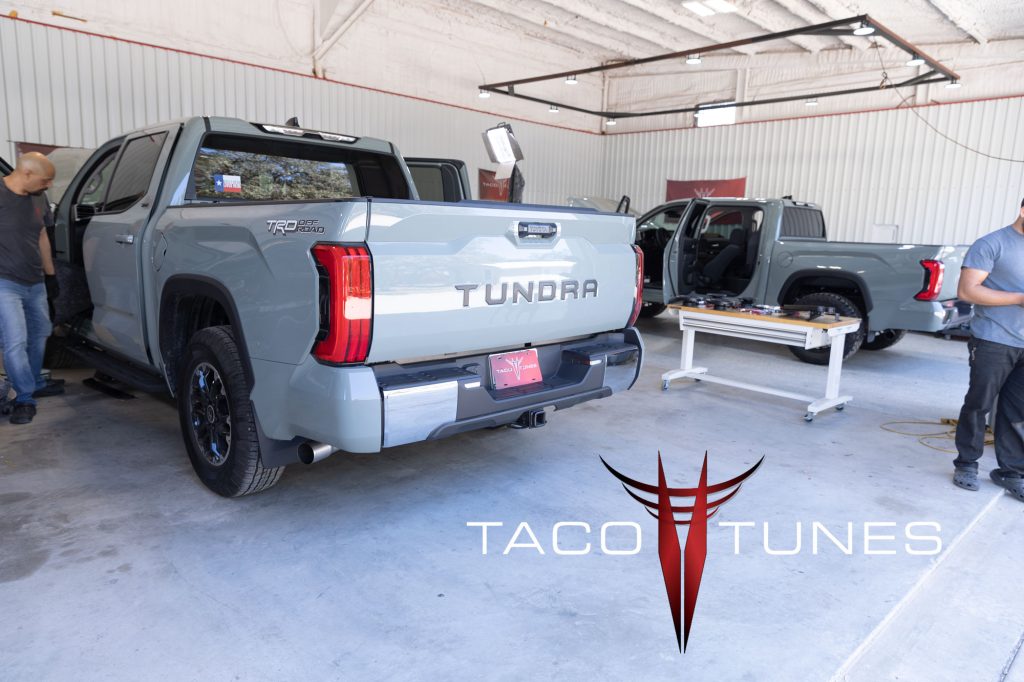
2 – 2022 Toyota Tundra CrewMax – Lunar Rock Audio System Upgrades
Laser Cut Amp Rac & Tacotunes Amplifiers – bolts to stock mounting location. No drilling!
Dual 10″ Subwoofer Box – Ported
tacotunes.com TT65CS Component Speakers
tacotunes.com tt6CS Component Speakers
Tundra Direct Integration – no cutting or splicing your factory wires. Amps bolt to stock mounting location.
2022 Toyota Tundra Audio Upgrade & Wiring Diagram
How to connect amp to your stock stereo
How to install subwoofer 2022 Tundra.
Component Speakers – no cutting or splicing uses all factory wiring.
Below you will find a detailed listing of all the parts we used in the installation.
Typical Installation time is 1 day, however if we matt (sound deaden) the front, rear doors and the rear wall behind the subwoofer it adds a day. If we are matting the truck, we keep the truck for two days. One day audio installation and matting jobs are possible, but require at least 12 hours with the truck.
Below is a detailed listing of the audio products installed in Eddie’s Tundra CrewMax
2022 Tundra Factory Integration System:
3 Harness Plug and Play system – no cutting or splicing any of your wires in your new Tundra.
NTUNE6 – LOC / Audio leveler & Bass Enhancement module
Front Door Component Speakers:
Tacotunes.com TT65CS Component Speakers
Tacotunes.com heavy duty speaker mounts cut to 5.6”
TT65 Mid bass Drivers -100 Watts RMS
TT65 Crossover
TT65 Tweeter
Tacotunes.com Front Door Speaker Wire Harness Adapters
Tacotunes.com Dash Speaker Wire Harness Adapters
Tweeters Installed in dash location using tweeter adapters.
Rear Door Components:
Tacotunes.com TT65CS Component Speakers
Tacotunes.com heavy duty speaker mounts cut to 5.6”
TT65 Mid bass drivers Handles -100 watts RMS
TT65 Crossover
TT65 Tweeter
Tacotunes.com Tweeter Harness Adatpers
Tweeters will fit in stock door location
Amps:
tacotunes.com TXD3204v3 – 4 Channel Amp (100×4)
tacotunes.com TXD10001 – Subwoofer Amp
100 x 4 (Speakers)
800 x 1 (Subwoofer)
Subwoofer(s):
Subwoofer Box & Subwoofers
Tacotunes.com Dual 10” subwoofers
NOTE: Keep eye out for our under seat fiberglass subwoofer boxes! These are designed for serious bass lovers! Tons of air space and mounting depth!
Following the instructions below is crucial to a successful installation. We recommend prepping the following items the day before you begin your installation. This will ensure all the parts are at your disposal. There are a couple of steps where it will help to have a buddy help you out. Not necessary but makes it easier. Do NOT start drinking your favorite beverage until recommend below. Plus be sure to keep your mind sharp. By getting the installation done right the first time you will enjoy years of quality sound in your Toyota Tundra. Shortcuts and rushing through the install will cause issues down the road. Take your time enjoy the install.
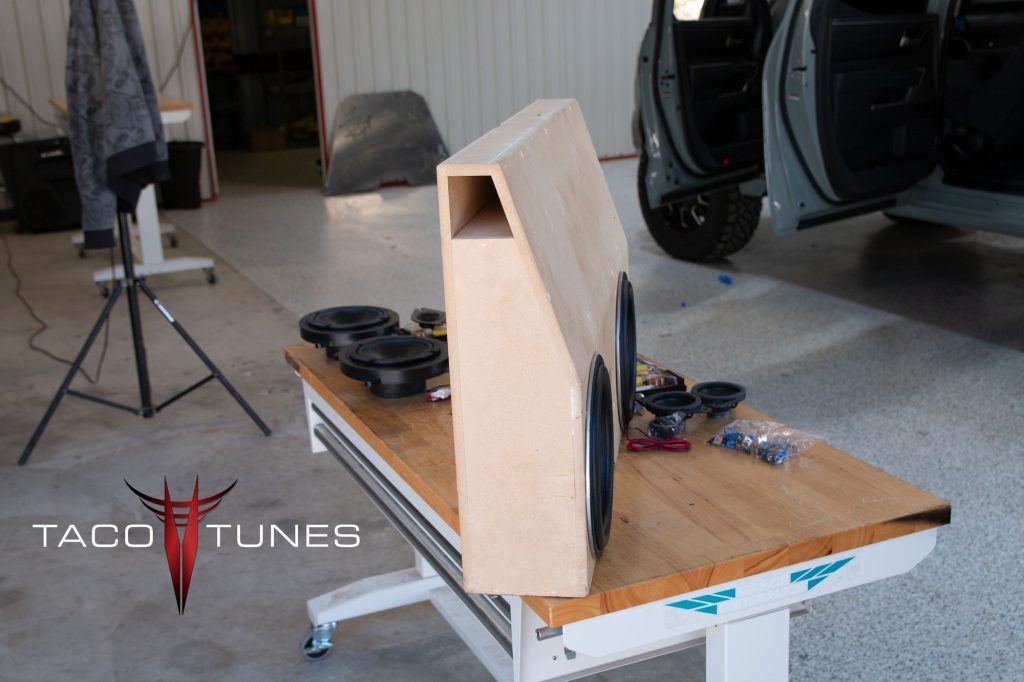
Mount your crossovers to the provided crossover mounts. (see speaker install video)
Connect the 18g & 16g wiring to the crossovers
If mounting your tweeters in sail panels, prepare your sail panels.
Assemble your amp rack, amplifier, distribution block etc. (see video below)
Assemble your subwoofer / subwoofer box. (see video below)
Watch installation videos to understand the process.
Get your six pack on ice. DO NOT OPEN until instructed! 🙂
Go over checklist and ensure all parts are in the package. We have a checklist that we do on EACH system. But we are human so it is possible a part was missed.
Installation: 3 – 5 hours
Tundra Preparation
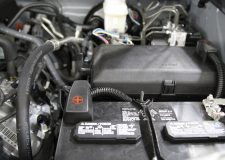
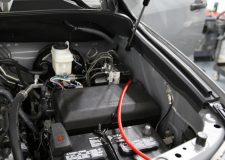
UNPLUG YOUR BATTERY. Remove the NEGATIVE connection from the battery and secure it AWAY from battery.
Unplug battery – ground connection.
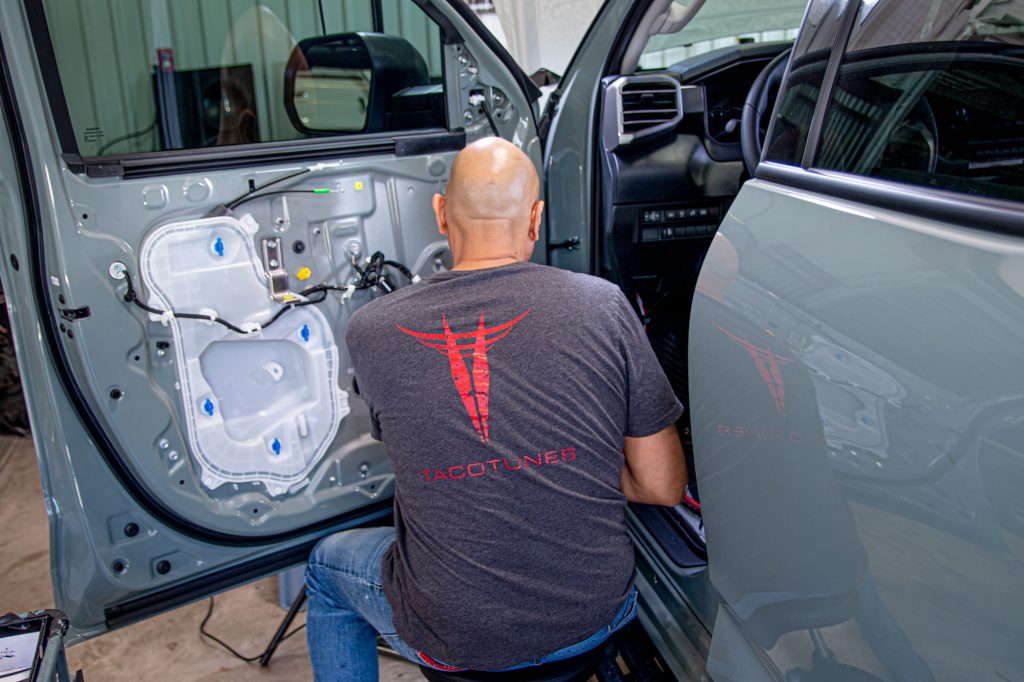
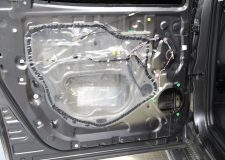
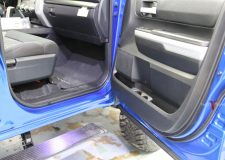
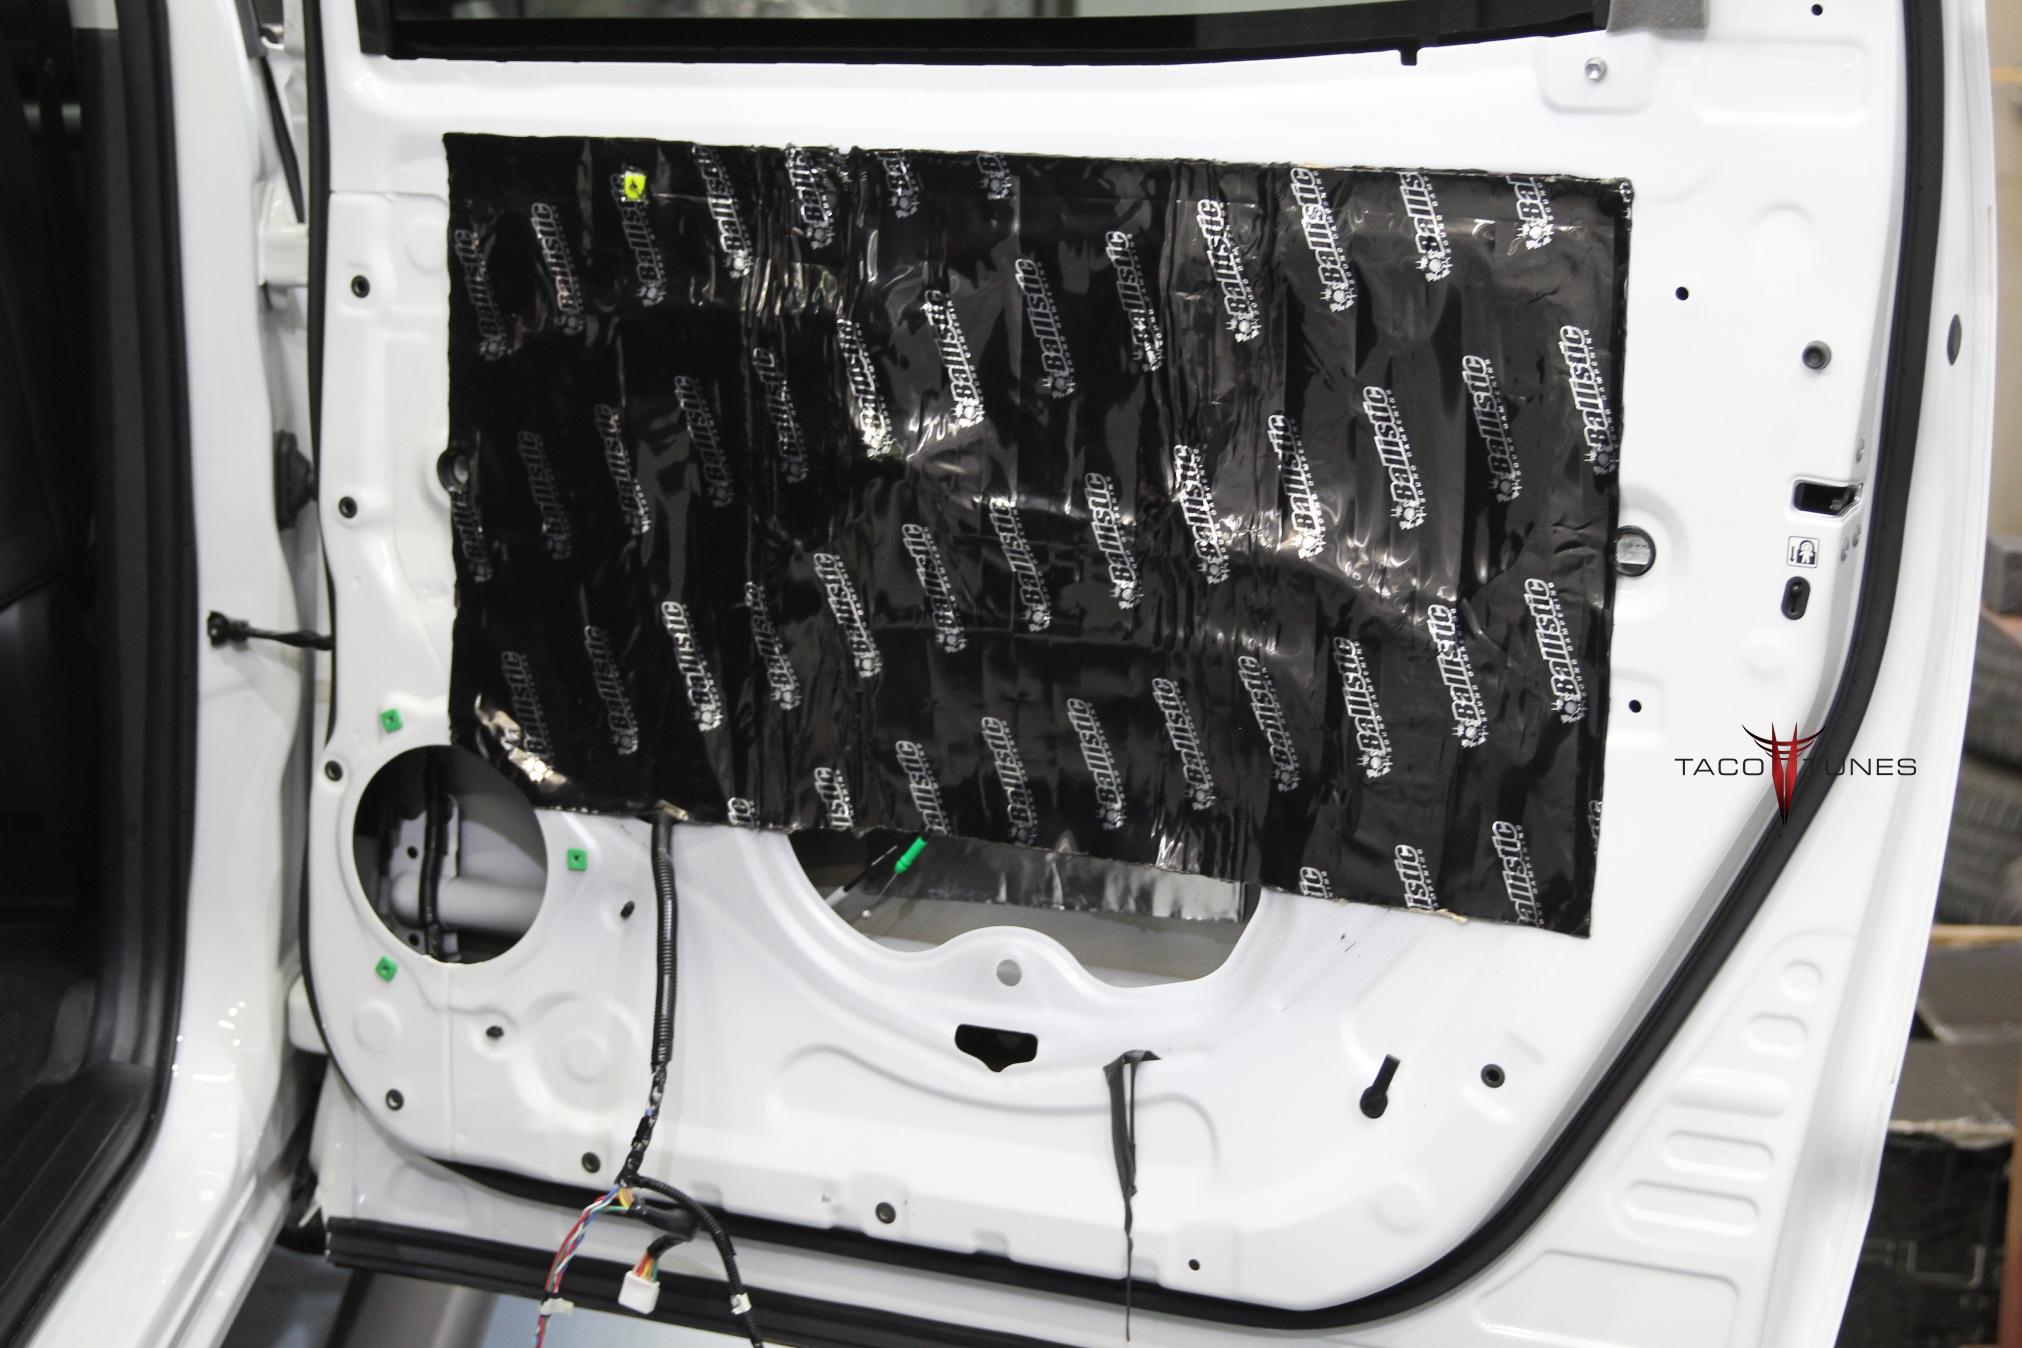
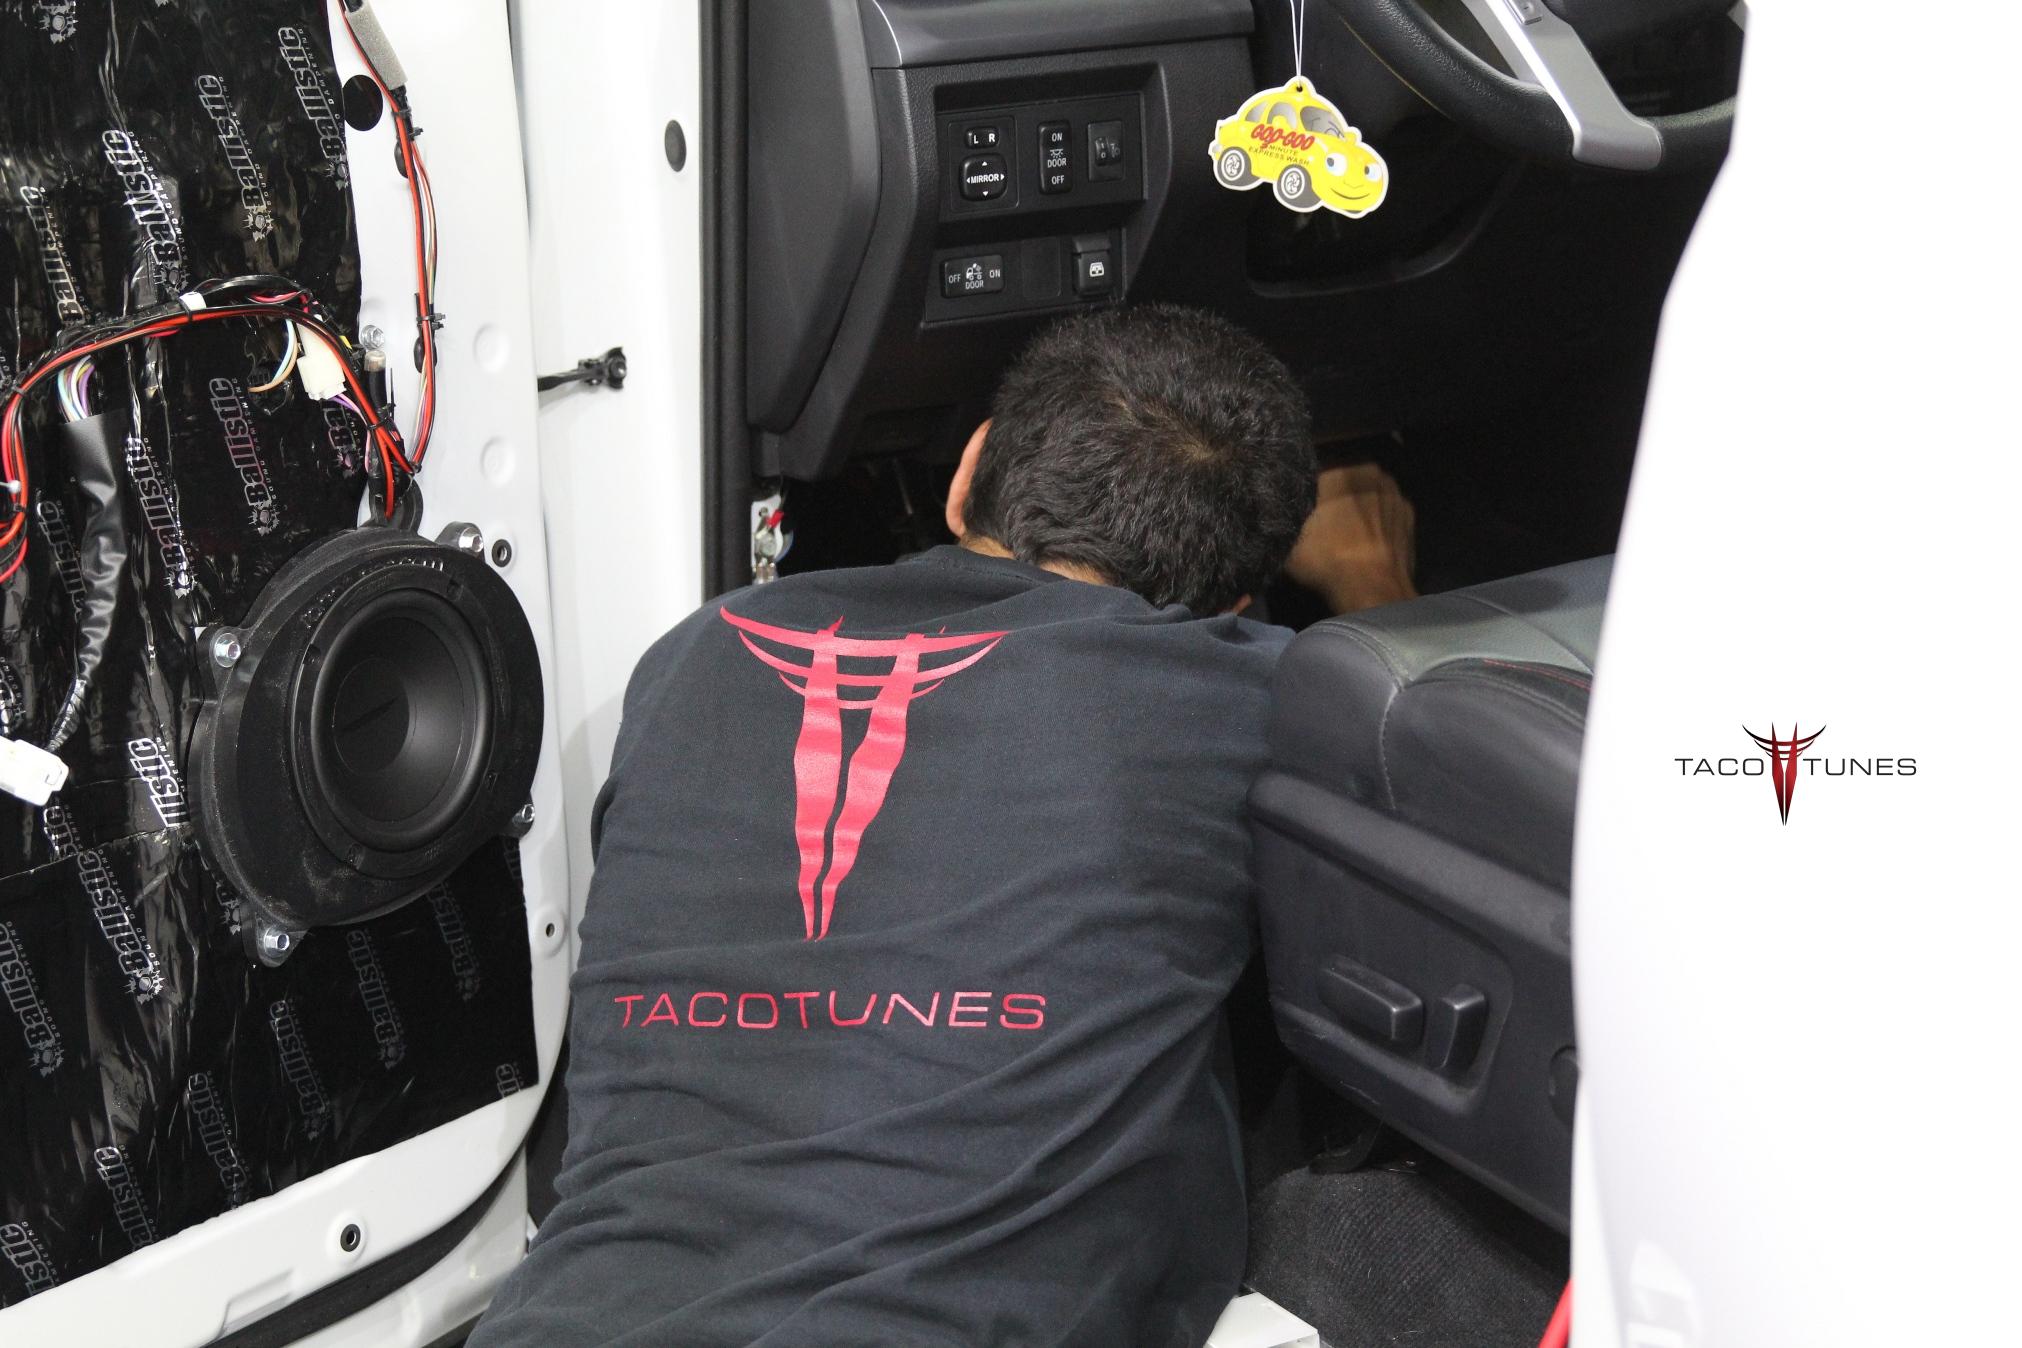
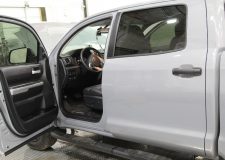
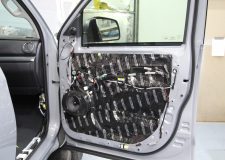
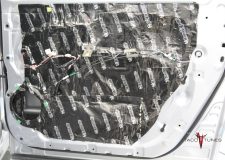
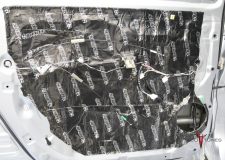
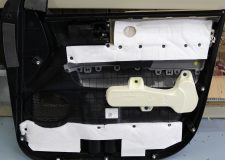
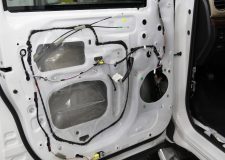
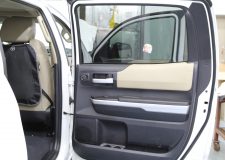
Remove the door panels – if you are installing new speakers.
Remove door sills.
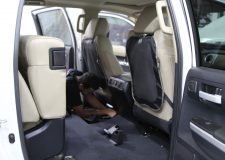
Remove front passenger seat. (you can lean seat back per video)
Remove center console cover – cover ONLY. (Per Video)
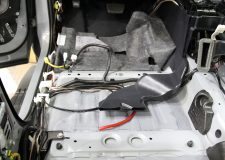
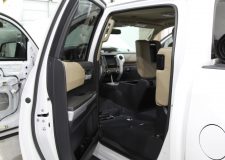
Remove rear seats (if installing subwoofer) – have a friend help the rear seats are heavy. ( you can lean larger seat to front of vehicle to avoid removal). Remove the smaller passenger side seat to make it easier to access amp under front seat. NOTE: Use the rear wall pad (per vid) as a way to protect your carpet from the rear seats.
Remove stock amplifier under front passenger seat. (save the bolts)
Remove front / rear speakers.
Remove dash speakers / tweeters and center speaker if equipped. You can leave them unplugged and in place, but we recommend leaving them unplugged during and after you have completed your install. Note: We offer 2 solutions for JBL equipped Tundras, please see notes below.
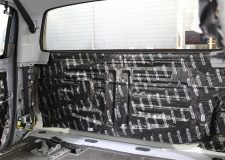
If you will be matting your doors we suggest doing this before you begin the steps below. Keep in mind matting will add a full day to your install.
Installation Steps:
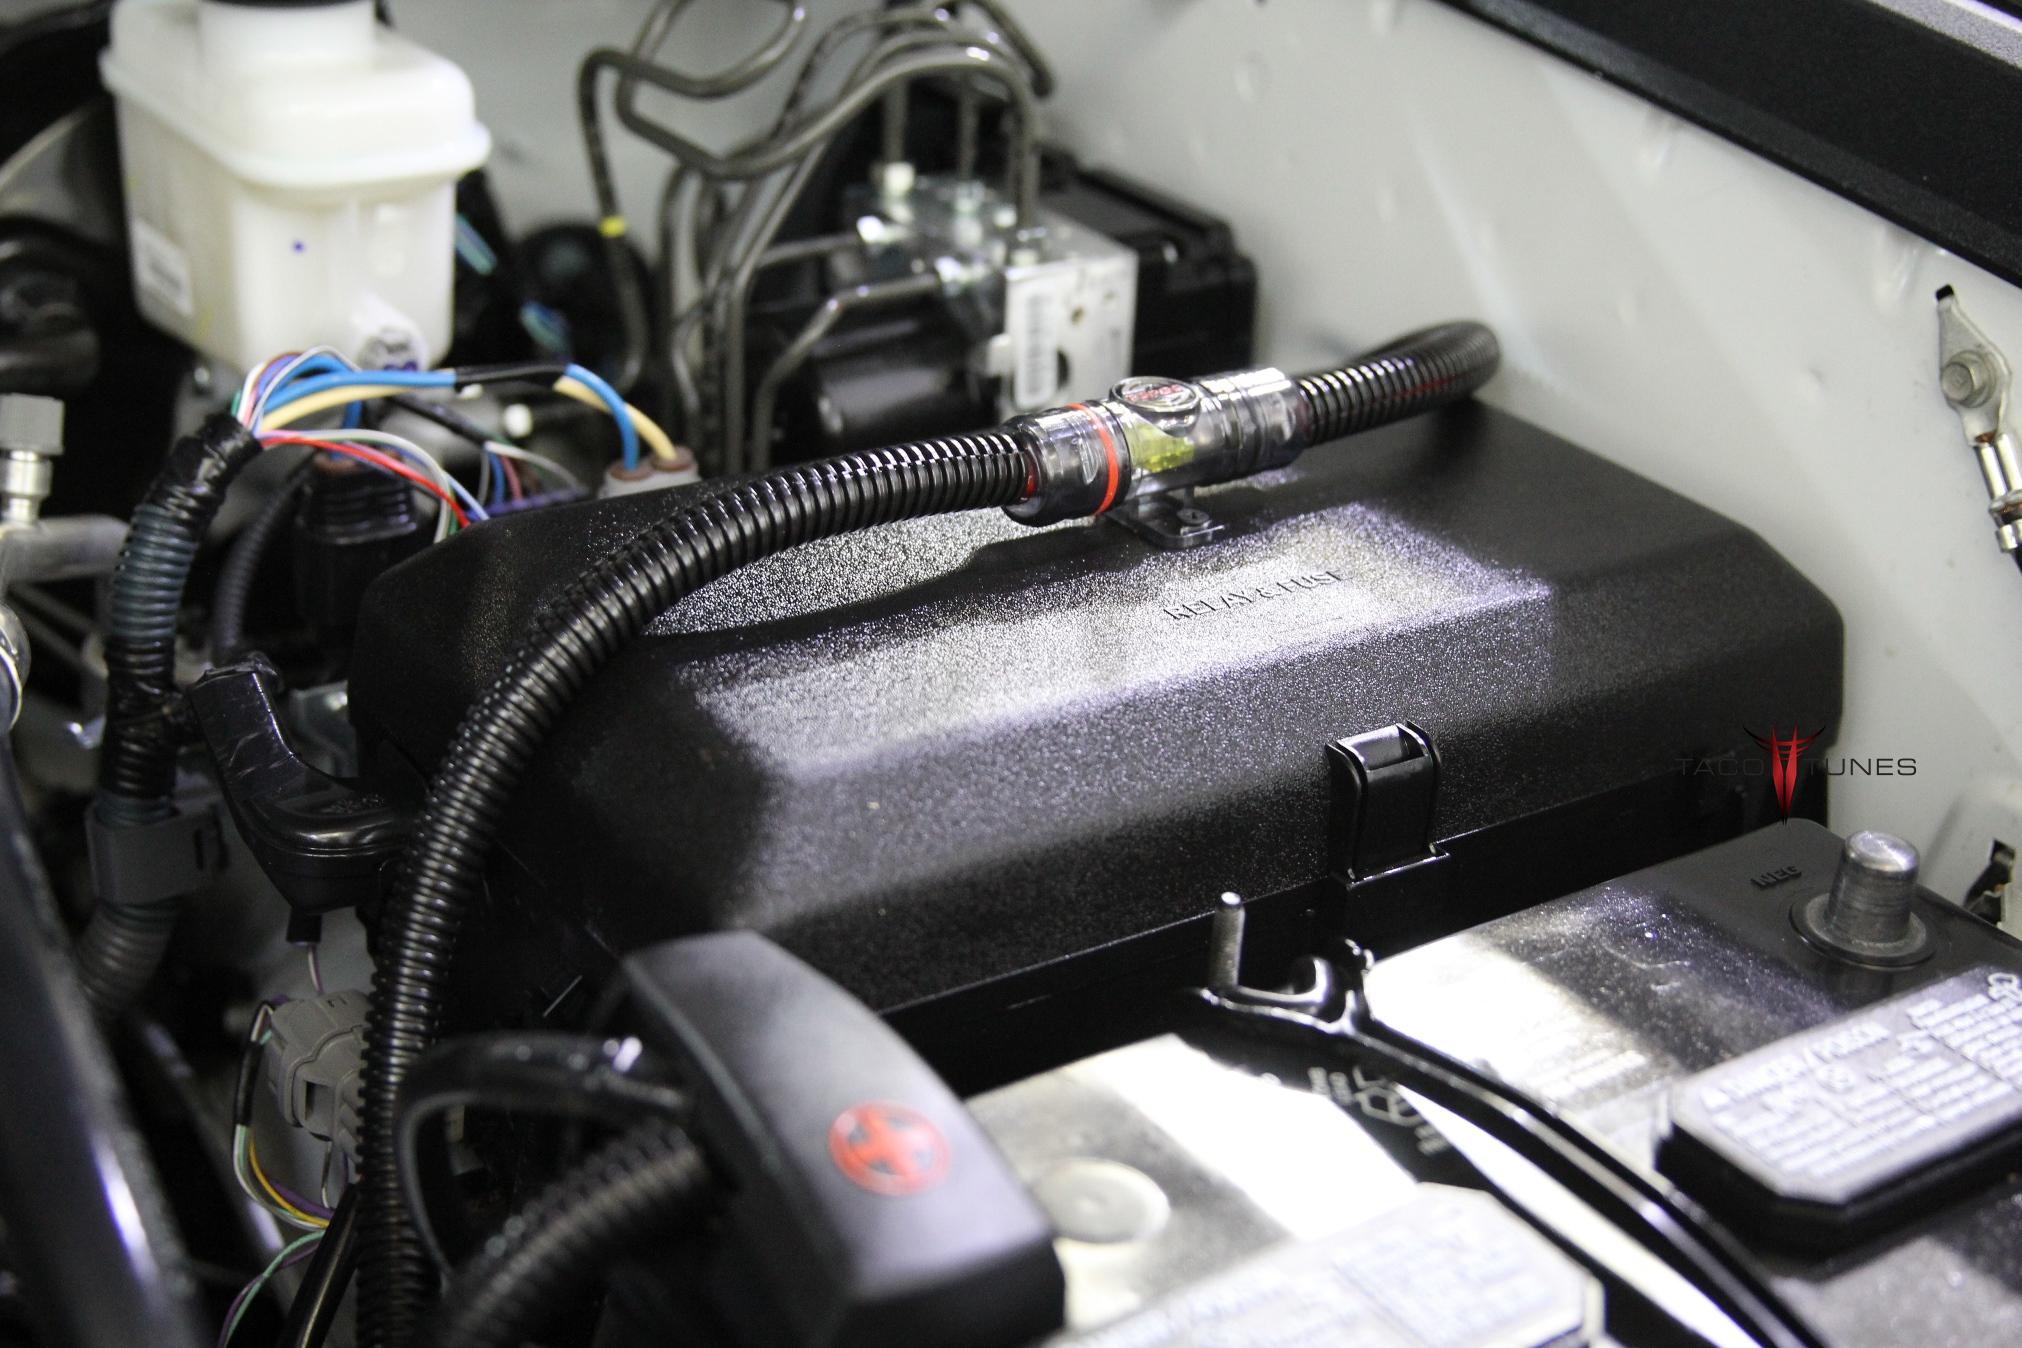
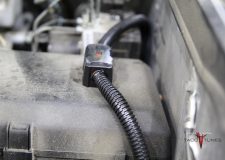
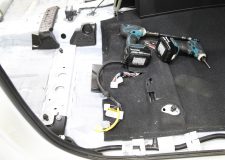
Run power wire from battery to new amp location. (see video)
Assemble the fuse block and complete under hood details. (Do not connect to battery)
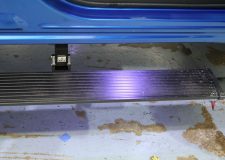
Run subwoofer wire to rear of vehicle per the installation video.
Install amps / amp rack per video. (do not connect speaker output connections)
Connect input side of amp first. (Blue molex plugs from direct connect harness)
Connect battery
Tune amplifiers per tuning video(s).
Install front / rear speakers.
Install subwoofer.
Test system – ensure playing correctly.
disconnect battery.
Install center console.
Install seats BEFORE installing door panels and door sills. (battery should be unplugged)
Install door sills.
Install door panels.
Connect battery.
Test the sound and ensure all playing properly.
Open a single beverage, beat your chest and listen to your tunes for about 10 minutes.
Finish cleaning up odds and ends.
Be sure to save ALL stock parts.
Congratulations you just installed an audio system that would have cost thousands of $ at your local audio shop.
System 1A Install Videos:
Preparing for installation:
Assemble Amp Rack & 5 Channel Amp
Assemble Subwoofer Box:
How to remove door panels:
How to install Front Door Speakers:
Installing Power Wire
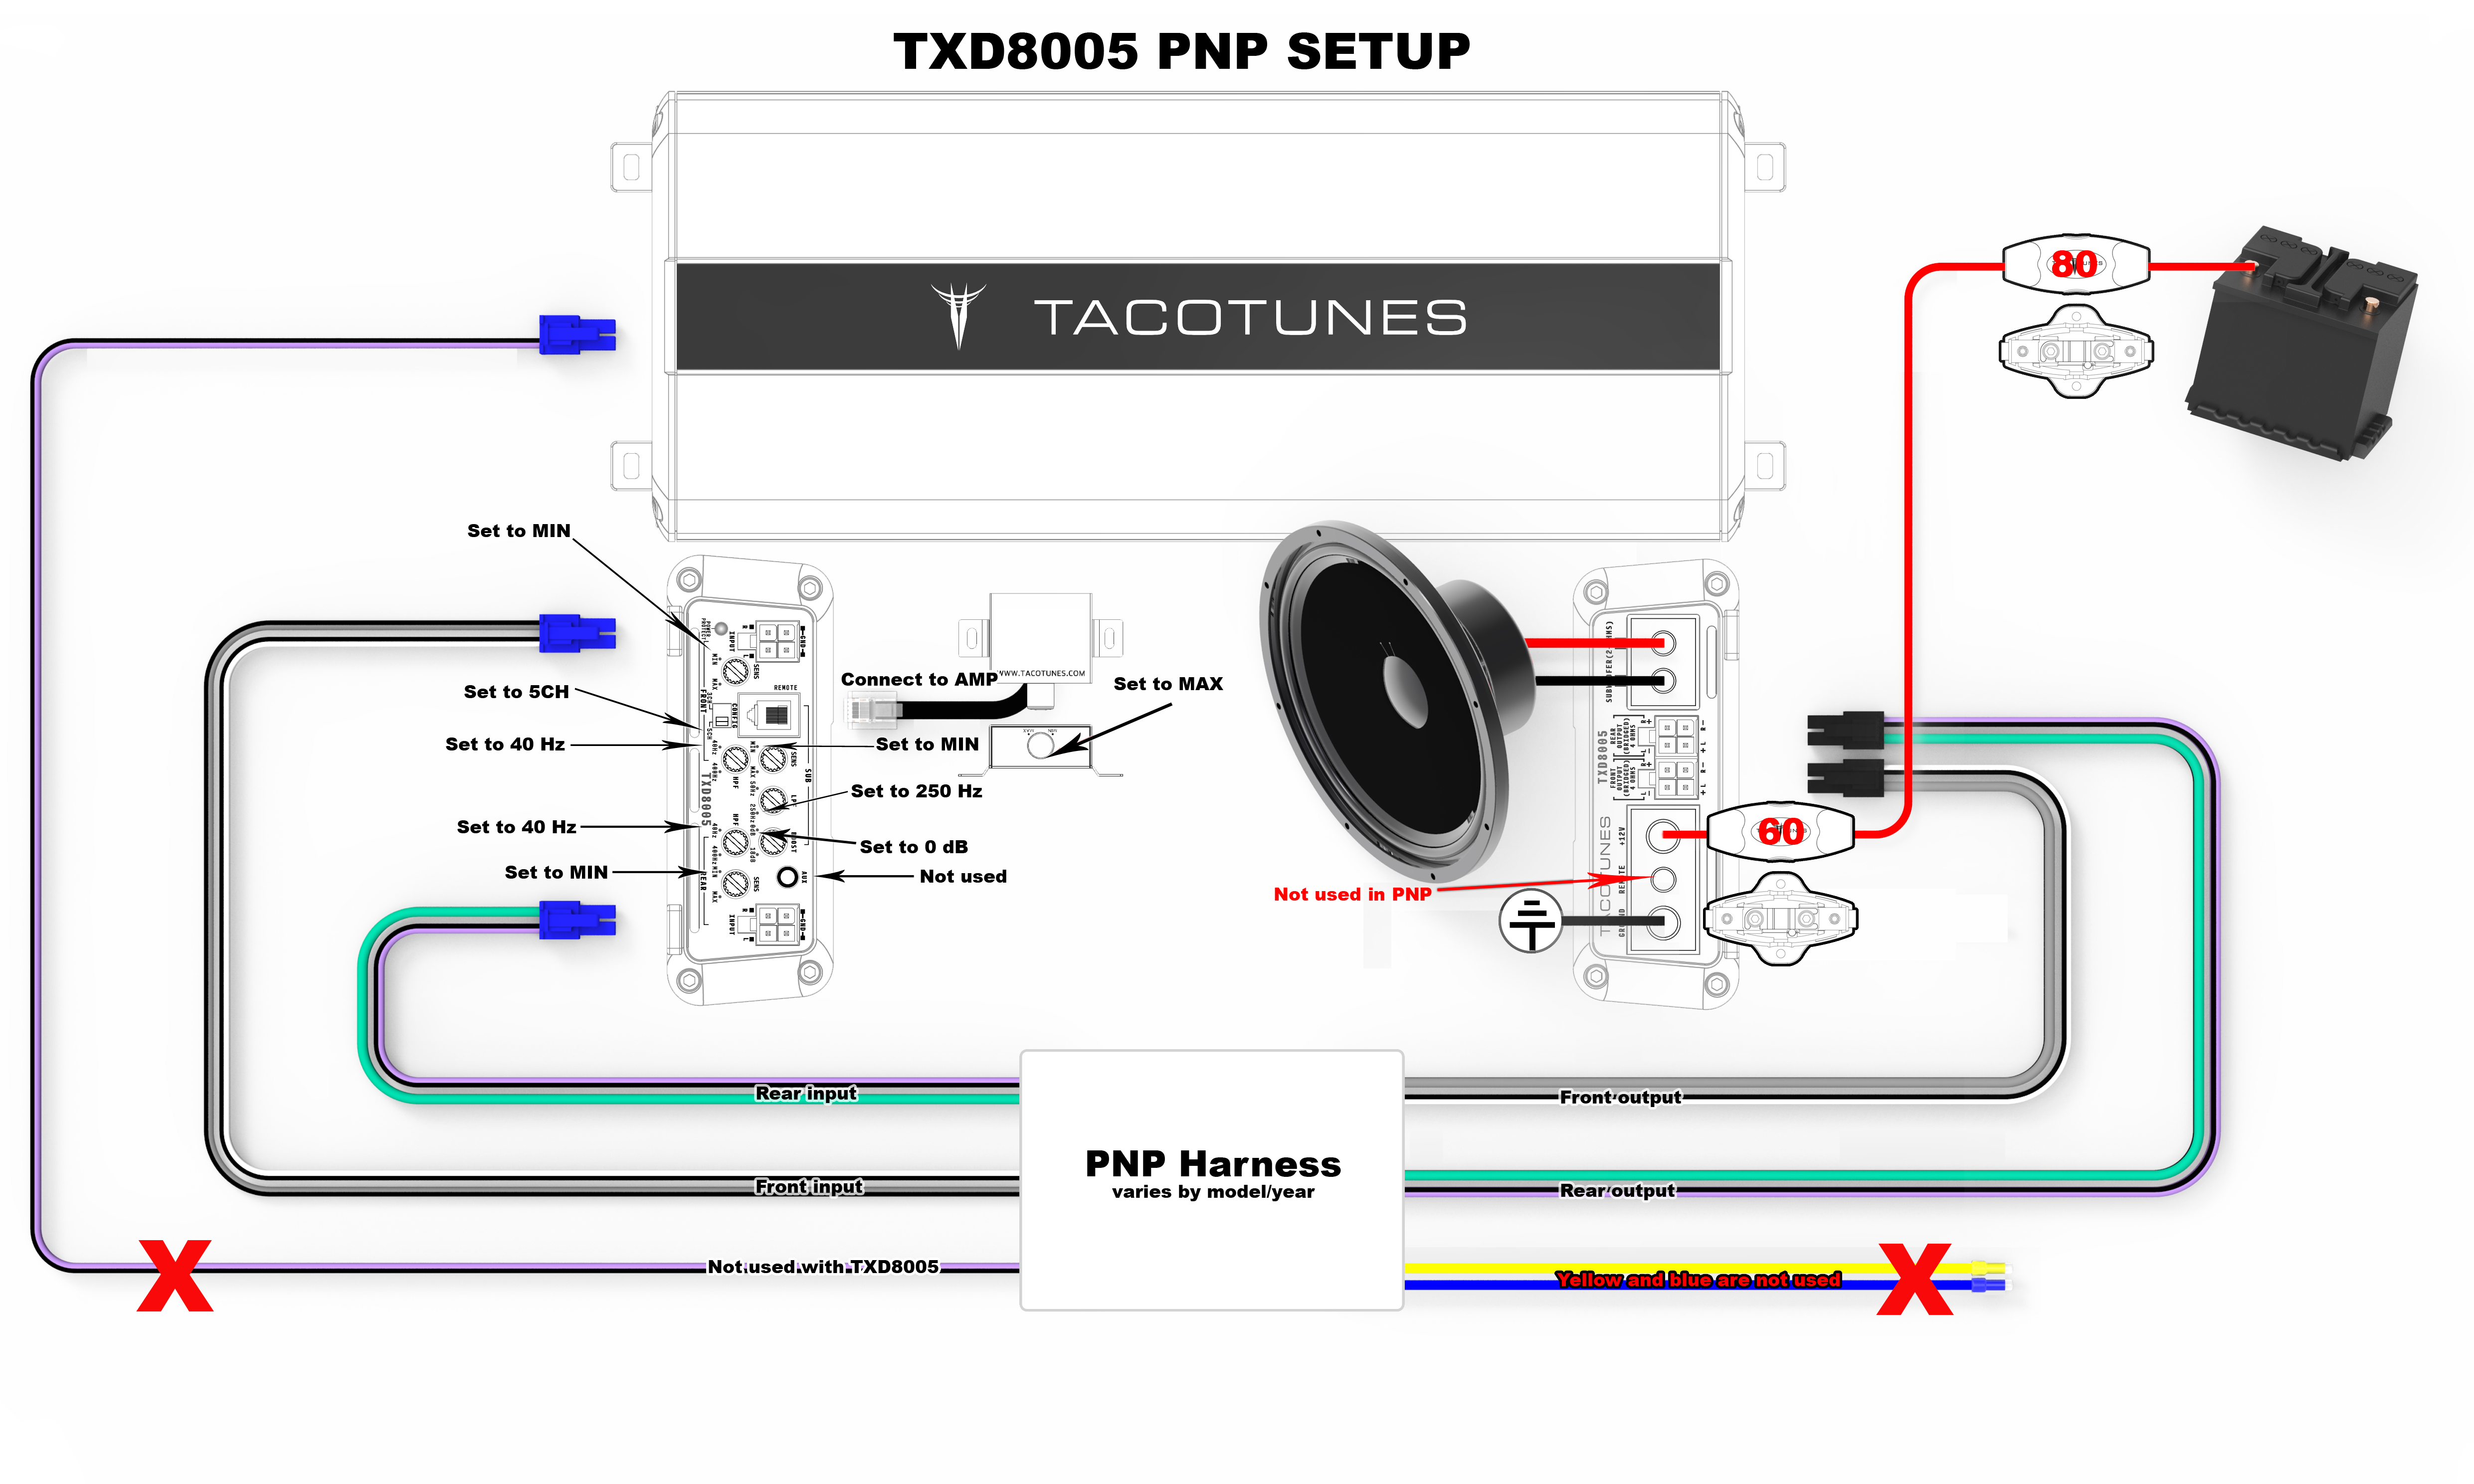
How to tune TXD8005
How to install TXD8005 5 Channel amplifier – 2014-2020 Toyota Tundra
How to tune TXD8005 (System 1)
How install & route subwoofer wiring from amp to subwoofer box:
How to install subwoofer box:
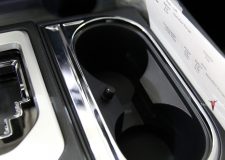
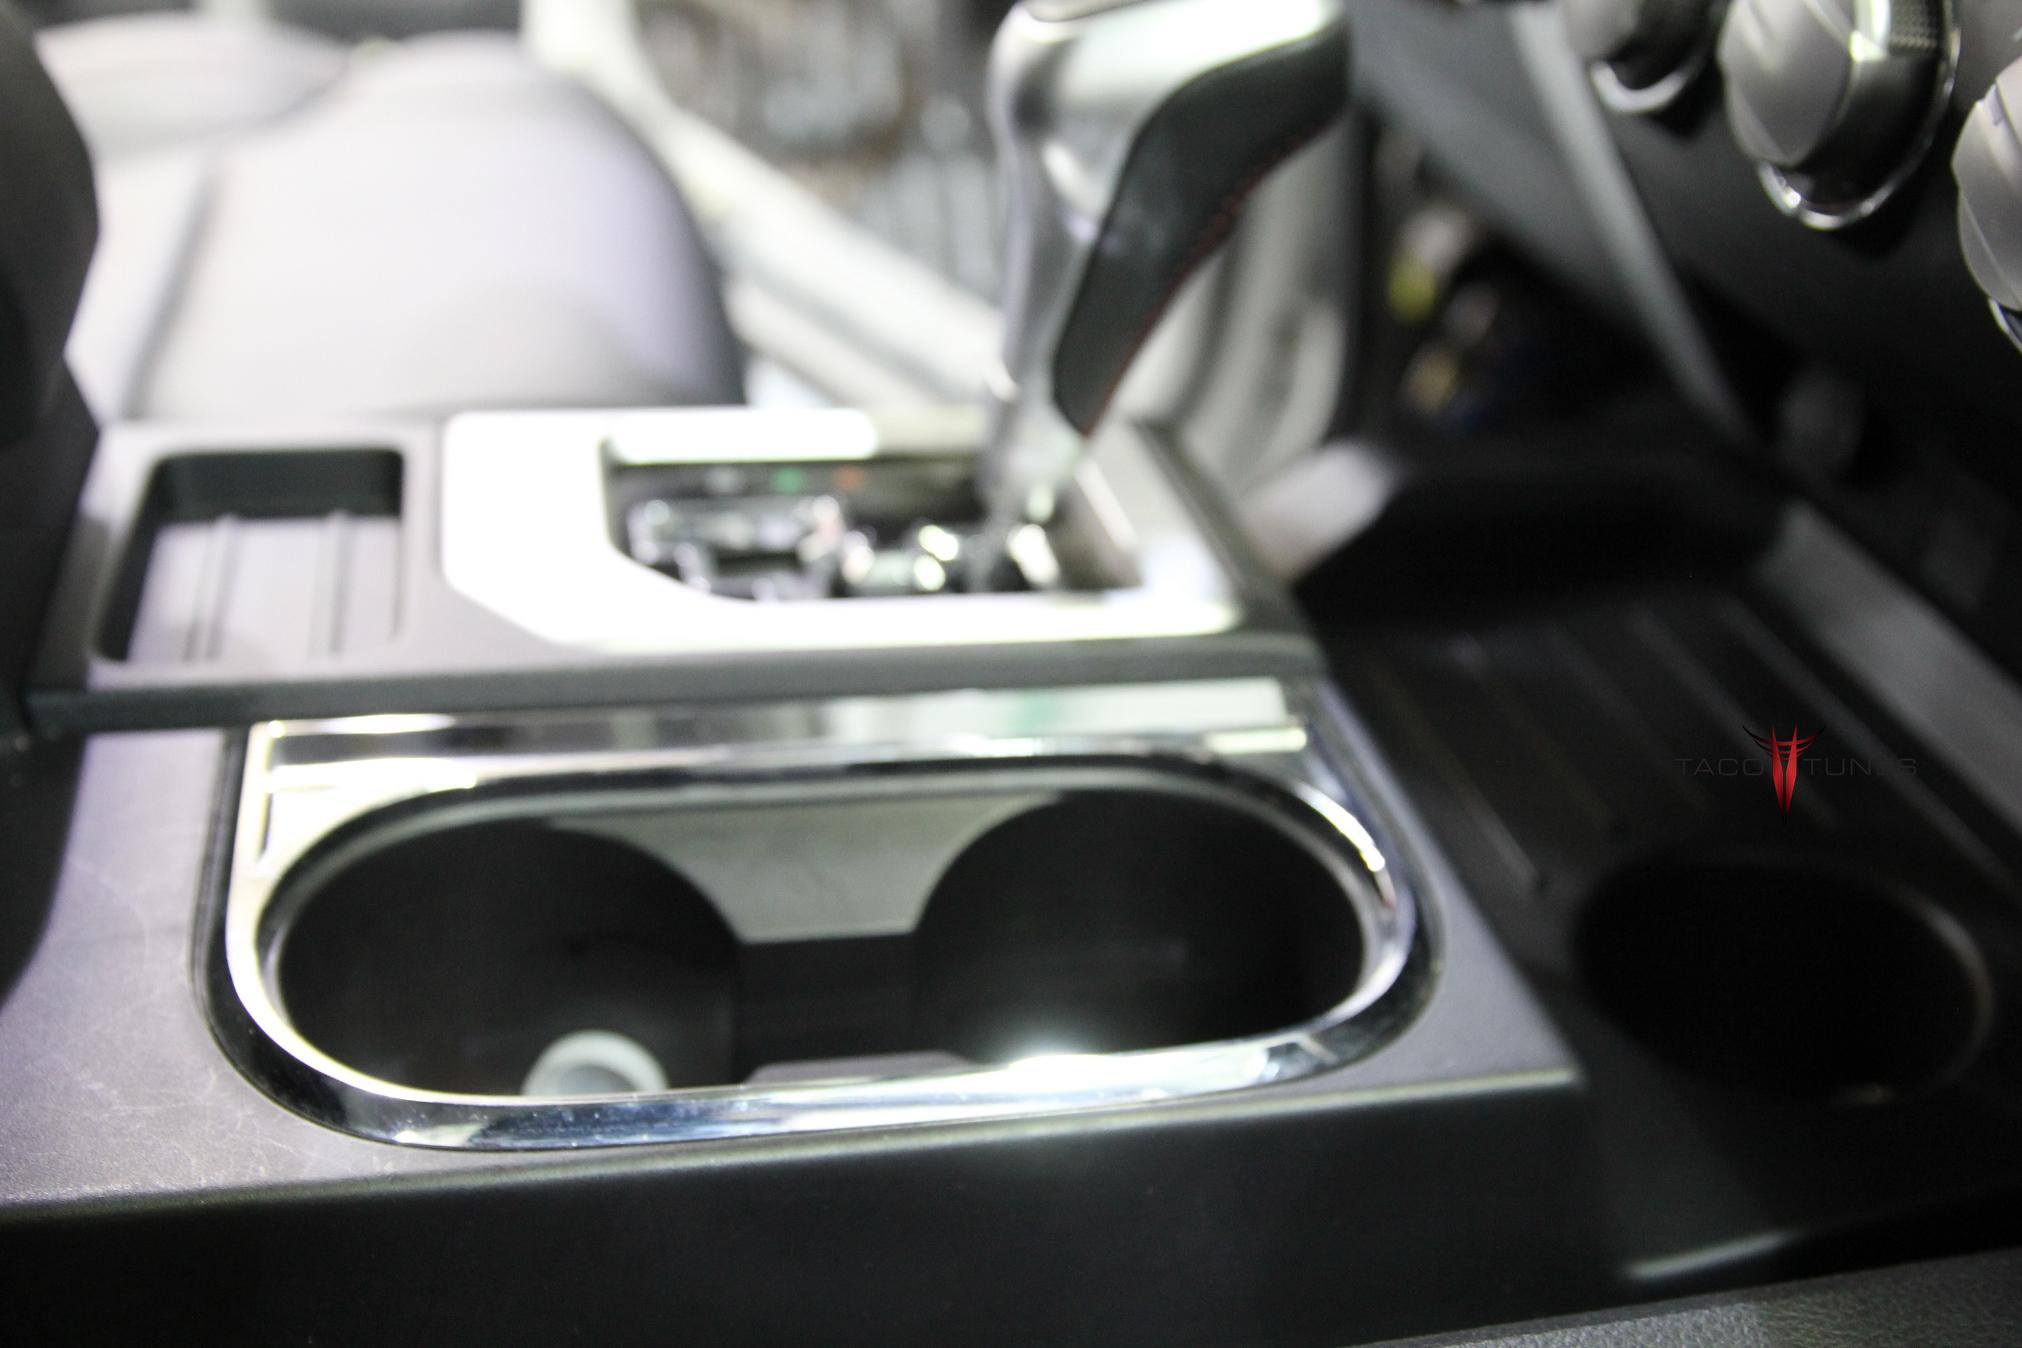
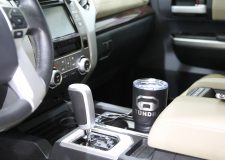
How to install bass control knob in your cupholder:
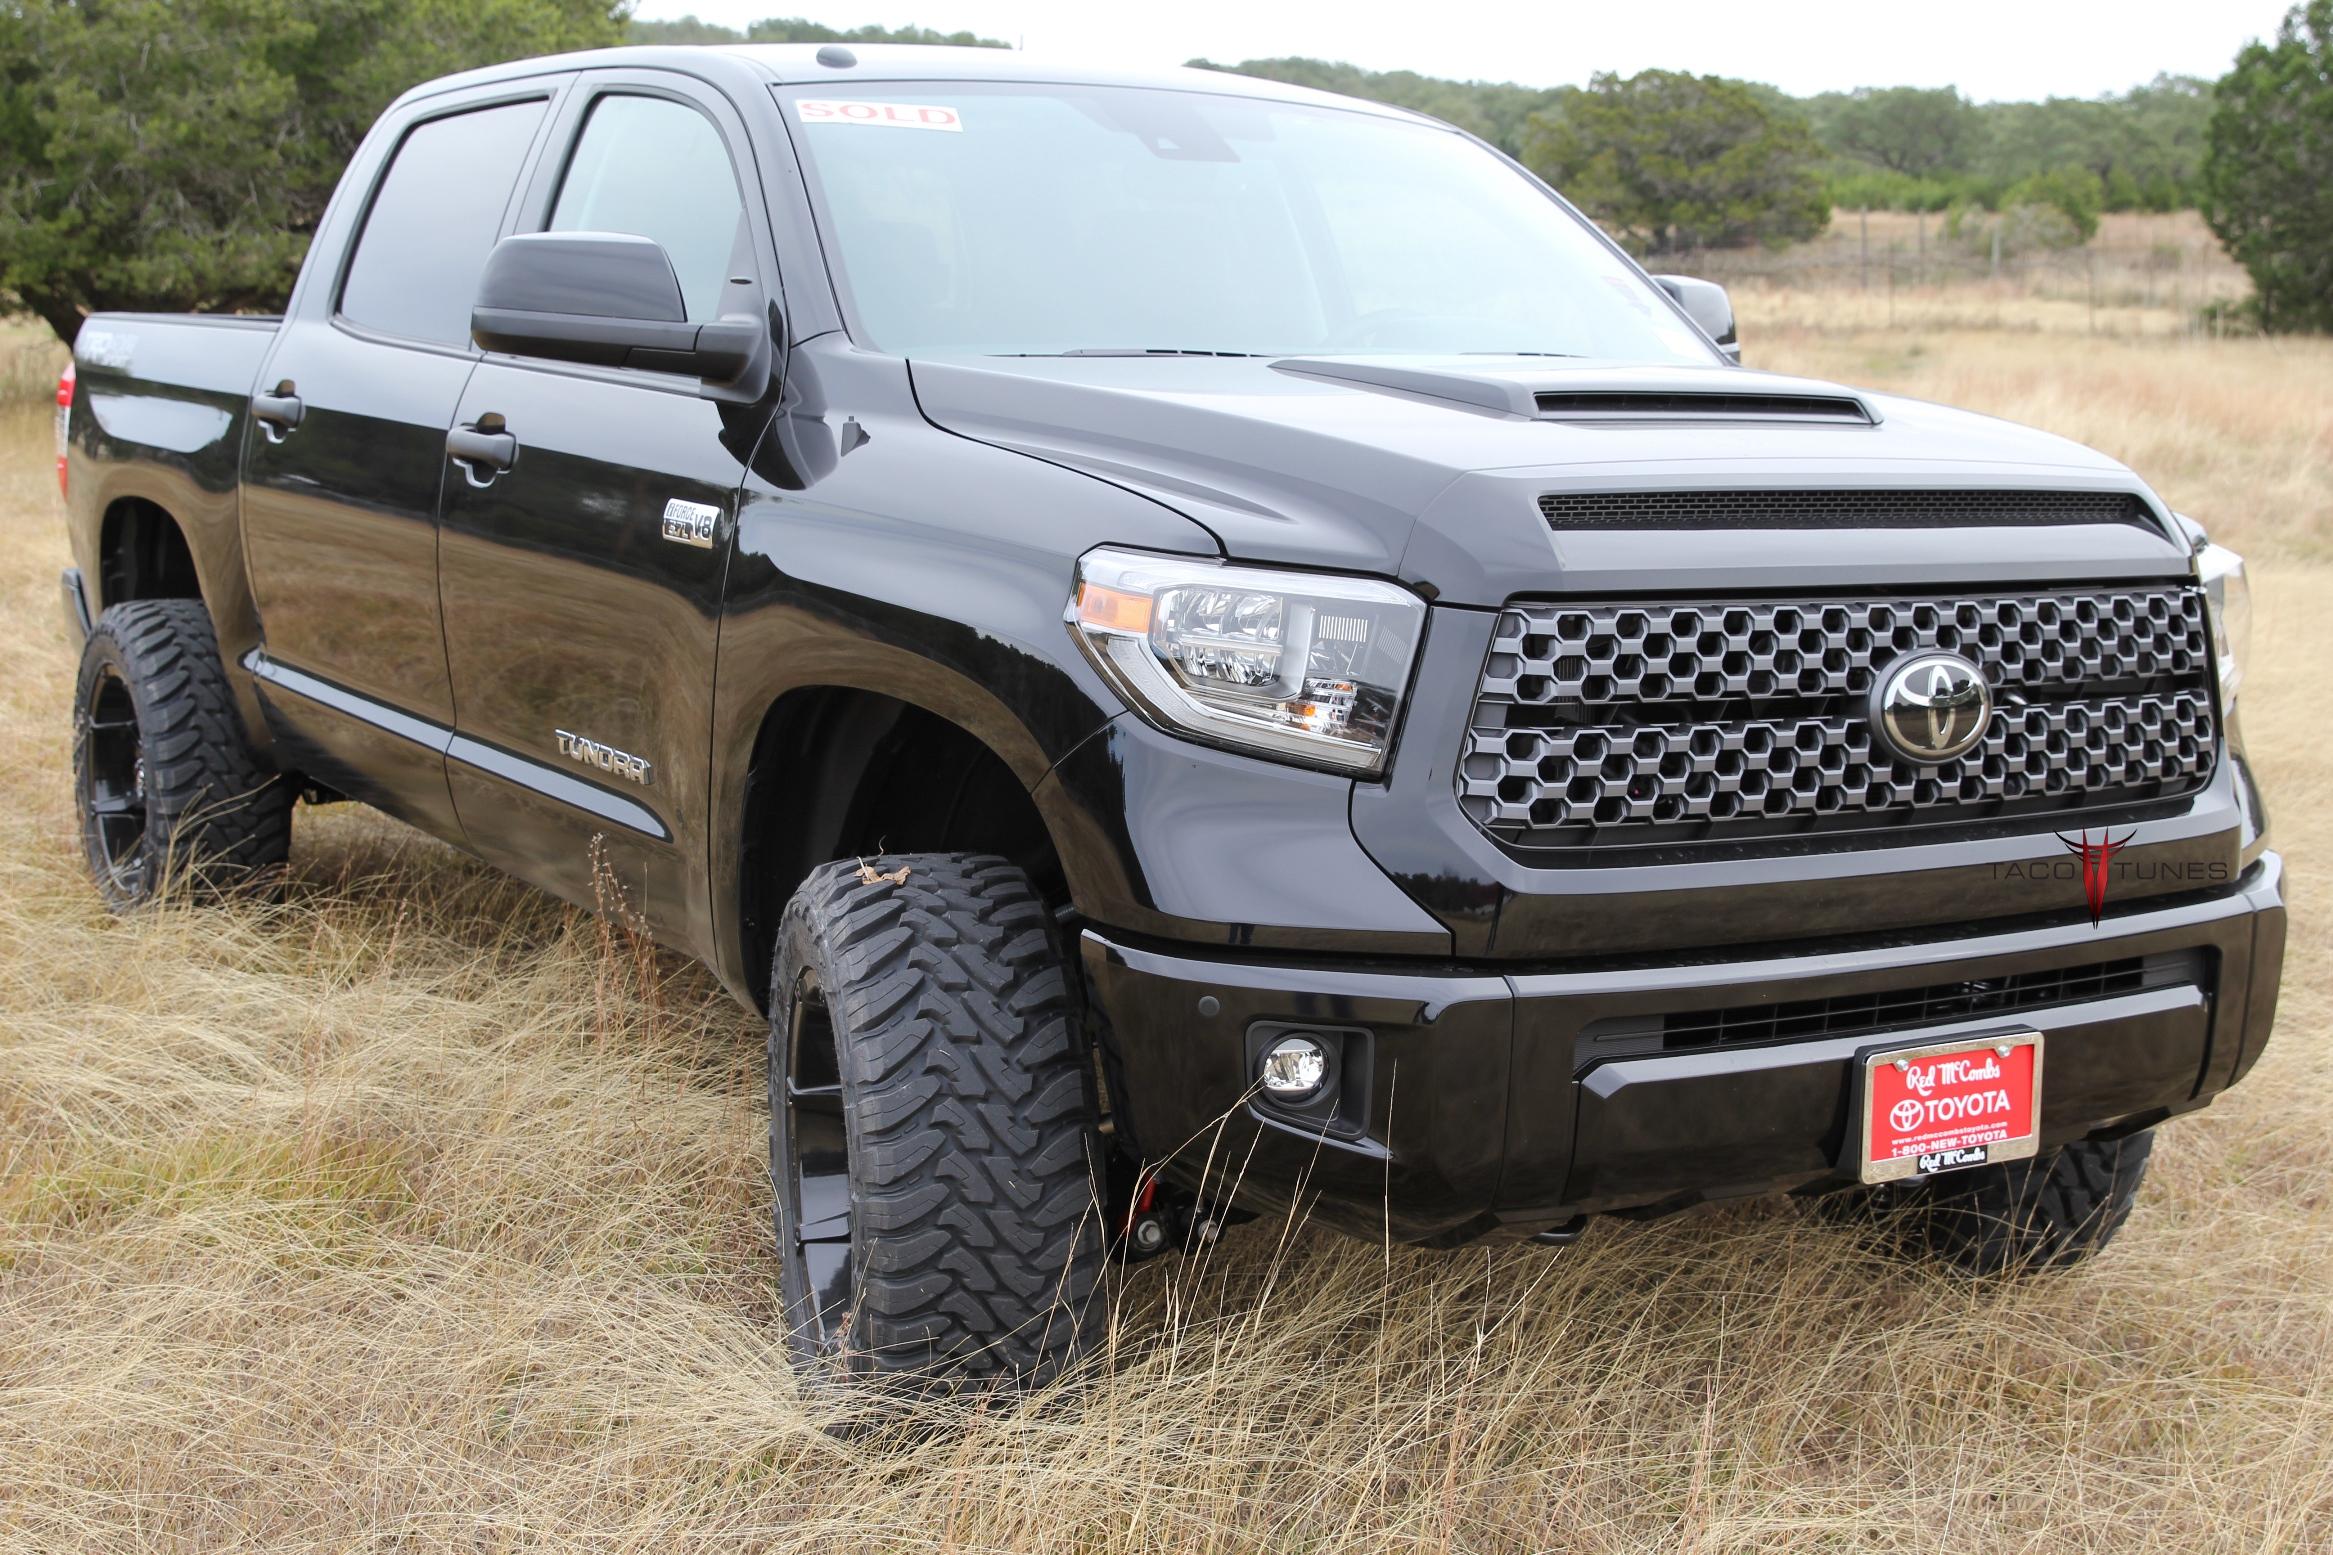
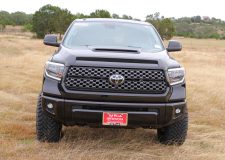
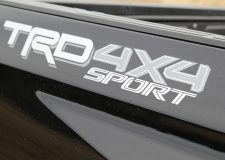
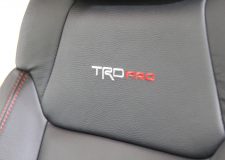
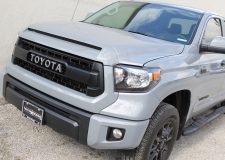
2018 Toyota Tundra CrewMax TRD Sport 4×4 System 1B Audio System Upgrade
This is a brand new Toyota Tundra from Red McCombs Toyota dealership here in San Antonio
Call Shane if you are interested in purchasing a TRD Sport 4×4 Tundra!
Installation Summary / History: Red McCombs is a local Toyota dealer here in San Antonio. We have installed our System 1B in many of their Toyota Tundras before they are listed for sale. This truck is roughly our 646th Toyota Tundra audio upgrade we have done here in San Antonio! We now have over 20,000 Tundra customers around the globe!
Our plug and play amps provide amazing clarity and tons of power.
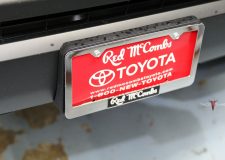
Customer Name: Red McCombs Toyota
Toyota Year / Model: 2018 Toyota Tundra CM TRD Sport 4×4 Audio System Upgrade
2018 Toyota Tundra TRD Sport 4×4 Audio System Upgrade
tacotunes.com Dual 10″ Subwoofer enclosure
2018 Toyota Tundra TRD Sport 4×4 Audio System Upgrade
2018 Toyota Tundra TRD Sport 4×4 Audio System Upgrade
tacotunes.com plug and play amps connect directly to stock wiring and bolt into stock location
2018 Toyota Tundra TRD Sport 4×4 Audio System Upgrade
2018 Toyota Tundra TRD Sport 4×4 Audio System Upgrade
Sail Panel before & after
2018 Toyota Tundra TRD Sport 4×4 Audio System Upgrade
2018 Toyota Tundra TRD Sport 4×4 Audio System Upgrade
2018 Toyota Tundra TRD Sport 4×4 Audio System Upgrade
2018 Toyota Tundra TRD Sport 4×4 Audio System Upgrade
2018 Toyota Tundra TRD Sport 4×4 Audio System Upgrade
2018 Toyota Tundra TRD Sport 4×4 Audio System Upgrade
2018 Toyota Tundra TRD Sport 4×4 Audio System Upgrade
2018 Toyota Tundra TRD Sport 4×4 Audio System Upgrade
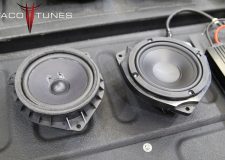
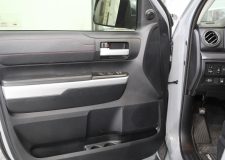
Rear Door Speaker Replacement
2018 Toyota Tundra TRD Sport 4×4 Audio System Upgrade
2018 Toyota Tundra TRD Sport 4×4 Audio System Upgrade
2018 Toyota Tundra TRD Sport 4×4 Audio System Upgrade
2018 Toyota Tundra TRD Sport 4×4 Audio System Upgrade
2018 Toyota Tundra TRD Sport 4×4 Audio System Upgrade
2018 Toyota Tundra TRD Sport 4×4 Audio System Upgrade
2018 Toyota Tundra TRD Sport 4×4 Audio System Upgrade
2018 Toyota Tundra TRD Sport 4×4 Audio System Upgrade
2018 Toyota Tundra TRD Sport 4×4 Audio System Upgrade
2018 Toyota Tundra TRD Sport 4×4 Audio System Upgrade
2018 Toyota Tundra TRD Sport 4×4 Audio System Upgrade
2018 Toyota Tundra TRD Sport 4×4 Audio System Upgrade
2018 Toyota Tundra TRD Sport 4×4 Audio System Upgrade
2018 Toyota Tundra TRD Sport 4×4 Audio System Upgrade
2018 Toyota Tundra TRD Sport 4×4 Audio System Upgrade
2018 Toyota Tundra TRD Sport 4×4 Audio System Upgrade
2018 Toyota Tundra TRD Sport 4×4 Audio System Upgrade
2018 Toyota Tundra TRD Sport 4×4 Audio System Upgrade
2018 Toyota Tundra TRD Sport 4×4 Audio System Upgrade
2018 Toyota Tundra TRD Sport 4×4 Audio System Upgrade
2018 Toyota Tundra TRD Sport 4×4 Audio System Upgrade
2018 Toyota Tundra TRD Sport 4×4 Audio System Upgrade
2018 Toyota Tundra TRD Sport 4×4 Audio System Upgrade
2018 Toyota Tundra TRD Sport 4×4 Audio System Upgrade
2018 Toyota Tundra TRD Sport 4×4 Audio System Upgrade
2018 Toyota Tundra TRD Sport 4×4 Audio System Upgrade
2018 Toyota Tundra TRD Sport 4×4 Audio System Upgrade
2018 Toyota Tundra TRD Sport 4×4 Audio System Upgrade
2018 Toyota Tundra TRD Sport 4×4 Audio System Upgrade
2018 Toyota Tundra TRD Sport 4×4 Audio System Upgrade
2018 Toyota Tundra TRD Sport 4×4 Audio System Upgrade
2018 Toyota Tundra TRD Sport 4×4 Audio System Upgrade
2018 Toyota Tundra TRD Sport 4×4 Audio System Upgrade
2018 Toyota Tundra TRD Sport 4×4 Audio System Upgrade
2018 Toyota Tundra TRD Sport 4×4 Audio System Upgrade
2018 Toyota Tundra TRD Sport 4×4 Audio System Upgrade
2018 Toyota Tundra TRD Sport 4×4 Audio System Upgrade
2018 Toyota Tundra TRD Sport 4×4 Audio System Upgrade
2018 Toyota Tundra TRD Sport 4×4 Audio System Upgrade
2018 Toyota Tundra TRD Sport 4×4 Audio System Upgrade
2018 Toyota Tundra TRD Sport 4×4 Audio System Upgrade
2018 Toyota Tundra TRD Sport 4×4 Audio System Upgrade
2018 Toyota Tundra TRD Sport 4×4 Audio System Upgrade
2018 Toyota Tundra TRD Sport 4×4 Audio System Upgrade
2018 Toyota Tundra TRD Sport 4×4 Audio System Upgrade
2018 Toyota Tundra TRD Sport 4×4 Audio System Upgrade
2018 Toyota Tundra TRD Sport 4×4 Audio System Upgrade
2018 Toyota Tundra TRD Sport 4×4 Audio System Upgrade
2018 Toyota Tundra TRD Sport 4×4 Audio System Upgrade
2018 Toyota Tundra TRD Sport 4×4 Audio System Upgrade
Below you will find a detailed listing of all the parts we used in the installation.
Typical Installation time is 1 day, however if we matt the front, rear doors and the rear wall behind the subwoofer it adds a day. If we are matting the truck we keep the truck for two days. One day audio installation and matting jobs are possible, but require at least 12 hours with the truck.
Below is a detailed listing of the audio products installed in Brian’s Tundra CrewMax
Front Door Component Speakers:
Image Dynamics CTX65CS/ID65CS
Tacotunes.com heavy duty speaker mounts cut to 5.6”
CTXCS Mid bass Drivers -100 Watts RMS
CTXCS Crossover
CTXCS Tweeter
Use Stock Sail Panel for Tweeter mounts.
Rear Door Components:
Image Dynamics CTX65CS or ID65
Tacotunes.com heavy duty speaker mounts cut to 5.6”
CTX65CS Mid bass drivers Handles -100 watts RMS
CTX65CS Crossover
CTX Tweeters
Tweeters will fit in stock door location
Amp:
tacotunes.com TXD3204v2 Four channel amplifier
tacotunes.com TXD10001 Mono subwoofer amplifier
100 watts x 4 to each speaker and 800 x 1 (subwoofers)
2018 Toyota Tundra CrewMax System 1B plug and play audio system upgrade
This is a brand new Toyota Tundra from a local Toyota dealership here in San Antonio
Installation Summary / History: Red McCombs is a local Toyota dealer here in San Antonio. We have installed our System 1B in many of their Toyota Tundras before they are listed for sale. This truck is roughly ur 575th Toyota Tundra audio upgrade we have done here in San Antonio! We now have over 20,000 Tundra customers around the globe!
Our plug and play amps provide amazing clarity and tons of power.
tacotunes.com plug and play amps. Upgrade stock amp from 9 watts to 100 watts RMS to each speaker.
Stock Amp before we replaced with our plug and play amps
We offer full size Dual 10 or 12 inch subwoofers!
Brand New Dealer Truck with window sticker.
New tweeter installed in the sail panel.
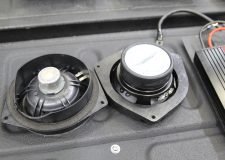
Front Speaker Before
Front Speaker After
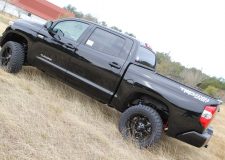
Toyota Tundra CrewMax 2018 Stereo System Upgrade
Toyota Tundra CrewMax 2018 Stereo System Upgrade
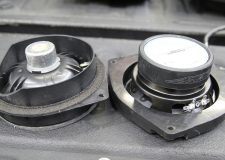
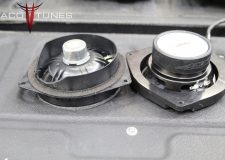
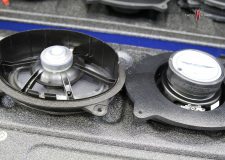
Stock Speaker Next to New Replacement Speakers
New Dash Design for 2018
New Key FOB
2018 Toyota Tundra Calvary Blue Picture
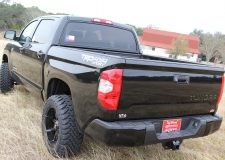
Toyota Tundra CrewMax 2018 Stereo System Upgrade
Toyota Tundra CrewMax 2018 Stereo System Upgrade
Dual 10″ Subwoofer Box
Dual 10″ Subwoofer Box
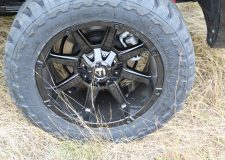
Fuel Wheels
Fuel Wheels & Toyo Tires
Stereo Installation Bay San Antonio
Toyota Tundra CrewMax 2018 Stereo System Upgrade
Toyota Tundra CrewMax 2018 Stereo System Upgrade
Picture before during stereo system install
New Rear Door Speakers installed
New LED headlight (strips)
Bass Knob Mod
Crossovers mounted in door for easy install.
Toyota Tundra CrewMax 2018 Stereo System Upgrade
Toyota Tundra CrewMax 2018 Stereo System Upgrade
Sail Panel after tweeter installation
Toyota Tundra CrewMax 2018 Stereo System Upgrade
Toyota Tundra CrewMax 2018 Stereo System Upgrade
Toyota Tundra CrewMax 2018 Stereo System Upgrade
Toyota Tundra CrewMax 2018 Stereo System Upgrade
Toyota Tundra CrewMax 2018 Stereo System Upgrade
Toyota Tundra CrewMax 2018 Stereo System Upgrade
Toyota Tundra CrewMax 2018 Stereo System Upgrade
Toyota Tundra CrewMax 2018 Stereo System Upgrade
Toyota Tundra CrewMax 2018 Stereo System Upgrade
Toyota Tundra CrewMax 2018 Stereo System Upgrade
Toyota Tundra CrewMax 2018 Stereo System Upgrade
Toyota Tundra CrewMax 2018 Stereo System Upgrade
Toyota Tundra CrewMax 2018 Stereo System Upgrade
Toyota Tundra CrewMax 2018 Stereo System Upgrade
Toyota Tundra CrewMax 2018 Stereo System Upgrade
Plug and Play Wiring
Toyota Tundra Built in Texas!
Toyota Tundra CrewMax 2018 Stereo System Upgrade
New Upgraded Ground Wire
Toyota Tundra CrewMax 2018 Stereo System Upgrade
Toyota Tundra CrewMax 2018 Stereo System Upgrade
Toyota Tundra CrewMax 2018 Stereo System Upgrade
Toyota Tundra CrewMax 2018 Stereo System Upgrade
Toyota Tundra CrewMax 2018 Stereo System Upgrade
Toyota Tundra CrewMax 2018 Stereo System Upgrade
Toyota Tundra CrewMax 2018 Stereo System Upgrade
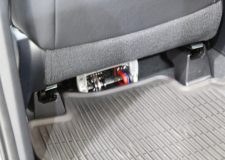
Amp Research Steps Down
Toyota Tundra CrewMax 2018 Stereo System Upgrade
Toyota Tundra CrewMax 2018 Stereo System Upgrade
Below you will find a detailed listing of all the parts we used in the installation.
Typical Installation time is 1 day, however we matted the front, rear doors and the rear wall behind the subwoofer. If we are matting the truck we keep the truck for two days. One day audio installation and matting jobs are possible, but require at least 14 hours with the truck.
Below is a detailed listing of the audio products installed in Brian’s Tundra CrewMax
Front Door Component Speakers:
Image Dynamics CTX65CS/ID65CS
Tacotunes.com heavy duty speaker mounts cut to 5.6”
CTXCS Mid bass Drivers -100 Watts RMS
CTXCS Crossover
CTXCS Tweeter
Use Stock Sail Panel for Tweeter mounts.
Rear Door Components:
Image Dynamics CTX65CS or ID65
Tacotunes.com heavy duty speaker mounts cut to 5.6”
CTX65CS Mid bass drivers Handles -100 watts RMS
CTX65CS Crossover
CTX Tweeters
Tweeters will fit in stock door location
Amp:
tacotunes.com TXD3204v2 Four channel amplifier
tacotunes.com TXD10001 Mono subwoofer amplifier
100 watts x 4 to each speaker and 800 x 1 (subwoofers)
Brian’s System 2016 Toyota Tundra CrewMax TRD Pro System 1B audio system upgrade
This is a brand new Toyota Tundra from a local Toyota dealership here in San Antonio
Installation Summary / History: Brian is a local here in San Antonio. He recently hit the jackpot and scored a TRD Pro during his visit to San Marcos (just outside of San Antonio) Toyota dealer. He began researching stereo upgrades and came across our website as a referral form another customer. He opted for our System 1B and also wanted the front & rear doors matted. Below are some progress pics of his installation. As of May 4, 2017, we have installed over 500 2014+ Toyota Tundras here in our local San Antonio shop. We now have over 19,000 Tundra customers around the globe.
This is our 26th TRD Pro, these are RARE! We feel fortunate to have so many under our belt.
Our plug and play amps provide amazing clarity and tons of power.
Toyota Tundra CrewMax Subwoofer Upgrade / Installation – FULL SIZE 10” Subs
Toyota Tundra CrewMax TRD Pro Audio Upgrade
Toyota Tundra CrewMax TRD Pro Audio Upgrade
Toyota Tundra CrewMax Sail Panel Tweeter Upgrade – Before & After
Toyota Tundra CrewMax Sail Panel Tweeter Upgrade – After
Toyota Tundra CrewMax TRD Pro Audio Upgrade
Toyota Tundra CrewMax TRD Pro Audio Upgrade
Toyota Tundra CrewMax TRD Pro Audio Upgrade
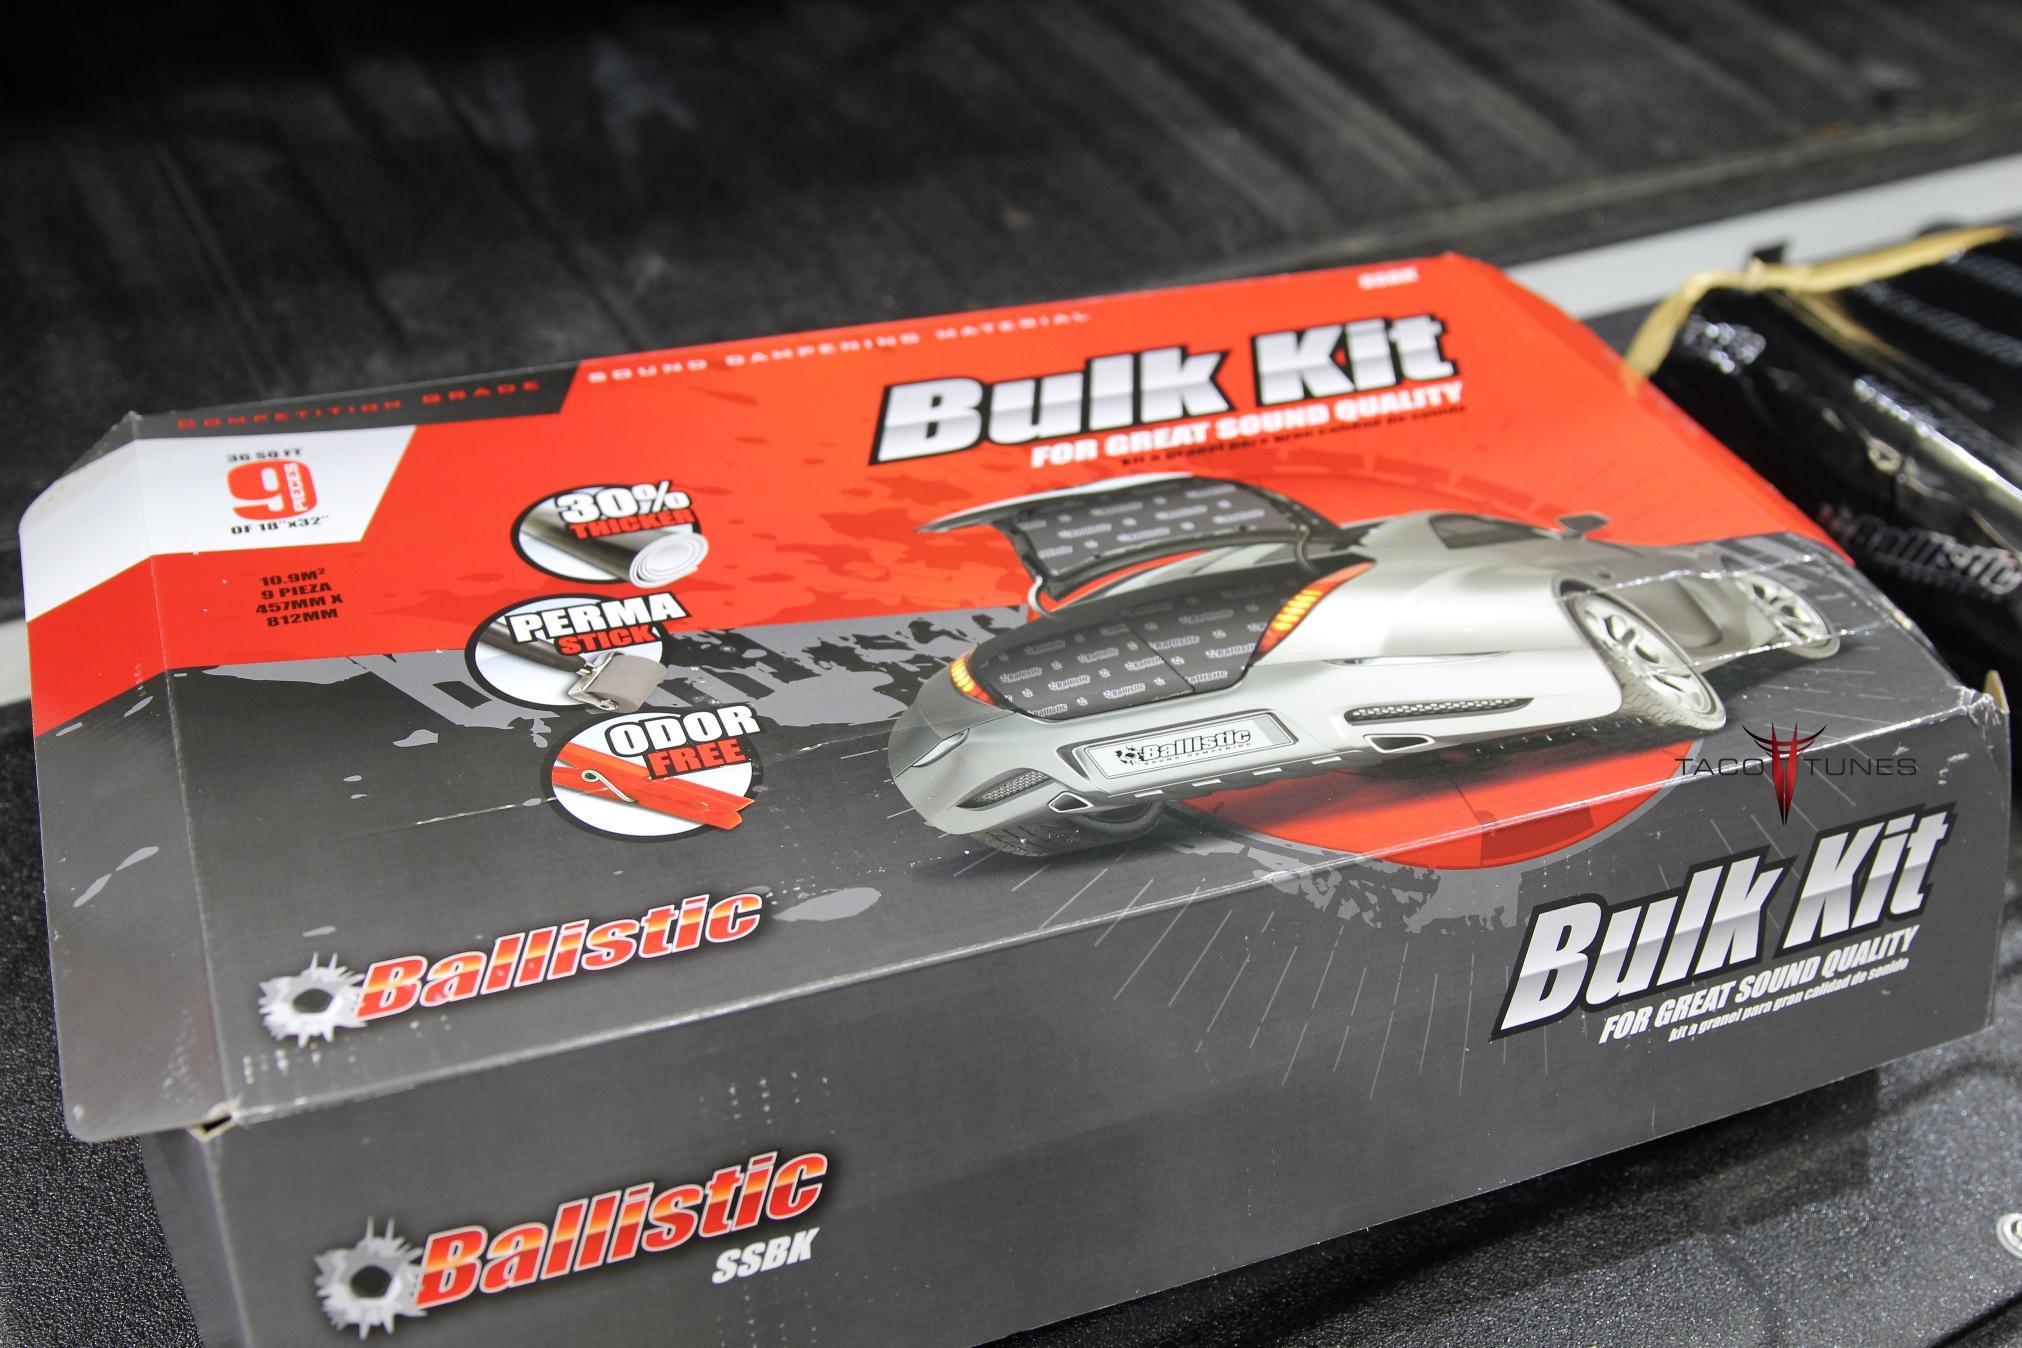
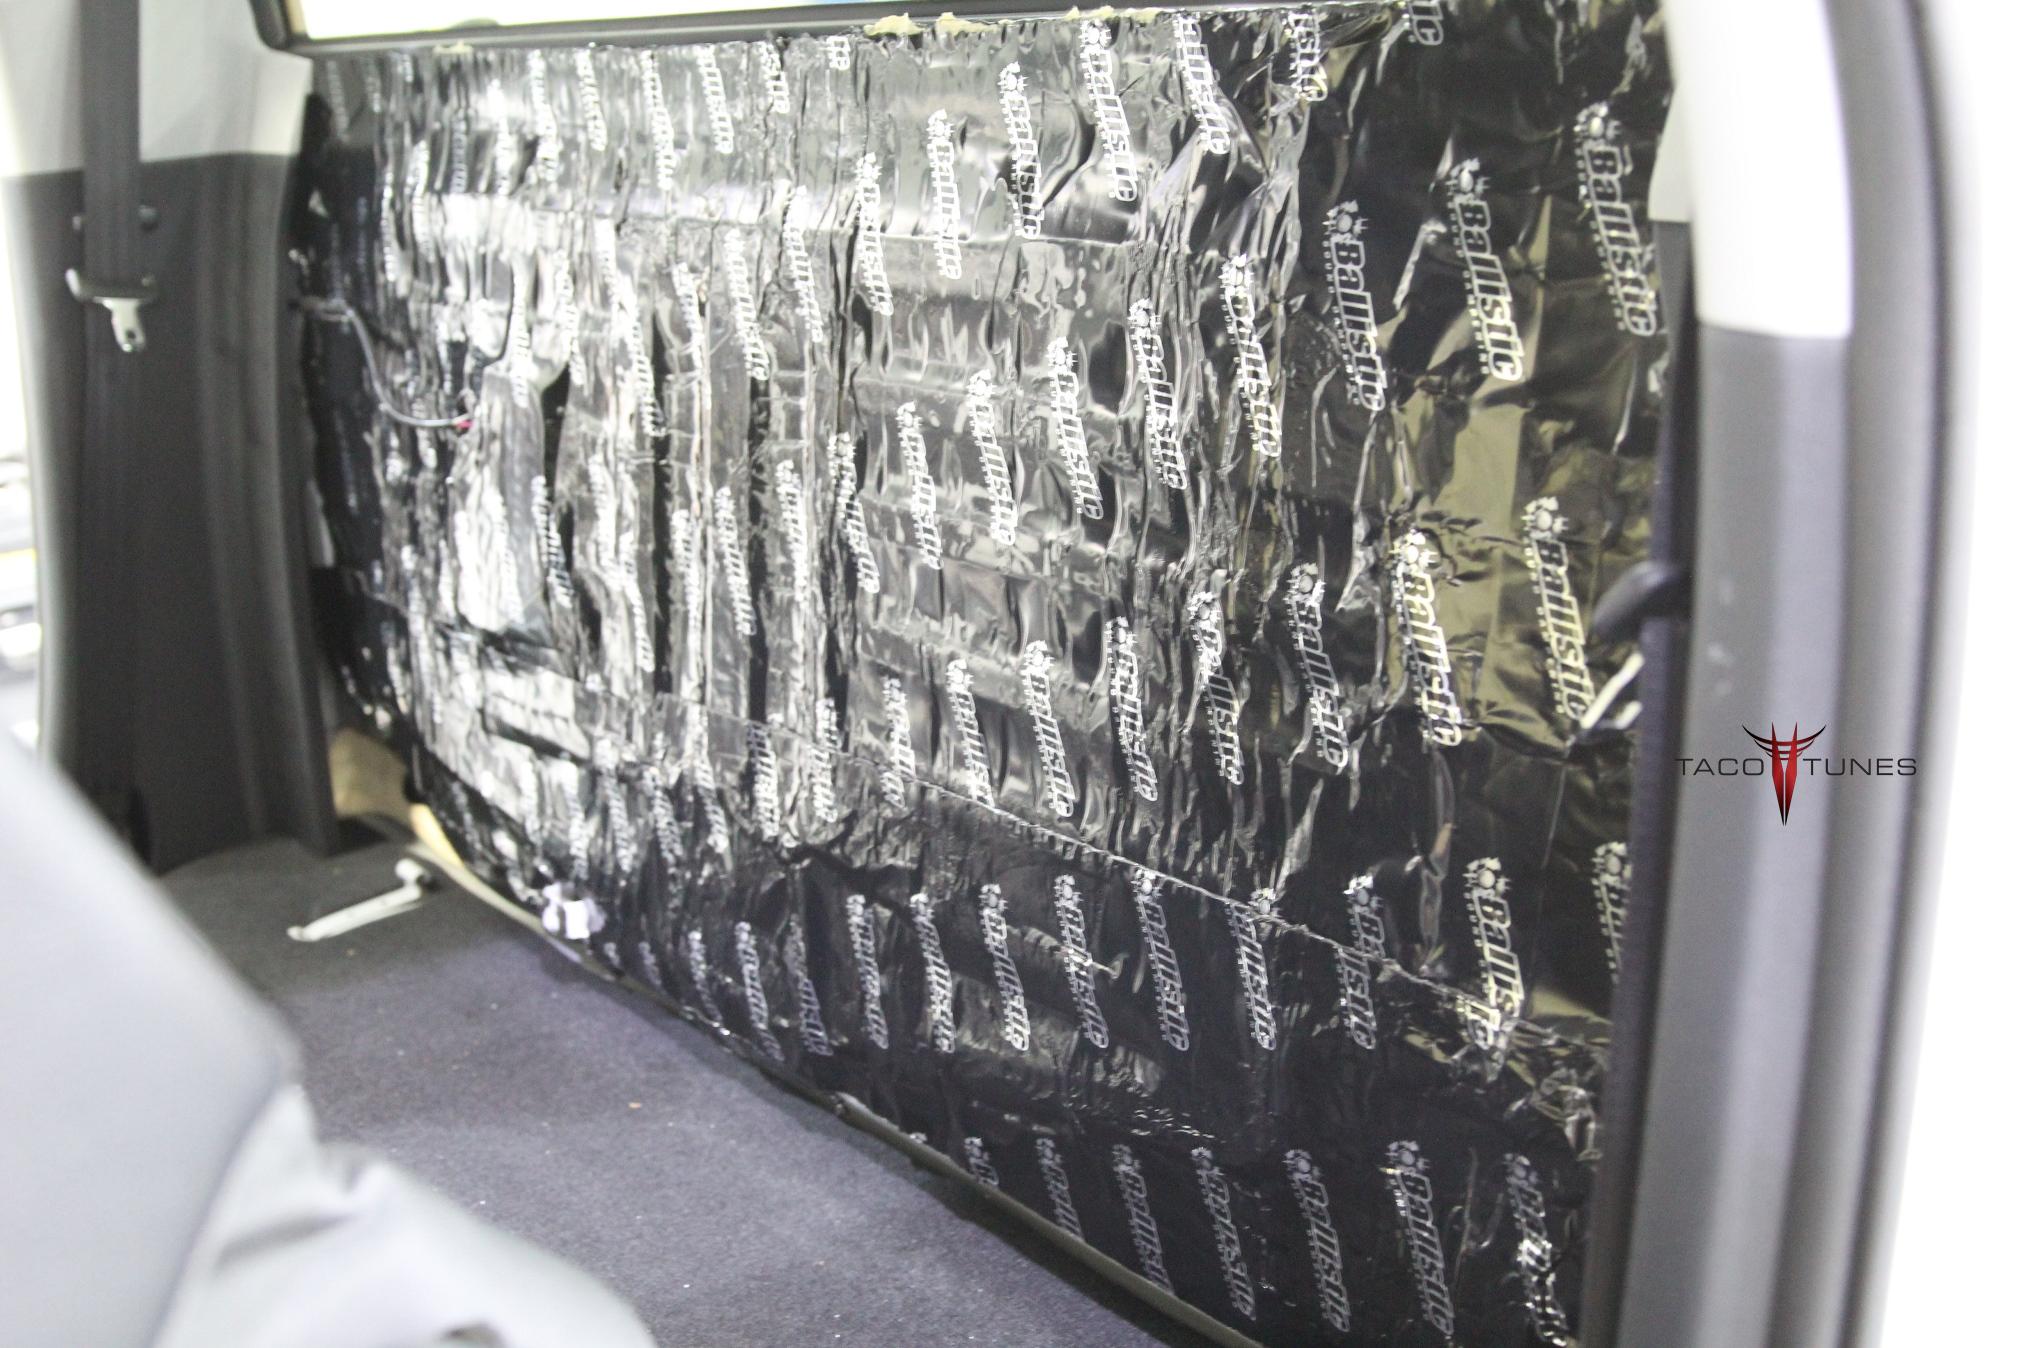
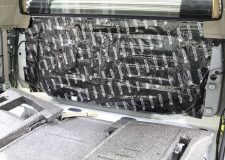
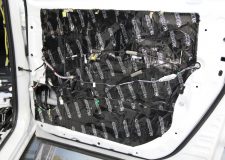
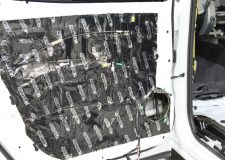
Toyota Tundra Matting Sound Dampener Installation
Toyota Tundra Matting Sound Dampener Installation
Toyota Tundra Matting Sound Dampener Installation
Toyota Tundra Matting Sound Dampener Installation
Toyota Tundra CrewMax Sail Panel Tweeter Upgrade – Before
Toyota Tundra CrewMax Before Bass Knob
Toyota Tundra TRD Pro Bass Knob Mod
Toyota Tundra CrewMax TRD Pro Audio Upgrade
Toyota Tundra CrewMax TRD Pro Audio Upgrade
Toyota Tundra CrewMax TRD Pro Audio Upgrade
Toyota Tundra CrewMax TRD Pro Audio Upgrade
Toyota Tundra Matting Sound Dampener Installation
Toyota Tundra Matting Sound Dampener Installation
Toyota Tundra CrewMax TRD Pro Audio Upgrade
Toyota Tundra CrewMax TRD Pro Audio Upgrade
Toyota Tundra CrewMax TRD Pro Audio Upgrade
Toyota Tundra CrewMax TRD Pro Audio Upgrade
Toyota Tundra CrewMax TRD Pro Audio Upgrade
Toyota Tundra CrewMax Sail Plug and Play Amplifier Installation
Toyota Tundra CrewMax TRD Pro Audio Upgrade
Toyota Tundra CrewMax TRD Pro Audio Upgrade
Toyota Tundra CrewMax TRD Pro Audio Upgrade
Toyota Tundra CrewMax Subwoofer Upgrade / Installation – FULL SIZE 10” Subs
Toyota Tundra CrewMax Subwoofer Upgrade / Installation – FULL SIZE 10” Subs
Toyota Tundra CrewMax TRD Pro Audio Upgrade
Below you will find a detailed listing of all the parts we used in the installation.
Typical Installation time is 1 day, however we matted the front, rear doors and the rear wall behind the subwoofer. If we are matting the truck we keep the truck for two days. One day audio installation and matting jobs are possible, but require at least 14 hours with the truck.
Below is a detailed listing of the audio products installed in Brian’s Tundra CrewMax
Front Door Component Speakers:
Image Dynamics CTX65CS/ID65CS
Tacotunes.com heavy duty speaker mounts cut to 5.6”
CTXCS Mid bass Drivers -100 Watts RMS
CTXCS Crossover
CTXCS Tweeter
Use Stock Sail Panel for Tweeter mounts.
Rear Door Components:
Image Dynamics CTX65CS
Tacotunes.com heavy duty speaker mounts cut to 5.6”
CTX65CS Mid bass drivers Handles -100 watts RMS
CTX65CS Crossover
CTX Tweeters
Tweeters will fit in stock door location
Amp:
tacotunes.com TXD3204 Four channel amplifier
tacotunes.com TXD10001 Mono subwoofer amplifier
70 watts x 4 to each speaker and 400 x 1 (subwoofer)
2017 Toyota Tundra TRD PRO Stereo Speaker Audio Complete Upgrade San Antonio TX
Brannon’s 2017 Toyota Tundra CrewMax TRD Pro Complete Stereo System Upgrade San Antonio TX
Installation Summary / History: Brannon is on the management team at RackSpace hosting here in San Antonio. He was referred to us by a local Toyota Dealer.
Customer Name: Brannon
Toyota Year / Model: 2017 Toyota Tundra CrewMax TRD Pro Cement
Head Unit: Non JBL
Color: Cement
Installed by: tacotunes.com
Brannon came to us with high expectations for his brand new 2017 Toyota Tundra TRD Pro. He was aware he would be upgrading the stock stereo.
Below you will find a detailed listing of all the parts we used in the installation. We also included some pictures of the 12″ subwoofer next to 10″ subwoofer and a shallow mount 12″ subwoofer.
Typical Installation time is 1 day, however we matted the front, rear doors and the rear wall behind the subwoofer. If we are matting the truck we keep the truck for two days. One audio installation and matting jobs are possible, but require at least 14 hours with the truck.
Below is a detailed listing of the audio products installed in Tobin’s Tundra CrewMax
Branon’s 2017 Toyota Tundra TRD Pro CrewMax Cement
2017 Toyota Tundra TRD Pro CrewMax Subwoofer Box
Toyota Tundra TRD Pro CrewMax Front Door Component Speakers
Toyota Tundra TRD Pro CrewMax Rear Door Component Speakers
Toyota Tundra Tweeter Replacement Installation Sail Panel
Toyota Tundra TRD Pro CrewMax Sound Deadener Matting
Toyota Tundra TRD Pro CrewMax Sound Deadener Matting
Toyota Tundra Yeti 30oz Tumbler Rambler RTIC cup
2017 Toyota Tundra TRD Pro Cement Indoor Pictures
2017 Toyota Tundra TRD Pro Cement Indoor Pictures
2017 Toyota Tundra TRD Pro Cement Indoor Pictures
2017 Toyota Tundra TRD Pro Cement Indoor Pictures
2017 Toyota Tundra TRD Pro Cement Indoor Pictures
2017 Toyota Tundra TRD Pro Cement Indoor Pictures
2017 Toyota Tundra TRD Pro Cement Indoor Pictures
Toyota Tundra TRD Pro Cement Interior Photos
Toyota Tundra TRD Pro Cement Interior Photos
Toyota Tundra TRD Pro Cement Interior Photos
Toyota Tundra TRD Pro Cement Interior Photos
Toyota Tundra TRD Pro Cement Interior Photos
Toyota Tundra TRD Pro Cement Interior Photos
Toyota Tundra TRD Pro Cement Interior Photos
Toyota Tundra TRD Pro Cement Interior Photos
Toyota Tundra Tweeter Replacement Installation Sail Panel
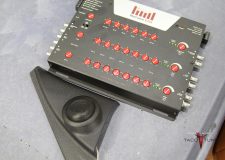
Toyota Tundra TRD Pro Sound Processor Installation
Toyota Tundra TRD Pro Sound Processor Installation
Tundra TRD Pro CrewMax Cement Pictures
Tundra TRD Pro CrewMax Cement Pictures
Tundra TRD Pro CrewMax Cement Pictures
Tundra TRD Pro CrewMax Cement Pictures
Tundra TRD Pro CrewMax Cement Pictures
Tundra TRD Pro CrewMax Cement Pictures
Tundra TRD Pro CrewMax Cement Pictures
Toyota Tundra Bass Knob Control Retrofit in cup holder
2017 TRD PRO Speaker System Upgrade
2017 TRD PRO Speaker System Upgrade
2017 Toyota Tundra TRD Pro Cement Indoor Pictures
2017 Toyota Tundra TRD Pro Cement Indoor Pictures
2017 TRD PRO Speaker System Upgrade
2017 Tundra CrewMax TRD PRO Cement Color
2017 Tundra CrewMax TRD PRO Cement Color
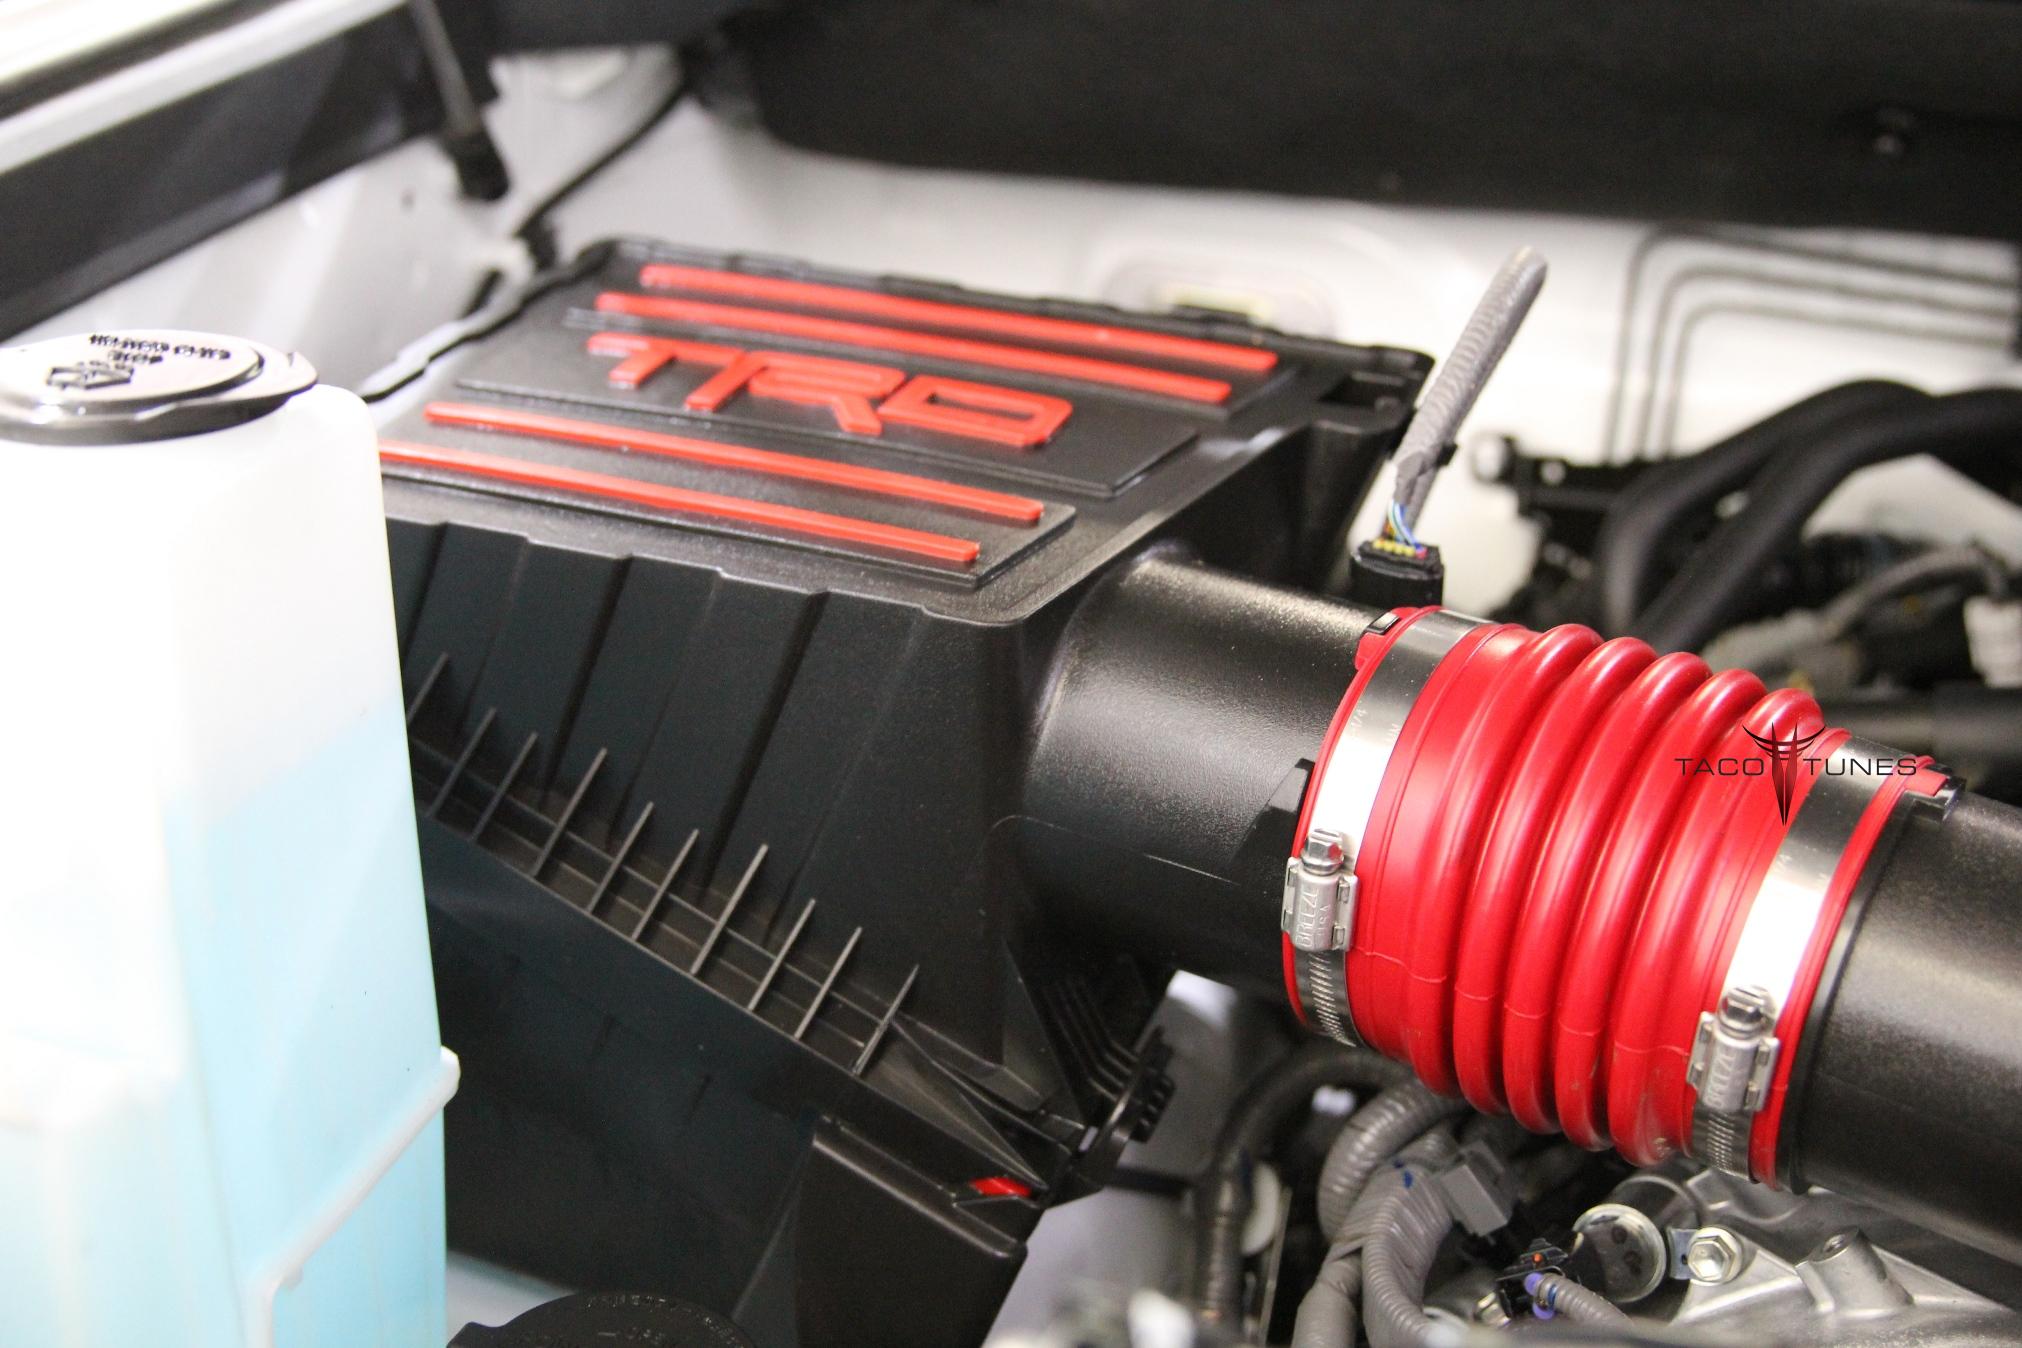
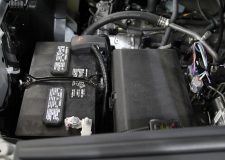
2017 Tundra CrewMax TRD PRO Under the hood
2017 Toyota Tundra TRD Pro CrewMax amplifier power wire
Toyota Tundra TRD PRO Sound Processor ReCurve EZQ
Toyota Tundra 5 Channel Amp fits under seat
Toyota Tundra CrewMax Pro Tweeters and speakers power amplifier
Toyota Tundra CrewMax Pro Tweeters and speakers power amplifier
Toyota Tundra TRD PRO Stereo System Install
Toyota Tundra TRD PRO Stereo System Install
Toyota Tundra TRD PRO Stereo System Install
Toyota Tundra TRD PRO Stereo System Install
Toyota Tundra TRD PRO Stereo System Install
Toyota Tundra TRD PRO Stereo System Install
Toyota Tundra TRD PRO Stereo System Install
Toyota Tundra TRD PRO Stereo System Install
2017 Toyota Tundra TRD Pro CrewMax amplifier power wire
Toyota Tundra TRD PRO Stereo System Install
Tundra Crew Max Ballistic Matting Installation
TRD PRO Speaker System Replacement
TRD PRO Speaker System Replacement
TRD PRO Speaker System Replacement
Toyota Tundra Tweeter Replacement Installation Sail Panel
TRD PRO Speaker System Replacement
Toyota Tundra TRD Pro Subwoofer Box 12” Subwoofers
Toyota Tundra CrewMax Pro Tweeters and speakers power amplifier
Toyota Tundra CrewMax Pro Tweeters and speakers power amplifier
Toyota Tundra TRD Pro Subwoofer Box 12” Subwoofers
Toyota Tundra TRD Pro Subwoofer Box 12” Subwoofers
Toyota Tundra TRD Pro Subwoofer Box 12” Subwoofers
Specs on the audio installation:
The AMP is hidden under the driver seat. Sound Processor (ReCurve EZQ) is hidden under rear set. The full size Image Dynamics 10” subwoofers fit behind the rear seats. The entire truck appears to be stock and makes the truck appear to e stock and less likely for break ins. Additionally, the gear is setup for Toyota’s so chances of theft are greatly reduced.
Front Door Component Speakers:
Image Dynamics CXS64
Tacotunes.com heavy duty speaker mounts cut to 5.6”
CXS Mid bass Drivers -125 Watts RMS
CXS Crossover
CXS 28M Silk Dome Tweeter
Use Stock Sail Panel for Tweeter mounts.
Rear Door Components:
Image Dynamics CTX65CS
Tacotunes.com heavy duty speaker mounts cut to 5.6”
CTX65CS Mid bass drivers Handles -100 watts RMS
CTX65CS Crossover
CTX Tweeters
Tweeters will fit in stock door location
Sound Processor:
Tacotunes.com ReCurve EZQ
Tacotunes.com JBL Harness
Amp:
Exile Audio 5 channel amp
100 watts x 4 to each speaker and 800 x 1 (subwoofer)
Subwoofer(s):
Subwoofer Box & Subwoofers
Tacotunes.com dual 12” subwoofer enclosure 2.0” cu feet
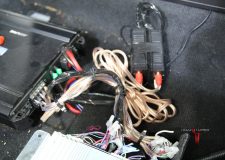
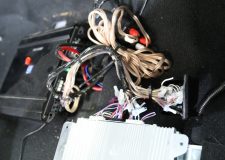
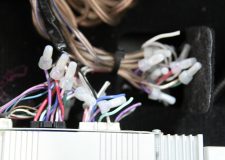
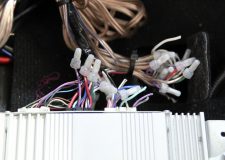
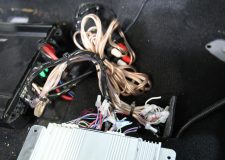
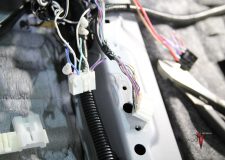
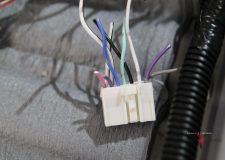
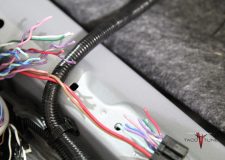
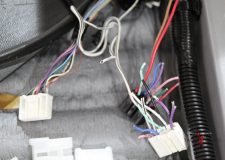
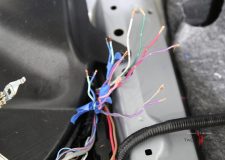
Guys’ Toyota Tundra JBL Wiring Repair and audio system re-makeover Image Dynamics SQ1 System
Installation Summary / History: Guy lives in a town a bit north of San Antonio. He paid a local audio shop to upgrade the audio in his 2016 Toyota Tundra CrewMax 1794 Edition. After 3 visits to the same shop and another large shop here in San Antonio with no luck, he found our website. He came in for a system evaluation. Unfortunately, we see the scenario quite often . “Professional installation” shops doing a horrible job on the installation on JBL equipped Tundras. This is probably the 15th Tundra we have repaired or assisted in repairing here at our location in San Antonio.
When Guy came in, 2 of his door speakers were not working and the system was popping and turning off / on. The system sounded worse than the stock JBL setup. We gave him a quote and he said he would have to think about it. We recommended that harness system be repaired and replacing the speakers and sub(s). Pretty much a re-do. Guy called us back and said please get this fixed.
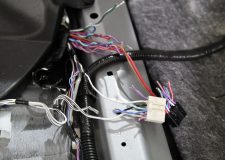
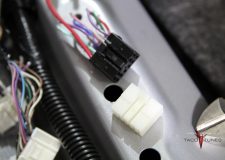
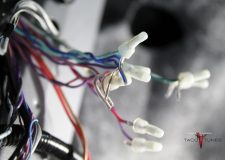
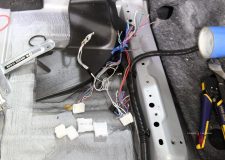
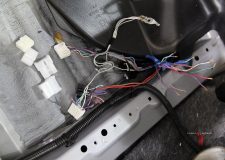
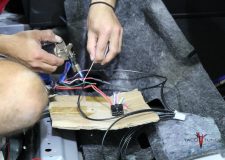
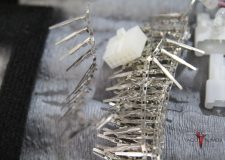
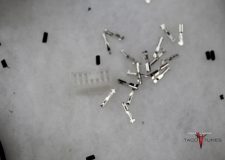
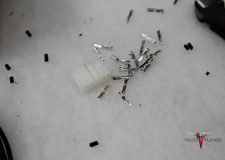
Before we could start installing a new system, we had to repair the damaged JBL wiring system. The previous shop did not leave enough of the stock wiring to work with. We had to create a new harness and solder back to original stock wiring. In the pictures below you will see the repair process.
Customer Name: Guy
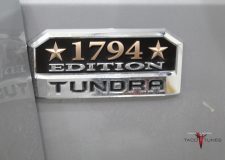
Toyota Year / Model: 2016 Toyota Tundra CrewMax 4×4 1794 Edition
Jons 2015 Toyota Tundra CrewMax Limited Audio System Upgrade Austin TX
Jons 2015 Toyota Tundra CrewMax Limited Audio System Upgrade Austin TX
Jons 2015 Toyota Tundra CrewMax Limited Audio System Upgrade Austin TX
Jons 2015 Toyota Tundra CrewMax Limited Audio System Upgrade Austin TX
Jons 2015 Toyota Tundra CrewMax Limited Audio System Upgrade Austin TX
Jons 2015 Toyota Tundra CrewMax Limited Audio System Upgrade Austin TX
Jons 2015 Toyota Tundra CrewMax Limited Audio System Upgrade Austin TX
Jons 2015 Toyota Tundra CrewMax Limited Audio System Upgrade Austin TX
Jons 2015 Toyota Tundra CrewMax Limited Audio System Upgrade Austin TX
Jons 2015 Toyota Tundra CrewMax Limited Audio System Upgrade Austin TX
Jons 2015 Toyota Tundra CrewMax Limited Audio System Upgrade Austin TX
Jons 2015 Toyota Tundra CrewMax Limited Audio System Upgrade Austin TX
Jons 2015 Toyota Tundra CrewMax Limited Audio System Upgrade Austin TX
Jons 2015 Toyota Tundra CrewMax Limited Audio System Upgrade Austin TX
Jons 2015 Toyota Tundra CrewMax Limited Audio System Upgrade Austin TX
Jons 2015 Toyota Tundra CrewMax Limited Audio System Upgrade Austin TX
Jons 2015 Toyota Tundra CrewMax Limited Audio System Upgrade Austin TX
Jons 2015 Toyota Tundra CrewMax Limited Audio System Upgrade Austin TX
Jons 2015 Toyota Tundra CrewMax Limited Audio System Upgrade Austin TX
Jons 2015 Toyota Tundra CrewMax Limited Audio System Upgrade Austin TX
Jons 2015 Toyota Tundra CrewMax Limited Audio System Upgrade Austin TX
Jons 2015 Toyota Tundra CrewMax Limited Audio System Upgrade Austin TX
Jons 2015 Toyota Tundra CrewMax Limited Audio System Upgrade Austin TX
Jons 2015 Toyota Tundra CrewMax Limited Audio System Upgrade Austin TX
Jons 2015 Toyota Tundra CrewMax Limited Audio System Upgrade Austin TX
Jons 2015 Toyota Tundra CrewMax Limited Audio System Upgrade Austin TX
Jons 2015 Toyota Tundra CrewMax Limited Audio System Upgrade Austin TX
Jons 2015 Toyota Tundra CrewMax Limited Audio System Upgrade Austin TX
Jons 2015 Toyota Tundra CrewMax Limited Audio System Upgrade Austin TX
Jons 2015 Toyota Tundra CrewMax Limited Audio System Upgrade Austin TX
Jons 2015 Toyota Tundra CrewMax Limited Audio System Upgrade Austin TX
Jons 2015 Toyota Tundra CrewMax Limited Audio System Upgrade Austin TX
Jons 2015 Toyota Tundra CrewMax Limited Audio System Upgrade Austin TX
Jons 2015 Toyota Tundra CrewMax Limited Audio System Upgrade Austin TX
Below you will find a detailed listing of all the parts we used in the installation.
Typical Installation time is 1 day, however we matted the front, rear doors and the rear wall behind the subwoofer. If we are matting the truck we keep the truck for two days. One day audio installation and matting jobs are possible, but require at least 14 hours with the truck.
Below is a detailed listing of the audio products installed in Jon’s Tundra CrewMax
Front Door Component Speakers:
Image Dynamics CXS64
Tacotunes.com heavy duty speaker mounts cut to 5.6”
CXS Mid bass Drivers -125 Watts RMS
CXS Crossover
CXS 28M Silk Dome Tweeter
NOTE: JBL equipped
Use Stock Sail Panel for Tweeter mounts.
Rear Door Components:
Image Dynamics CTX65CS
Tacotunes.com heavy duty speaker mounts cut to 5.6”
CTX65CS Mid bass drivers Handles -100 watts RMS
CTX65CS Crossover
CTX Tweeters
Tweeters will fit in stock door location
Sound Processor:
Tacotunes.com ReCurve EZQ
Tacotunes.com JBL Harness
Amp:
Exile Audio 5 channel amp
100 watts x 4 to each speaker and 800 x 1 (subwoofer)