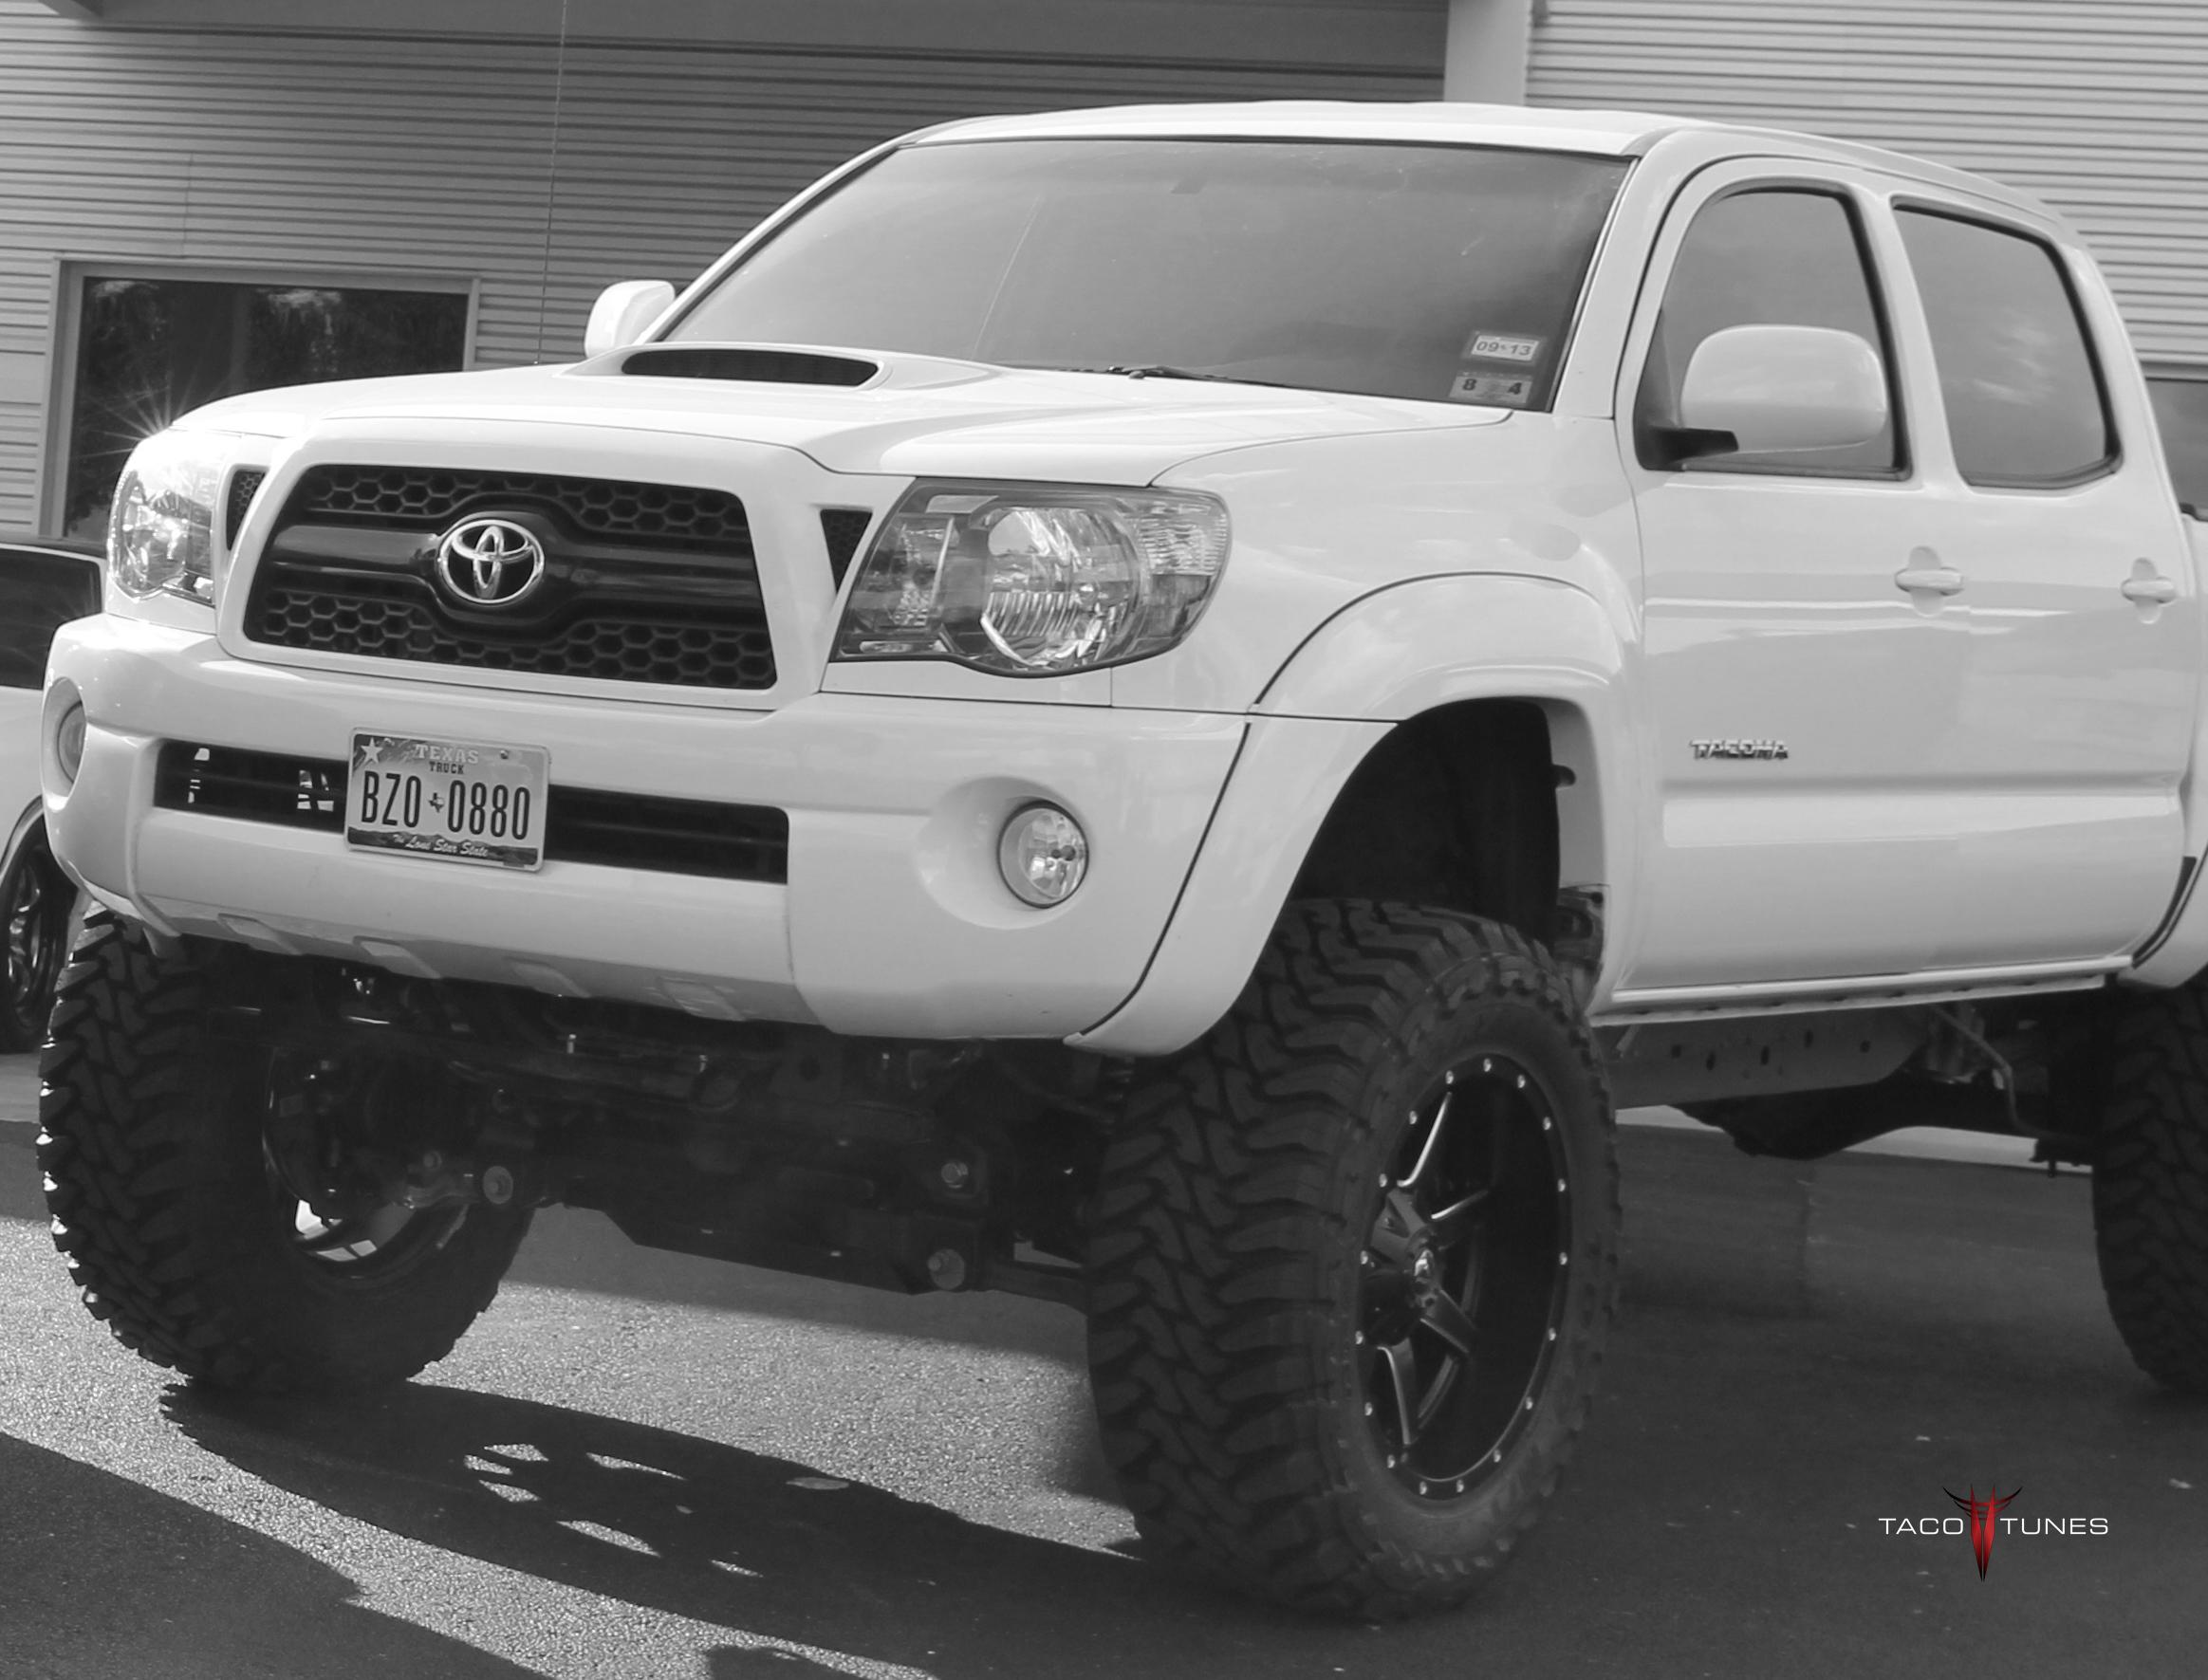
2003 Toyota Tacoma Double Cab Tacotunes Build Audio Stereo LED Winch Installation PIC
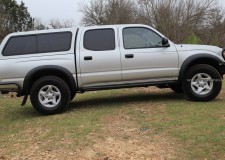
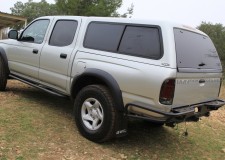
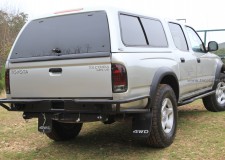
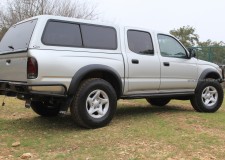
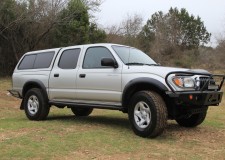
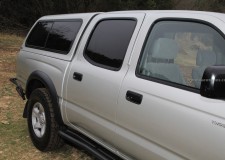
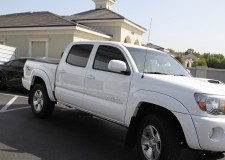
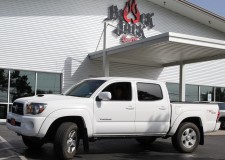
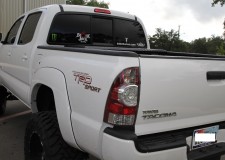
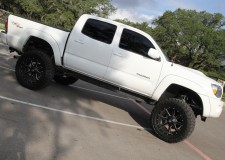
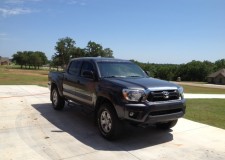
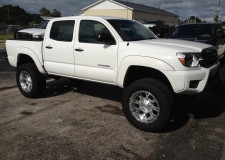
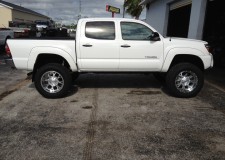
This is an in house 2003 Toyota Tacoma Double Cab, belongs to a past customer / now part time employee.
Here at tacotunes.com we perform a number of audio installations right here in San Antonio TX. In the past we have only provided installation products for 2005 and up Toyota Tacoma, 2007 and up Toyota Tundra and quite a few other model Toyota.However, we began to offer some products for the 2001, 2002, 2003, 2004 Toyota Tacomas.
This build page was put together to give some ideas and assistance in upgrading or modifying your Gen 1 Toyota Tacoma. The build pages will be broken down by each build section.
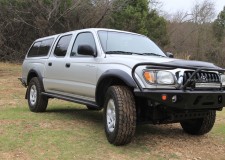
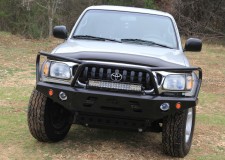
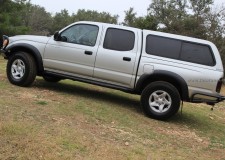
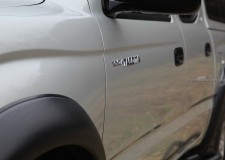
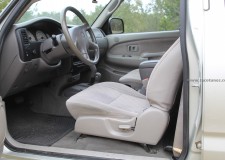
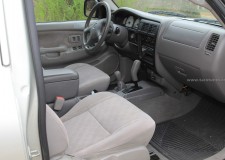
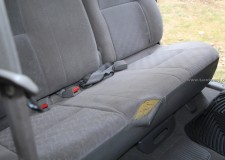
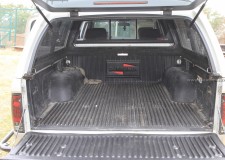
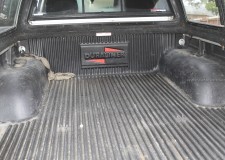
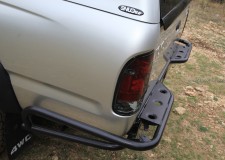
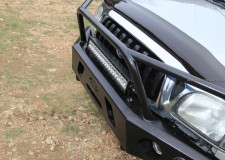
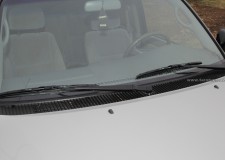
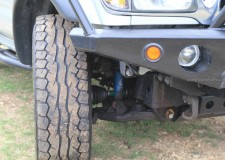
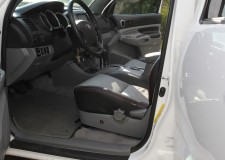
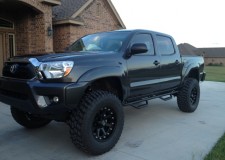
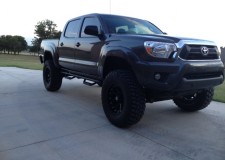
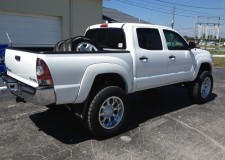
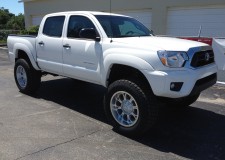
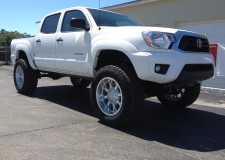
2003 Toyota Tacoma Double Cab 4×4 The gallery below contains a number of pictures of the 2003 Tacoma Double at the beginning of the build. As you can see it had already been modified pretty heavily when we decided to upgrade it even further.
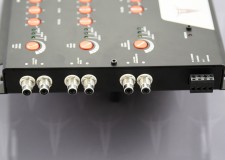
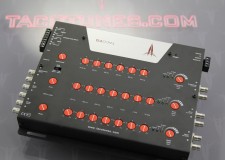
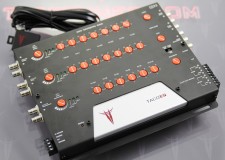
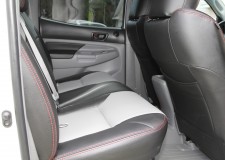
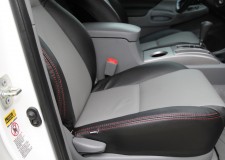
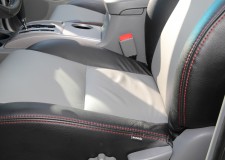
2003 Toyota Tacoma Double Cab 4×4 Stereo Installation
2003 Toyota Tacoma Double Cab 4×4 Stereo Installation
2003 Toyota Tacoma Double Cab 4×4 Stereo Installation
2003 Toyota Tacoma Double Cab 4×4 Stereo Installation
2003 Toyota Tacoma Double Cab 4×4 Stereo Installation
2003 Toyota Tacoma Double Cab 4×4 Stereo Installation
2003 Toyota Tacoma Double Cab 4×4 Stereo Installation
2003 Toyota Tacoma Double Cab 4×4 Stereo Installation
2003 Toyota Tacoma Double Cab 4×4 Stereo Installation
2003 Toyota Tacoma Double Cab 4×4 Stereo Installation
2003 Toyota Tacoma Double Cab 4×4 Stereo Installation
2003 Toyota Tacoma Double Cab 4×4 Stereo Installation
2003 Toyota Tacoma Double Cab 4×4 Stereo Installation
2003 Toyota Tacoma Double Cab 4×4 Stereo Installation
2003 Toyota Tacoma Double Cab 4×4 Stereo Installation
2003 Toyota Tacoma Double Cab 4×4 Stereo Installation
2003 Toyota Tacoma Double Cab 4×4 Stereo Installation
2003 Toyota Tacoma Double Cab 4×4 Stereo Installation
2003 Toyota Tacoma Double Cab 4×4 Stereo Installation
2003 Toyota Tacoma Double Cab 4×4 Stereo Installation
2003 Toyota Tacoma Double Cab 4×4 Stereo Installation
2003 Toyota Tacoma Double Cab 4×4 Stereo Installation
2003 Toyota Tacoma Double Cab 4×4 Stereo Installation
2003 Toyota Tacoma Double Cab 4×4 Stereo Installation
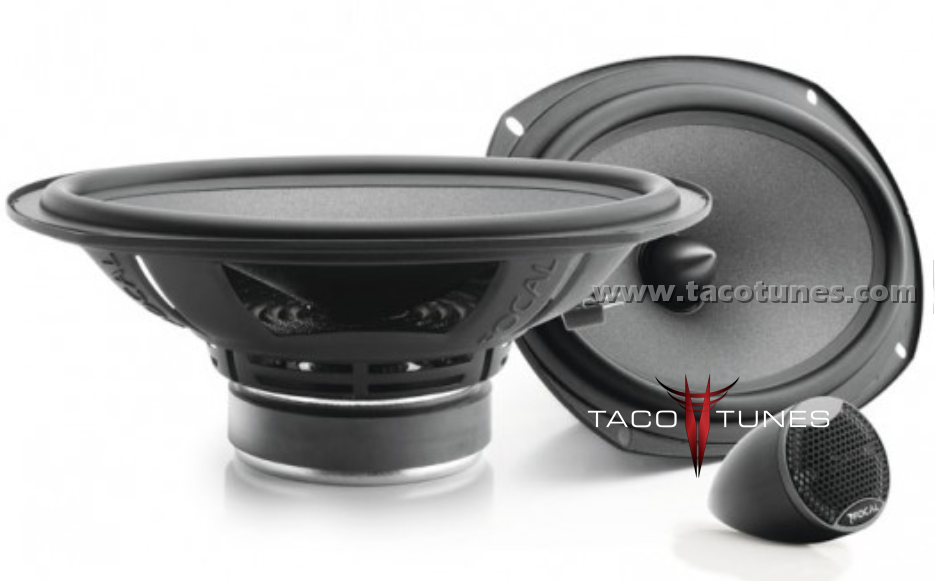
Focal Integration ISS 690 Component 6×9 Speakers Toyota Tacoma
Toyota TacomaFocal Integration ISS 690 Component 6×9 Speakers
To install iFocal Integration ISS 690 Component 6×9 Speakers into your Toyota Tacoma, you will want to use tacotunes.com speaker adapters designed to work in your Tacoma. The Focal Integration ISS 690 Component 6×9 Speakers work with our 6×9 speaker mounts for the mid range speakers. The Focal Integration ISS 690 Component 6×9 Speakers tweeters will require a 1.677″ cutout diameter.
The iFocal Integration ISS 690 Component 6×9 Speakers will fit you your Toyota Tacoma without any cutting, drilling or modifications to your Tacoma.
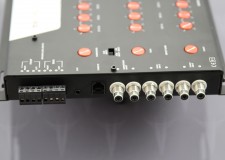
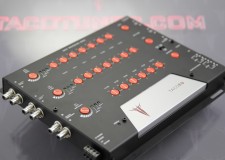
How to set gain on Exile Javelin 5 Channel Class D Amplifier
This post is part of a video series on youtube. Be sure to watch the video(s) and read all information below, BEFORE you ask questions or make comments. This is a DIY site. We make every attempt to provide the information you will need to perform your own installation. Questions / comments that are clearly answered in the videos/posts will be deleted. If we missed something that you think will be helpful or will make it easier to understand please feel free to comment below.
Per the video, the calculator below will help you to find the correct voltage for setting the gain on your EXILE JAVELIN amplifier. This video will work or most amps, however to assist our customer base we try to provide as much specific information as possible.
Ok, so if you are ready to set the gain on your amp. You have already completed the following videos / steps:
1. How to select a head unit.
2. How to add an amplifier to my stock head unit.
3. How to install power and speaker wiring in your Toyota Tacoma.
4. How to select speakers that fit my Toyota Tacoma.
5. How to select amplifier for my Toyota Tacoma.
6. How to wire a subwoofer.
7. How to get the actual “load” from your speakers / subs.
Tools / items needed to set the gain:
1. Digital Multi-Meter –
2. Audio Test Tones – Available on this page
3. Small Screwdriver to adjust gain knob.
4. Voltage Calculator (see below)
5. The performance (birth) sheet for your amp.
Per the video, the best way to set the gain on your amplifier is by using an oscilloscope. However, an inexpensive digital multimeter (DMM) is a great alternative. The voltage calculator below will help you to set your gain.
Most amplifiers will include a “birth sheet”. The birth sheet includes actual output numbers when the amp was tested at the factory. Most quality amplifier companies will provide the RMS output. The current model of the Javelin Exile Amp is rated at
PIC of Birth-sheet
Specs:
85 watts x 4 to each speaker
500 watts x 1
Setting the gain on the speaker channel.
The amp is rated at 80 watts. Using the calculator below, enter the voltage of your Toyota. You can use the DMM to get the actual voltage.If you purchased our amp kit, we include an on-board voltmeter.
Head unit:
We need to figure out the maximum volume for our head unit. In about 85% of the cases we found most head units will start to “clip” the signal at around 80% of the volume. When the signal begins to clip, it will send distortion to the speakers / subs. Once we know the maximum volume setting, keep in mind this will be the maximum volume you should turn your stereo. NOTE: Some music is recorded at different levels and the quality of music will play a role in the volume. In some cases the the max volume will fluctuate a little bit.
Turn on the car and note the voltage.
Connect the DMM to channel 1 on amplifier.
FAQ:
What is gain?
The amplifier gain is used to match the output of the head unit to the amplifier. The maximum audio output voltage from different head units will vary by brand / models. Without a gain control, most head units may not be able drive the amplifier to full power.
Subscribe – Please be sure to subscribe to our youtube channel. youtube.com/tacotunes
Contribute – If you are a customer of ours great! Thank you! If you are using our videos and information to setup and install your system . . . Please help us out with a monetary contribution. The videos take time and money to produce. Hosting services and web design cost money. Most shops charge about $200 to install and tune an amp. If we helped you out, send $10 to [email protected] and we will keep more videos coming. Chances are you will use our help again in the future. 🙂
Subscribe – Please subscribe to us on youtube!
Share – Please share this page with friends via Facebook, forums and other forms of online media.
Help – Please take time to like us on Facebook and like our product partners on Facebook. Please tell them we sent you!
Most videos providing instructions that use a DMM for amp tuning are only providing a small part of the information required to properly set your gains using a DMM. To accurately set your gain(s) you must consider some of the factors that affect the correctl DMM voltage you need to have.
Per the video, the additional calculations below might be considered “splitting hairs” but we like to arm our customers with as much knowledge as possible. With that said; keep in mind:
1. Most amps are bench tested using 14.4 volts. However, most cars do not produce that much voltage.
2. Most people are assuming the speaker(s) / sub(s) are actually providing the “stated” load. For example, most people assume that their speakers are 4 ohm load.
These two factors will affect your final output. Below we will show you how to get more accurate numbers to apply to your amp.
How to keep your stock factory Entune stereo and add an amplifier sound processor equalizer
How to keep your stock factory Entune stereo and add an amplifier sound processor equalizer – Love your Toyota Tacoma, but not really enjoying the sound quality coming from the factory Entune stereo? Until recently, many audio enthusiasts (including myself) looking for great sound quality would generally recommend replacing the factory Entune stereo (head unit) with a QUALITY aftermarket head unit. Why? Because most qualityaftermarket head units are setup for great sound – they are NOT detuned like factory head units. It used to be VERY difficult to get great sound quality from a factory Entune stereo. Sure you can make it “loud” but loud does not mean great sound quality. However, recent technological advances in factory head units have made complete stereo replacement less practical.These days Toyota is including a ton of great features in their factory Entune stereos. At the time of this post, many of the stock head units have Bluetooth, Internet search capability, navigation (GPS), steering wheel controls, IPod and auxiliary inputs, HD radio, satellite radio and the list just goes on and on. So it really does not make sense to replace the stock head unit when it includes all these great features. Plus a car stereo that looks factory, or “stealth,” is more likely to deter thieves. After a large number of requests from Toyota Tacoma owners we decided to produce a product that makes it easy to keep your factory Entune stereo while paving the road to AMAZING sound quality.
YES WORKS WITH NON ENTUNE UNITS ALSO!
Tacotunes is excited to introduce the ReCurve EZQ. The ReCurve EZQ has been in development for nearly 3 years. We have been testing it in a number of Toyotas here in San Antonio. From base model Toyota Tacoma to Limited or Platinum, this little “magic box” will help you get the sound you are craving from your stock Entune stereo. PLUS, installation is a SNAP! NO wire cutting, splicing, or soldering. Simply plug it in and you are ready to add one or more amplifiers to your Toyota. Gone are the days of wondering, “Will this unit work with my version of Windows or support an Apple? What did I do with the configuration CD? Why can’t I use my steering wheel controls anymore?” No more wasting countless hours reviewing wiring diagrams followed by ruining the factory wiring harness.
To make it even easier, we will provide a template to help you tune the EZQ for you Toyota Tacoma Entune system when you provide the year and body style. PLUS, if you purchase one of our turn-key sound quality packages , this unit will be setup for plug and play from front to back. Of course everyone has different listening taste, so not only did make easy to install, the Tacotunes ReCurve EZQ is also EXTREMELY easy to adjust.
Our goal was simple. Make it quick and easy to restore amazing sound to your “detuned” factory head unit. Whether you like more or less bass, brighter highs or even want to adjust the mid bass to your desire, it could not be easier than using the ReCurve EZQ.
So what exactly does the ReCurve EZQ do for my audio system? The short version: the ReCurve EZQ takes the audio signal coming for your factory head unit, restores the frequencies that have been reduced /detuned by Toyota, then supplies a balanced preamp output to your amp(s). Additionally, you have the ability to adjust the sound to your taste! Want more bass? Want less highs? Not a problem! Be sure to check out our installation videos. We walk you through the entire process.
add an amp to your toyota tacoma stereo – entune
Line Out converter factory stereo toyota tacoma – entune
how to add amp to stock stereo toyota tacoma – entune
Toyota Tacoma add amp to stock stereo head unit entune
Toyota Tacoma add amp to stock stereo – entune
Toyota Tacoma add amp to factory stereo – entune
How do I add an amp to toyota tacoma stereo – entune
FAQ:
Does this work with the Entune system?
YES! It also works with a number of Toyota Tacomas. We have tested this unit from 2005 Toyota Tacoma to the 2014 Toyota Tacoma with Entune. When you order you will be prompted to include the year and model of your Tacoma to ensure we send the correct items you will need to get this installed quickly and easily
Do I need an amplifier too, or does the TACQEzQ help my speakers sound better?
The ReCurve EZQ is not an amplifier, as stated above. The primary purpose of the TACOEzQ is to restore the audio frequencies your amplifier(s) need to obtain great sound quality from your stock head unit. Yes, you will need an amp(s), depending on what you plan to install in your Toyota. Be sure to check out our turnkey No need to waste a bunch of time trying to figure out what will work AND sound amazing!
Does tacotunes.com recommend an amp to work with the TACOEzQ?
We have tested and used this setup with a number of high quality amps to ensure the best solution for our customers. Our current list of amps that we recommend are as follows: (1) Exile Javelin 5 Channel Amplifier (2) Alpine PDXV9 Amplifier 5 Channel Amplifier (3) JL Audio HD900/5. However, you can use just about any quality amplifier. Some other examples, Alpine PDXF4 and Alpine PDXM6 amps can be used together . . We have started to offer the Exile Javelin amp as our primary amp in our SQ1 packages. The Exile amp will fit under the front seat of your Toyota, provide nearly 100 watts to Front and Rear speakers AND a whopping 800 watts to the subwoofer. This is a perfect match for our SQ1 system. Remote bass knob makes it a perfect setup for in-car listening and crank it up tailgating sound!
Why do I need the Recuve EzQ? I have used line out converters (LOC) in the past . . LOCs will do the same thing, right?
You can use LOCs to obtain a louder system. However, most of our customers are looking for sound quality not just volume. As we have mentioned above, most auto manufacturers including Toyota will detune a system by reducing frequencies the stock system is unable to reproduce. Most auto manufacturers do this so they can squeeze more power out of the system and allow you to turn the volume up louder by powering the stock speakers with the frequency range they can handle. However, the reason you are reading this information is because of the crappy sound coming from your stock speakers J. Also in most cases, people have used one LOC to add a subwoofer to the factory system. Sure you will get some bass, but it will leave you wondering it just doesn’t sound right. If you used LOCS to setup front, rear and subwoofer outputs you would need multiple LOCS. Plus you will still be spending hours trying to locate wires only to end up with a subpar system. Regardless of the quality of the LOC that you use, an LOC does not restore the missing frequencies. And most of the requests that lead to the development of the Recruve EzQ came from folks that initially installed LOCs or lower quality units that try to perform the same functions as the ReCurve EZQ.
There are similar products to the ReCurve EZQ. What makes this unit better?
First off, our plug and play system is the first of its kind in the industry. At the time we released/began field testing the ReCurve EZQ. No other manufacturer was offering a turnkey wiring harness and equalization device geared directly toward the Toyota Tacoma market. Additionally, we have not seen any systems that offer an optional subwoofer control module, an auxiliary input, and use only high quality materials in the production of the unit. Just one look at Recruve EzQ and you can see the high quality parts and design. The RCA input// output connectors we used are the same you will find on high end amplifiers and the tiffany style connectors ensure a long product life. The number one reason for failure in amps and head units is stress on the circuit boards caused by cutting corners on RCA connections.
Side notes:
We build our systems for sound quality. I often get requests from customers that want to add a sub to their stock system. My personal opinion is why would you go through all the work of running power wire, run RCA(s) and then end up with a system that has a subwoofer that drowns out the rest of the system? I try to understand how some people just like bass only, but I can’t! When people listen to our systems, I always here the same thing: “WOW! That is so clear and balanced.” The highs, mids and subs all work together to create amazing sound. My biggest satisfaction is when I turn the keys over to a customer as he / she grins from ear to ear!
Line Out Converters (bolded) Personal opinions on LOCs: I have heard a lot of systems that used LOCs to connect the stock head unit to aftermarket amps. Quite honestly, a lot of guys are just happy with a louder system. Our goal is not to create LOUD systems but rather amazing sound that enhances your drive time. A byproduct is the ability to turn up the sound LOUD and enjoy music while tailgating. However our first goal is to achieve a sound paradise in your Toyota Tacoma.
Powered Subs
I have been in car audio for many years. I started at age 15 tinkering with my first hand me down car. My first installation, I used a voltmeter and black tape to add an aftermarket system without using a harness adapter (YUK what a messy installation). Spent hours figuring out the color codes and splicing the factory wire harness. My first subwoofer was a powered “tube” subwoofer. I don’t want to mention product names, but you can get the picture. At first I was happy with what I thought was bass. But as each day went by I was not happy with the sound quality. My grandfather used to tell me. A “smart” person learns from his own mistakes. A “wise” man learns from other people’s mistakes. My point? I want to help guide you so you avoid making the same mistakes I, along with millions of others, have made in building an audio system. All that to say, powered subwoofers will leave you wanting more. IMO, save your money and do it right. A subwoofer requires three things: power, mass and control. At this point in time there is no way to reproduce the lower end of the frequency range without a subwoofer. To do this you need a good amount of power, the mass and “excursion” of a subwoofer and the control of a good quality subwoofer and the box that is matched to the subwoofer. When all the parts work together NO one will say they don’t need a subwoofer when they hear a properly tuned system.
Entune is a trademark of Toyota Motor Sales USA Inc., please see the Toyota website for additional information on the Entune system.
Entune encompasses the complete audio display stack of your vehicle – including Bluetooth, voice recognition, USB, aux port, navigation, and your display screen. On select, premium audio head units, you have access to navigation and a rich set of Apps and Data Services, now referred to as the “Entune® App Suite”.
How to add amplifier to stock stereo head unit and have great sound quality Toyota Tacoma
You love your Toyota Tacoma Double Cab but not really enjoying the sound quality coming from the factory stereo? Until recently, many audio enthusiasts looking for great sound quality, including myself would generally recommend replacing the factory stereo (head unit) with a QUALITY aftermarket head unit. Why? Well most QUALITY aftermarket head units are setup for great sound. They are NOT detuned like factory head units. It used to be VERY difficult to get great sound quality from a factory stereo. Sure you can make it “loud” but loud does not mean great sound quality.
These days Toyota is including a ton of great features in their factory stereos. At the time of this video, many of the stock units have Bluetooth, Internet search capability, navigation (GPS), steering wheel controls, IPod and auxiliary inputs, HD radio, satellite radio and the list just goes on and on . . So it really does not make sense to replace the stock head unit when they include all these great features. Plus a car stereo that looks factory or “stealth” is more likely to detour thieves. After a large number of requests from Toyota Tacoma owners we decided to produce a product that makes it easy to keep your factory stereo while paving the road to AMAZING sound quality.
Tacotunes is excited to introduce the TACOEzQ. The TACOEzQ has been in development for nearly 3 years. We have been testing it in a number of Toyotas here in San Antonio . . . from base model 2005 Toyota Tacoma to a 2014 Limited with the Entune system, this little “magic box” will help you get the sound you are craving from your stock stereo . . PLUS installation is a SNAP! NO wire cutting splicing, soldering simply plug it in and you are ready to add one or more amplifiers to your Toyota. Gone are the days of wondering; Will this unit work with my version of Windows or support an Apple? What did I do with the configuration CD?, Why can’t I use my steering wheel controls anymore? No more wasting countless hours reviewing wiring diagrams followed by ruining the factory wiring harness.
To make it even easier, we will tune the EQ for you Toyota Tacoma when you provide the year and body style. PLUS If you purchase one of our turn-key sound quality turnkey packages, this unit will be setup for plug and play from front to back . . Of course everyone has different listening taste so not only did make easy to install, the TACQEzQ is EXTREMELY easy to adjust.
Our goal was simple. Make it quick and easy to restore amazing sound to your “detuned” factory head unit. Whether you like more or less bass, brighter highs or even want to adjust the mid bass to your desire. It could not be easier than using the TACOEzQ.
So what exactly does the TACOEzQ do for my audio system? The short version; the TACOEzQ takes the audio signal coming for your factory head unit, restores the frequencies that have been reduced /detuned by the factory unit, then supplies a balanced preamp output to your amp(s). Additionally, you have the ability to adjust the sound to your taste! Want more bass? Want less highs? Not a prob! Be sure to check out our installation videos. We walk you through the entire process.
What is the difference between RMS peak and max power ratings in car audio
RMS vs MAX ratings speakers
Without getting into the electrical engineering side of this topic, for the most part you will want to ignore the max ratings. They have ALMOST no bearing on the actual power handling capability of your speakers. You need to focus on the RMS number. RMS or Root Means Square refers to the continuous power that you speakers can effectively handle.
I wish I had a dollar for every time I heard someone say my speakers are rated at 300 watts. At the time of this post, there are VERY few CAR speakers that can handle over 125 watts RMS. Keep in mind most quality speaker manufactures will use the RMS numbers to rate their speaker power handling capability. Most low end retail stores that offer speakers will be advertise using the MAX ratings. When you look at the fine print most will show you the RMS ratings somewhere in a difficult spot to locate.
Keep in mind power handling is important but there are many other factors in selecting quality speakers. If you are primary concern is price, you will probably not care about the quality of sound. I may be wrong, but I have been in car audio a long time. Most people that are only focused on price are generally not concerned about the quality of music.
A good quality speaker that is made with better materials will cost more money to make. We have provided some examples in our site of some lower end speakers and some examples of higher end speakers.
Hybrid Audio Technologies Imagine Component Speakers Toyota Tacoma
Hybrid Audio Tech i61-2v2 Component Speakers
Toyota Tacoma Hybrid Audio Tech i61-2v2 Component Speakers
To install Hybrid Audio Tech i61-2v2 Component Speakers into your Toyota Tacoma, you will want to use tacotunes.com speaker adapters designed to work in your Tacoma. The Hybrid Audio Tech i61-2v2 Component Speakers require a 5.6″ cutout diameter for the mid range speakers. The Hybrid Audio Tech i61-2v2 Component Speakers tweeters will require a 2.13″ cutout diameter. The Hybrid Audio Tech i61-2v2 Component Speakers will fit you your Toyota Tacoma without any cutting, drilling or modifications to your Tacoma.
The Imagine series consist of coaxial/convertible component sets designed for the discerning consumer interested in more than just an ‘OEM replacement speaker.’
The Imagine line-up has quickly become Hybrid Audio’s best-selling speaker, and a favorite amongst dealers and consumers because of its price to performance ratio. Imagine easily outperforms sets costing twice to three times the price. In fact, Imagine was named “one of the top-11 best bargain speakers available” by Car Audio & Electronics Magazine in 2011.
Kits include a pair of cast ABS frame midbass coaxials with water-proof paper cones proprietary to Hybrid Audio Technologies, high-energy ferrite magnets, 25mm soft-dome tweeters, component set conversion items (midbass phase plugs, tweeter cups and hardware, connection wire, and an extra set of magnet decals), integrated high- quality Mylar tweeter crossover capacitors.
Also available, are a range of incredible subwoofers in both the Stage II Imagine series and Stage IV Clarus series, including the I6SW, a 6.5-inch long-throw subwoofer, and the powerful C15SW, a 15-inch low-inductance, low-distortion subwoofer, available in either dual 2 ohm or dual 4 ohm configurations.
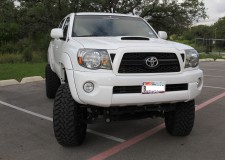
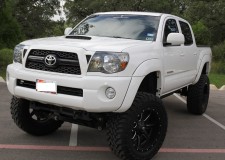
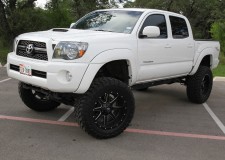
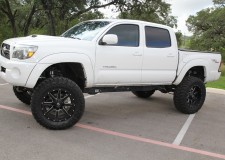
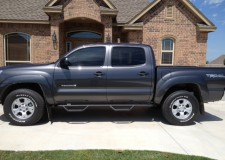
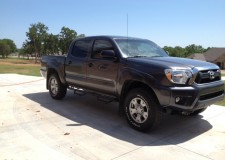
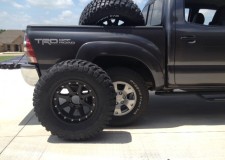
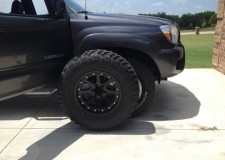
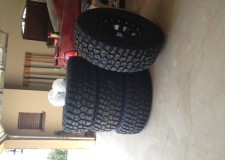
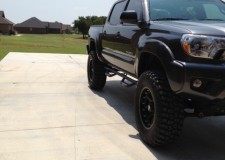
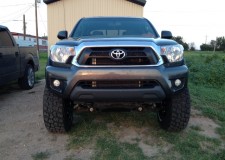
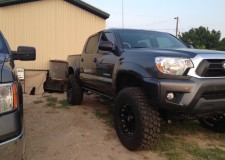
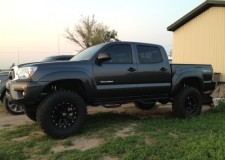
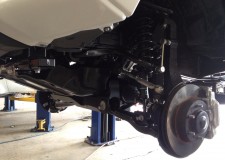
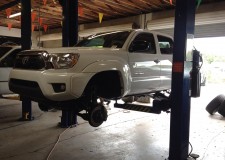
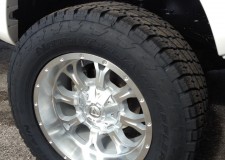
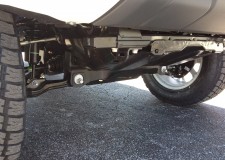
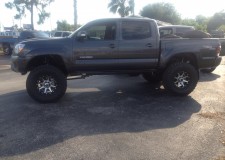
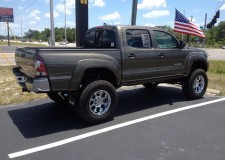
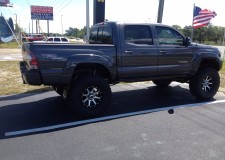
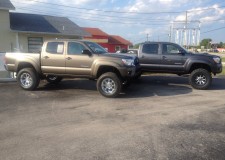
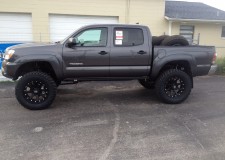
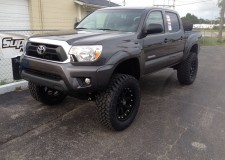
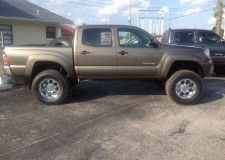
BDS Suspension Lift Kit Before and After Pictures tires wheels specs offset
BDS Suspension Lift Kit Before and After Pictures tires wheels specs offset . . . below are pictures of Toyota Tacoma Trucks that were lifted using BDS Suspension. We will provide the specs on each rig below. If you have friends that are using BDS suspension on their Toyota Tacoma Double Cab or Access cab, please have them send us pictures and specs so we can put on this page.
The head unit is like the “brain” of the entire audio system. These days head units have an amazing number of built-in and optional features; Bluetooth, Pandora, iHeart , Ipod, satellite, HD Radio, USB readers and many other interfaces and features Many also include backup camera display, navigation, DVD player along with many more features so where do you start? If you are looking to build a quality sound system and plan for future growth you need to be sure you head unit has the following options:
Must Haves:
High Pass Filter
Front Preamp Output RCA
Rear Preamp Output RCA
Subwoofer Preamp Output RCA
Nice Features:
Onboard EQ
Low Pass Filter
\
NOTE: If you have steering wheel controls for your audio, you will need to purchase a steering wheel interface. We have the easiest setup and instructions here **:
If you are going to stay with a basic, just select a decent name brand product and don’t worry about the features above.
Next decide do I want Navigation / DVD or just a good head unit?
Lately it seems like more and more people are steering way from Navigation units and just going with a head double DIN unit that will play DVDs or nice single DIN head unit
Next you will want to decide do I want single DIN or double DIN? Don’t get scared here, this is really easy! Head units generally come in either single DIN (180 x 50 mm panel) or double DIN (180 x 100 mm panel) size. The depth is not standardized. The US standard for a singe DIN head unit is 2″ x 7″ and the Double DIN sized head unit is a 4″ x 7″. Your new head unit will say single or double DIN.
Head Unit FAQ;
Why do I need an amp, my new stereo will output 50 watts per channel.
99% of all stock & aftermarket head units do not provide more than 20 watts RMS. Most manufacturers state the PEAK ratings in large print and the RMS rating in small print. Without getting all technical you want to look at RMS. Since most head units do not output much power, many will end up adding an amp.
Will my steering wheel controls work with my new head unit?
Most new head units will require a steering wheel interface that integrates the new head unit to their existing steering wheel controls. We have custom kits just for your Toyota Tacoma Double Cab.
I have the JBL system, do I need anything special to install my new head unit / aftermarket stereo?
The JBL system includes a factory amplifier. If you want to add a new head unit, you will need to purchase a JBL interface kit. It will allow you to connect your new head unit to your factory JBL amp.
Will a 4, 5 or x inch screen fit in my Toyota Tacoma Double Cab?
Most head units will clearly state if they are single or double din units. The size of the screens can vary greatly. But the overall unit will usually be a single or double din.
Can I move my camera video feed from my mirror to my new after market stereo?
Yes, we can show you how to do that. We have a video and even offer the custom parts you will need to easily move your camera display from your rearview mirror to your new stereo with a screen. Keep in mind your head unit must have a camera input and support backup camera function.
Which brand and model aftermarket stereo / head unit do you recommend?
For a single DIN on the entry level side:
For a single DIN on the mid level side:
For a double DIN on the entry level side (No Nav):
What size speaker will fit in front door of my Toyota Tacoma Double Access Cab or Xrunner?
This information applies to [TACOFSYR] Toyota Tacoma Double Cabs
The front doors in your Toyota Tacoma Double Cab Access cab & Xrunner front doors can accommodate 6×9 inch speakers, 6.5 or 6.75 inch coaxial and component speakers using our tacotunes.com speaker adapters. We even offer tweeter mounting options for aftermarket tweeters in your Toyota Tacoma Toyota Tacoma Double Cab Access cab & Xrunner. The Access Cab, Double Cab and XRunner come with a 6×9 speaker from the factory. However after you remove the factor speakesr, you will end up with an odd shaped hole and that is where our speaker adapters help you install aftermarket speakers.
Our speaker mounting adapters for your Toyota Tacoma are 1″ thick and they provide a top mount depth of 3.25″. If you are installing 6×9 speakers this will work with just about every 6×9 speaker that has a top mount depth of 3.25 inches or less. If you are planning to install 6.5 inch coaxial speakers the standard mounting diameter of 5.1 inches will accommodate approximately 90% of all 6.5 inch speakers. Higher end 6.5″ & 6.75 speakers and /or component speakers will usually have a larger mounting diameter.
For more in depth explanation of speaker sizes please watch this video. It should answer most of your questions regarding speaker sizes and mounting depth:
Below is a video instructional video that will show you how to remove the door panel and installs speakers in a Toyota Tacoma Toyota Tacoma Double Cab Access cab & Xrunner.
Tina showing 6×9 speakers installed in Toyota Tacoma Double Cab Access Cab & XrunnerClick here for step by step instructions on removing the door panel and installing speakers.After you have “popped” out the bottom portion of the door panel you will “lift” the panel upwards to remove it from the door.
Howdy Parters! We are currently sprucing up our ticket system to better serve you! If you need immediate assistance please text us at 210-472-0000. Dismiss