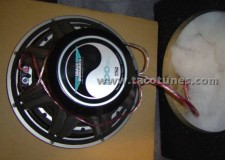
How to install JBL GTO18T Tweeters in your Toyota Tacoma
When you order these tweeter mounts from our site for your JBL GTO18T Tweeters, you will want to specify a custom size cutout @ 1.875″ cutout. We custom size the tweeter mount to fit your tweeter. Please keep in mind tweeters come in MANY different sizes. Please be sure to include the cutout diameter in the order notes.
The perfect tweeter to optimize your vehicle’s stereo image
Need to tune up your system and add some highs? The GTO18T is the perfect solution. It’s a 1″ (25mm) edge-driven My-Ti™ tweeter with I-Mount™ tweeter-mounting system. My-Ti (Mylar®/titanium composite) tweeters are stiff, light and extremely efficient. The well-thought-out I-Mount system allows for easy and versatile installation of the GTO18T. The GTO18T tweeter also features JBL’s proprietary Starfish™ tweeter mount, which allows the tweeter to be installed in a variety of factory locations.
Tweeter Specifications
Tweeter Size 1″ Tweeter Design Dome Tweeter Composition Mylar/Titanium Hybrid Flush Mount Yes Surface Mount Yes Angled Mount Yes Peak Power Handling 150 watts RMS Power Handling 50 watts Sensitivity 92 dB Frequency Response 2,500 – 21,000 Hz Impedance (Per Voice Coil) 2 ohms Top-Mount Depth 1″ Cutout Dimensions 1-3/4″ x 1-3/4″
1″ Grand Touring Series Car Tweeter
Power Handling:
Peak: 300 watts per pair / 150 watts each
RMS: 100 watts per pair / 50 watts each
Mylar/titanium composite dome tweeters
I-Mount for simple and versatile installation
Starfish tweeter mount allows the tweeter to be installed in a variety of factory locations
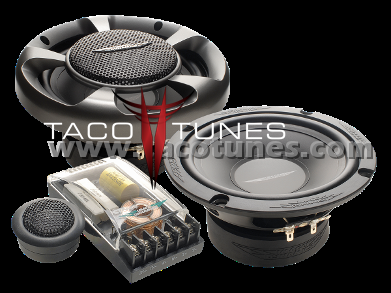
JL Audio ZR650 Csi Component Speakers Toyota Tundra
JL Audio ZR650 Csi Component Speakers in Toyota Tundra
To install JL Audio ZR650 Csi Component Speakers into your Toyota Tundra, you will want to use tacotunes.com speaker adapters designed to work in your Tundra. The JL Audio ZR650 Csi Component Speakers require a 5.5” cutout diameter for the mid range speakers. The JL Audio ZR650 Csi Component Speakers tweeters will require a 1.67″ cutout diameter.
2-Way Component System: 6.5-inch (165 mm) Woofer, 1-inch (25 mm) Aluminum Dome Tweeter
Our reference quality ZR component speakers are made for those seeking the highest possible levels of audio performance and are the pinnacle of the JL Audio component speaker lineup.
The ZR650-CSi features 6.5-inch (165 mm) component woofers with Kurt Müller cones and suspensions, precision-machined field plates and die-cast alloy baskets. The woofer design benefits from JL Audio’s vast woofer design experience and advanced modeling systems.
The ZR component tweeters included in this system feature 1-inch aluminum domes with rubber-roll suspensions that damp unwanted ringing while delivering spectacular high-frequency extension. A flush-mounting fixture with a classy electro-formed ring provides a sophisticated touch in any installation.
ZR crossover networks are bi-amp capable and built with super-premium component parts, including U.S.-made Mills™ resistors mounted on an extruded aluminum heat sink, polypropylene capacitors, and segmented air-core inductors. Five levels of tweeter attenuation are provided, as well as four levels of mid-range presence adjustment, for twenty possible voicing combinations!
Woofer grilles are included, each consisting of a black grille tray and a black steel mesh grille with an electroformed “ZR” logo.
JL Audio C5 650 Component Speakers in Toyota Tundra
To install JL Audio C5 650 Component Speakers into your Toyota Tundra, you will want to use tacotunes.com speaker adapters designed to work in your Tundra. The JL Audio C5 650 Component Speakers require a 5.6” cutout diameter for the mid range speakers. The JL Audio C5 650 Component Speakers tweeters will require a 1.49″ cutout diameter.
2-Way Component System: 6.5-inch (165 mm) Woofer, 0.75-inch (19 mm) Silk Dome Tweeter
The smoothness and transparency of a high-end silk dome tweeter combines with top-flight component woofer performance to create a loudspeaker system with exceptional refinement and dynamic capability.
The C5-650 component system features 6.5-inch (165 mm) component woofers with die-cast alloy baskets and Kurt Müller cones and suspensions. This woofer benefits from JL Audio’s vast woofer design experience and advanced modeling systems.
The C5 component tweeters are built with 0.75-inch silk dome diaphragms that deliver smooth, extended response, on and off axis. Flush-mounting and surface-mounting fixtures are included to fit a wide variety of installation needs. The flush-mount fixtures feature our RSR (Ratcheting Swivel Rotation) mechanism to allow precise tweeter aiming after installation.
C5 crossover networks are compact and built with premium component parts, including Mylar® capacitors and segmented air-core inductors. Four levels of tweeter attenuation are provided, as well as three levels of mid-range presence adjustment, for twelve possible voicing combinations!
Woofer grilles are included, each consisting of a black grille tray and a black steel mesh grille with an electroformed JL Audio logo.
Image Dynamics XS65 Component Speakers Toyota Tundra
Image Dynamics XS65 Component Speakers Toyota Tundra
Toyota Tacoma Image Dynamics XS65 Component Speakers
Installation tips:
To install Image Dynamics XS65 Component Speakers into your Toyota Tundra you will want to use our custom size 5.6″ cutout diameter for the mid range speakers, the tweeter will require a custom sized hole. We are Image Dynamics authorized! You can purchase the speakers and accessories you will need to get these installed quickly and easily.
Image Dynamics XS65 Component Speakers: The XS Series Components from Image Dynamics are the culmination of a engineering driven research and development project to produce sound performance that is without compromise.Powerfully detailed and dynamic in their musical output, they excel in the challenging automotive acoustic environment. XS Hybrid Components produce midrange with presence and detail without any coloration. The mid-bass carries weight and impact, and the highs are alive with detail and clarity without fatiguing harshness.Available in 6.5″ and 6×9″ models. An innovative speaker system, the XS Series allows multiple tweeter mounting options for the best in-car performance and ease of installation.
Image Dynamics CTX65CS Component Speakers Tweeters installing in your Toyota Tundra
Tacotunes.com is Image Dynamics Authorized. Please visit our shopping cart to purchase Image Dynamics CTX65CS Component Speakers Tweeters bundled with the parts you will need to get them installed quickly and easily.
Image Dynamics CTX65CS Component Speakers Tweeters: CTX Component Speakers are the affordable solution for the sound enthusiast seeking a high performance speaker system. Their high efficiency provides incredible detail and very high output levels while producing rich well-balanced sound with excellent tonal characteristics. More than the sum of the parts, the CTXcomponents feature a long excursion mid-woofer design that handles high-power amplifiers effortlessly with low distortion allowing higher output levels. The Silk dome CTX tweeters deliver the dynamics and detail without listening fatigue or harshness.The CTX components performance is the product of proper materials and a well executed engineering design. This translates to neodymium magnet silk dome tweeters with swivel mount, mica-polymer composite cones that are stiff, yet light and well-damped butyl rubber surrounds. Crossover with 250 volt metalized polypropylene capacitors air core inductors and 3 position tweeter level control.
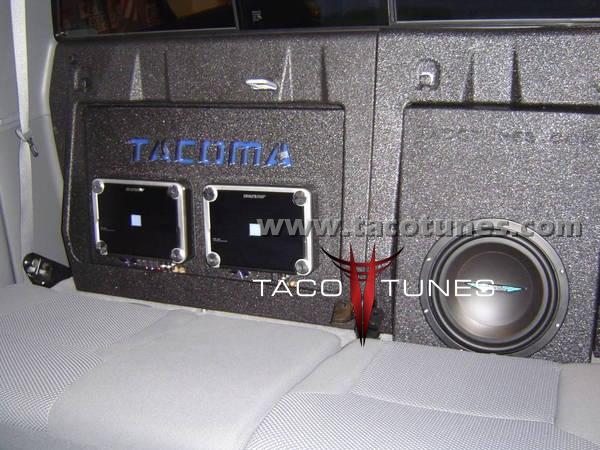
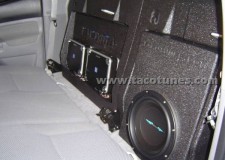
Toyota Tacoma Stereo Subwoofer Amp installationToyota Tacoma Double Cab Stereo System Installation
Toyota Tacoma Stereo pictures complete audio system subwoofer amplifiers
Customer installs Complete Toyota Tacoma Stereo pictures complete audio system subwoofer amplifiers
Toyota Tacoma Stereo pictures complete audio system subwoofer amplifiers installed by one of our customers that took time to document his entire installation process.
Below is a detailed installation of a complete audio system installed in Toyota Tacoma. Customer installation pictures complete audio system subwoofer amplifiers
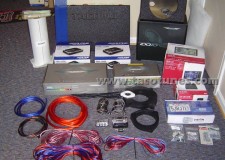
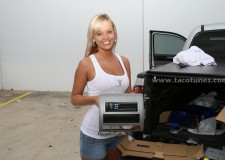
I bought my truck 3 months ago with 7 miles on it. It’s the 2009, Silver, 4×4, Double Cab, Long Bed, Hood Scoop, TRD, Tow Package… I couldn’t wait to rip out the sound system and put in something awesome. Well, my week long project is finally complete! Thanks to TacoTunes for some great ideas and great products supplied. The setup includes a long list of items… some I purchased on my own, such as headunit, bluetooth, XM, iPod connector, Amps, FatMat… and the rest I purchased from TacoTunes. I was pleasantly surprised to see such great quality and great looking items that I received.
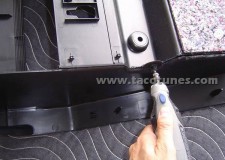
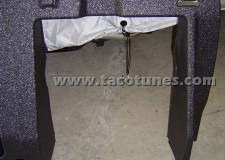
Stock storage bins… those came out with a quickness.
Bare back after everything was pulled.
Took my Dremmel, cut the back out of the driver’s side compartment as so to make room for the sub box.
The front looks like this after the two side cuts… then had to cut the top off.
Looks like this…
Took the wirebrush attachment and cleaned up the cut plastic for a smoother edge.
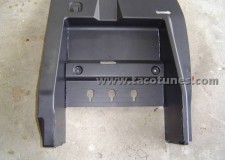
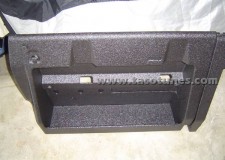
The other compartment… final look. Note, I had to cutout the little tray. There are instructions on how to do this on TacoTunes.com
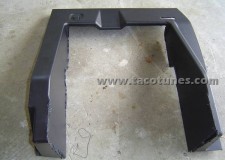
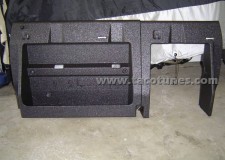
Final product.
Final product.
Here’s all the stuff going in.
Massive power wire attached to battery!! 20 feet of it… felt like 20 lbs!
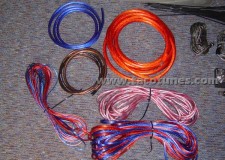
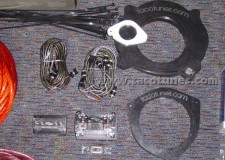
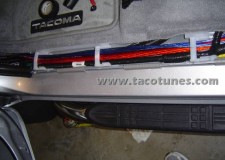
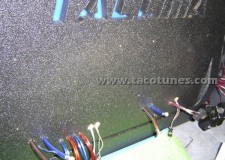
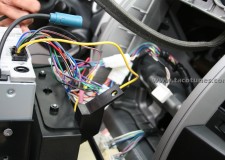
Main power wire is red, blue power wire 4 gauge from the distro block to amps, 4 gauge brown ground wire for amps, and many feet of tweeter wire, speaker wires, and sub wire
RCA’s from HU to amps, fuse block w/ custom engine compartment mount, distro power block, custom speaker mounts for the doors.
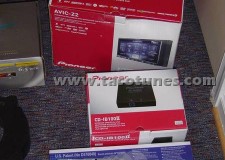
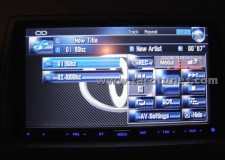
Pioneer AVIC-Z2 Hard Drive Navigation & Media Center, iPod Adapter, and Boyo Backup Cam. Didn’t have the boxes for my XM and Bluetooth.
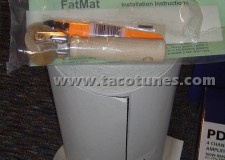
FatMat… great stuff. Got off Ebay… 50 sq ft for $80 shipped.
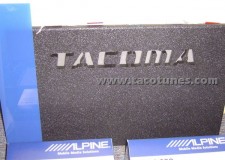
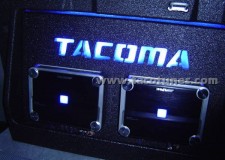
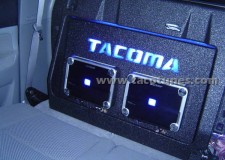
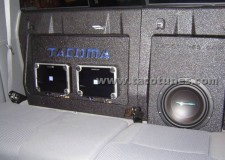
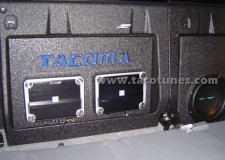
Amp Mounting board and blue plexiglass
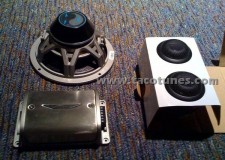
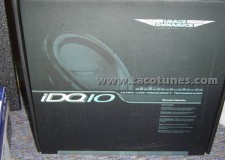
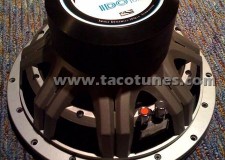
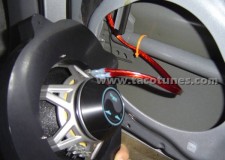
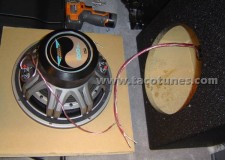
Image Dynamics IDQ10 D4v3
Image Dynamics IDQ10 D4v3
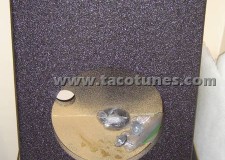
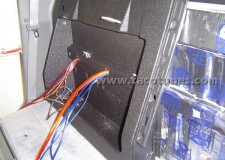
TacoTunes custom sub box.
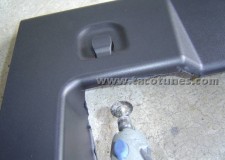
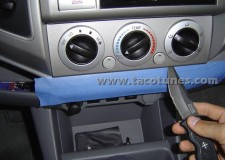
Install started with prying out the temp controls. Again, these instructions can be found on TacoTunes.com. I would recommend using a butter knife. My SOG knife was a bit sharp and can slice right through plastic.
Disconnected the temp controls.
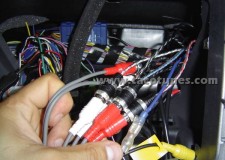
My RCA hookups and amp remote wire connections.
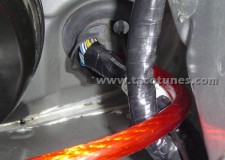
Here is where I tapped into for the Reverse Sensor Wire… It’s on this connector… the red wire. This is behind the driver side kick panel.
NaBehind the coin tray, left of the steering wheel… there’s your fuse box. I tapped into the black connector here for the Speed Sensor Wirevigation Stereo installation GPS Steering Wheel Control Toyota Tacoma
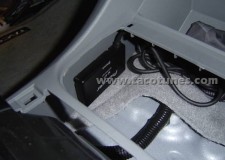
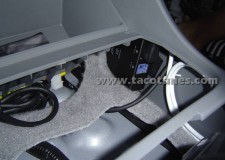
Navigation SterHere’s my XM unit. It’s mounted to the computer bracket behind the glove box and above the right side kick panel. I used tie wraps. Kindof ghetto, but it worked nicely! Also shown is the TSS-Radio XM antenna wire that connects to the factory antenna… found here: http://www.tss-radio.com/lexus-shark…er-p-5647.htmleo installation GPS Steering Wheel Control Toyota Tacoma
Further back view.
Here is the factory XM antenna connector… behind driver’s side kick panel.
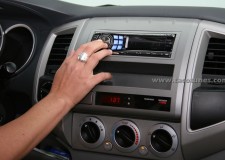
Radios… changing of the guard.
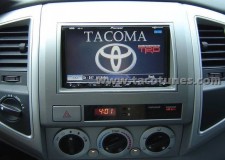
Here’s the HU installed… I created a custom background in photoshop.
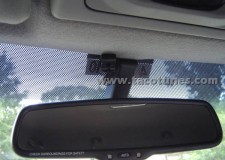
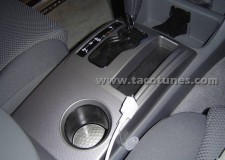
Mounted my bluetooth mic here. No one ever sees it there.
Mounted the bluetooth adapter here, under the cup holder in the center console.
iPod adapter went on the other side.
iPod cable routed here for now. I hook it to my iPhone since that’s where I normally keep it.
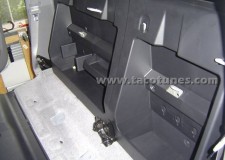
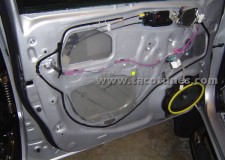
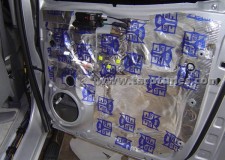
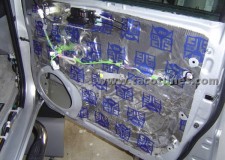
Door work time… disassembly instructions can be found on TacoTunes.com. Left Front Door.
Left Rear Door.
Rear Right Door w/ FatMat
Front Right Door w/ FatMat
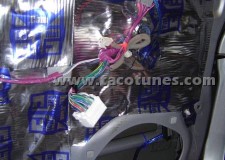
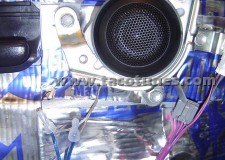
Left Front Door w/ tweeter and speaker wire run.
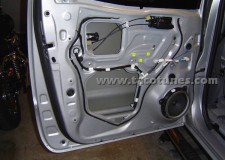
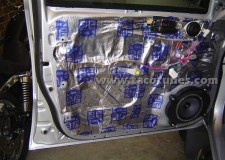
Left Front Door w/ speaker and tweeter mounted and connected.
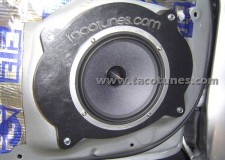
ID XS65 speaker and TacoTunes custom mount.
ID XS tweeter and TacoTunes custom mount.
The Right Front speaker and its connections before mounting. Make sure to tie wrap wire down like this so it doesn’t interfere with the window when it’s down.
Front Right Door all mounted.
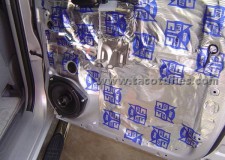
Right Rear Door and ID CTX65.
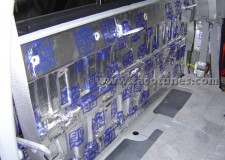
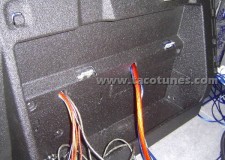
Rear wall… FatMatted.
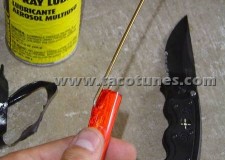
Preparing the massive Power wire for insertion. I hooked mine like a fish and taped it real tight… the sprayed it with lubricant. There was really only one opening to go through. I HIGHLY recommend using a lubricant spray of some sort! Also especially helpful when wiring speaker wire through the door tubes. After sprayed, the wires slip right in, through, and out… like a wet turd. =)
This process was not easy. Kindof like shoving a MK-48 Adcap Missile through a basketball hoop. It’s not going to happen without a little force. I’m not gonna lie… there was a little cursing, but I wised up, carefully cut a small slit, and use PLENTY of lube. Sounds so dirty, but just as satisfying in the end. It ended up out right in the end.
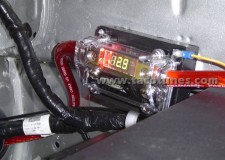
Here’s the Fuse Box connected and showing voltage.
Another pic…
Here’s the Fuse Box connected and showing voltage.
Run through here… BTW, NO… running it next to my speaker wires does not affect my sound in any way. Everything was grounded correctly and those wires are seriously insulated.
In the back now… drilled some holes and pulled all the wires through.
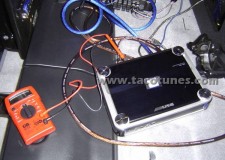
How to set gain on alpine pdx amp
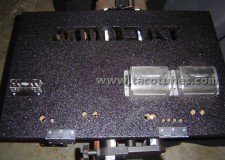
Prepping the amp board for amp installation… pre-drilling holes.
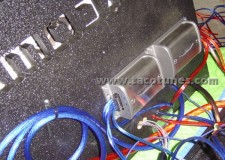
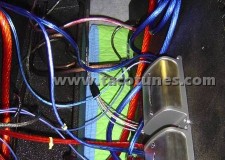
Turning the amp board over… mounted the crossovers from the XS package and power distro block on the back. Also pre-drilled holes for wire insertion to the other side.
Close up of crossovers. Had to take the covers off to set the correct pins for the speaker setup.
This was in the amp testing stage. I recorded a disk with 10 second clips, one of 1000 hz (for setting gain on 4 channel amp) and the other a 50 hz (for setting gain on single channel sub amp). I had the individual tracks play over and over so I could test the amps and tweek the gain for their respective tones… this is so I’m getting max use of my amps without blowing anything. You can also do this by ear by turning the gain up and listening for distortion and turning back down a little. I just wanted to be a little more precise. I have the formula for finding out these settings if anyone wants it.
Here’s the multimeter hooked up while the tones play and give me a reading.
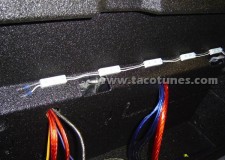
LED’s mounted in the amp box.
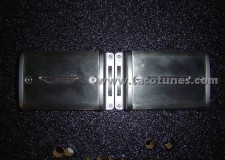
Everything hooked up, ready for amps to be installed and connected.
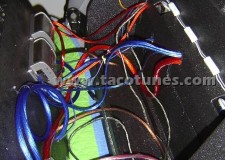
Close up picture of wiring and crossovers.
Another view. Note I have tie wraps cut real low on the rear speaker wires. This is so I didn’t get them confused with the front speaker wires on their respective sides.
Pulled through, ready for amp install.
Hooked up… Lit up!
Toyota Tacoma Double Cab Stereo System Installation
Last piece to the puzzle… installing the sub box to the rear wall and hooking up the sub.
Wired as so…
Final product!
Complete Audio System Installation Toyota Tacoma
Complete Audio System Installation Toyota Tacoma
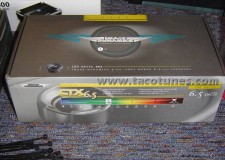
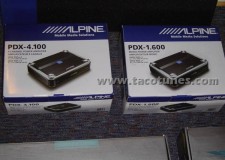
Here is the list of everything installed: Pioneer AVIC-Z2 HDD Navigation Media Center Pioneer GEX-P10XM Receiver w/ Nav Traffic Pioneer CD-IB100II iPod adapter Pioneer ND-BT1 Bluetooth adapter Boyo RearView License Plate Camera PAC SWI-PS steering wheel control unit Image Dynamics XS65 Components (front doors) Image Dynamics CTX65 Coaxials (rear doors) Image Dynamics IDQ D4v3 (sub) Alpine PDX-4.100 Alpine PDX-1.600 Sub Box with polyfill Amp Mounting Board (“Tacoma” cutout with blue plexiglass and LED lighting) Custom Amp Kit (includes power, speaker, RCA wires/fuse block/power distro block/screws, wire connectors, tie wraps) Custom Speaker mounts Fat Mat sound dampener
The pictures are pretty much in sequential order so you can see the process of the install. I’ve also included pics of all the pieces of installed equipment so you can see what I used. Here it goes:
Stock storage bins… those came out with a quickness.
www.tacotunes.com products used in this installation:
JL Audio W0 10 inch Subwoofer Toyota TacomaToyota Tacoma Double Cab Subwoofer Box
JL Audio 10W0 10 inch Subwoofer
Toyota Tacoma JL Audio 10W0 10 inch Subwoofer
To install JL Audio 10W0 10 inch Subwoofer will fit Toyota Tacoma, you will want to use tacotunes.com subwoofer box enclosure designed to work in your Tacoma Double Cab. The JL Audio 10W0 10 inch Subwoofer 9.1” cutout diameter for the subwoofer.
The JL Audio 10W0 10 inch Subwoofer will fit you your Toyota Tacoma without any cutting, drilling or modifying your Tacoma.
NOTE: To avoid cutting plastic storage bins you will need to remove them. If you want to have a custom fit look, you will want to use the following instructions that require cutting and modifying parts of your Toyota Tacoma Double Cab.
* Xmax specifications are derived via one-way voice coil overhang method with no correction factors applied. ** Efficiency (1 W / 1 m) is not an accurate indicator of a subwoofer’s output capability and should not be used as a comparison to other subwoofers to determine which one is “louder”.
Wall Thickness
0.75 in / 19 mm
Front Baffle Thickness
0.75 in / 19 mm
Volume (net int.)
0.65 cu ft / 18.41 L
External Width (W)
18 in / 457 mm
External Height (H)
11 in / 279 mm
External Depth (D)
9 in / 229 mm
F3
42.4 Hz
Fc
53.23 Hz
Qtc
1.002
Enclosure Notes* The enclosure recommendations listed above are external dimensions which assume the use of 0.75 in (19 mm) thick material. If you are using 0.625 in (16 mm) thick material, subtract 0.25 in (6.5 mm) from each dimension. Do not use any material with a thickness of less than 0.625 in (16 mm) as this may compromise the rigidity of the enclosure. * All enclosure volumes listed above are net internal volumes! Driver displacement, port displacement and brace displacement must be added to obtain the final gross internal volume. All enclosure dimensions above have already taken this into account. * When using multiple subwoofers in a common enclosure you will need to recalculate the enclosure and port dimensions. For assistance please contact your authorized JL Audio dealer or JL Audio Technical Support. * We recommend the use of this speaker in a bi-amplified system using high-quality satellite speakers and a high-quality amplifier. We do not recommend the use of this subwoofer with a passive crossover (coil), as this type of device will adversely affect performance. * All specifications are subject to change without notice.
Prolonged exposure to sound pressure levels in excess of 100dB can cause permanent hearing loss. This high-performance speaker can exceed this level. Please exercise restraint in its operation in order to preserve your ability to enjoy its fidelity.
When installing a subwoofer in your vehicle, it is extremely important to secure the enclosure firmly. We recommend bolting the enclosure through the metal of the floorpan or the frame of the vehicle with large diameter washers for reinforcement. If an enclosure is not firmly attached, it can become a projectile in a collision. This is particularly important in a hatchback, station wagon, sports utility vehicle, or van.
If you are wondering, How to install tweeters in to your Toyota Tacoma, you have come to the right place!
2016+ Toyota Tacoma
2005-2015 Toyota Tacoma
If you are considering installing aftermarket tweeters in your Toyota Tacoma, please take a few minutes and review the information below. I am fairly certain all your questions will be answered. This page was composed in an effort to answer the MANY questions and concerns we receive regarding tweeters installation in your Toyota Tacoma.
Tweeter Installation FAQ:
Q: How do I install tweeters in my Toyota Tacoma?
By using a component set and our speaker & tweeter adapters, you can quickly and easily install an aftermarket component set into your Toyota Tacoma. We offer custom sized tweeter mounts to help you get them installed quickly and easily. Be sure to check out the videos below for detailed installation tips. Don’t forget to check out our pre-packaged component sets and speaker / tweeter installation kits in our shopping cart.
Q: My tweeters say they are 1″, why do I need to order custom sized mounts?
In MOST cases aftermarket tweeters will be larger than 1″. In most cases 1″ refers to the surface area of the tweeter itself. The mounting diamter is usually larger. Most manufacters will provided the cutout or mounting diamter. This refers to the size of “hole” you need to mount the tweeters. We offer custom sizing as explained in your videos below.
Q: Do I need to use the passive crossover that was included with my component set? Can I just use the existing wiring in my Toyota Tacoma?
Y – E – S! You must use the crossovers included in your component speaker setup. In most cases, if you do not use the crossover you will damage the tweeters by introducing the lower frequency range they are not equipped to handle. The stock wiring coming from your Toyota Tacoma (at time of this post) is NOT equipped with a crossover. NOTE: If you are running an active crossover system, you probably don’t need to be reading this informationJ.
Q: Can I install aftermarket tweeters by using the factory speaker wire?
Yes, but see the detailed information below.
Q: I already installed a set of 6×9 or 6.5 inch speakers and want to add a tweeter; can I add these to my existing speakers?
Possibly, however, please see below for detailed answer.
Detailed answer to questions above:
In our opinion, the best case scenario to add tweeters to your Toyota Tacoma is to purchase a component set. Component sets generally include a midrange woofer, tweeter & passive crossover. This type of system will provide the best case scenario for a number of reasons. 1. The tweeter & midrange woofer will be properly “matched” to produce the best frequency range. Additionally, it will avoid duplicating signal and wasting power coming from the same speaker system. 2. You will be providing the correct resistance load (Ohms) to your head unit or amp. 3. Alleviates nuances and installation complications of adding mismatched drivers. NOTE: Stand alone tweeters are generally equipped with an inline crossover.
Check out our plug and play tweeter wire harness adapters:
If you already purchased speakers and would like to add tweeters this is possible. However, you need to consider the following. You MUST have a crossover in place to protect the tweeter from lower frequency range. Some aftermarket / stand – alone tweeters have these “inline”. An example is the:
You would run this in “parallel” with your existing speaker. However, this creates a “potential” problem. When you wire two drivers in parallel, you will change the resistance and final load (Ohm) delivered to your head unit or amp. In most cases you will end up with a 2 Ohm load. Most head units are not setup to handle the heat generated by a 2 ohm load. This will lead to premature head unit failure due to excessive heat. Many amplifiers can handle a 2 ohm load. Ok so now the power issue is explained now you have a staging issue to contend with. Your speakers and tweeters will now be producing the same frequency range. This is because your speakers have built in tweeters as well.
We are not stating this will not work, it is just not best practice. And, in many cases your general car audio enthusiast will be happy with the ‘extra” signal they are getting.
NOTE: Our mission is to provide the best sound system and quality. Therefore we do NOT suggest adding stand – alone tweeters to your sound system. Again, we are not stating it does not work, it is simply does not meet industry standards for best practice.
In an effort to provide the best and most cost effective way of adding aftermarket tweeters to your Toyota Tacoma. We are not implying it is the only method.
General Questions:
What is a tweeter and why do I need one:
Currently, (this was published 2013), technology does not provide a single “driver” that is able to reproduce the entire audio frequency range audible to a human being. Humans in general can process an audible frequency range between 20Hz & 20,000Hz.
NOTE: Many people refer to drivers as speakers, when in fact speakers are comprised of a set of drivers joined together to create a speaker system. A tweeter is not a speaker, it is actually a driver, just like a midrange woofer or subwoofer are actually drivers. If you want a sound system to reproduce sound accurately and with great clarity a good set of drivers is required.
Q: Is tweeter placement important?:
Tweeter placement is the MOST important of all drivers. The higher the frequency range the more directional it becomes. Check out the videos below on understanding the frequency range.
Q: What is crossover and why do I need it.
There are two types of crossovers that we use in car audio; active and passive. In this answer, we will cover a passive crossover. If you are familiar with active crossovers, you probably don’t need to be reading this information J. The basic task for a passive crossover is to send the high frequency signal to the tweeter and the lower frequency signal to the mid range driver/woofer.. A crossover is basically two frequency filters working in parallel. A high pass section and a low pass section. The high pass section passes high frequencies, the low pass passes low frequencies. The high pass is placed in series with the tweeter, and the low pass is in series with the woofer. Generally speaking a two way crossover will have six terminals. Two in (signal from head unit or amp) , and four out (signal out to tweeter and mid range). Usually the two sections (high-pass and low-pass) are in parallel and both sections ONLY work properly when the woofer and tweeter are both attached and operational.
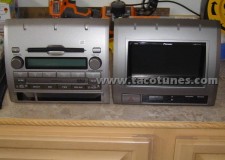
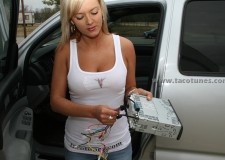
How to remove stock stereo and install new aftermarket head unit
You want to install an Alpine, Clarion, JVC, Jensen, Kenwood, Pioneer, Sony, or other brand(s) . . .but you don’t want to lose the stock look of your truck? We will show you how to remove stock stereo and install new aftermarket head unit.
Installation kit designed to integrate an aftermarket head unit / receiver into your Tacoma vehicle dash.
Head units generally come in either single DIN (180 x 50 mm panel) or double DIN (180 x 100 mm panel) size. The depth is not standardized. The US standard for a DIN radio is 2″ x 7″ and the Double DIN sized radio is a 4″ x 7″. Your new head unit will say single or double DIN.
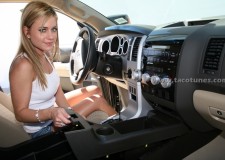
Tina will be showing you how to remove your old stereo and dashboard. From your Toyota 4Runner and Install a new after market head unit.
Before you start any audio project we recommend that you disconnect the battery to ensure a safe install.
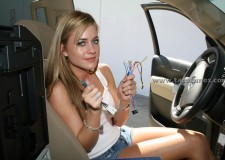
Tina laughing at something!
Gently insert a putty or butter knife below the AC knobs as shown. We HIGHLY recommend applying blue painter’s tape around the areas you will be working. This will alleviate potential dash scratches.
As shown above, gently pry downward to remove the AC control panel.
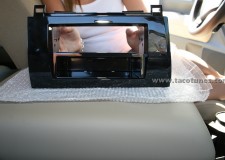
AC Panel Removed.
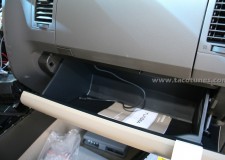
You can leave it hanging or remove the connectors and remove out of the way.
If you will be performing a major stereo upgrade with amps, Ipod, Satellite etc, it would be a good idea to remove the AC controls by simply unplugging the harnesses.
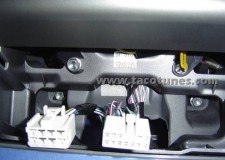
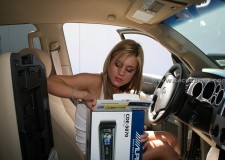
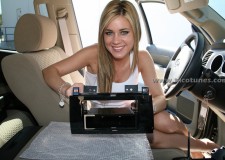
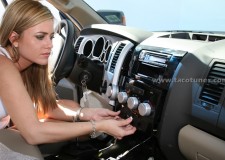
Using 1 hand to hold the head unit, remove the plugs on the back of the stereo with the other.
They have a release tab that you need to push to release. No need to label as they are all different sizes. Be careful this is where most dash scratches seem to occur.
If you purchased the dash kit and tools from our website, use the 10mm socket included in the kit. Using the proper size socket, remove the 4 bolts under the stereo as shown.
As shown, pull the old head unit straight out and away from the dash.
Using 1 hand to hold the head unit, remove the plugs on the back of the stereo with the other.
They have a release tab that you need to push to release. No need to label as they are all different sizes. Be careful this is where most dash scratches seem to occur.
To remove the antennae just gently pull straight out.
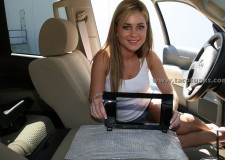
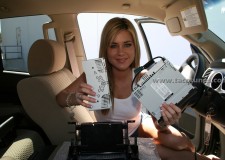
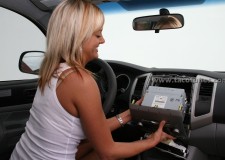
Head unit removed.
Head unit removed.
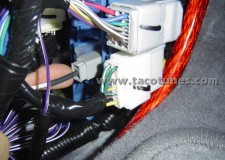
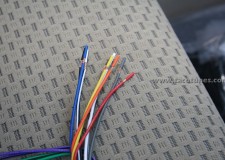
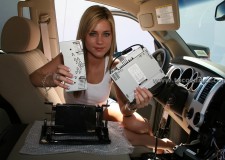
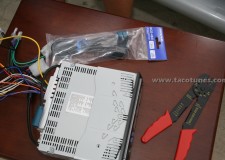
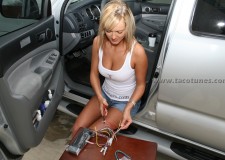
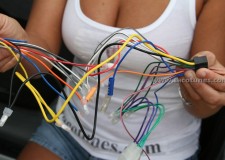
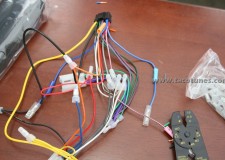
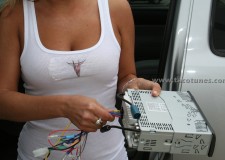
Head unit and wiring steps.
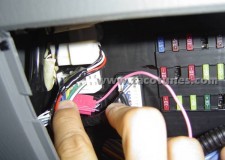
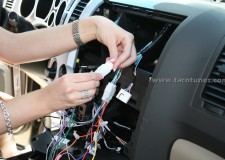
Locate the wire harness included with your stereo and the wire harness we included in your dash kit. If you purchased the JBL adapter kit, you will receive another set of instructions in your JBL wiring kit.
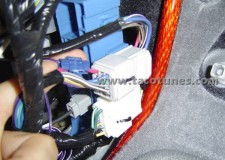
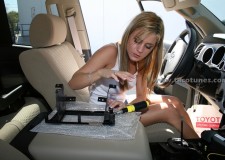
Match the colors on the two wire harnesses and twist them together as shown.
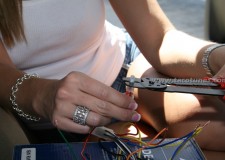
Using crimp caps and crimp tool, insert the wire into the cap and crimp as shown. We include crimp caps with the Toyota specific wire harness.
Using crimp caps and crimp tool, insert the wire into the cap and crimp as shown. We include crimp caps with the Toyota specific wire harness.
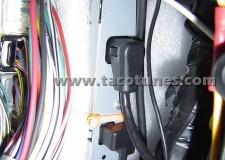
Stereo harness connected to toyota wire harness.
Close up.
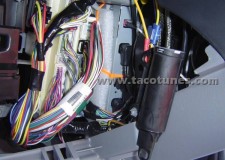
Plug stereo harness into the back of the head unit.
This will also be the time to plug in USB, IPOD or other devices to your new head unit.
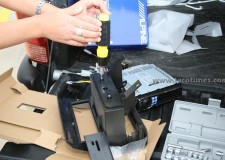
Assemble dash kit per instructions included. Use a piece of cardboard to protect the finish on your new dash kit.
Assemble dash kit per instructions included. Use a piece of cardboard to protect the finish on your new dash kit.
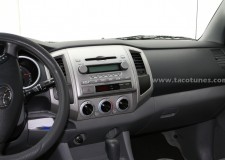
Ensure proper fit and finish.
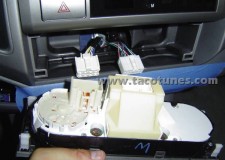
Remove the hazard button and clock from old head unit. There are four tabs holding the this module.
Ready for installation
Check all your cables.
Match the plugs from your truck to the wire harness and simply plug them in.
Don’t forget your antennae.
No cutting of your factory wires.
True plug and play installation.
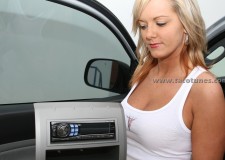
Turn on the truck on and ensure your stereo and hazard lights work.
Install the head unit into truck.
Locate the four screws from the old head unit.
Tighten the 4 screws as shown.
Tighten the 4 screws as shown.
Re-connect the wires to your AC controls and ensure they are working.
Lift into place and push the controls back into the dash.
Congratulations, your new head unit is installed.
Toyota 4Runner Stereo Installation and dash removal instructions
Toyota 4Runner Stereo Installation and dash removal instructions
Toyota 4Runner Stereo Installation and dash removal instructions
How to install Ipod Zune MP3 in your Toyota Tacoma Double Cab [TacoYR1]
How to install in dash receiver in your Toyota Tacoma Double Cab [TacoYR1]
How to install radio in your Toyota Tacoma Double Cab [TacoYR1]
How to install HD radio Sirius and XM in your Toyota Tacoma Double Cab [TacoYR1]
How to remove the factory stereo in your Toyota Tacoma Double Cab [TacoYR1]
Dash removal Toyota Tacoma Double Cab [TacoYR1]
Wiring new stereo Toyota Tacoma Double Cab [TacoYR1]
Wire harness adapter Toyota Tacoma Double Cab [TacoYR1]
Double Din Single DIN Toyota Tacoma Double Cab [TacoYR1]
Howdy Parters! We are currently sprucing up our ticket system to better serve you! If you need immediate assistance please text us at 210-472-0000. Dismiss