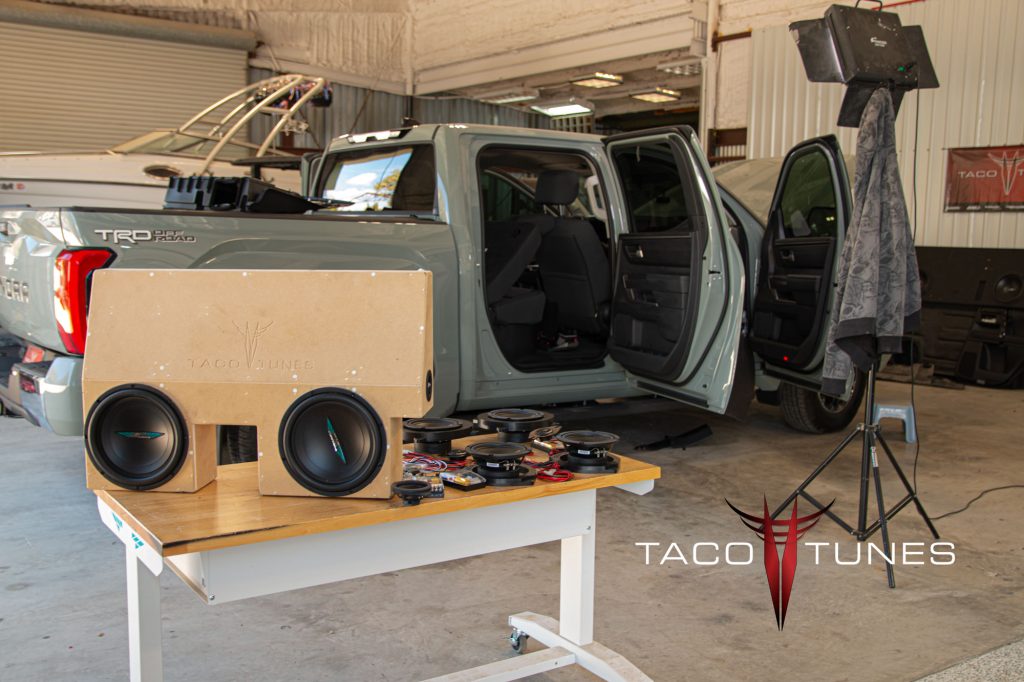
Huge thank you to Tristan for allowing us to install a System 1B into his 2022 Toyota Tundra. Tristan travels 200 days a year . . . AND the stock stereo system was driving him nuts! 🙂 He wanted to keep the stock head unit (radio/stereo) BUT wanted to upgrade his speakers and add subwoofer. He choose to go with our System 1B. Detailed listing below:
2022 Toyota Tundra Crewmax
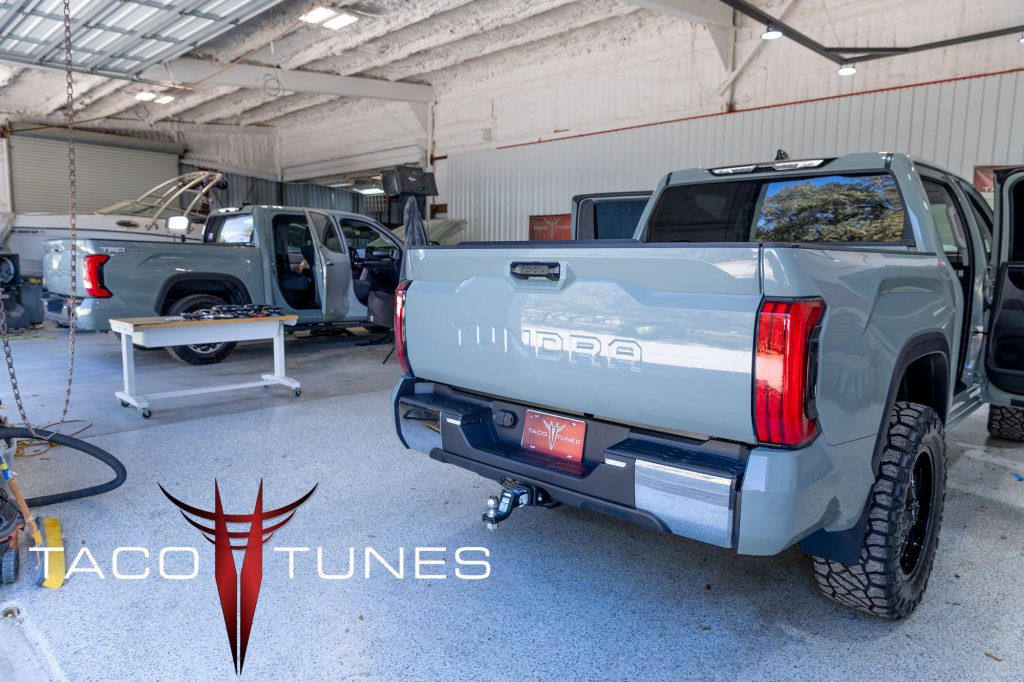
Color: Midnight Black
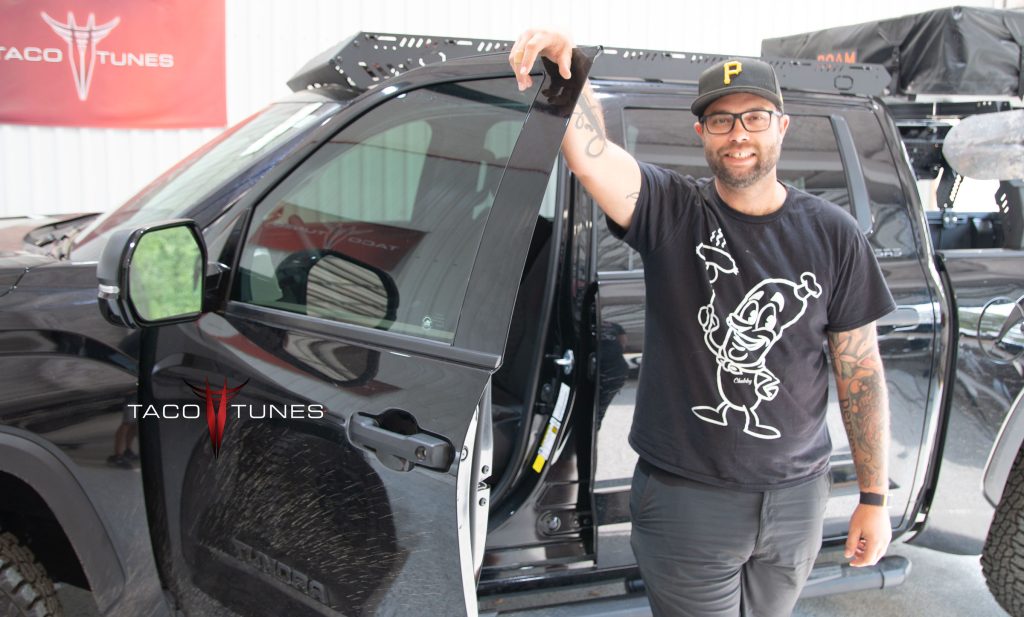
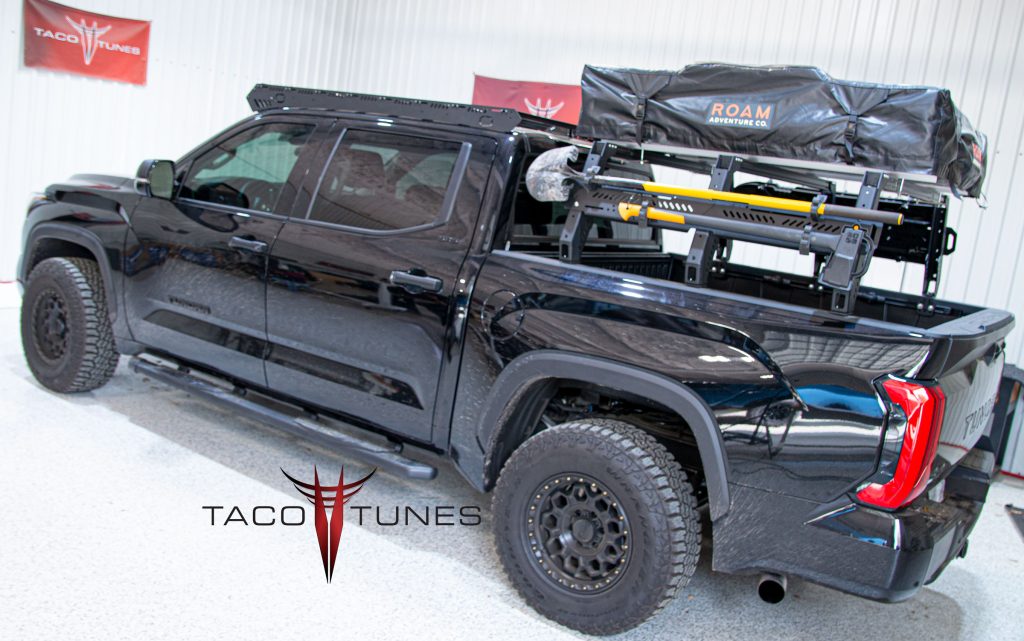
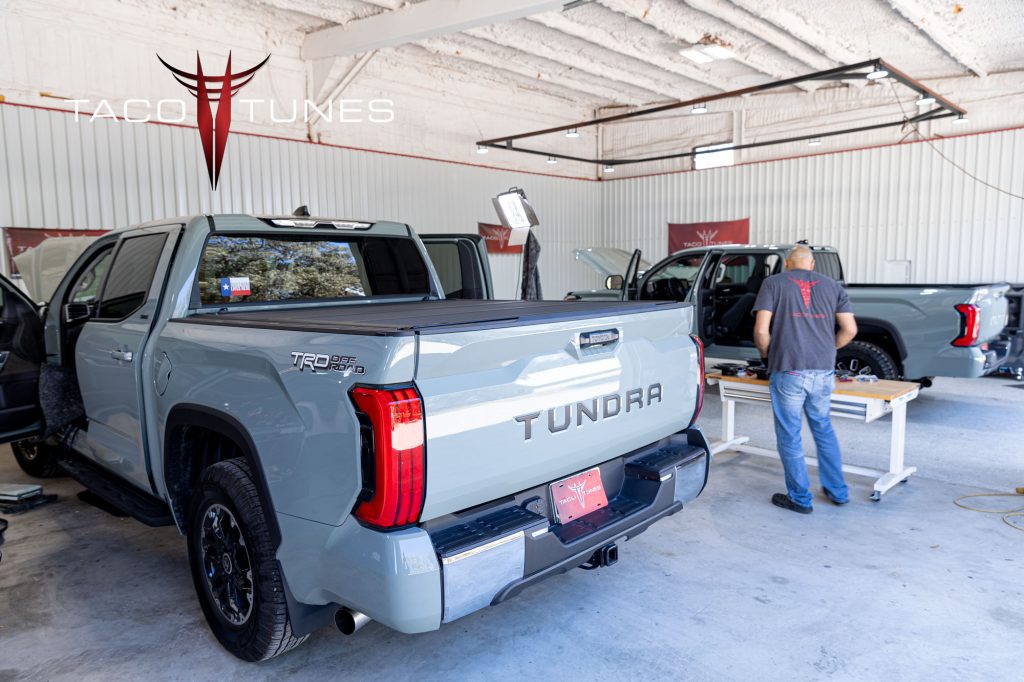
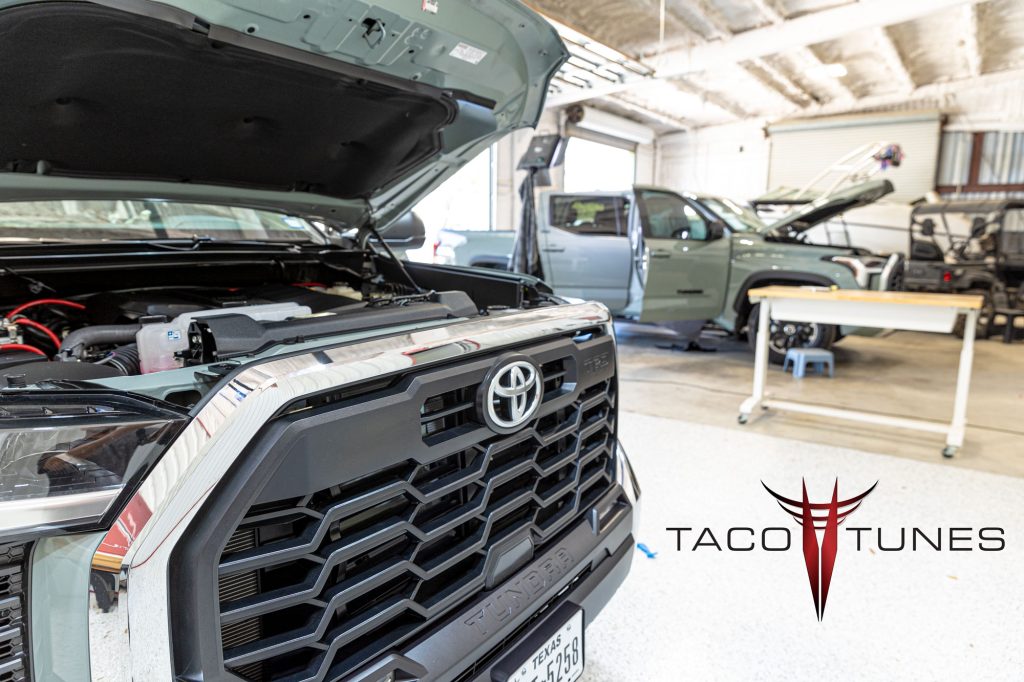
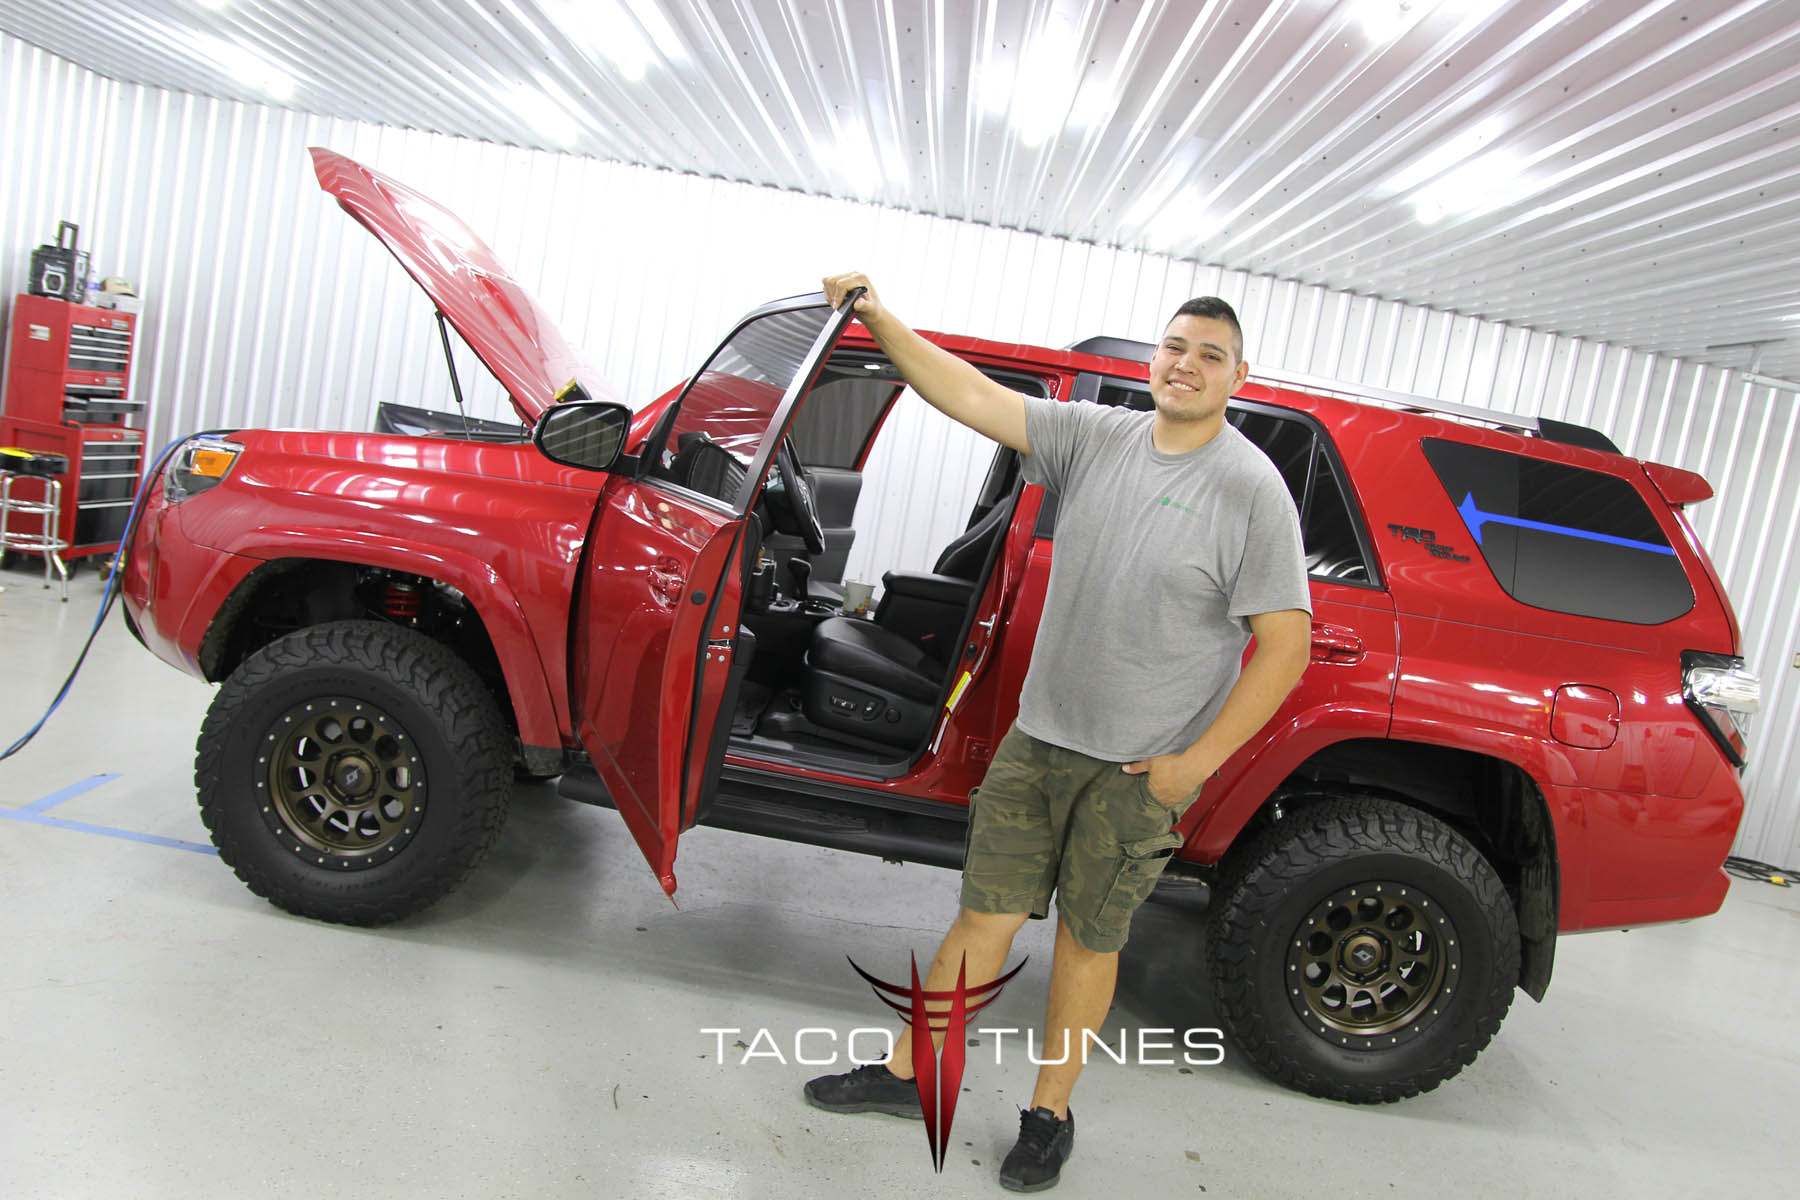
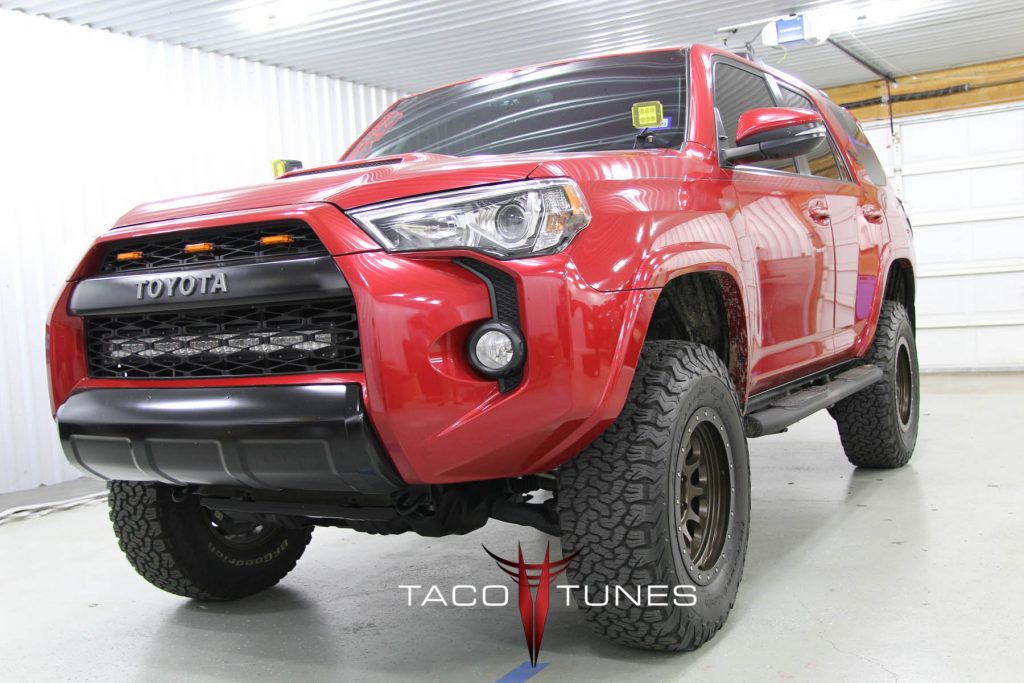
Tristan’s 2022 Toyota Tundra – in for audio system upgrade.
Tristan – ready to head out on his next road trip! Big smiles after upgrading his audio system!
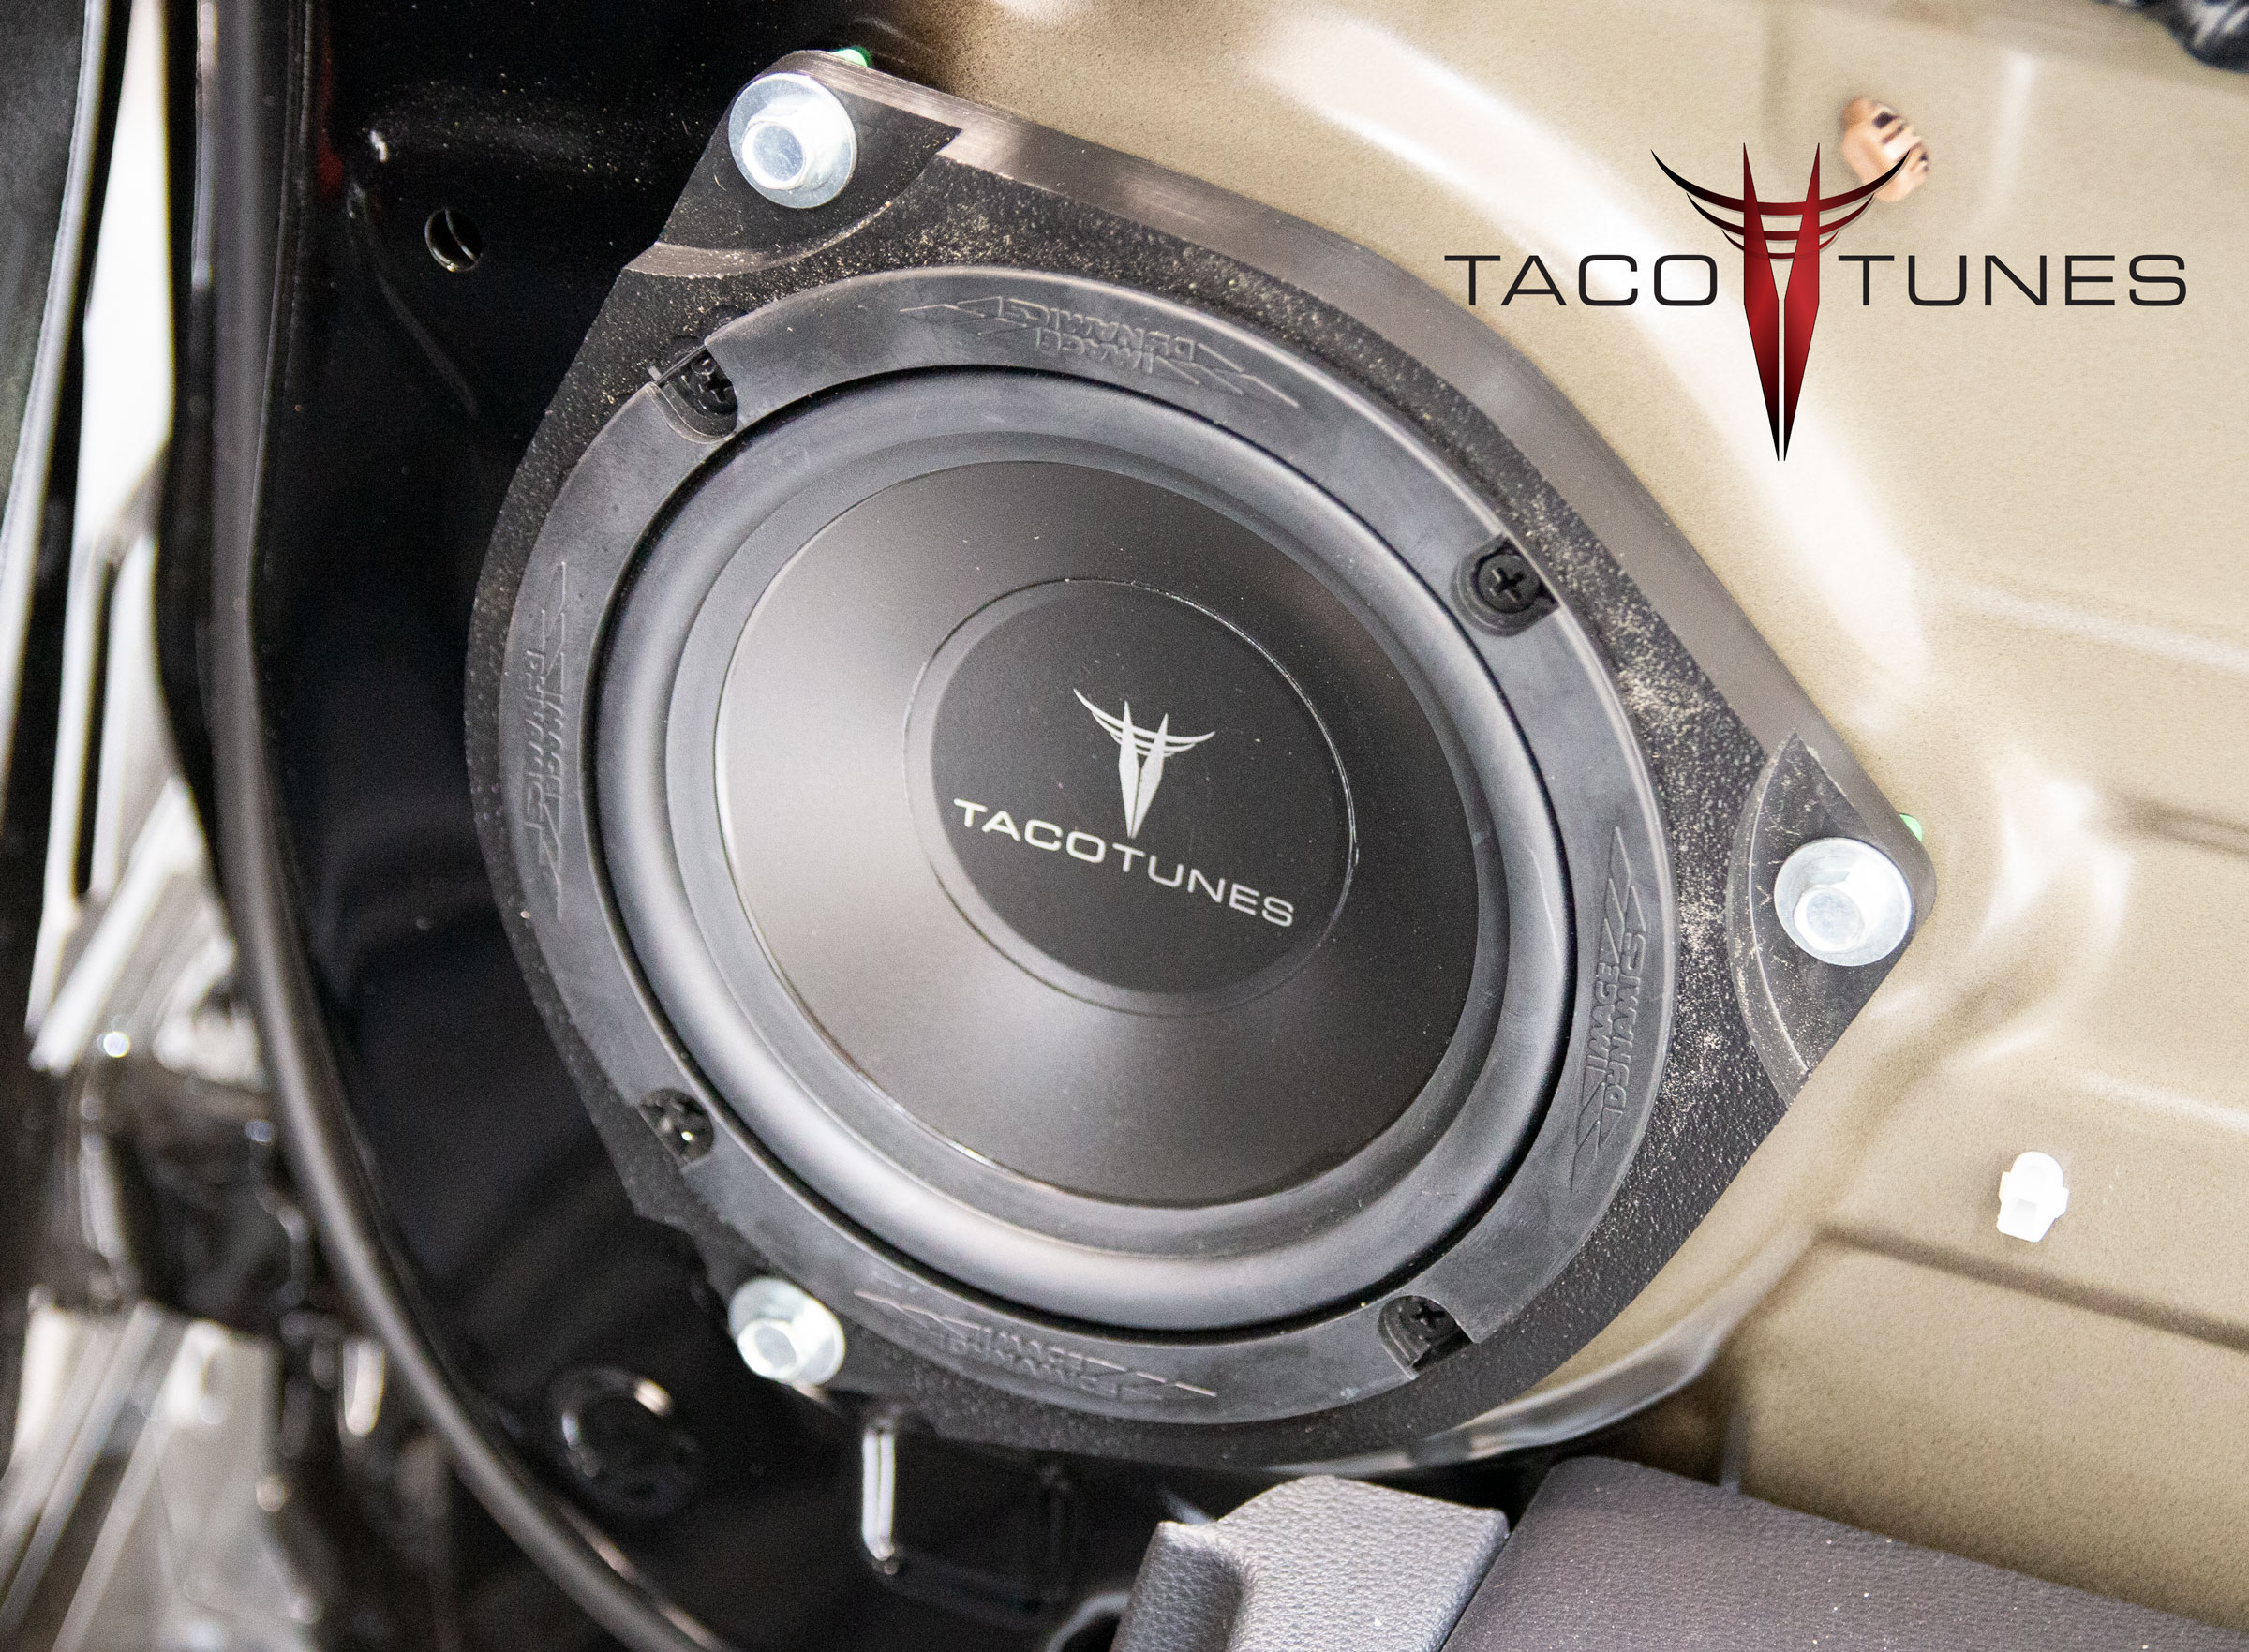
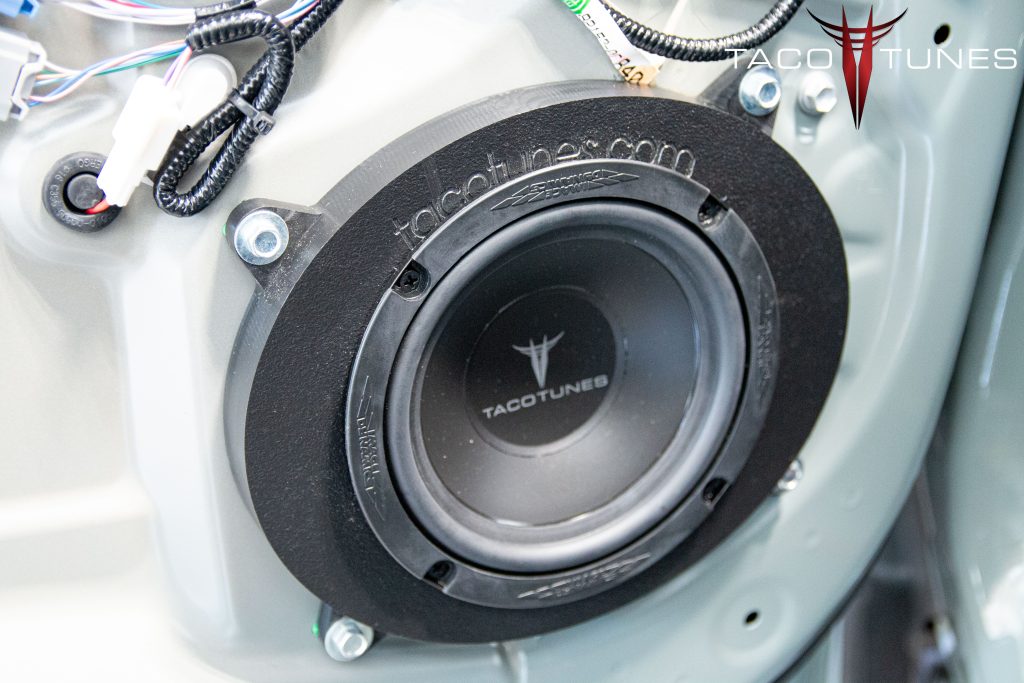
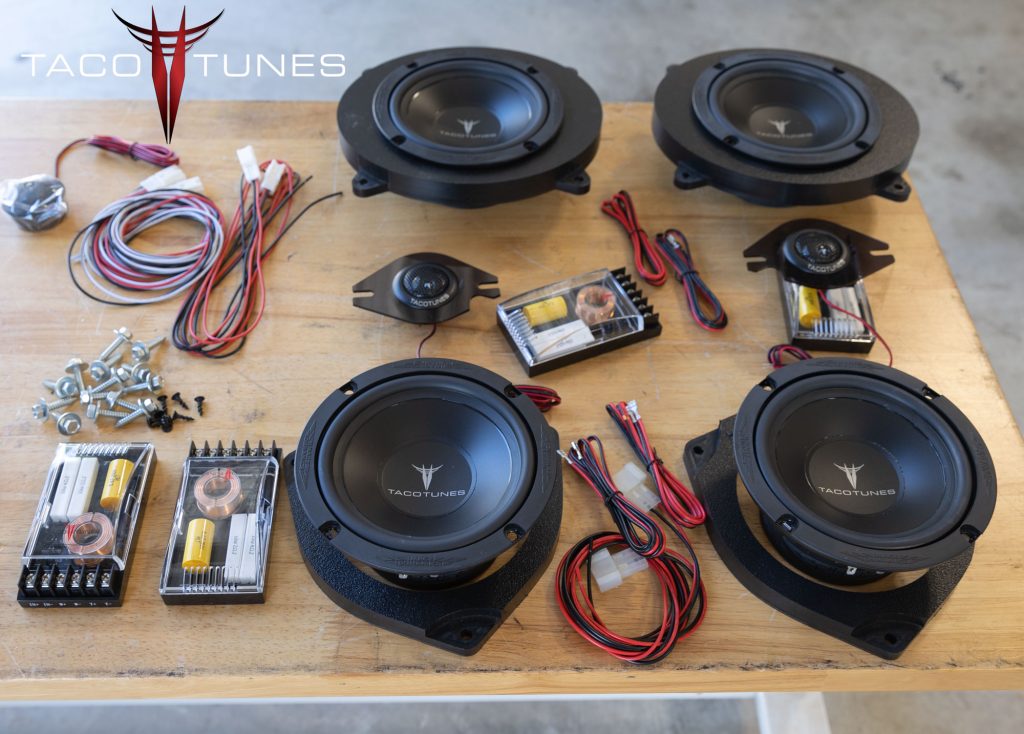
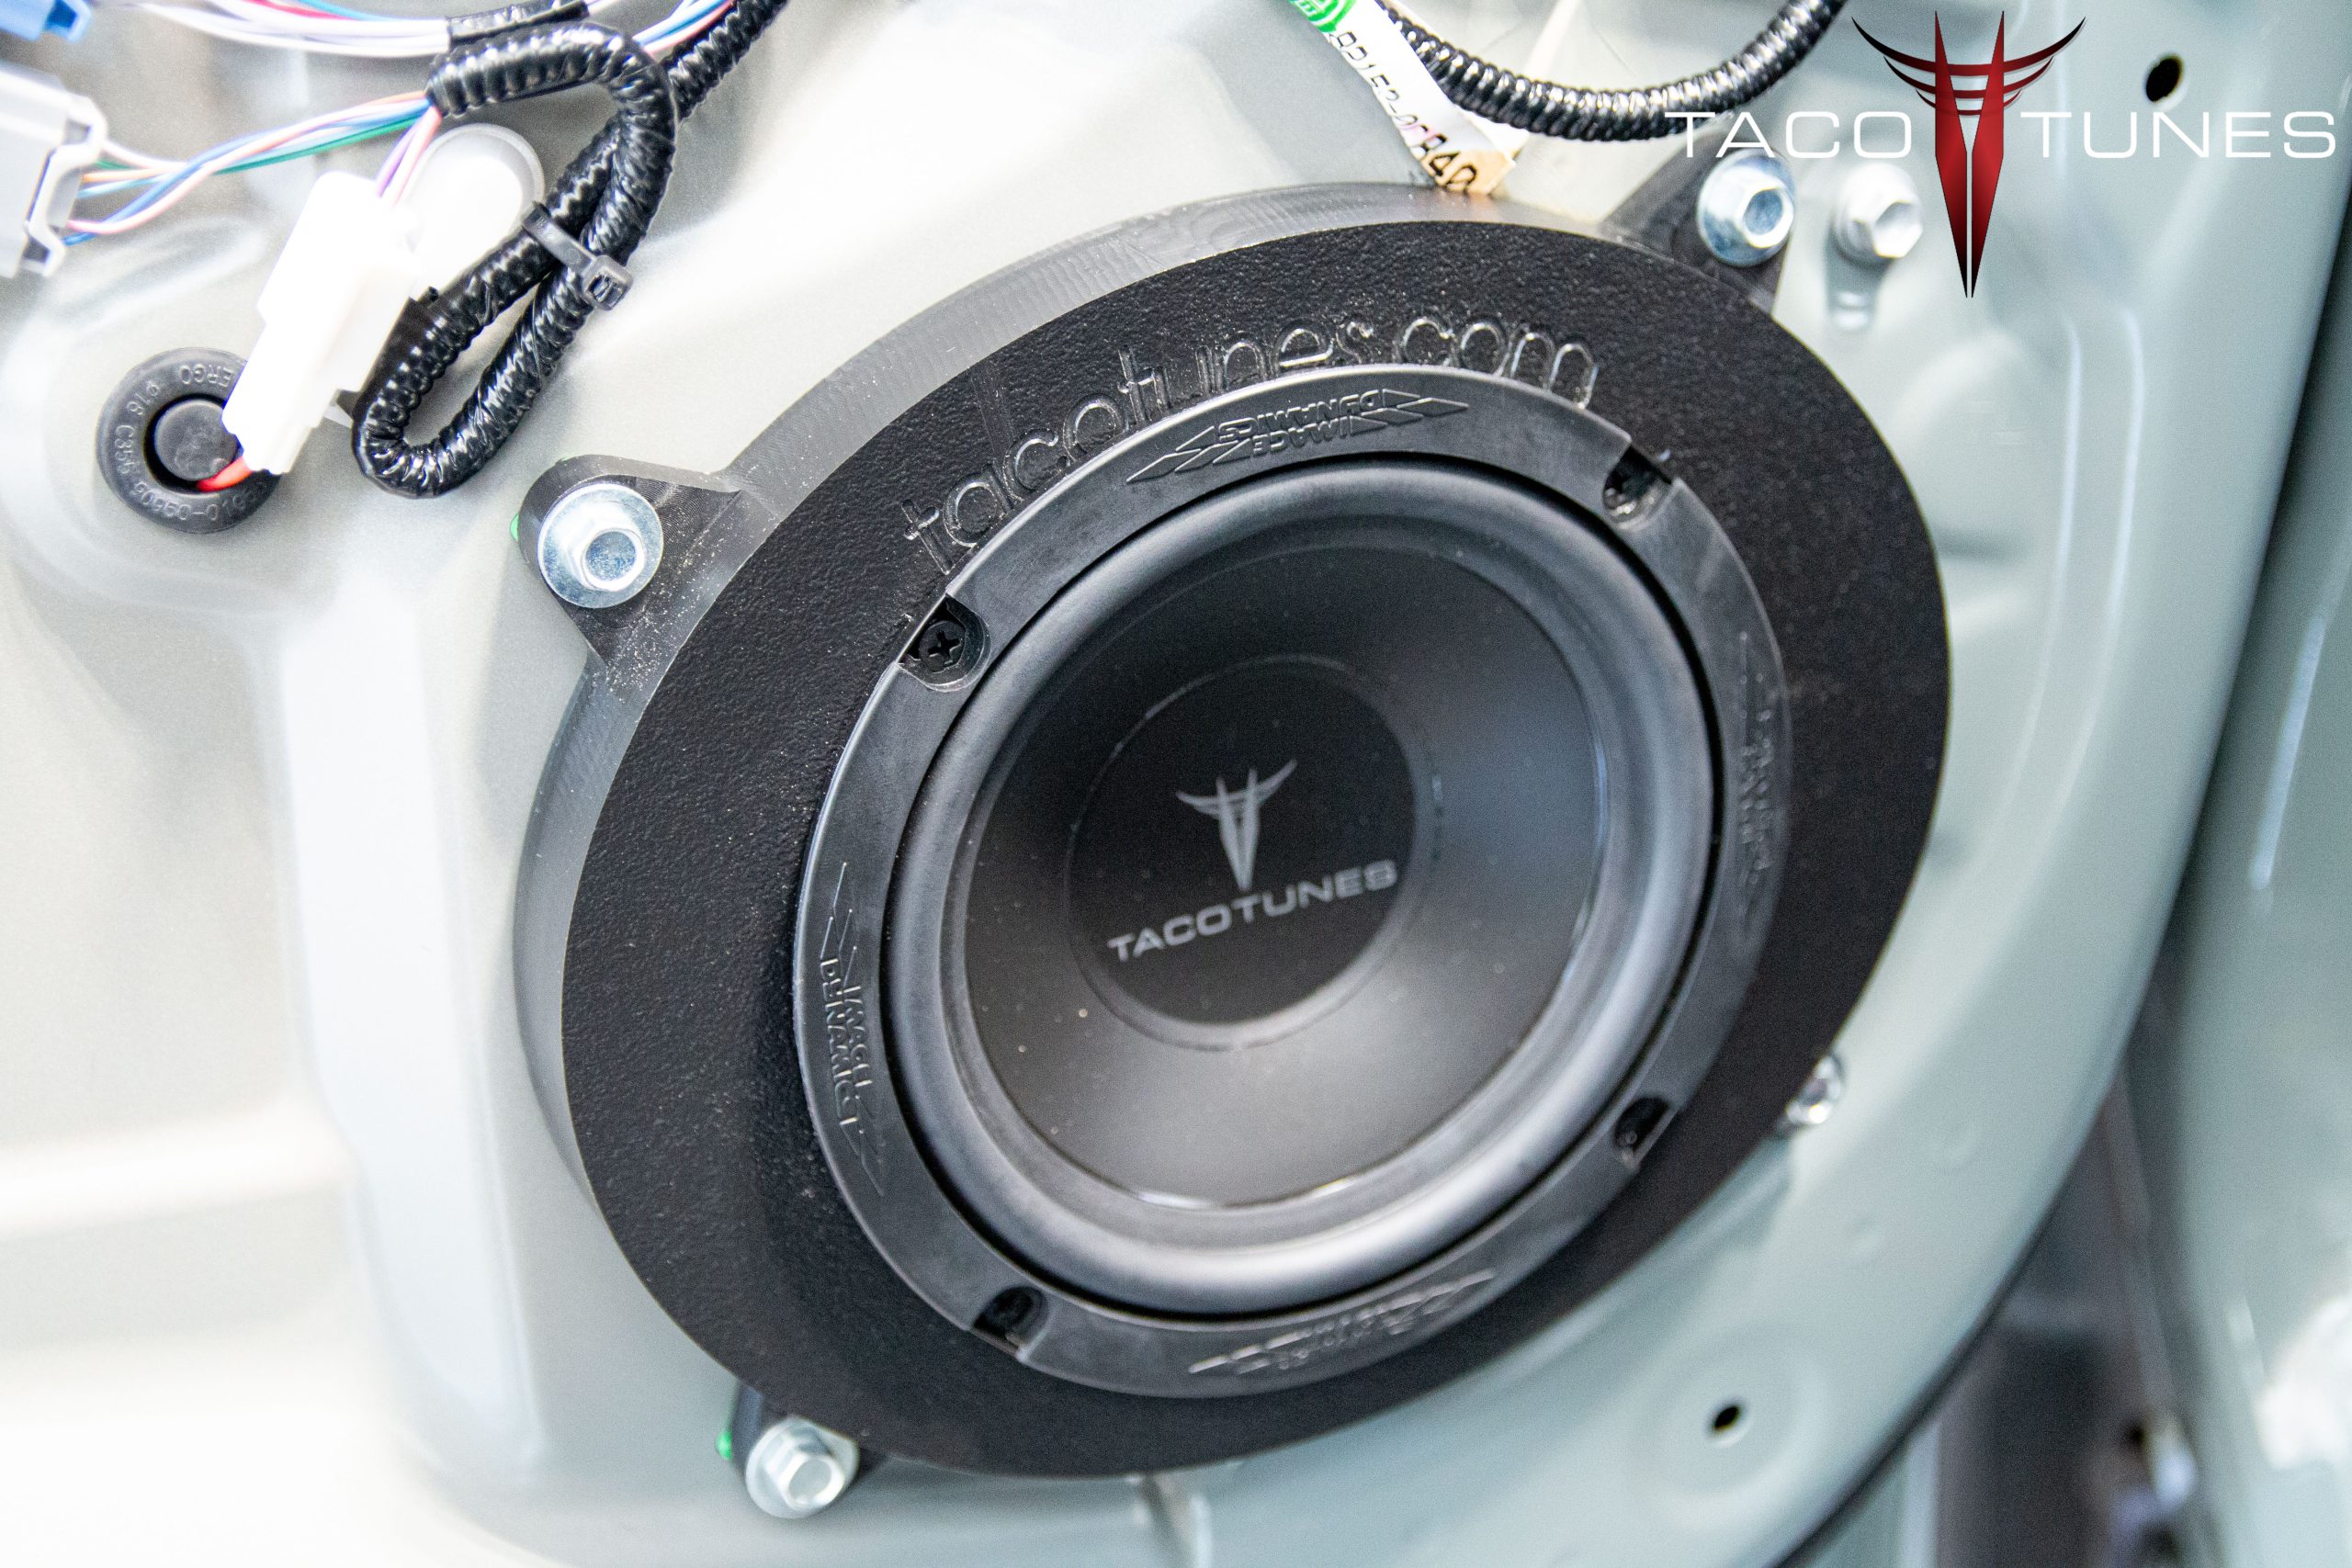
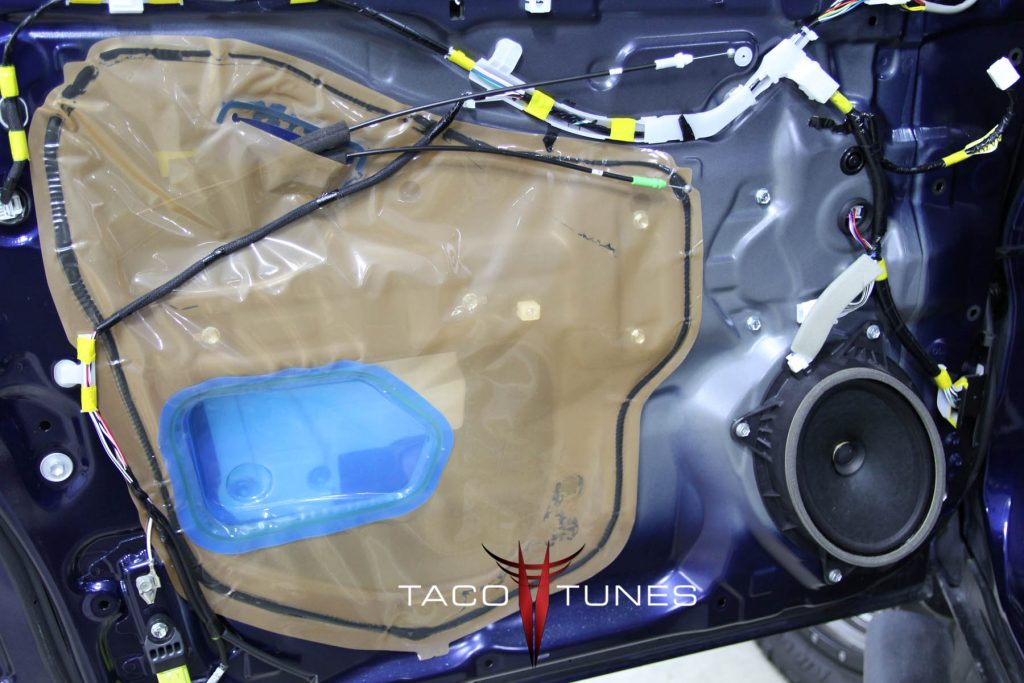
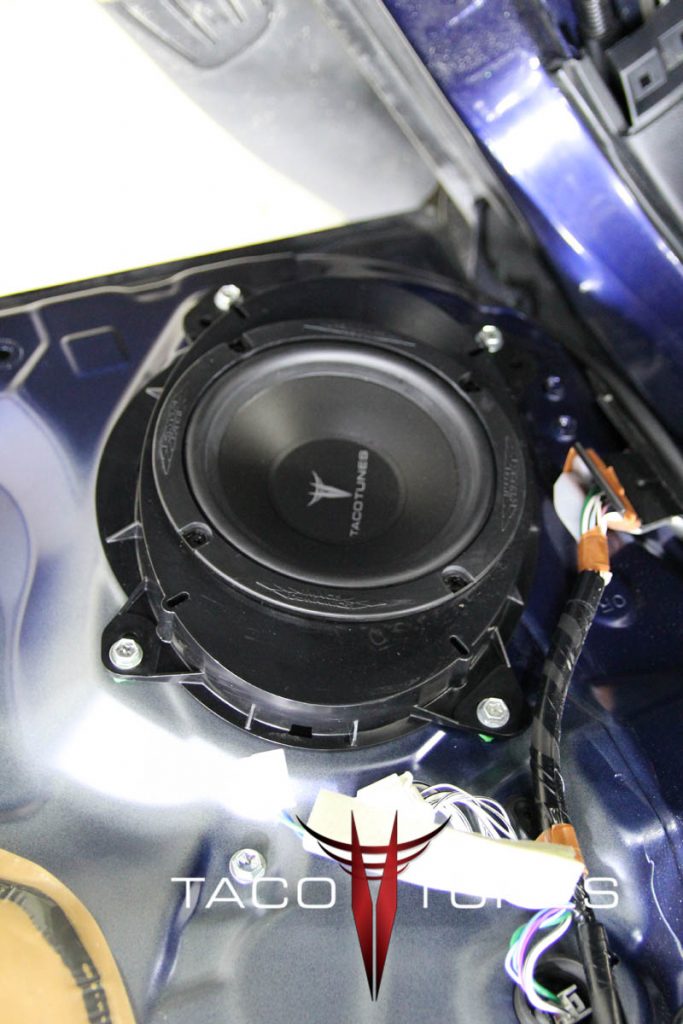
Front Door Component Speakers
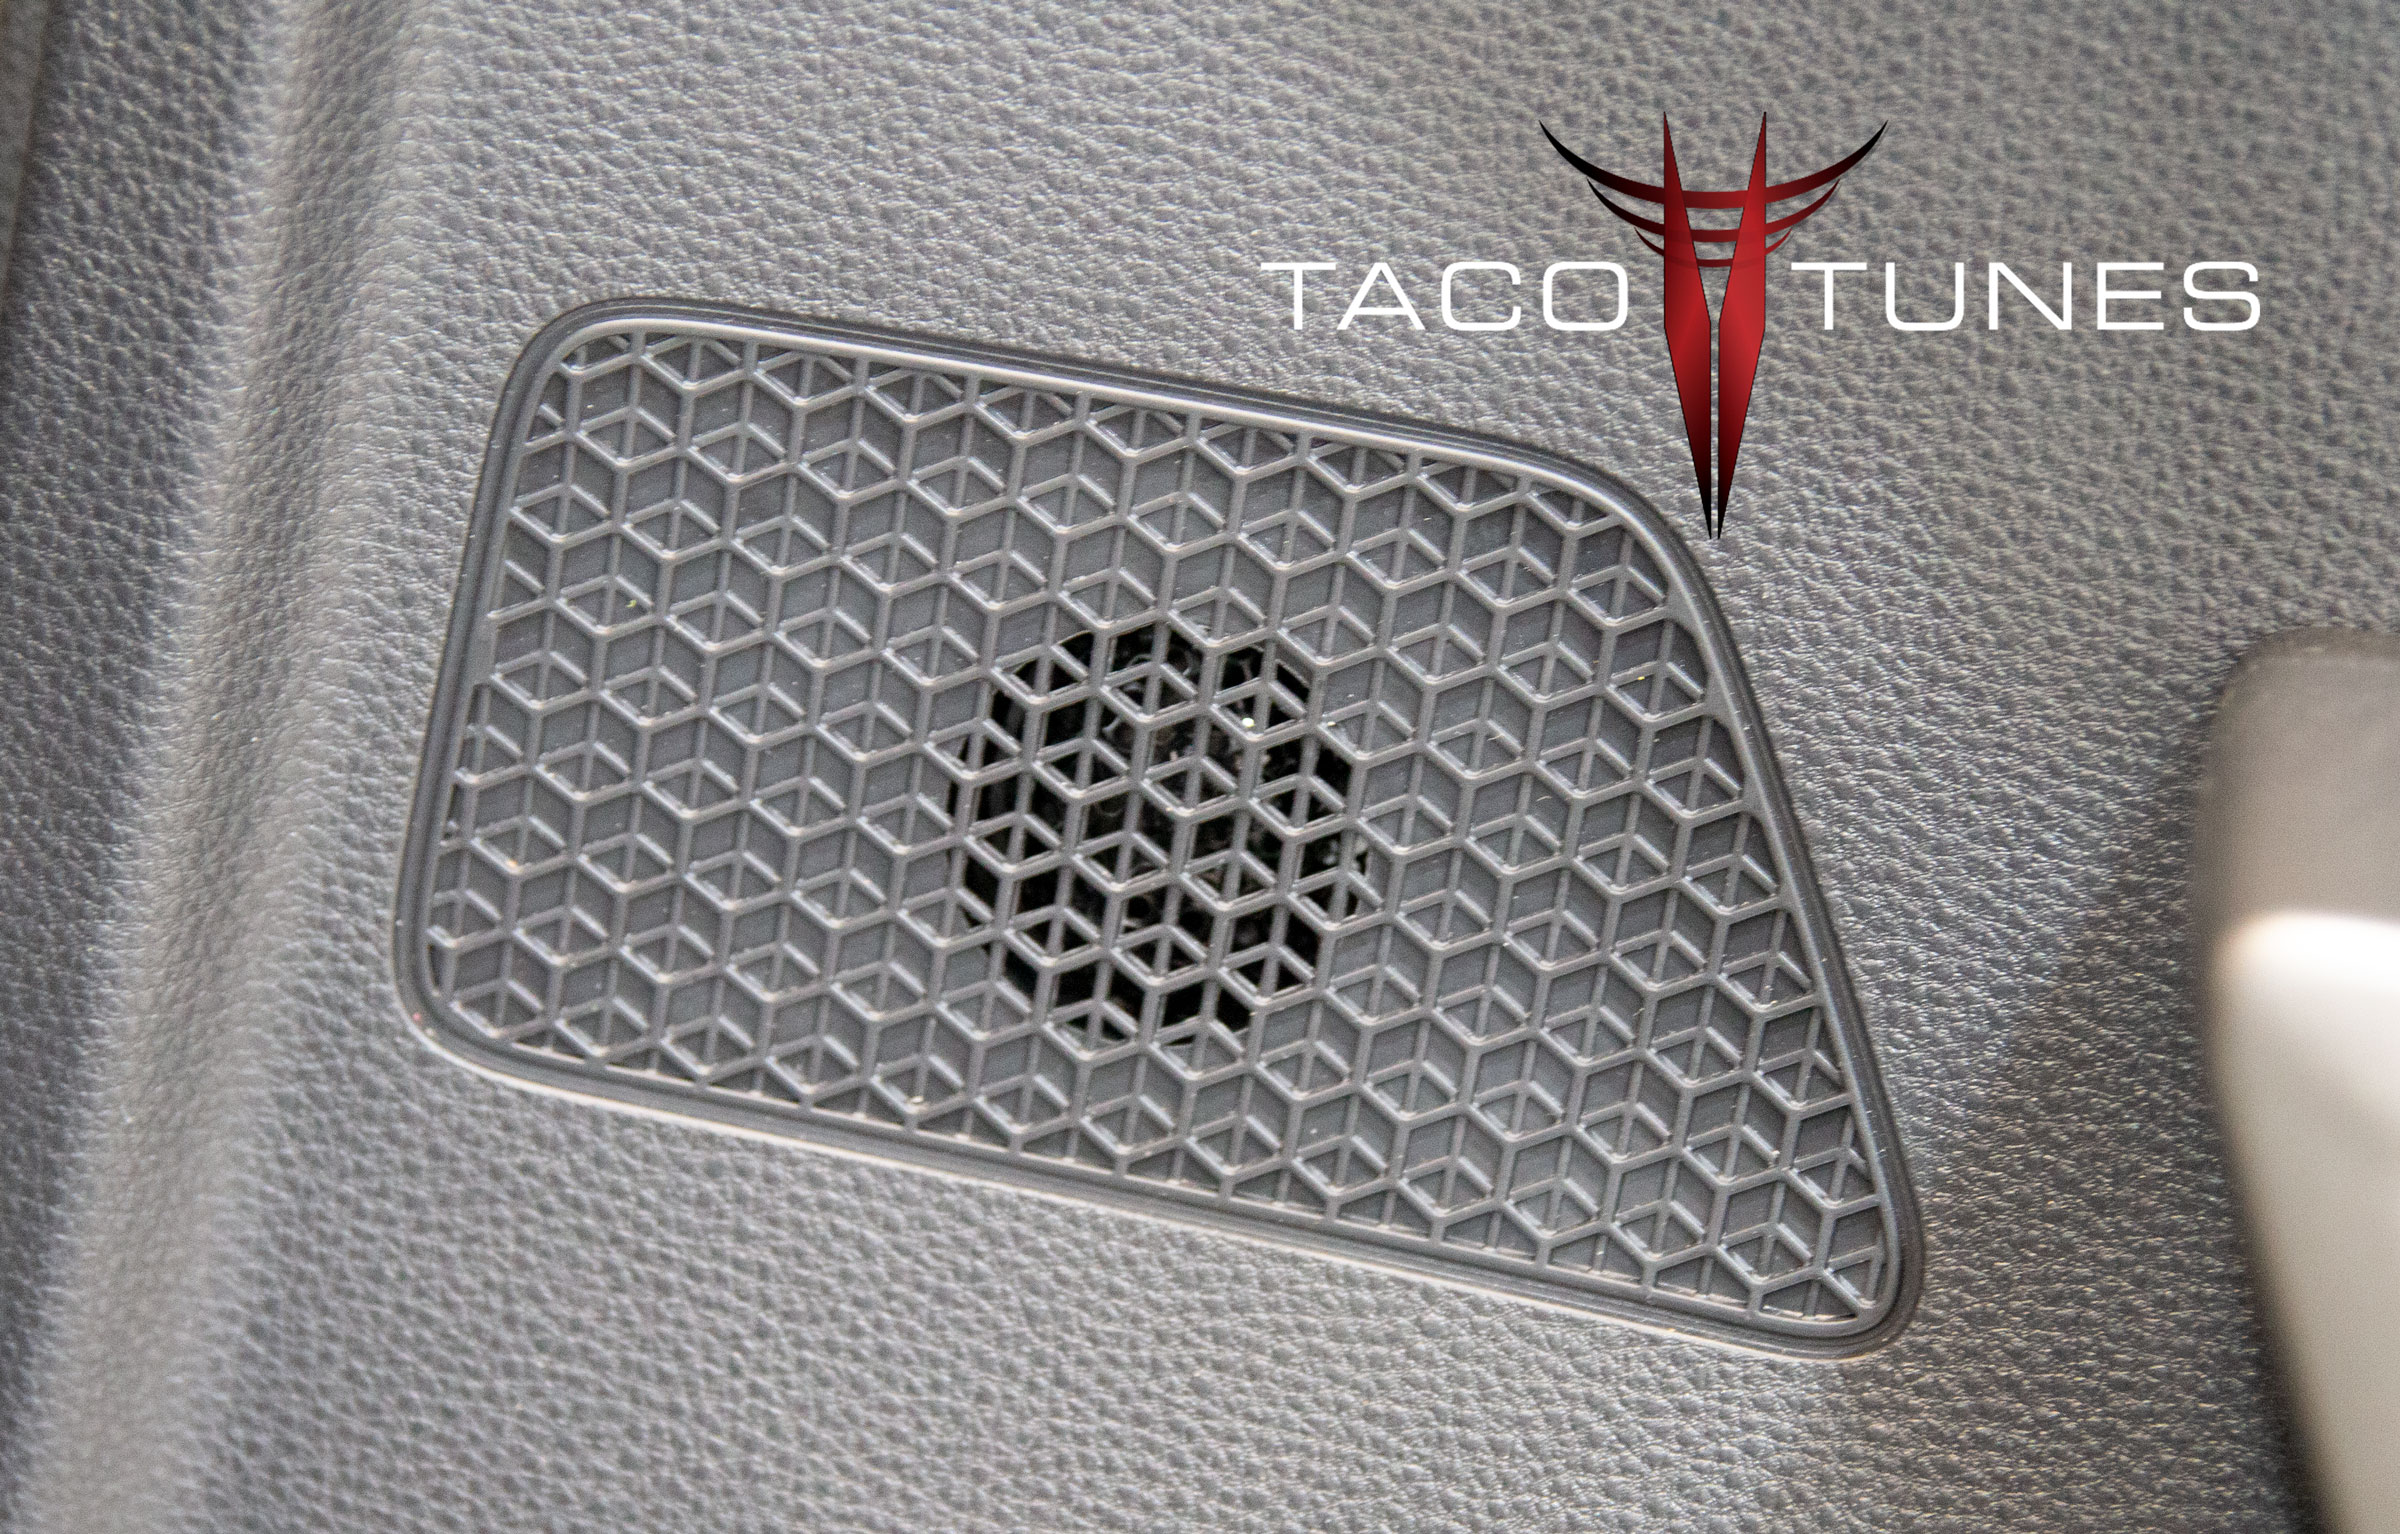
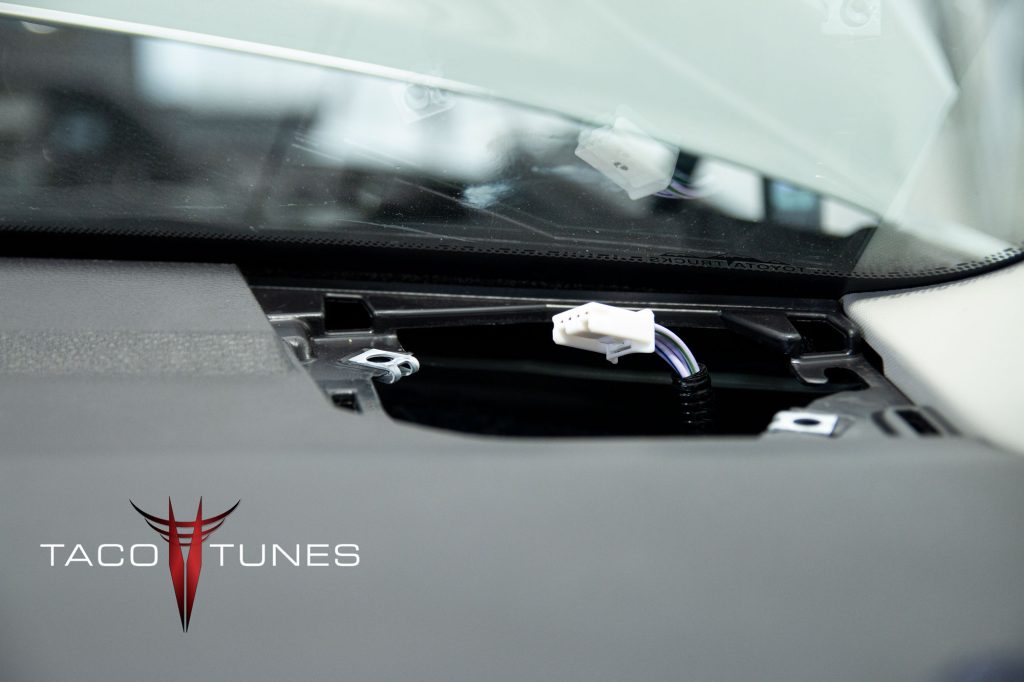
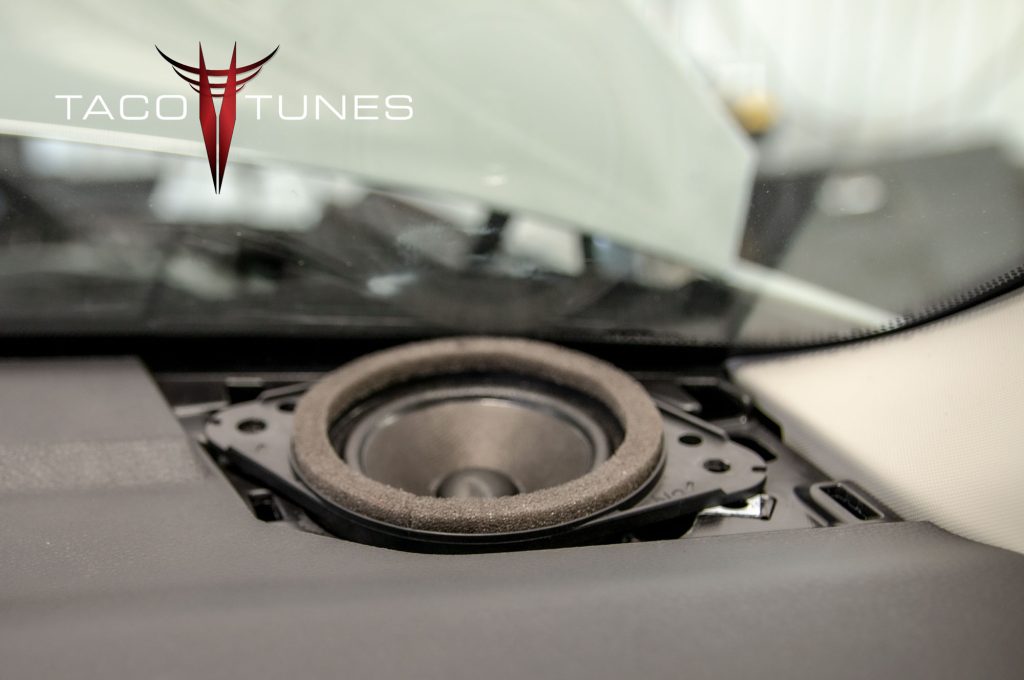
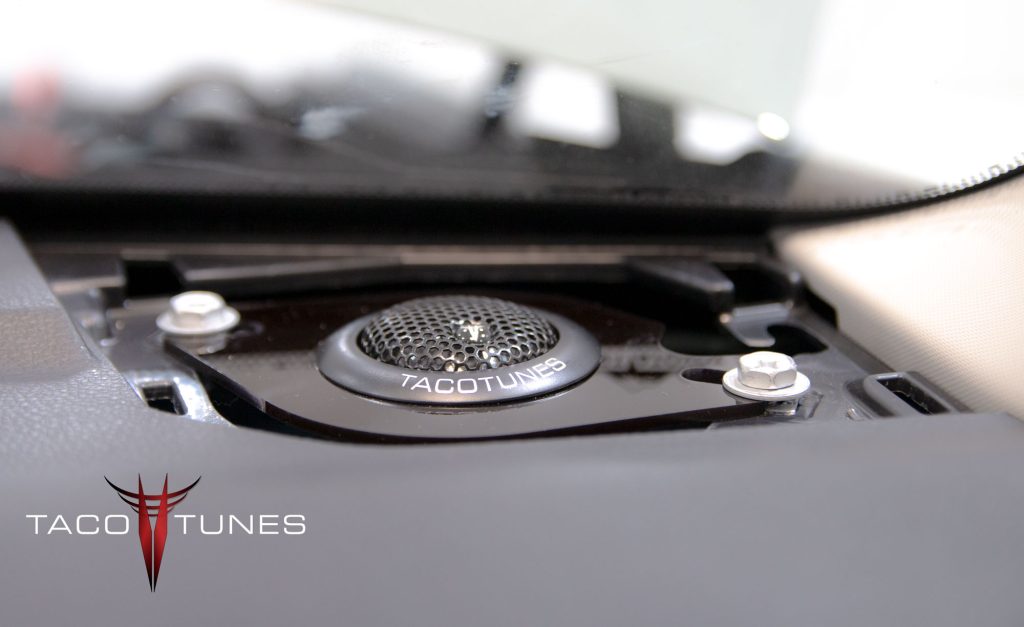
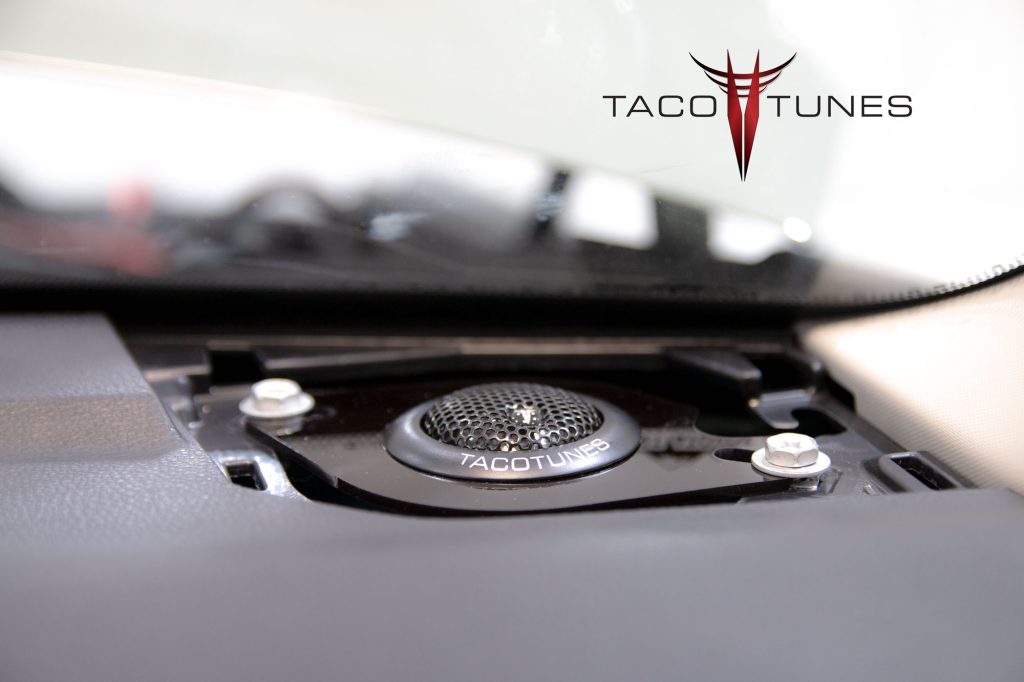
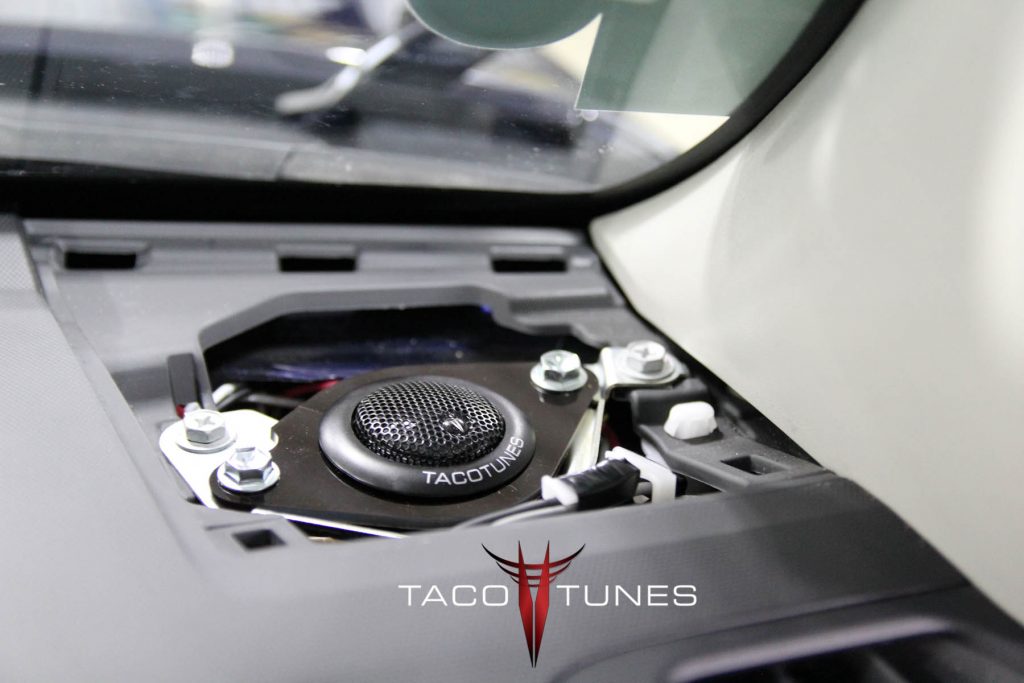
Dash Tweeter Replacement with True Component Speaker Sets
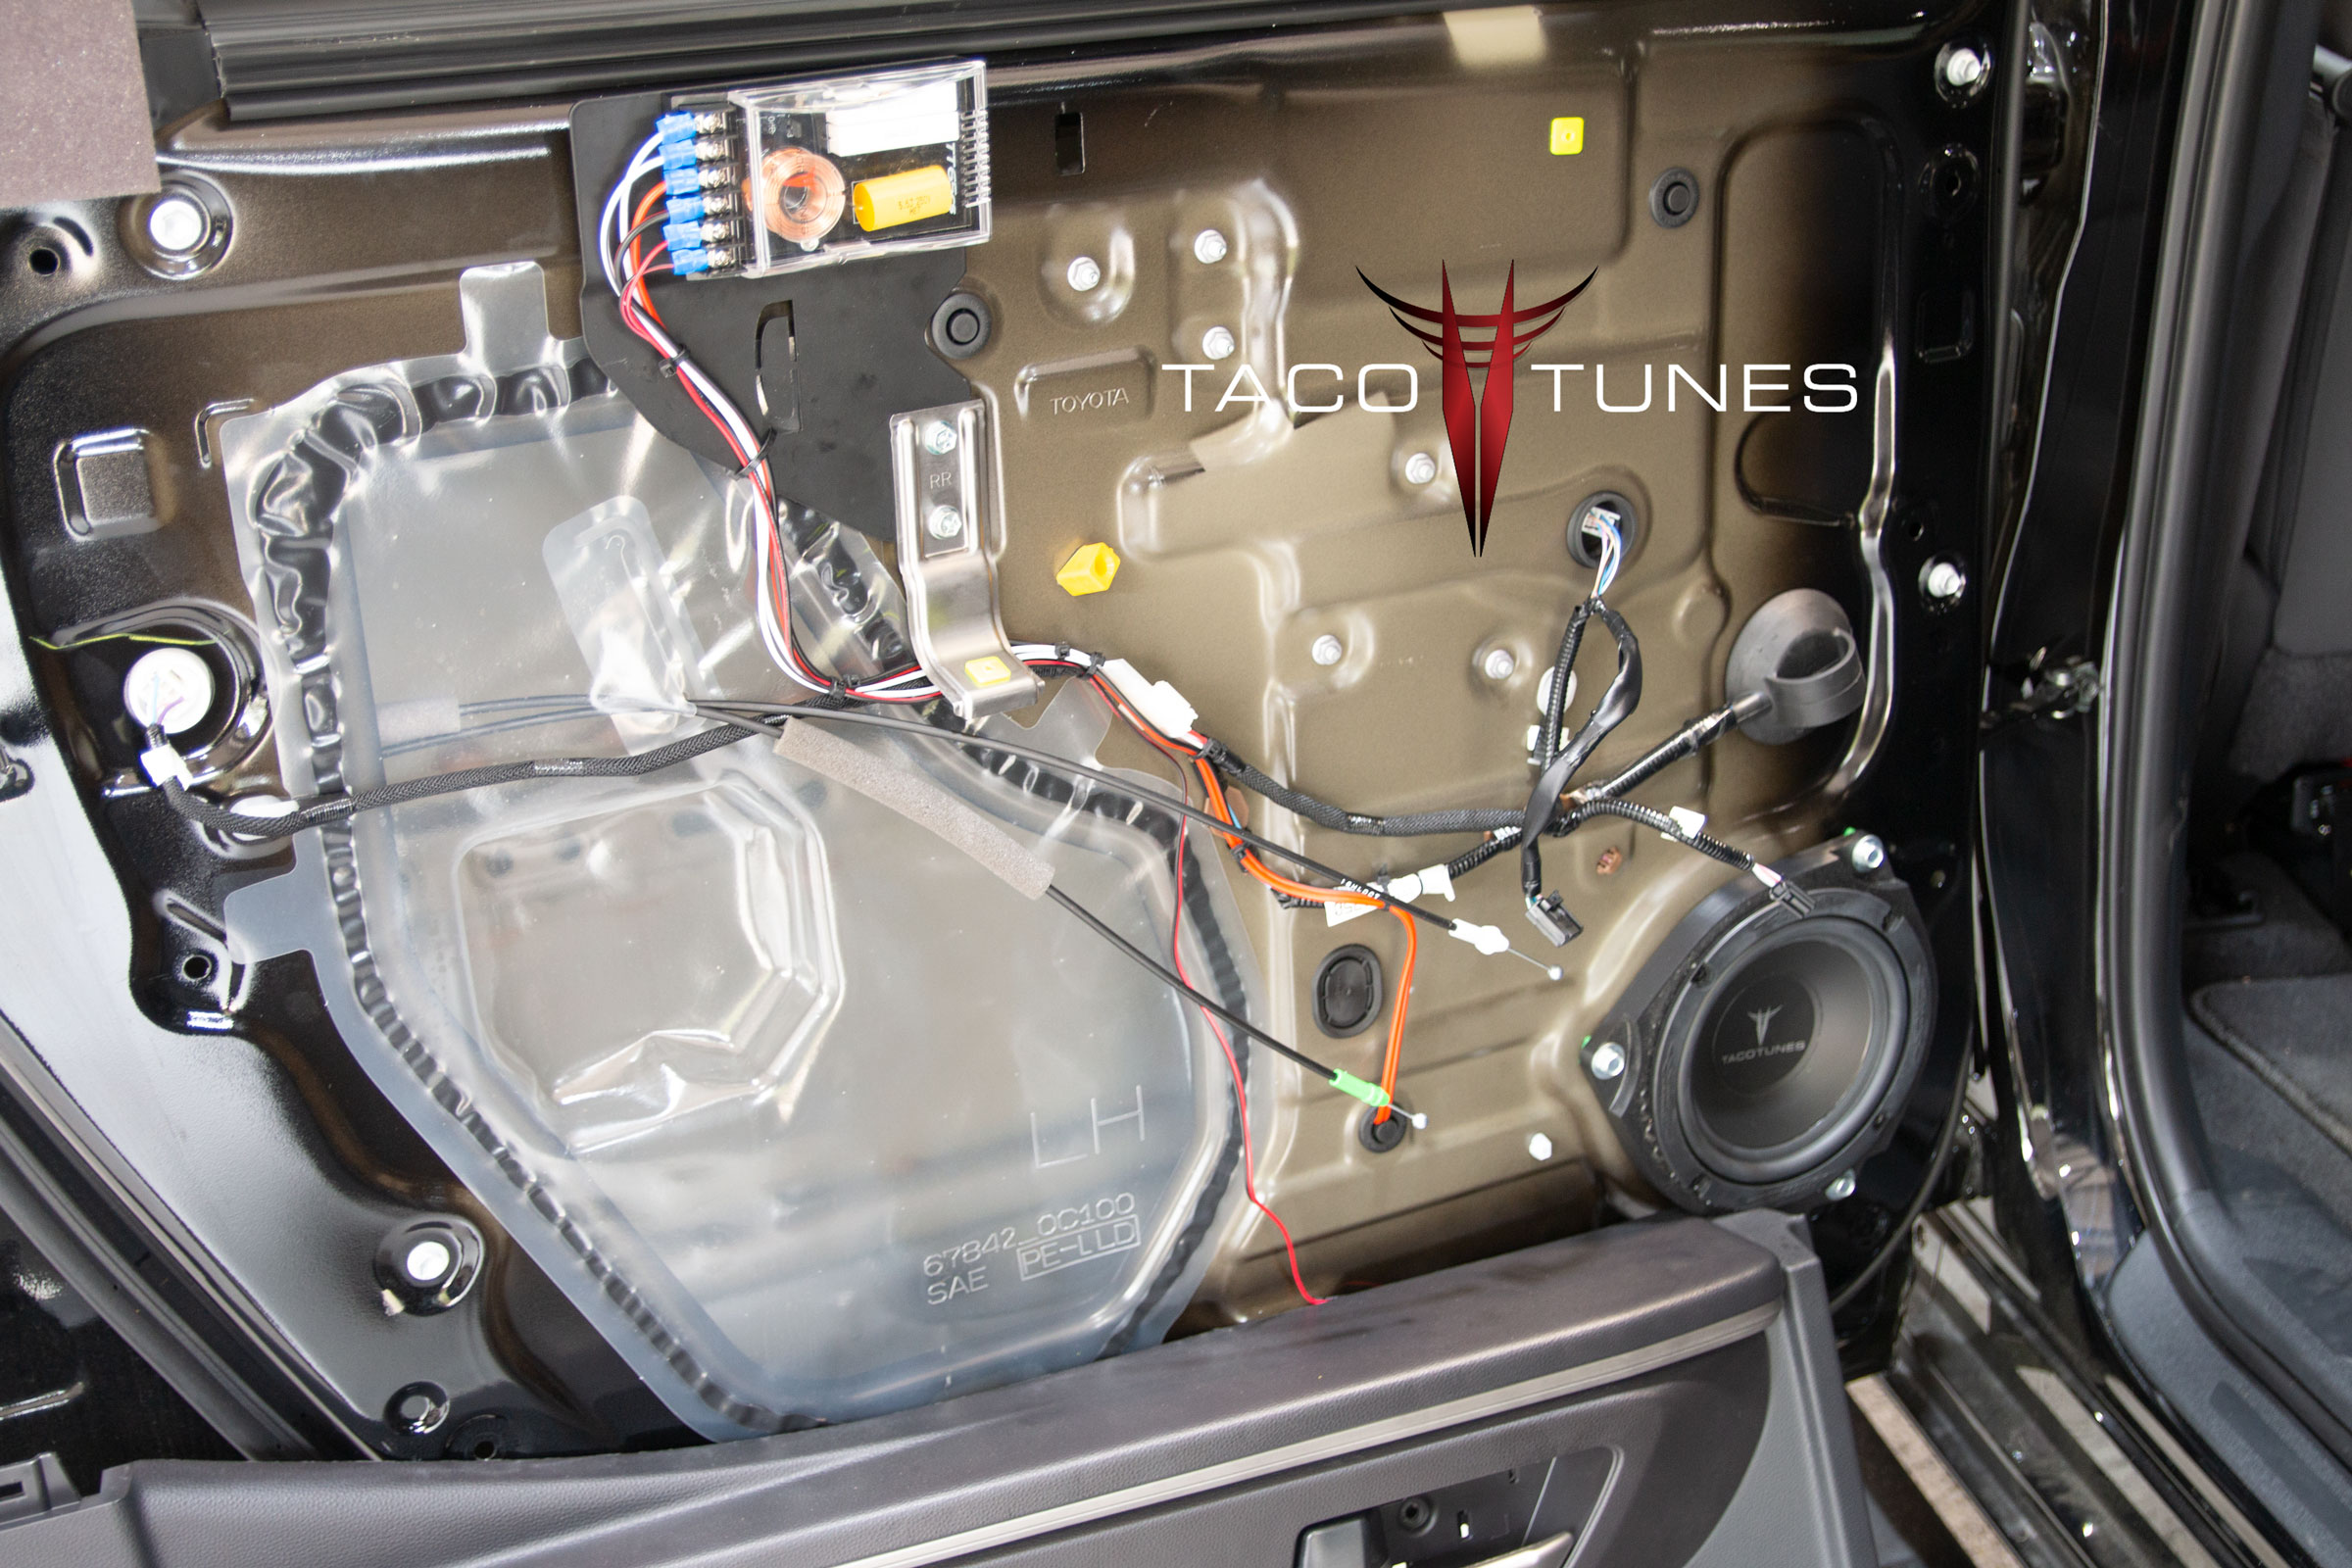
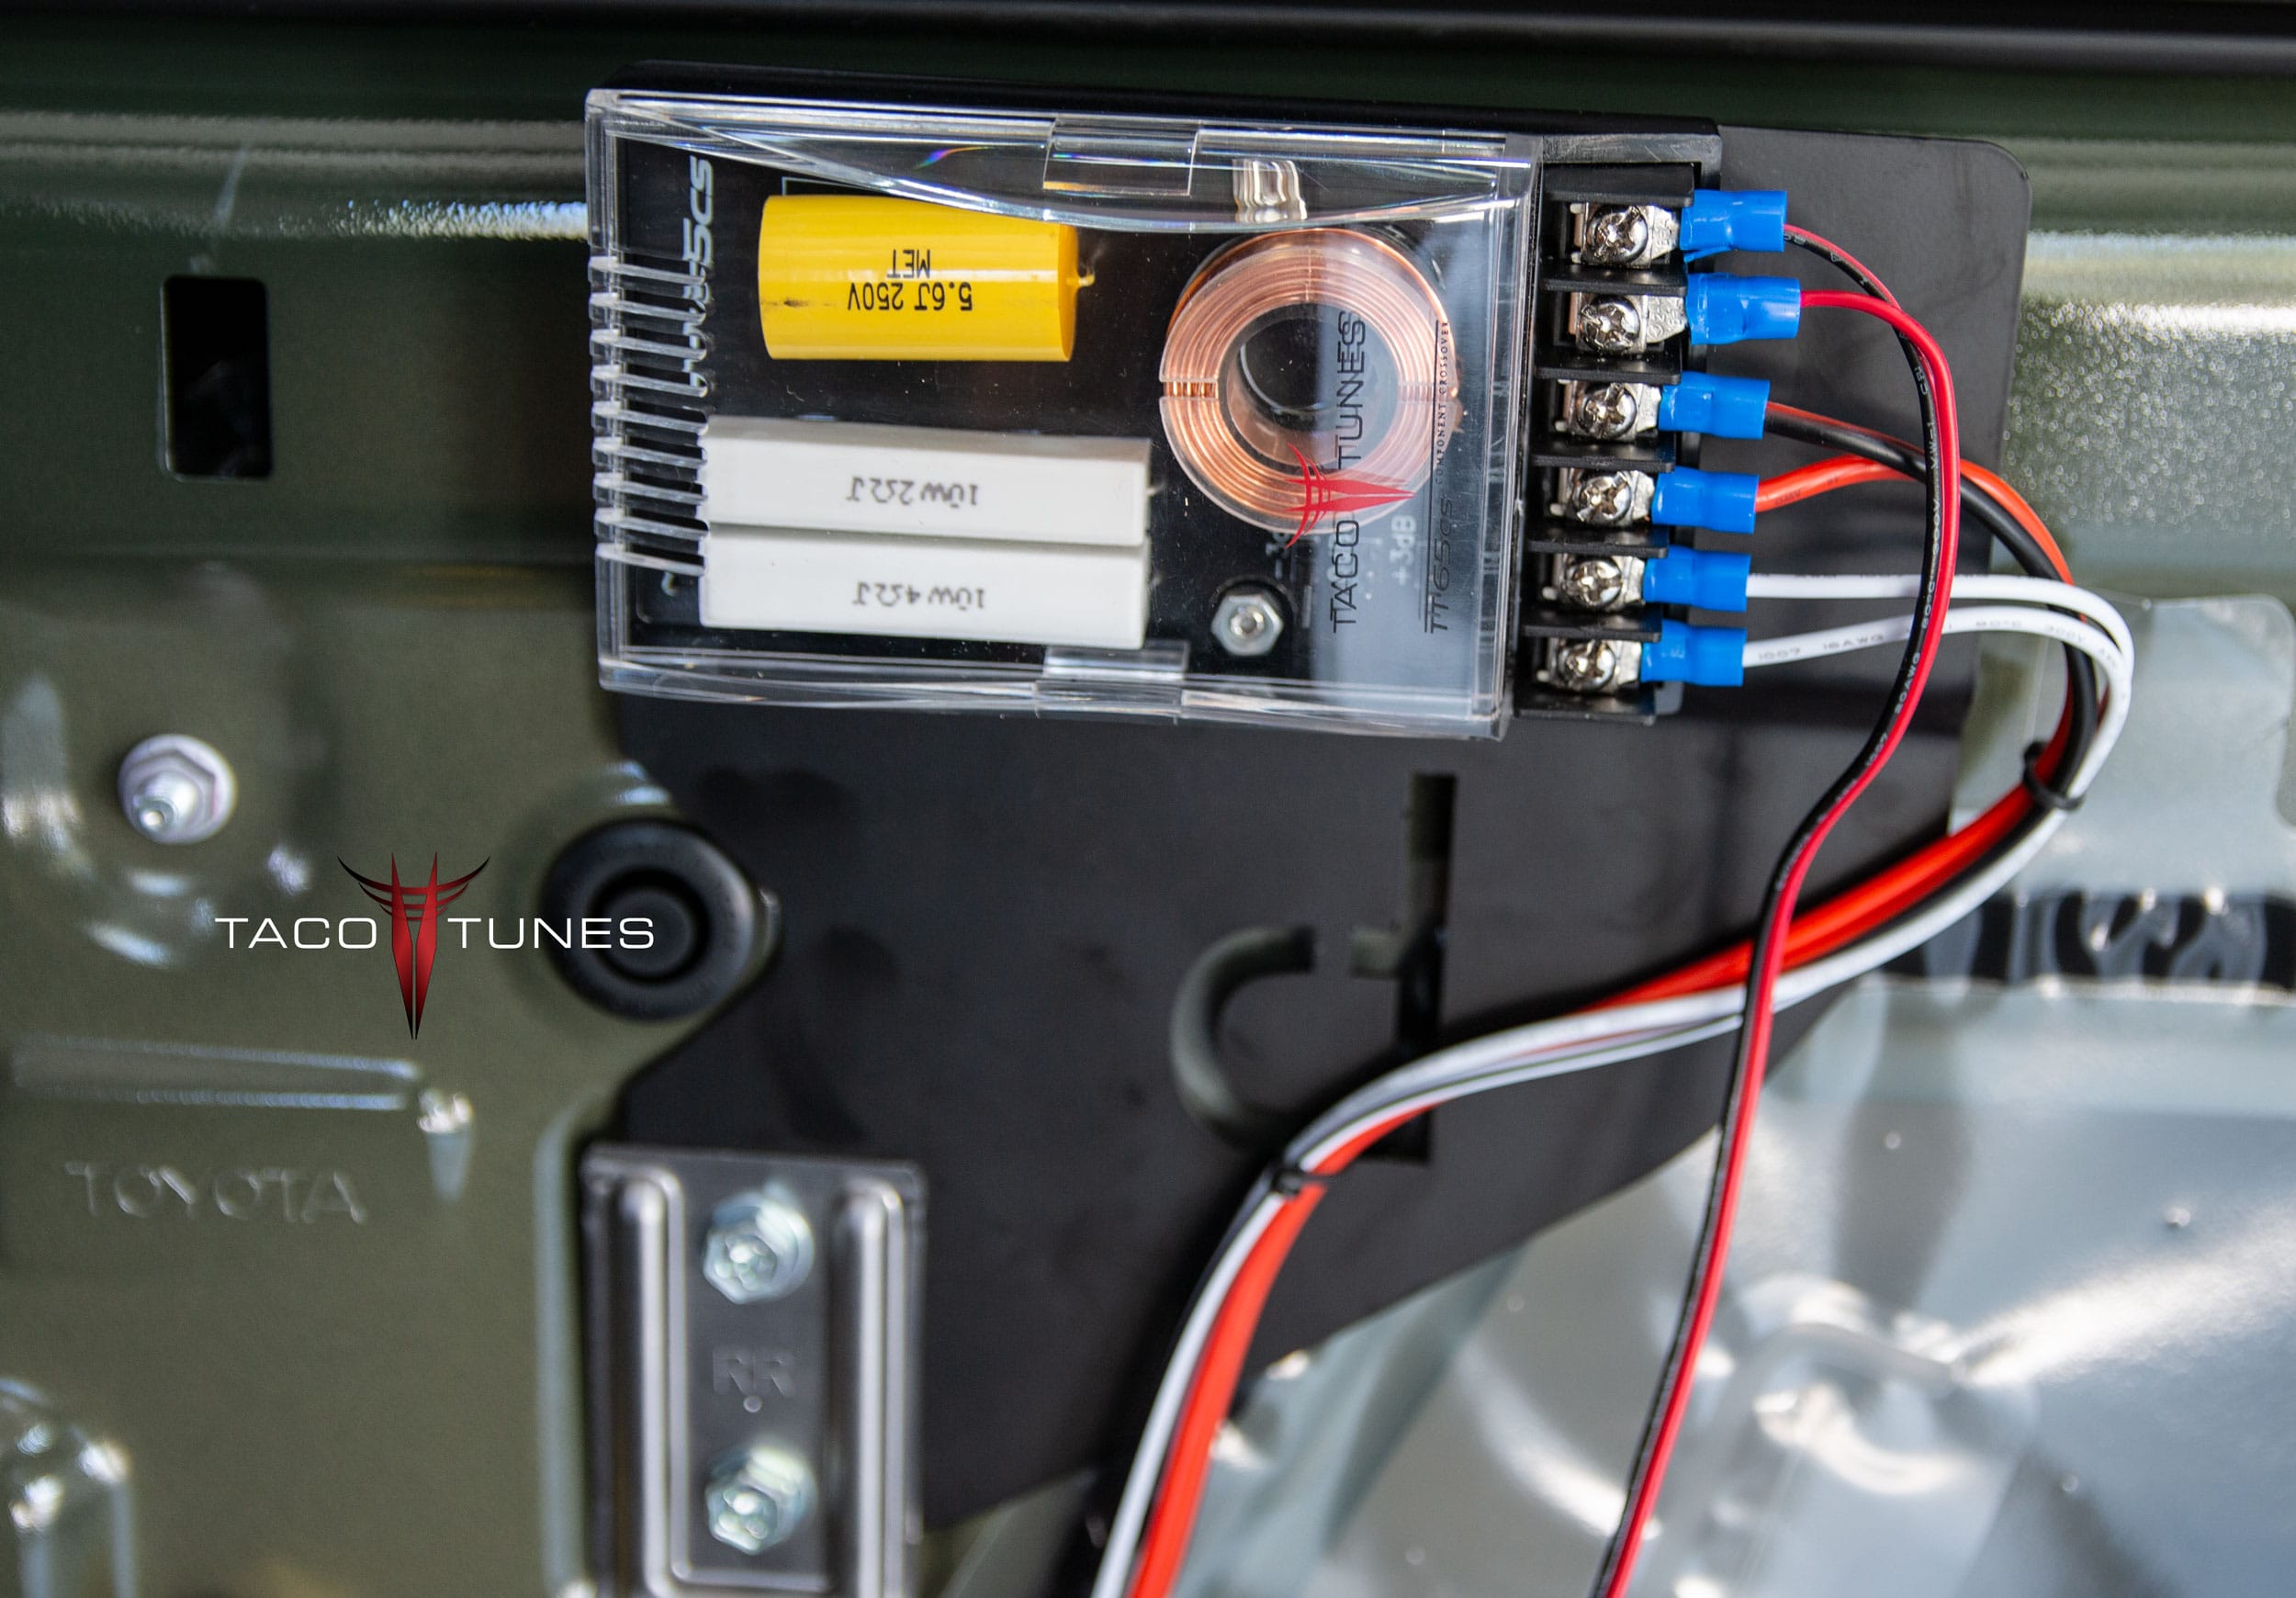
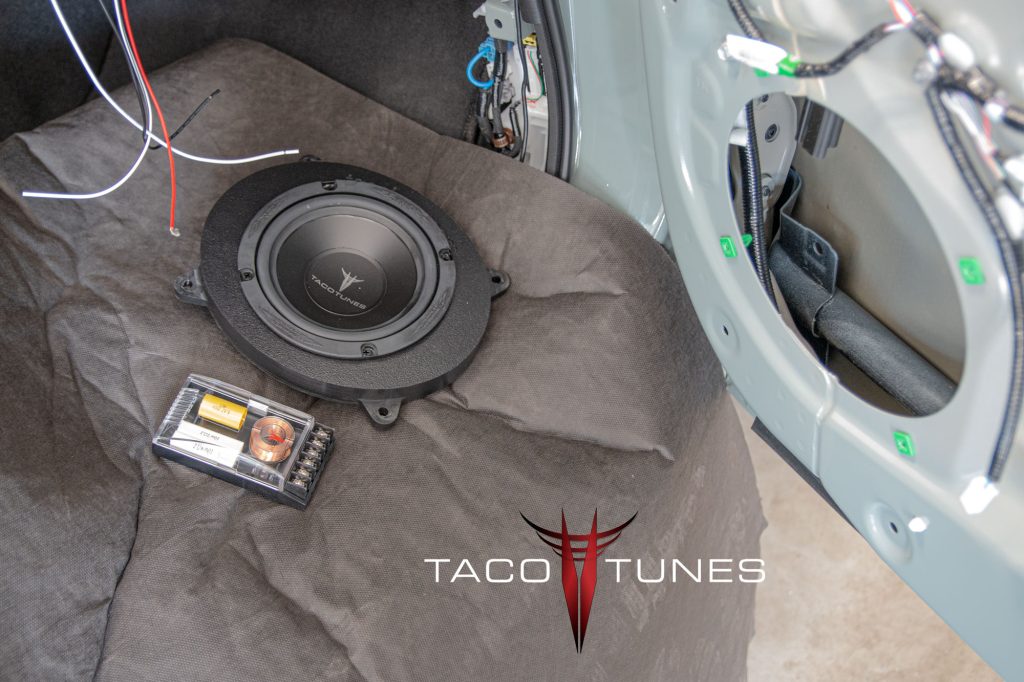
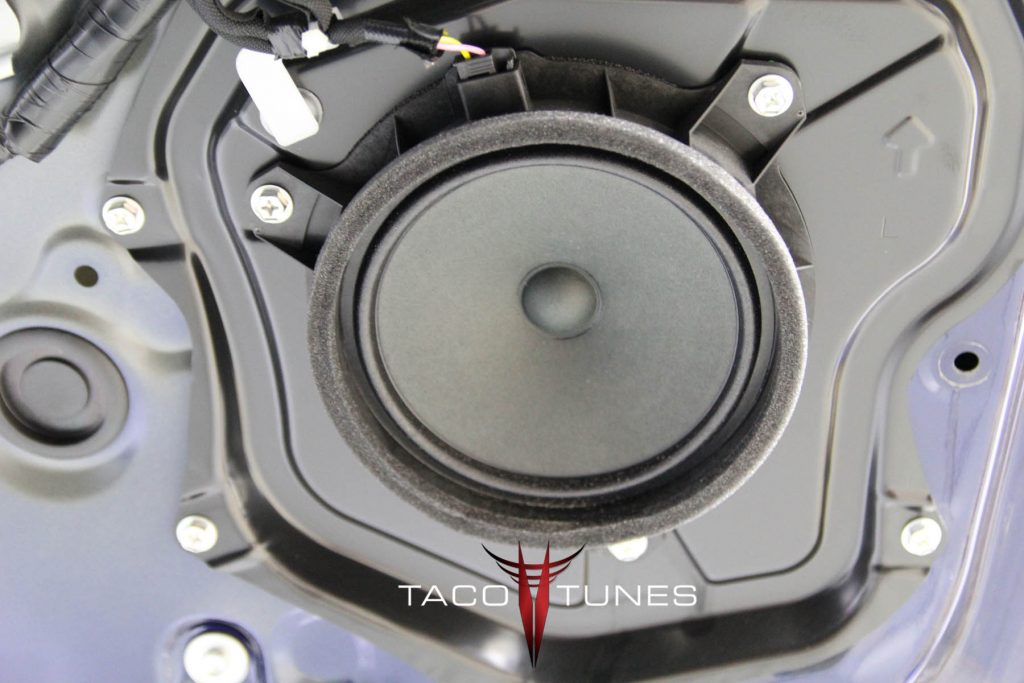
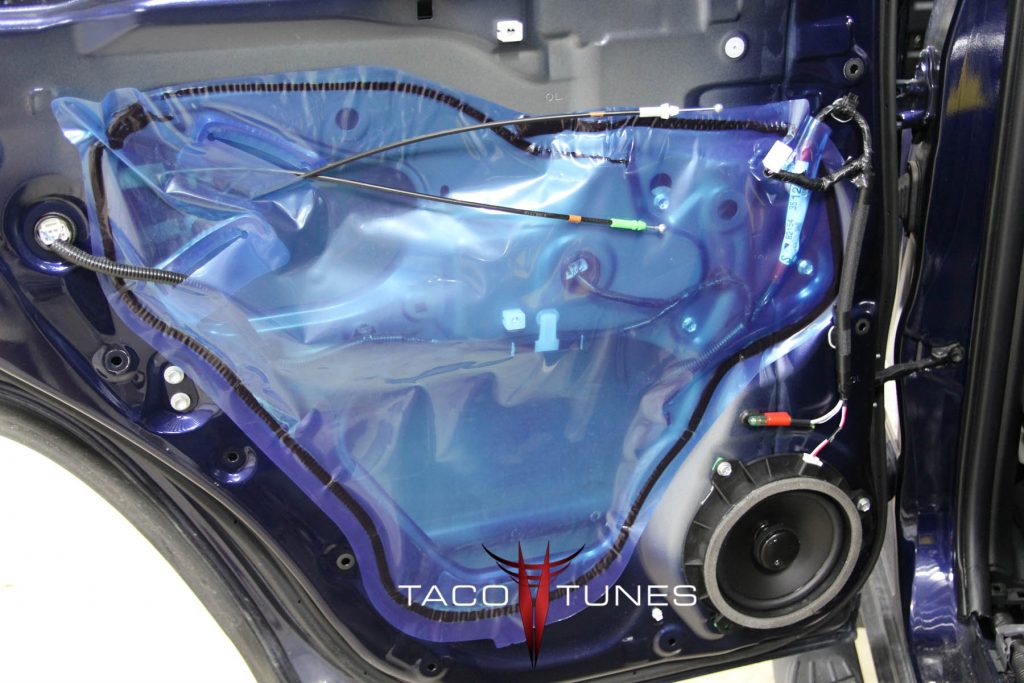
Tundra rear door crossover mount, mid bass driver & tweeter
tacotunes true component speakers for your 2022+ Toyota Tundra
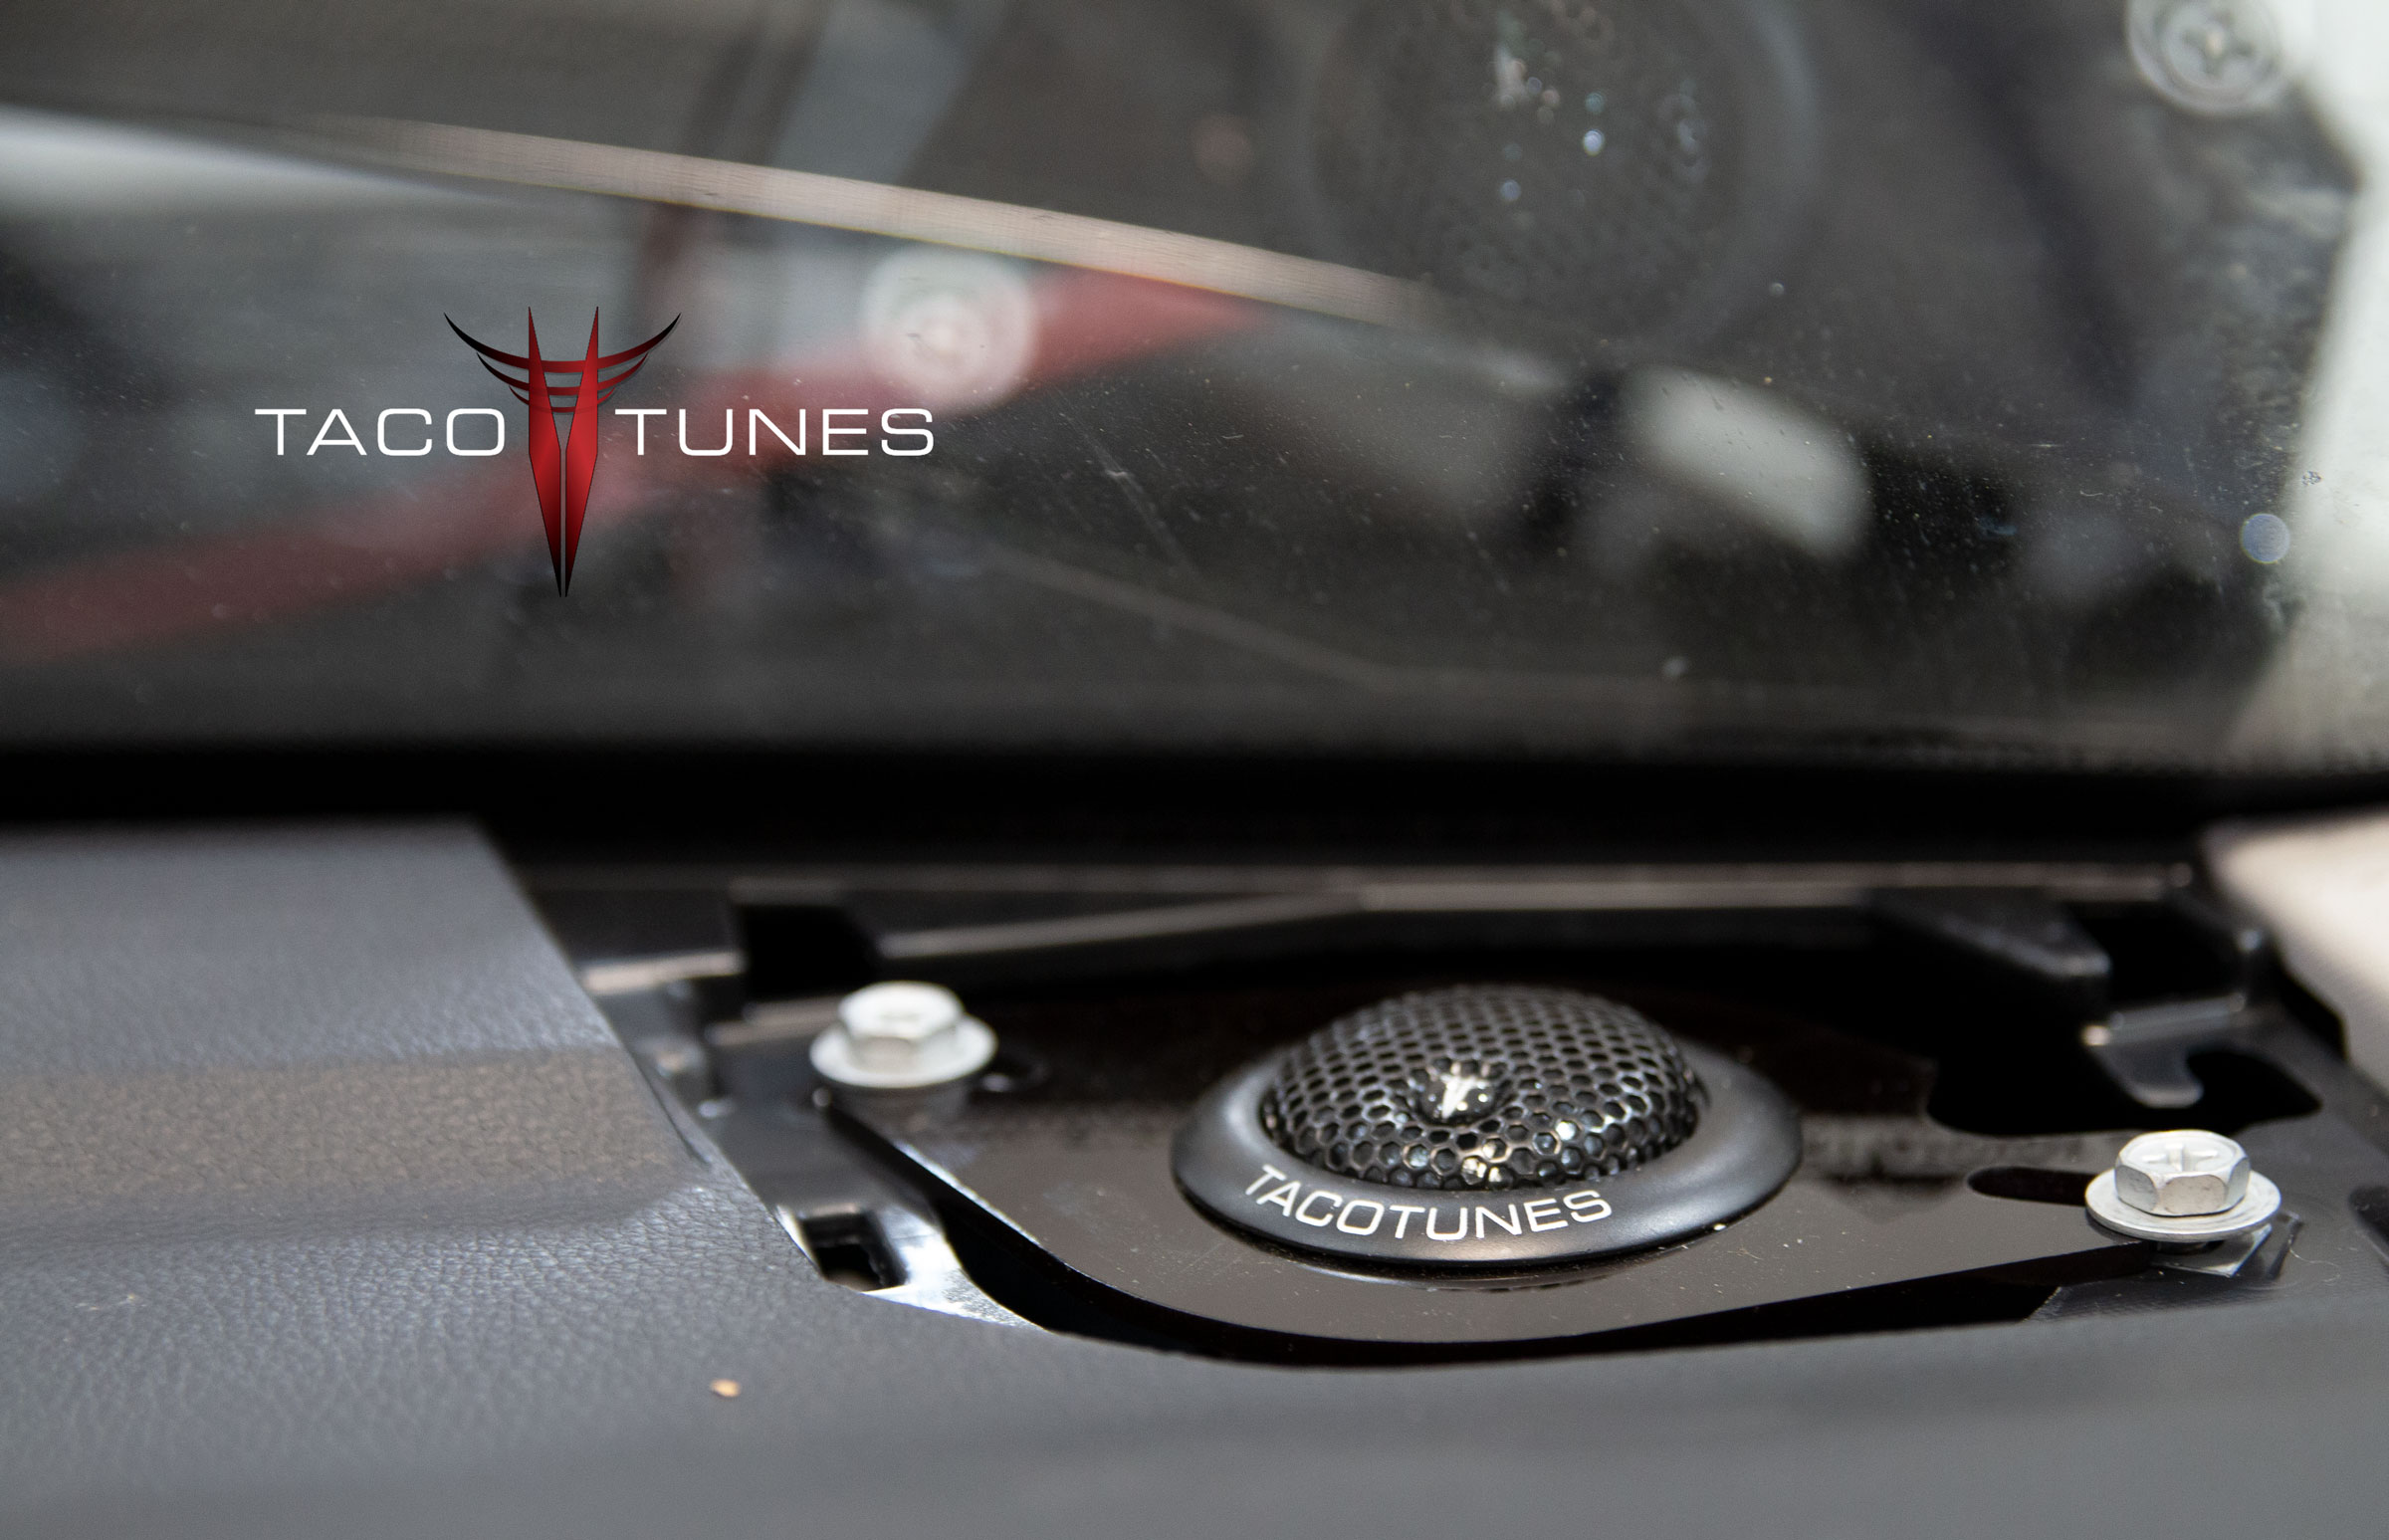
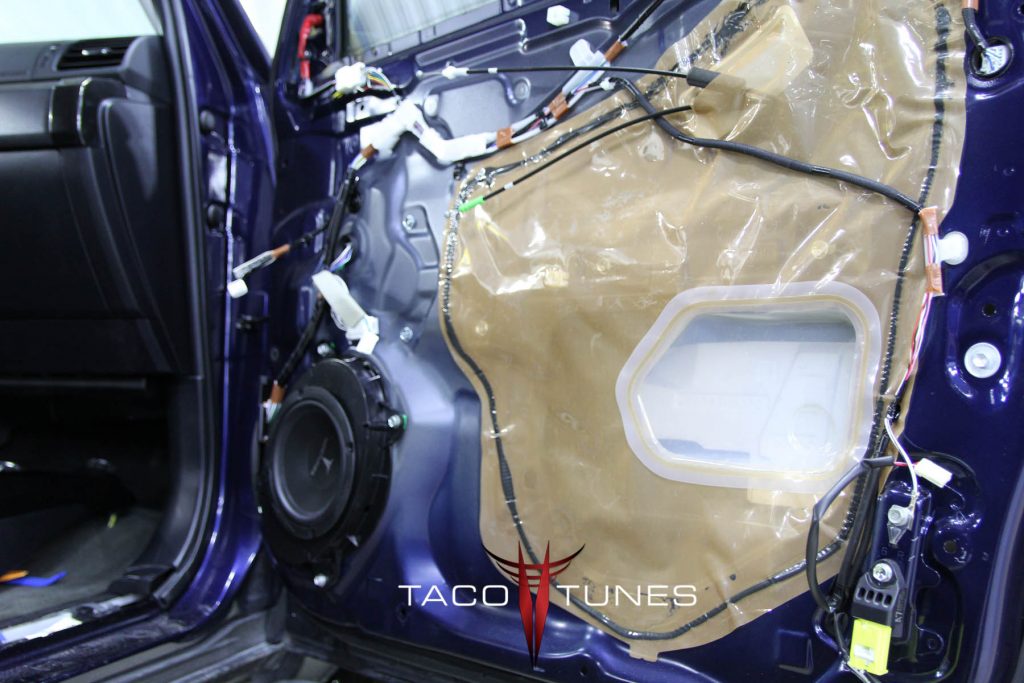
New Tweeters installed on door panel.
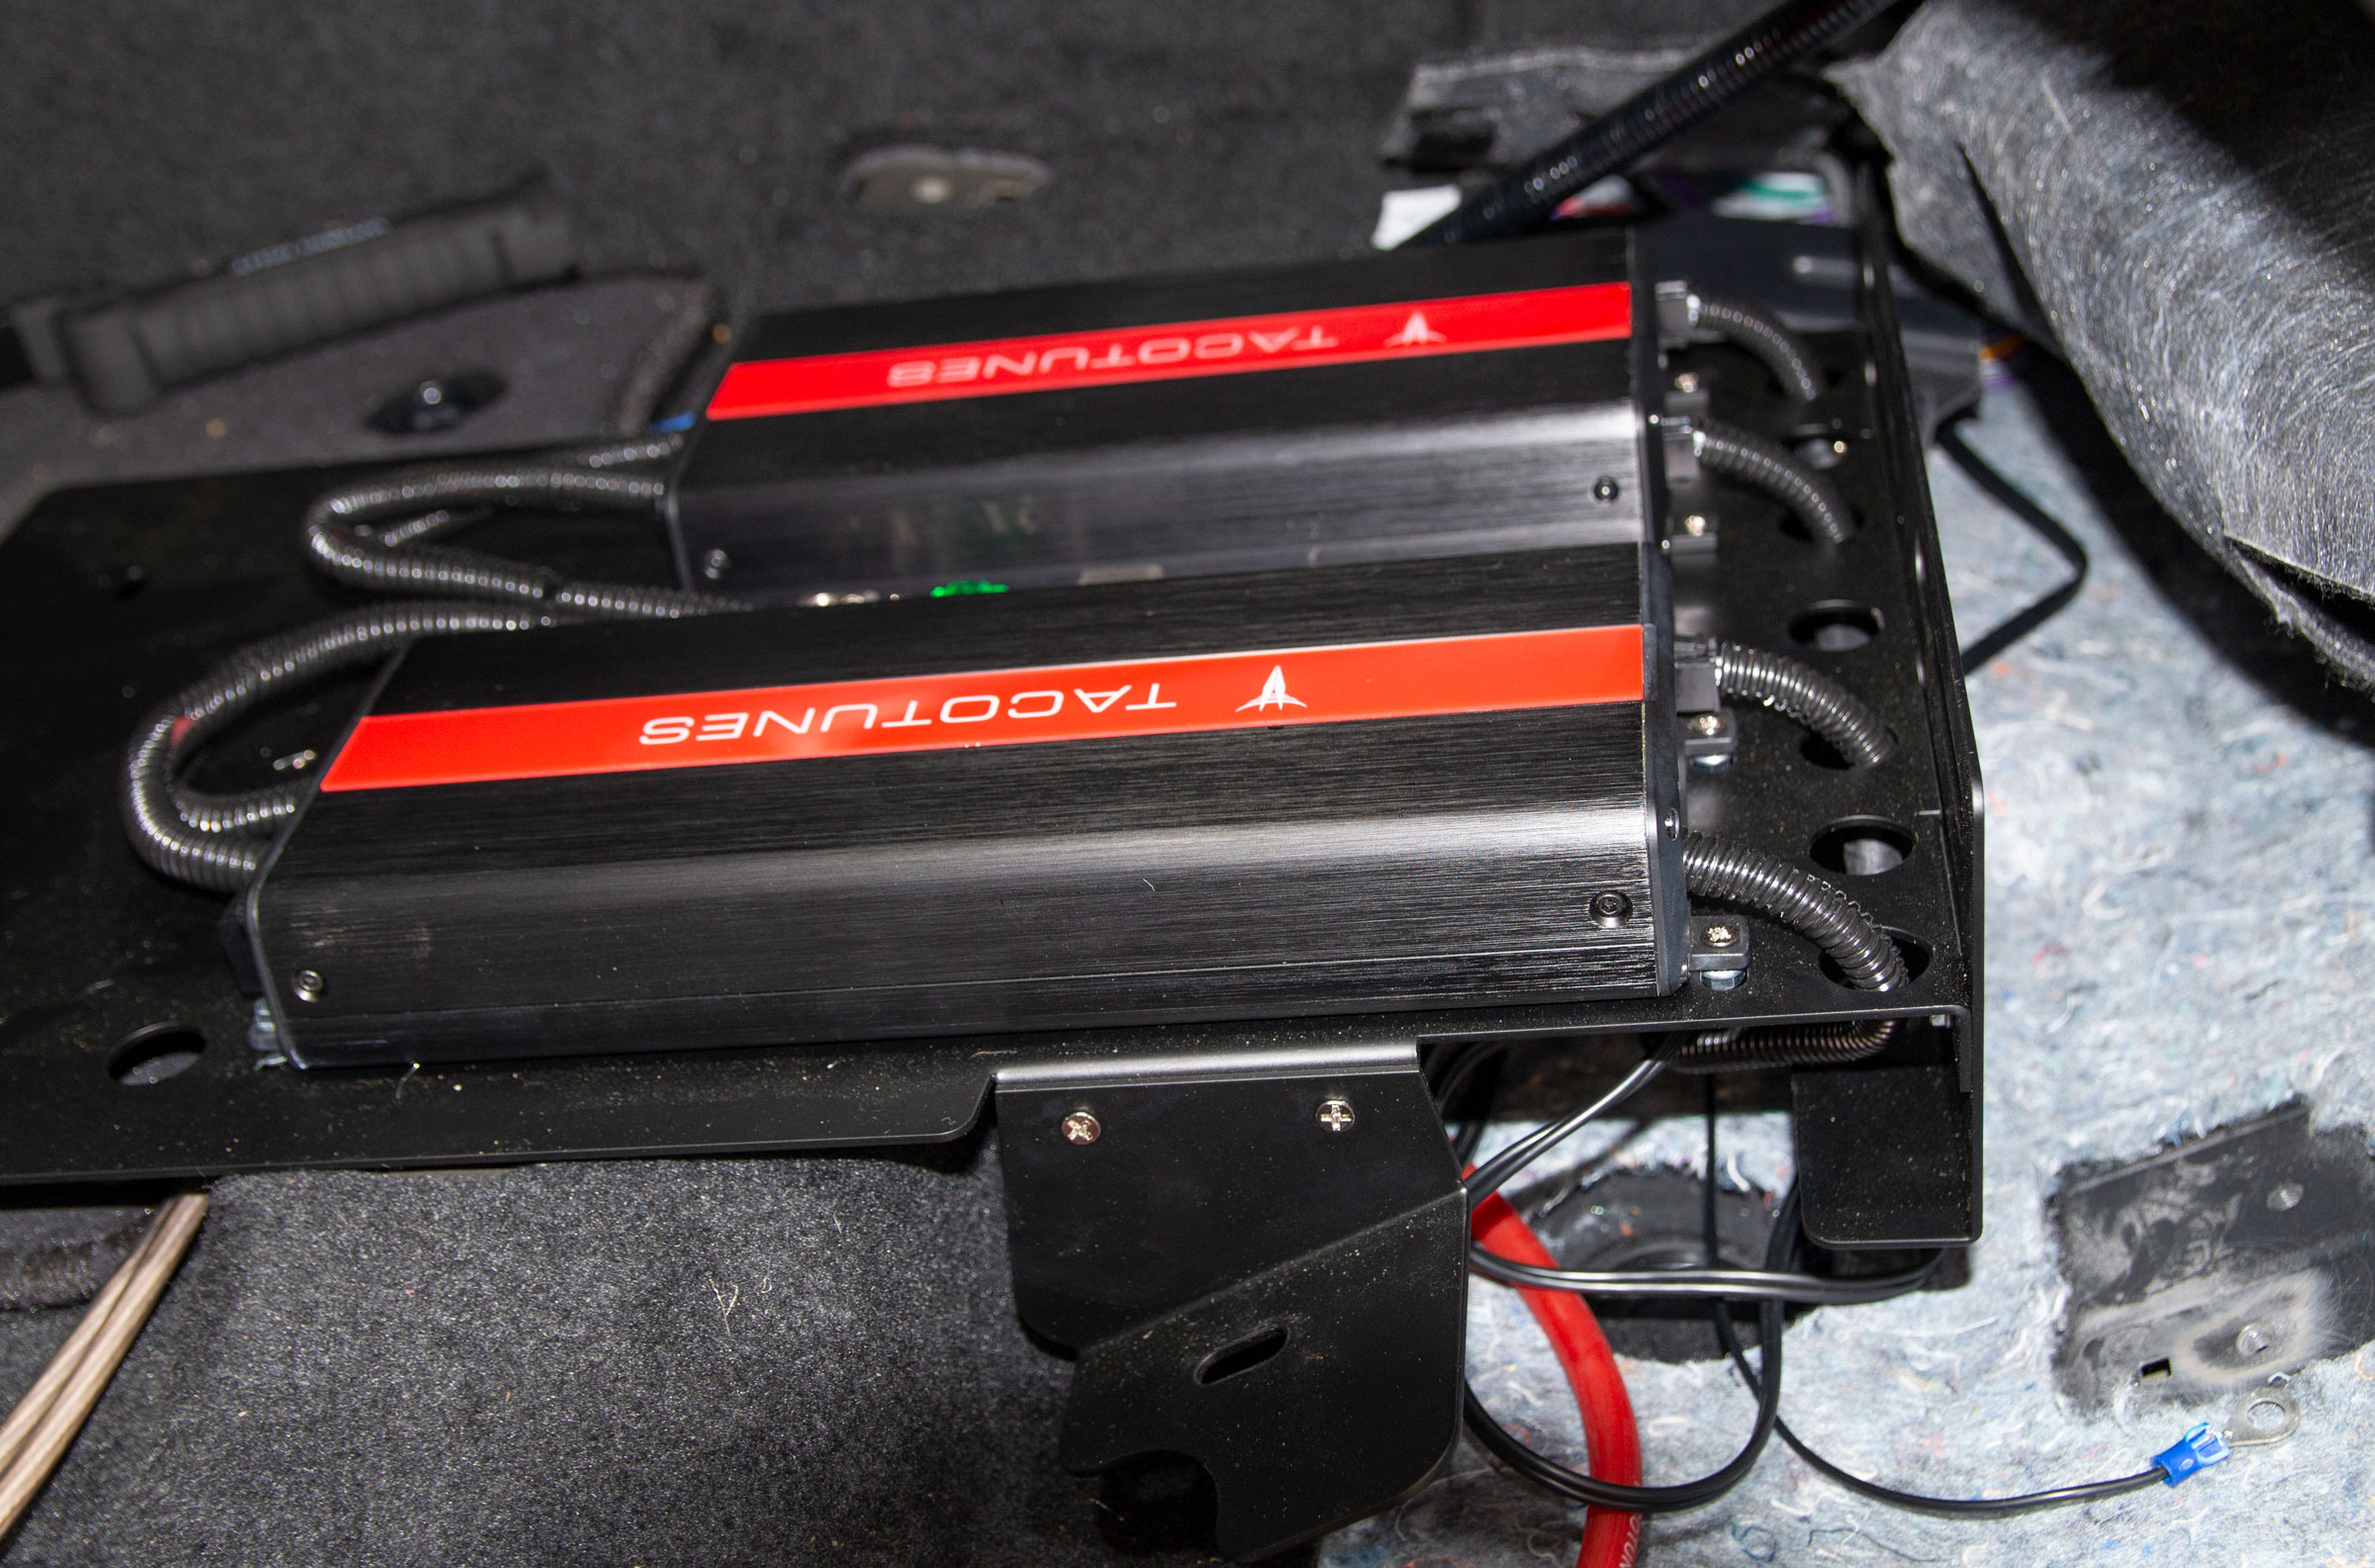
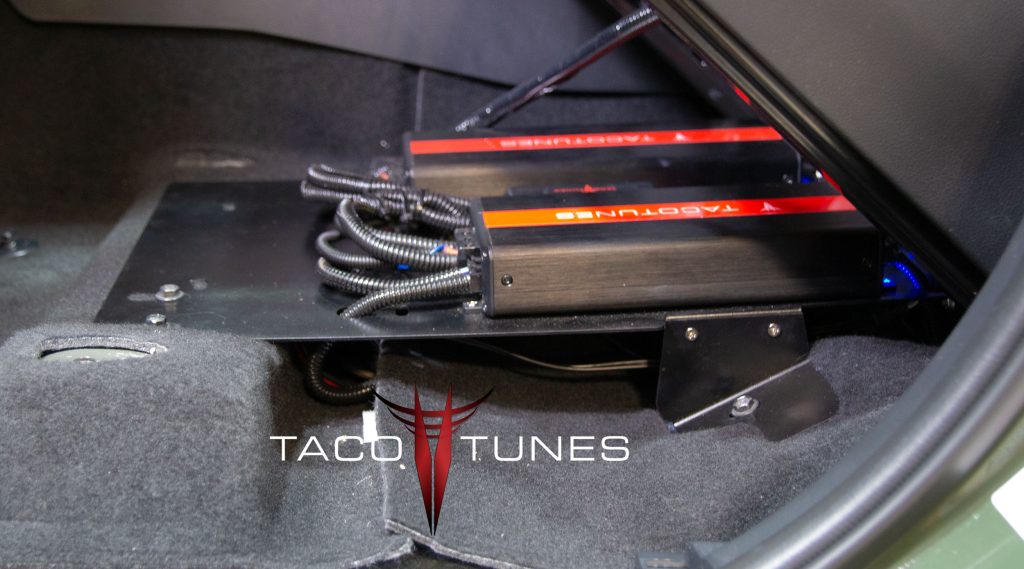
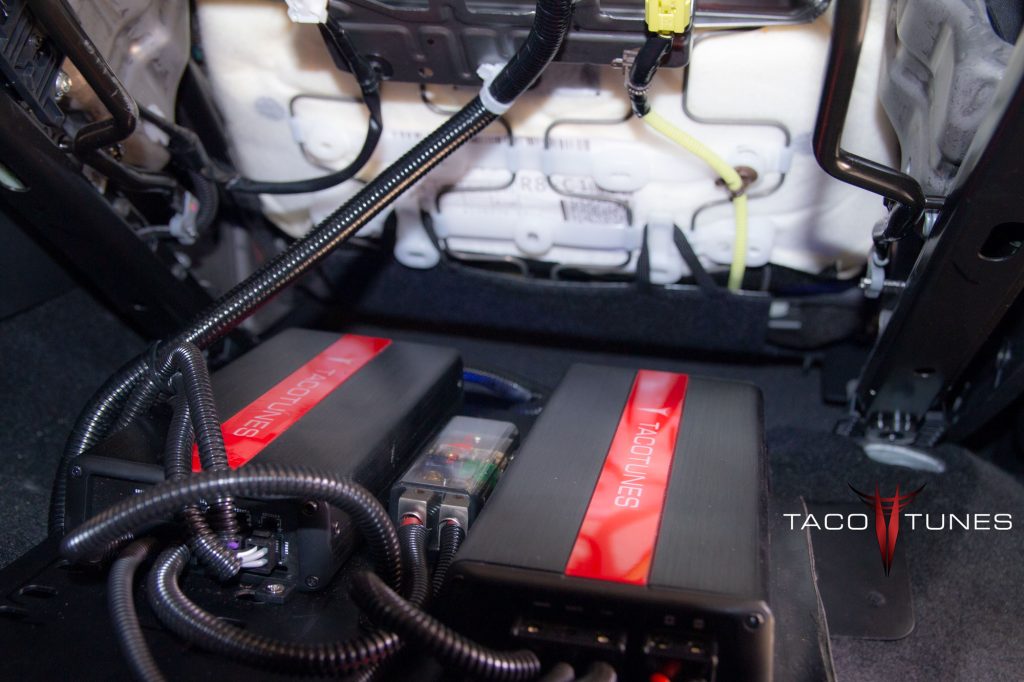
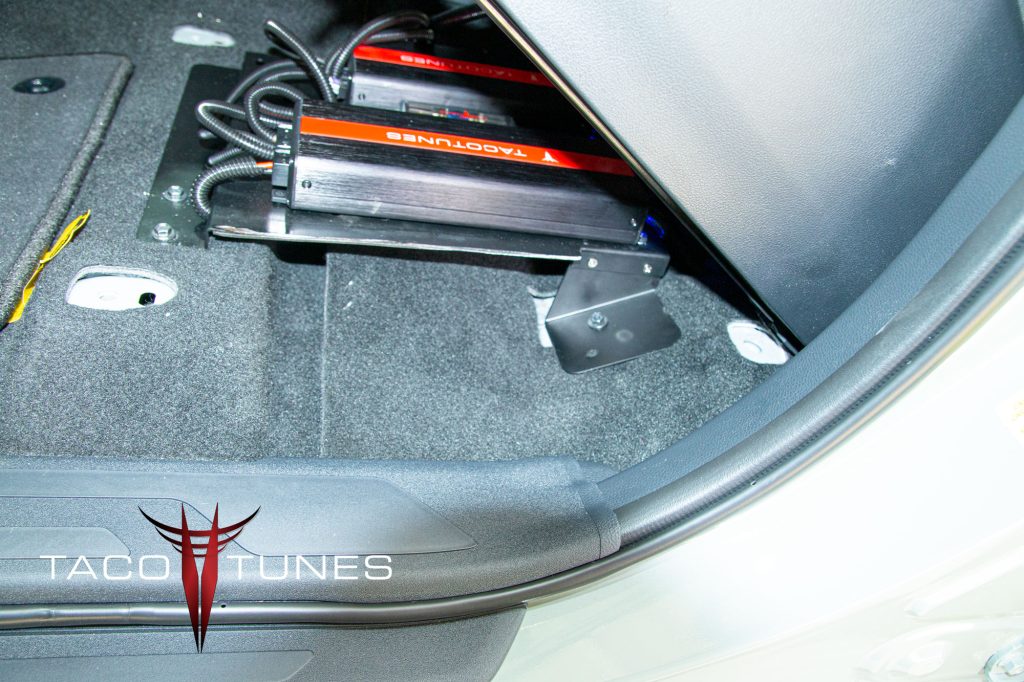
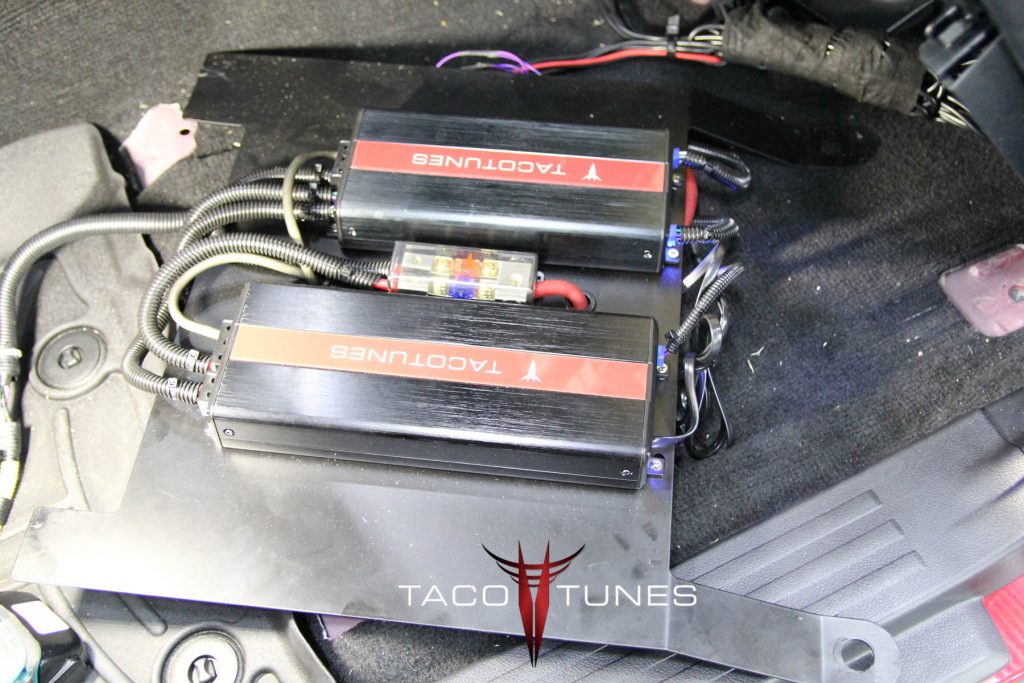
tacotunes TXD10001 and TXD3204 Amps mounted to laser cut amp rack – during the installation process
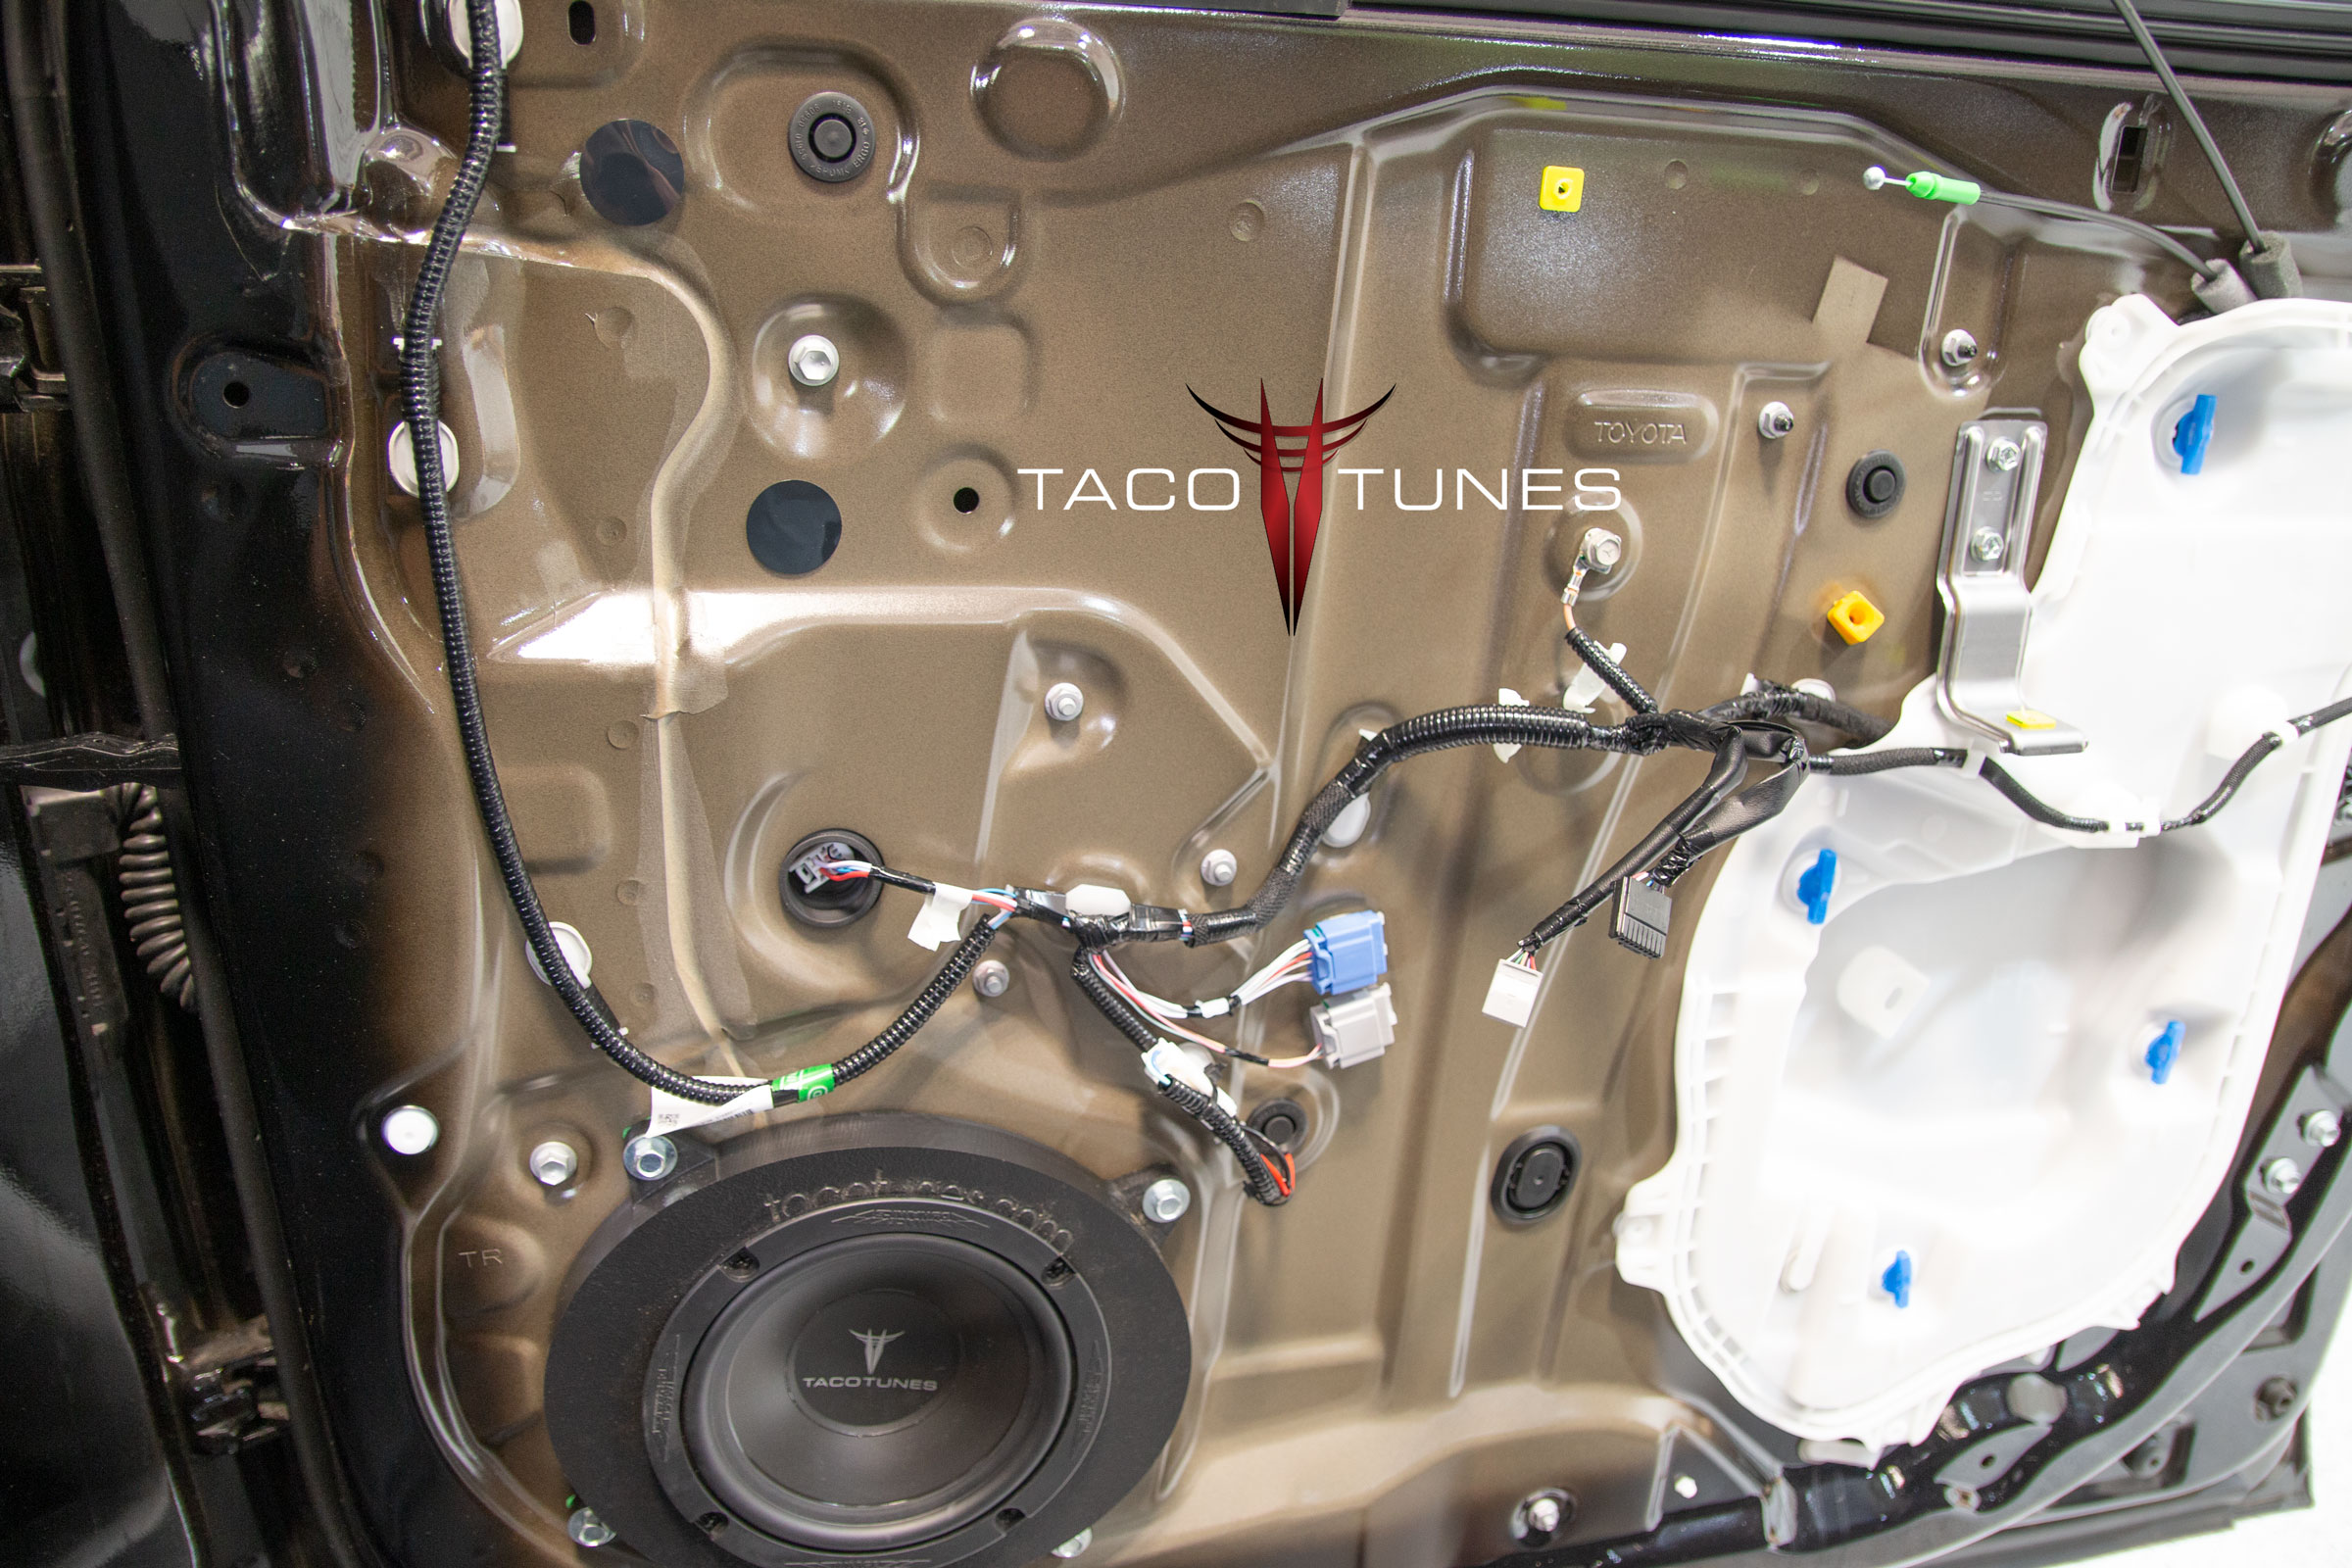
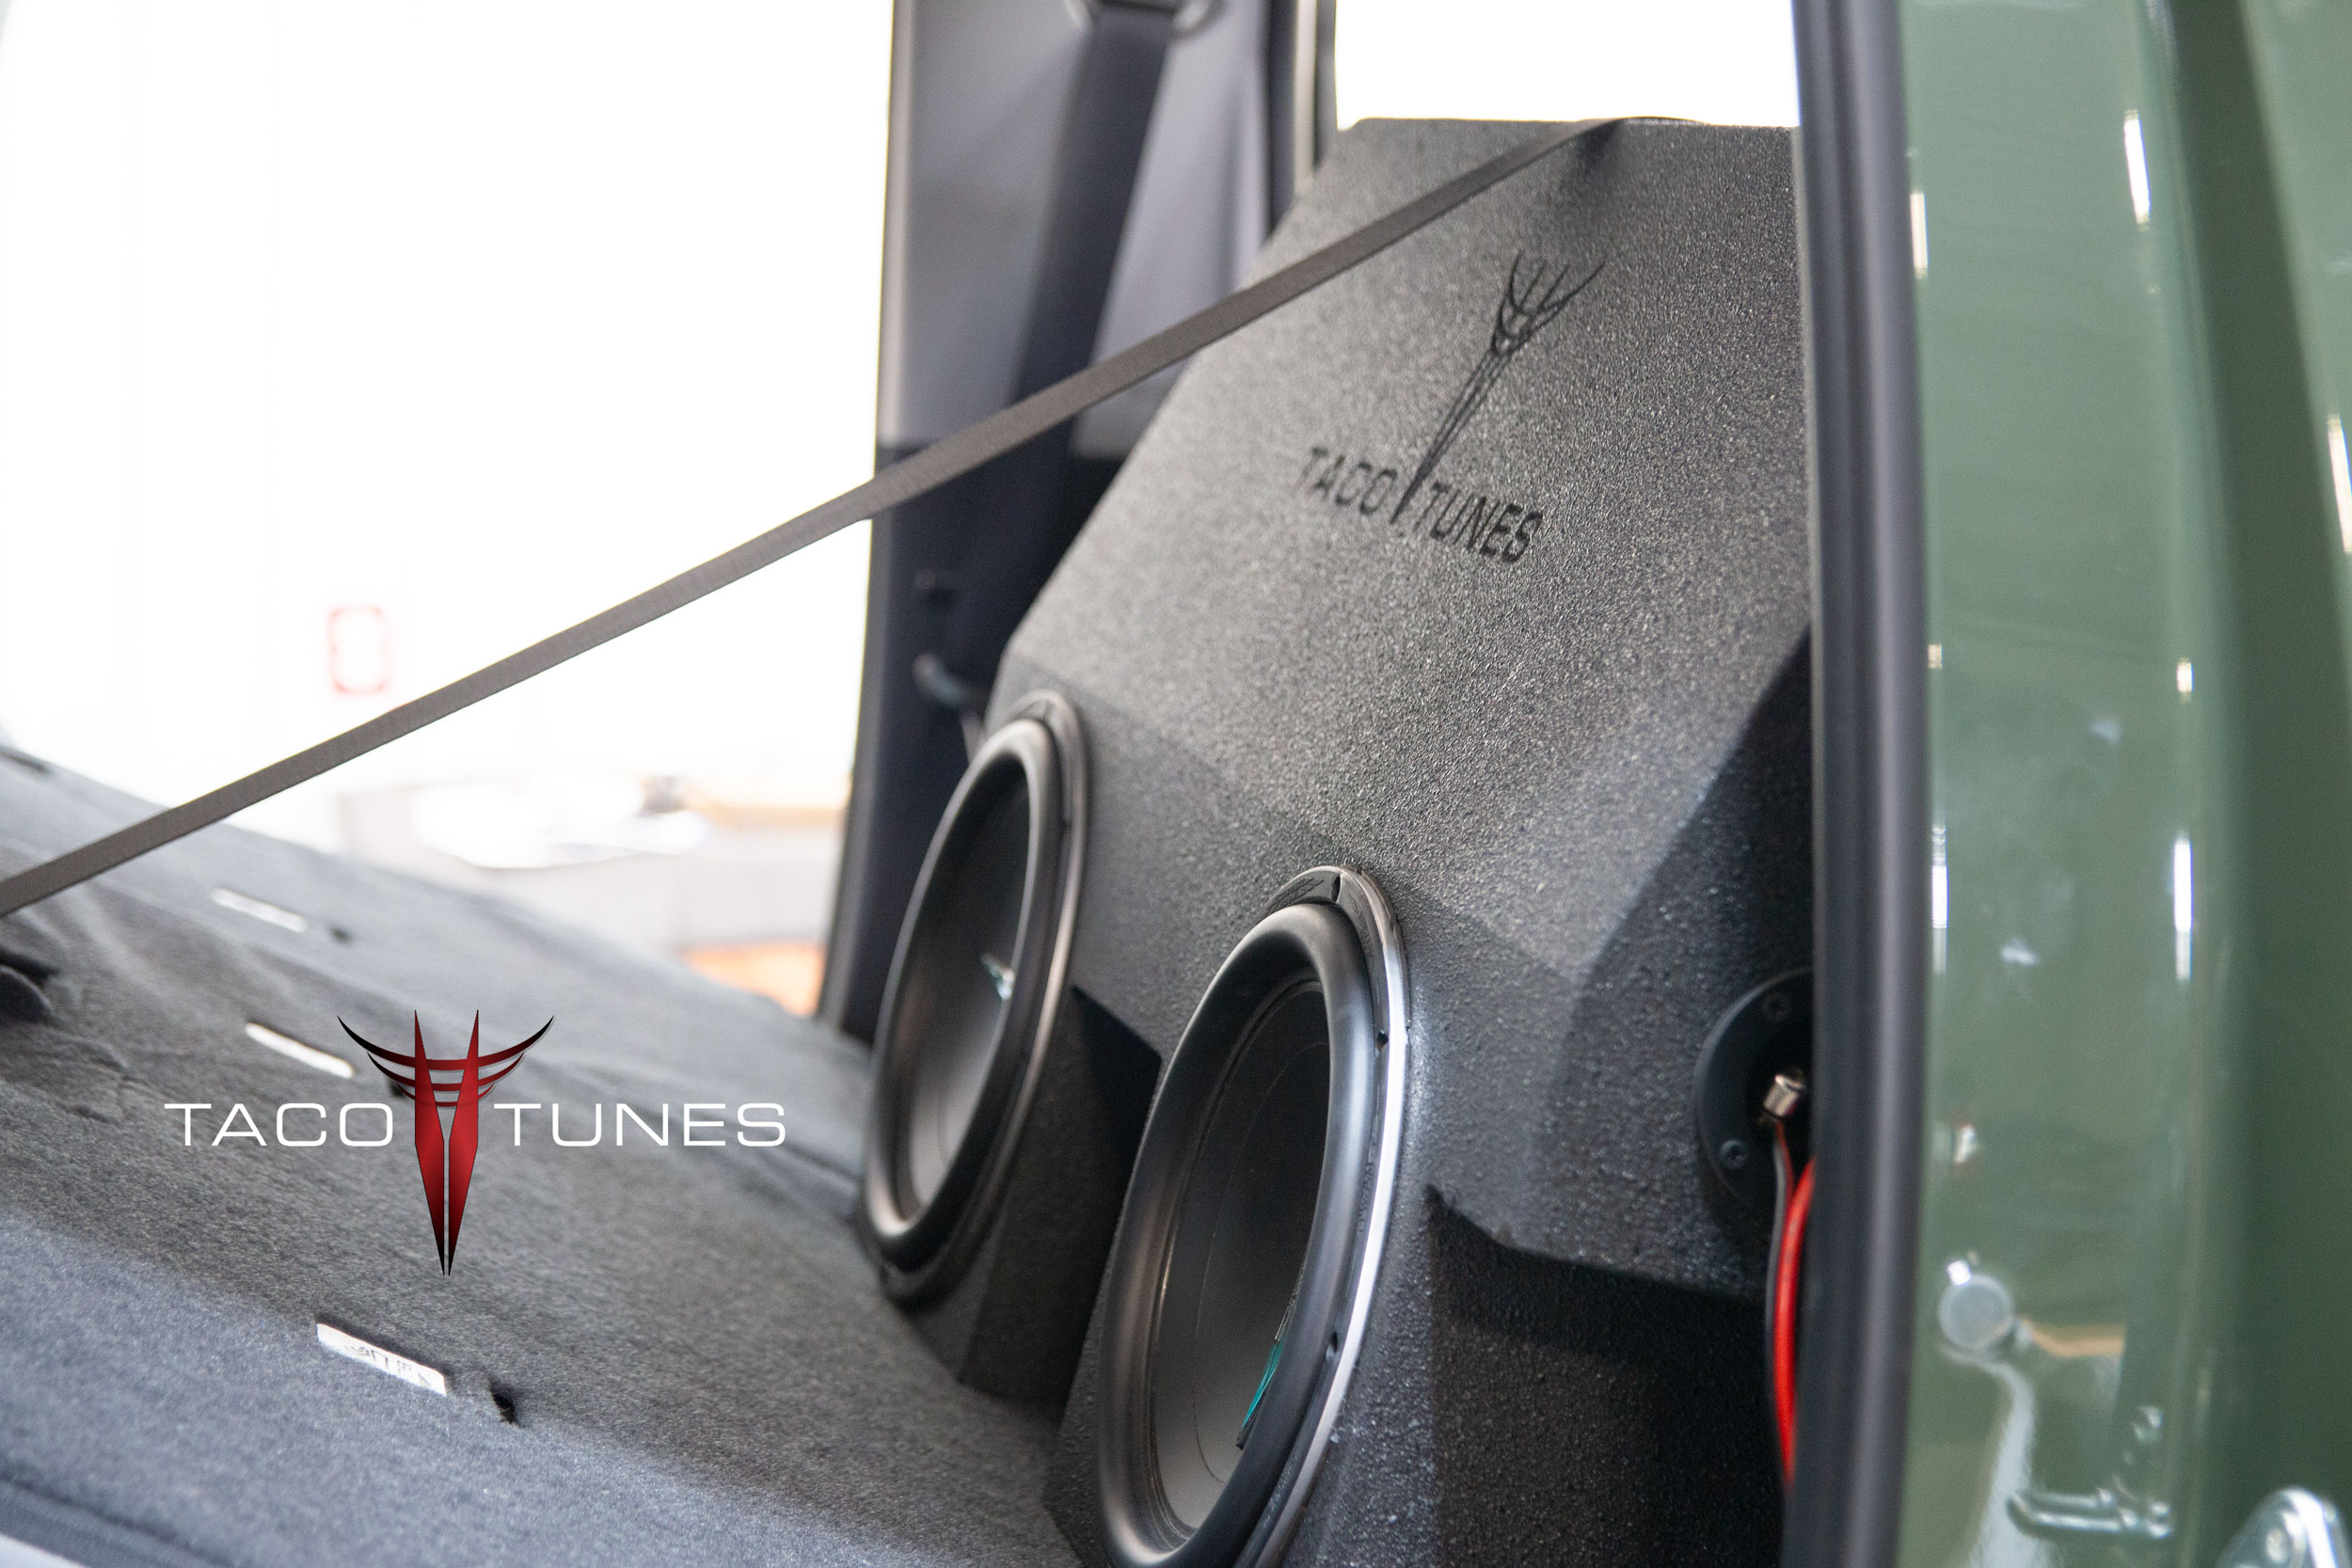
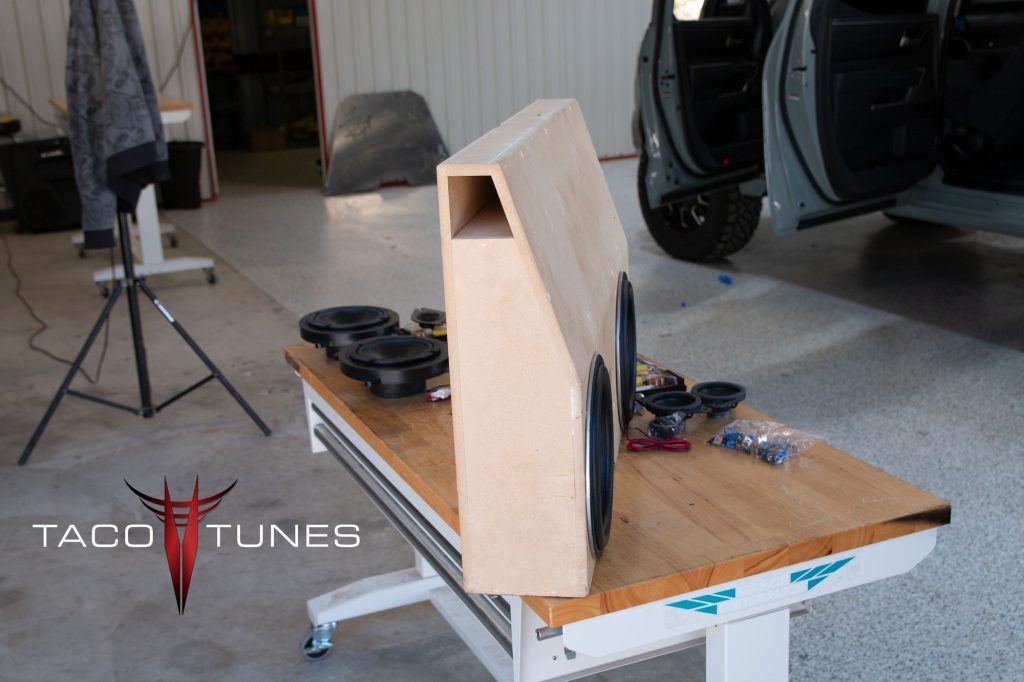
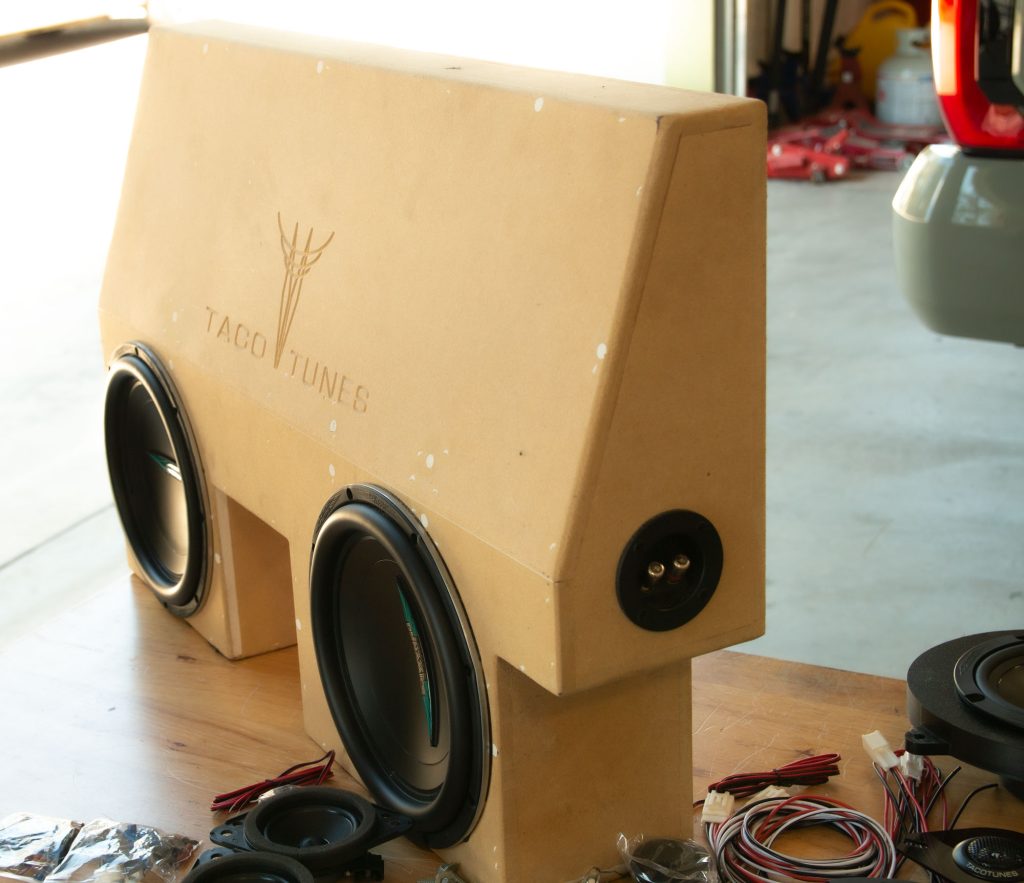
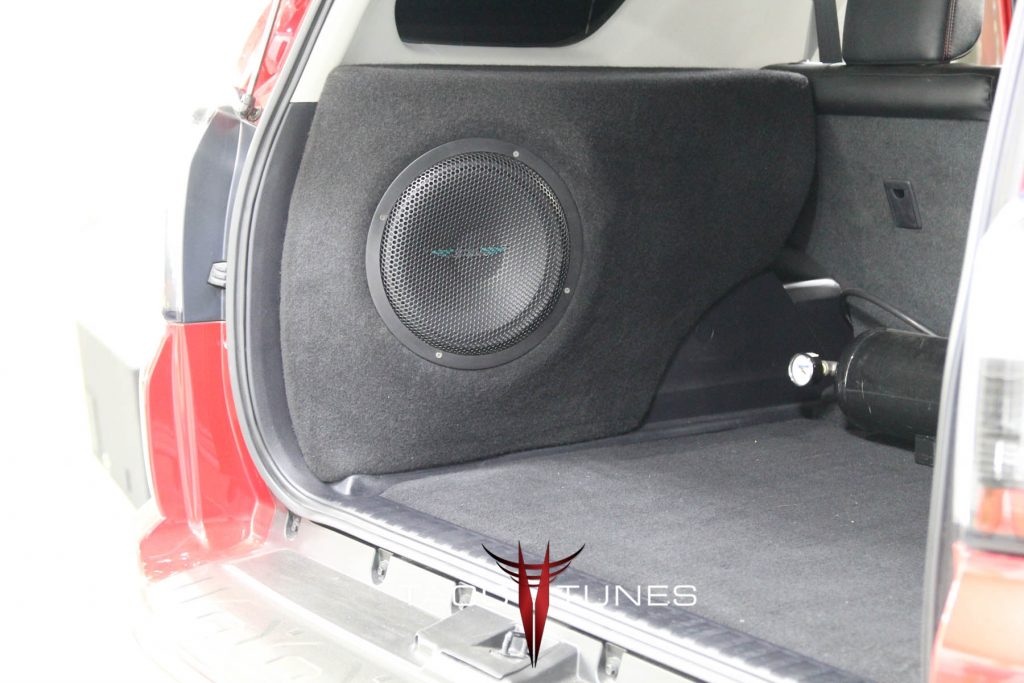
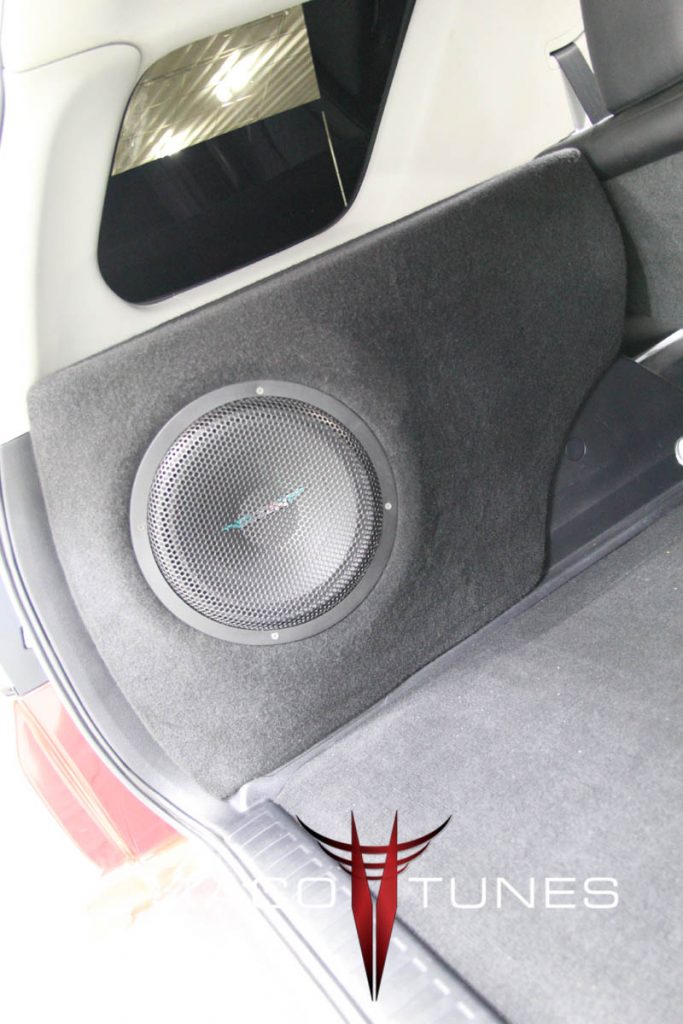
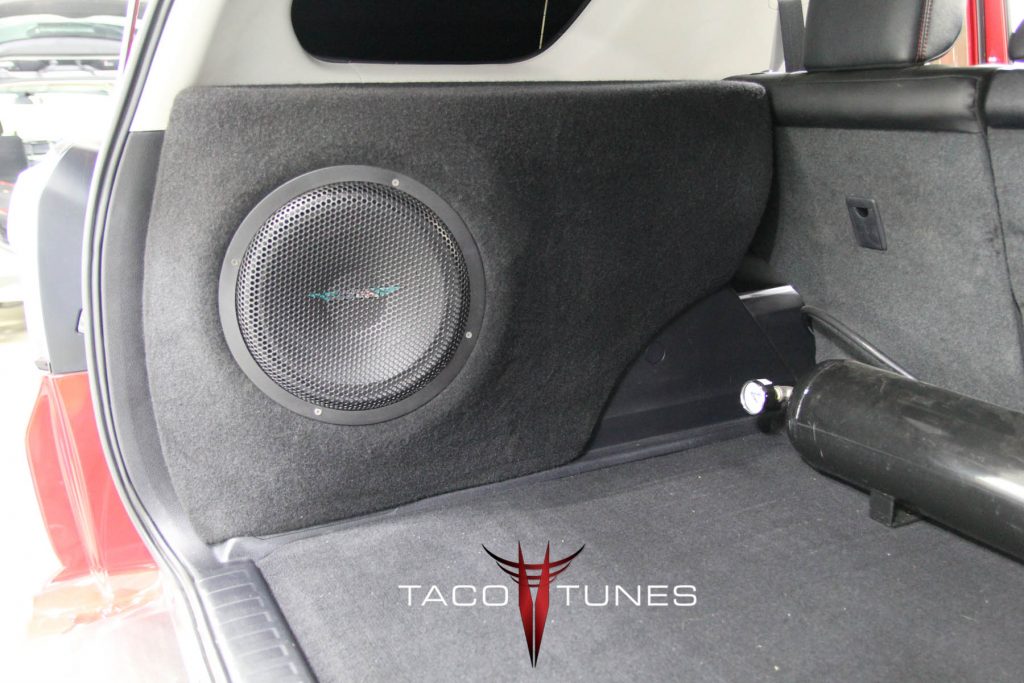
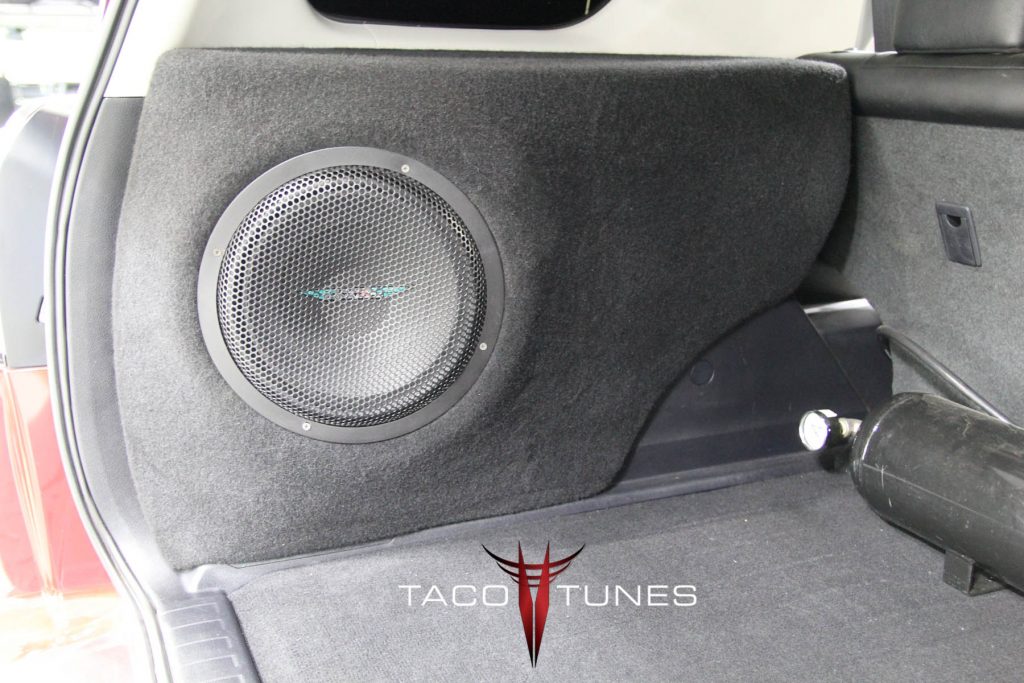
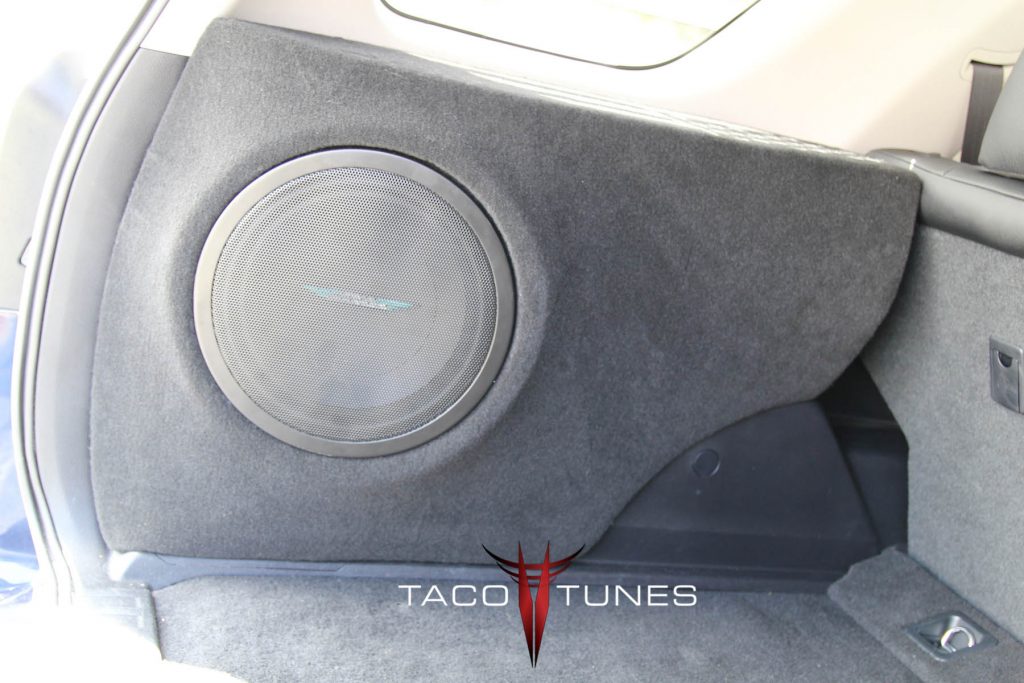
2022 Toyota Tundra Dual Subwoofer box holds 2 inch subwoofers.
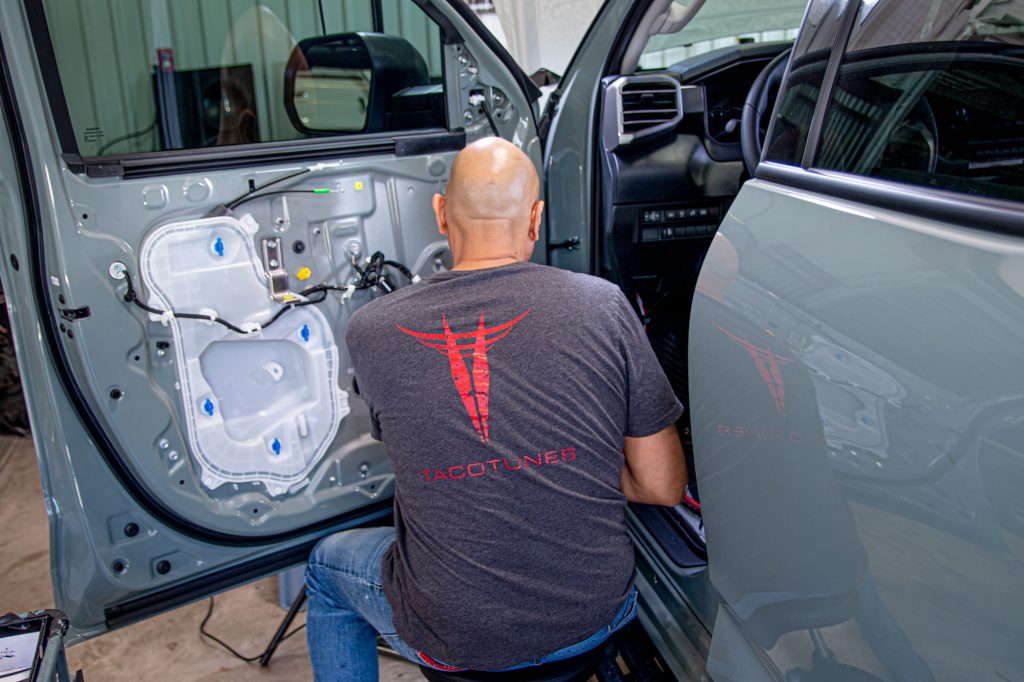
2022+ Toyota Tundra Subwoofer Box Installation being installed.
2022 Toyota Tundra Rear Door Component Speakers passive crossover and crossover mount
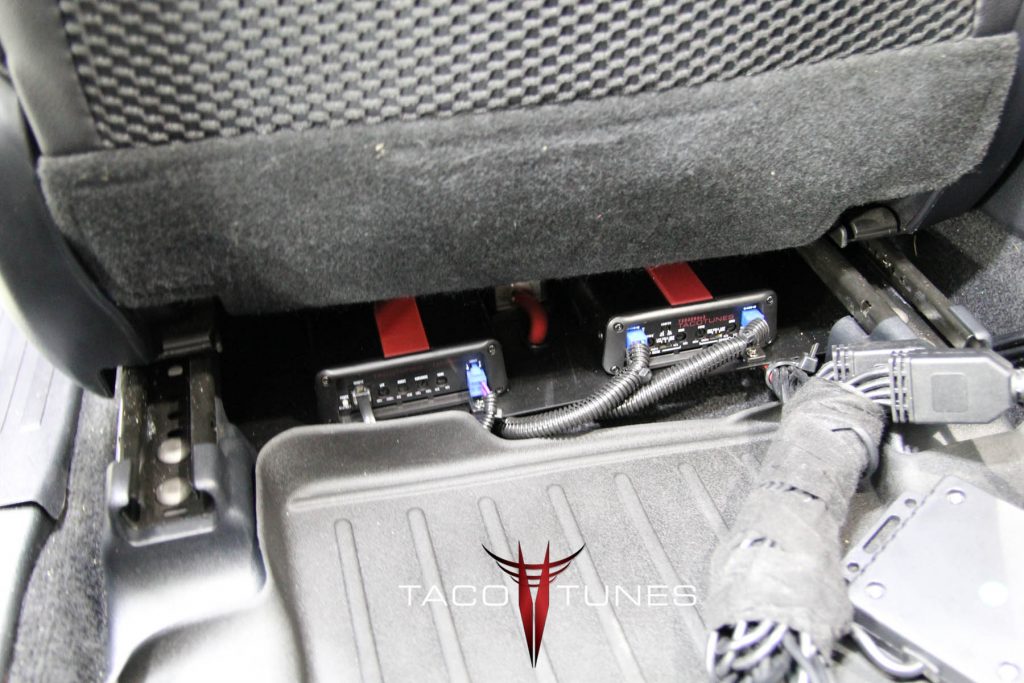
2022 Toyota Tundra Laser Cut Amp Rack bolts directly to stock mounting location. Don’t let audio shops drill holes in your Tundra!
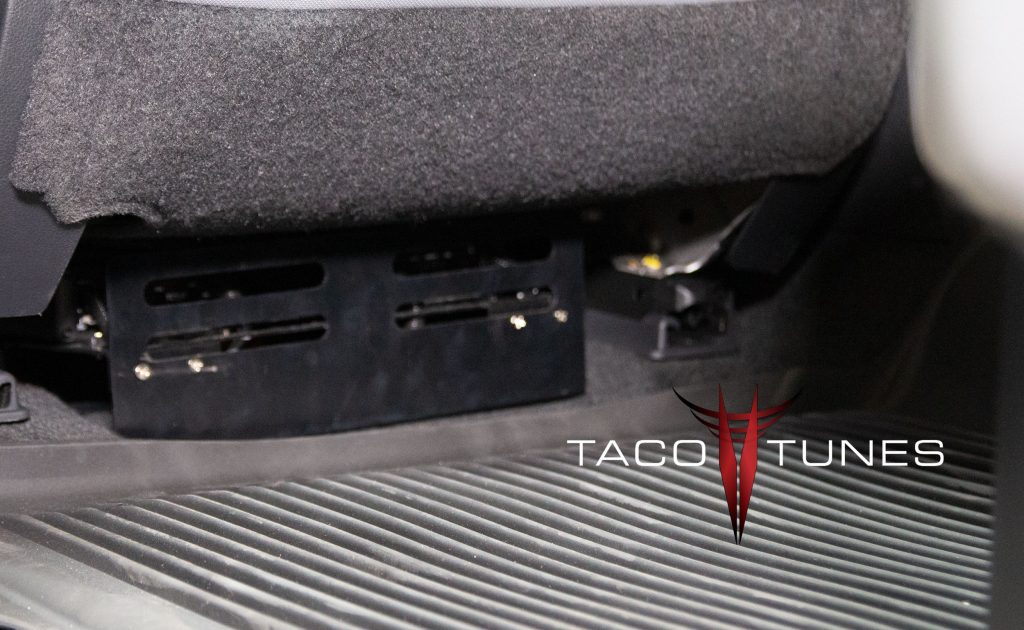
2022 Toyota Tundra Amp Rack with seat pushed all the way forward.
2022 Toyota Tundra Amp Rack with seat at about 5 foot 8 driver. Kick plate protects amps and wiring from passengers.
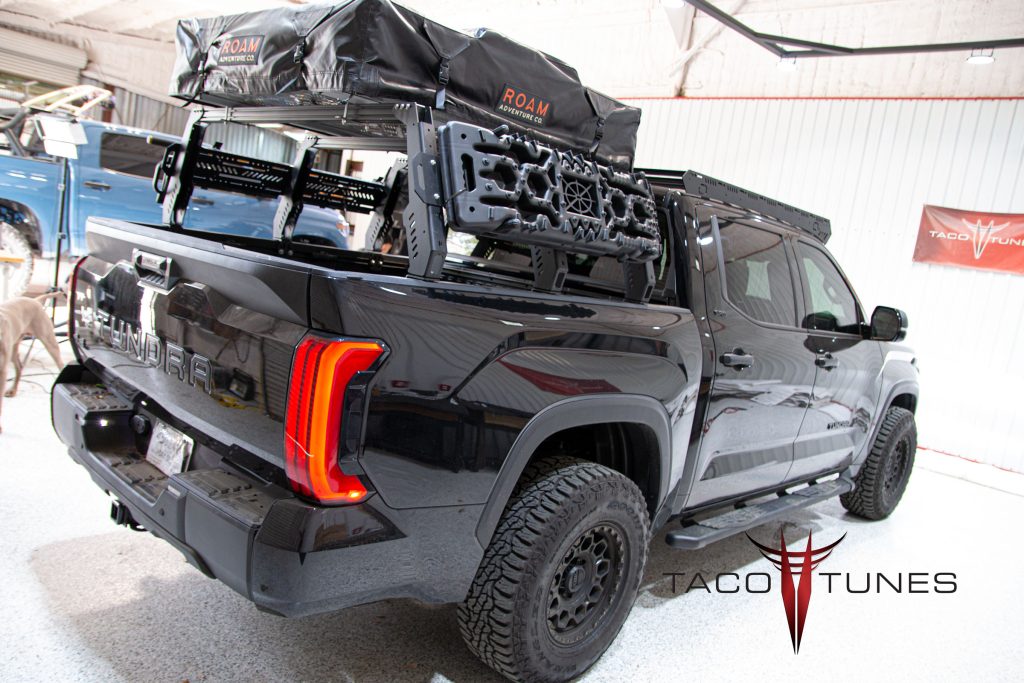
2022 Toyota Tuundra CrewMax Bed Rack and roof tent.
2022 Toyota Tuundra CrewMax Bed Rack and roof tent.
Dual 10″ Subwoofer Box – Ported
tacotunes.com TT65CS Component Speakers
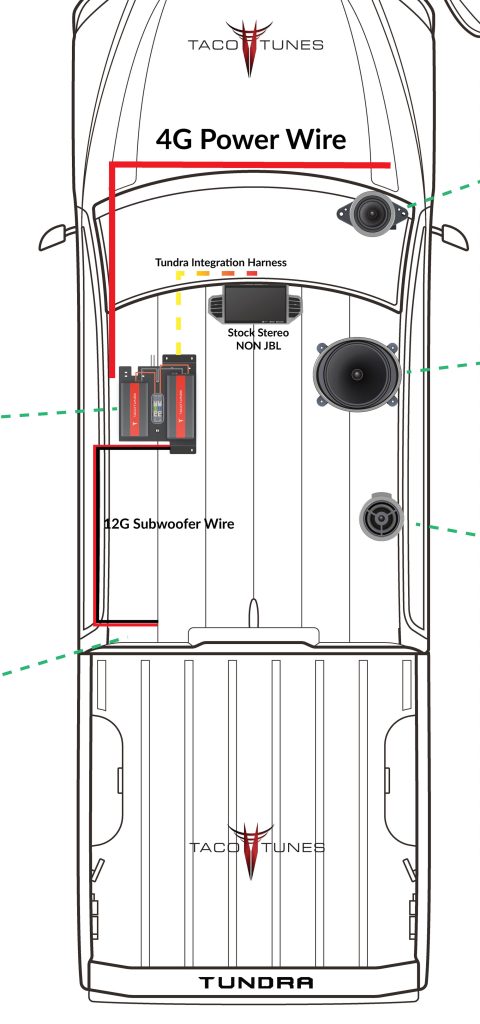
Tundra Direct Integration – no cutting or splicing your factory wires. Amps bolt to stock mounting location.
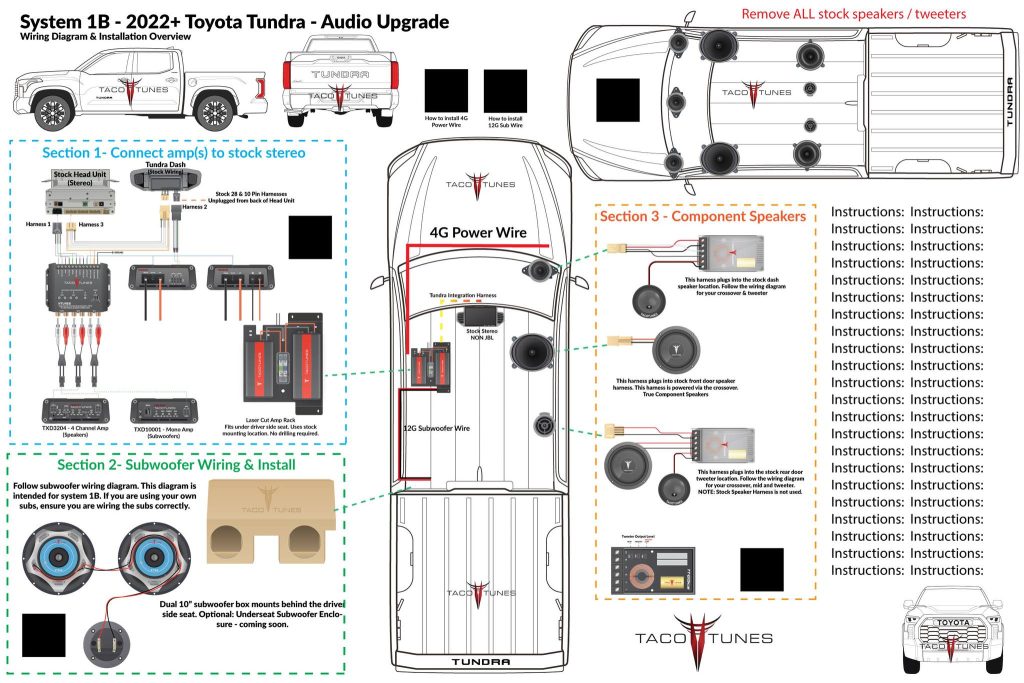
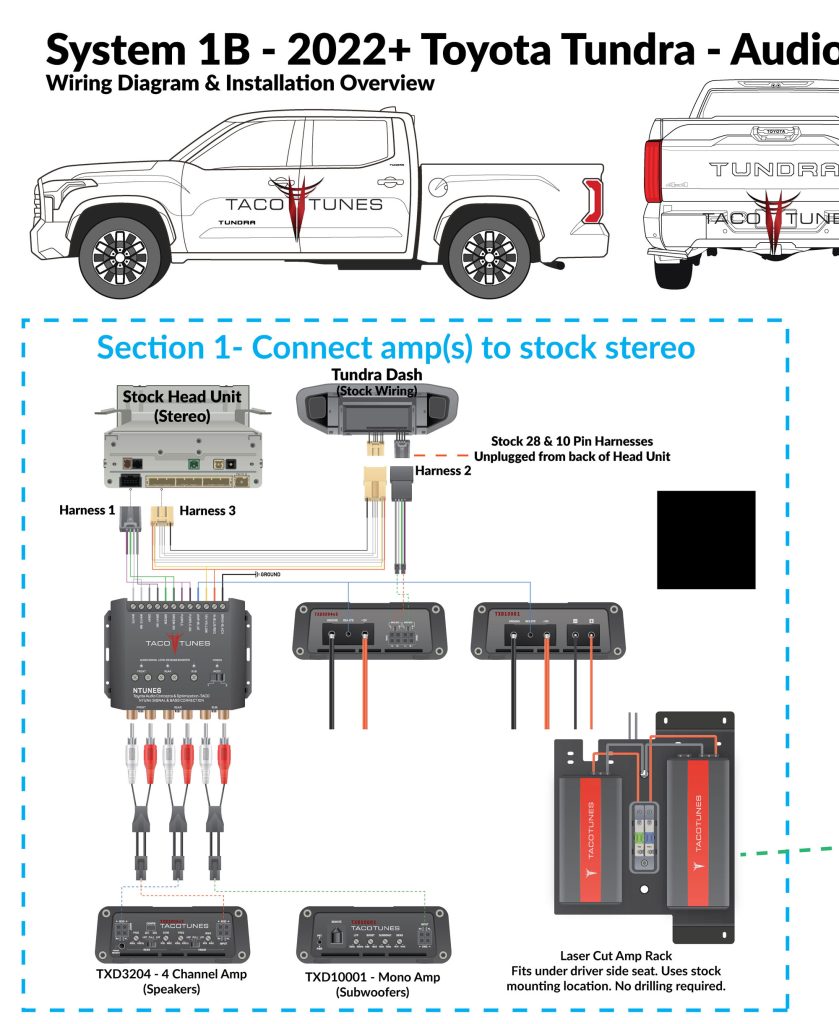
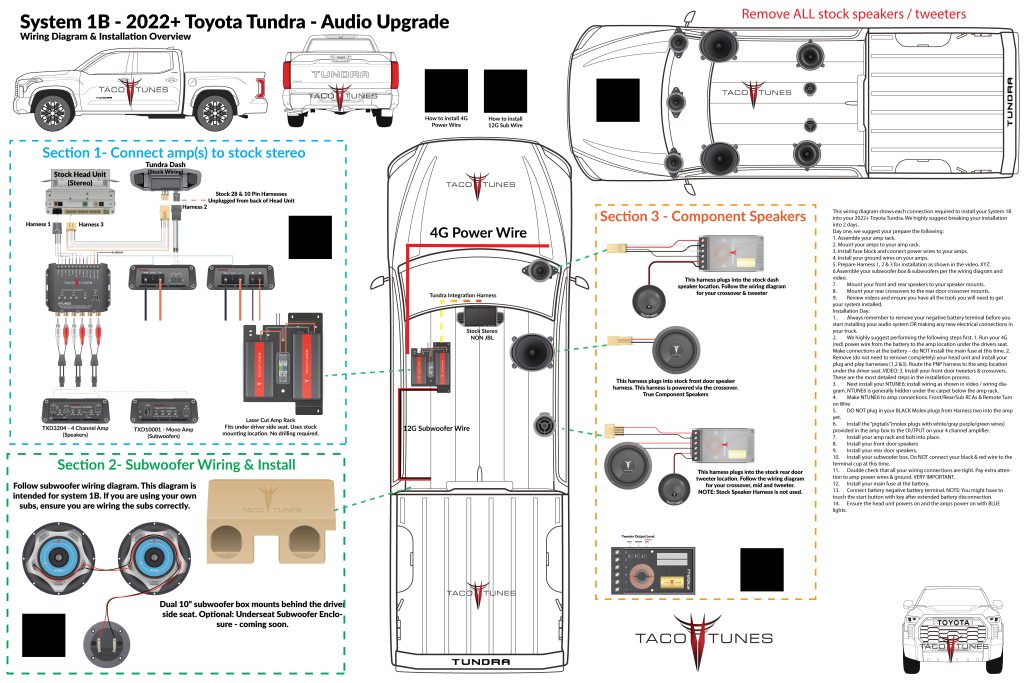
2022 Toyota Tundra Audio Upgrade & Wiring Diagram
How to connect amp to your stock stereo
How to install subwoofer 2022 Tundra.
Component Speakers – no cutting or splicing uses all factory wiring.
Below you will find a detailed listing of all the parts we used in the installation.
Typical Installation time is 1 day, however if we matt (sound deaden) the front, rear doors and the rear wall behind the subwoofer it adds a day. If we are matting the truck, we keep the truck for two days. One day audio installation and matting jobs are possible, but require at least 12 hours with the truck.
Below is a detailed listing of the audio products installed in Eddie’s Tundra CrewMax
2022 Tundra Factory Integration System:
3 Harness Plug and Play system – no cutting or splicing any of your wires in your new Tundra.
NTUNE6 – LOC / Audio leveler & Bass Enhancement module
Front Door Component Speakers:
Tacotunes.com TT65CS Component Speakers
Tacotunes.com heavy duty speaker mounts cut to 5.6”
TT65 Mid bass Drivers -100 Watts RMS
TT65 Crossover
TT65 Tweeter
Tacotunes.com Front Door Speaker Wire Harness Adapters
Tacotunes.com Dash Speaker Wire Harness Adapters
Tweeters Installed in dash location using tweeter adapters.
Rear Door Components:
Tacotunes.com TT65CS Component Speakers
Tacotunes.com heavy duty speaker mounts cut to 5.6”
TT65 Mid bass drivers Handles -100 watts RMS
TT65 Crossover
TT65 Tweeter
Tacotunes.com Tweeter Harness Adatpers
Tweeters will fit in stock door location
Amps:
tacotunes.com TXD3204v3 – 4 Channel Amp (100×4)
tacotunes.com TXD10001 – Subwoofer Amp
100 x 4 (Speakers)
800 x 1 (Subwoofer)
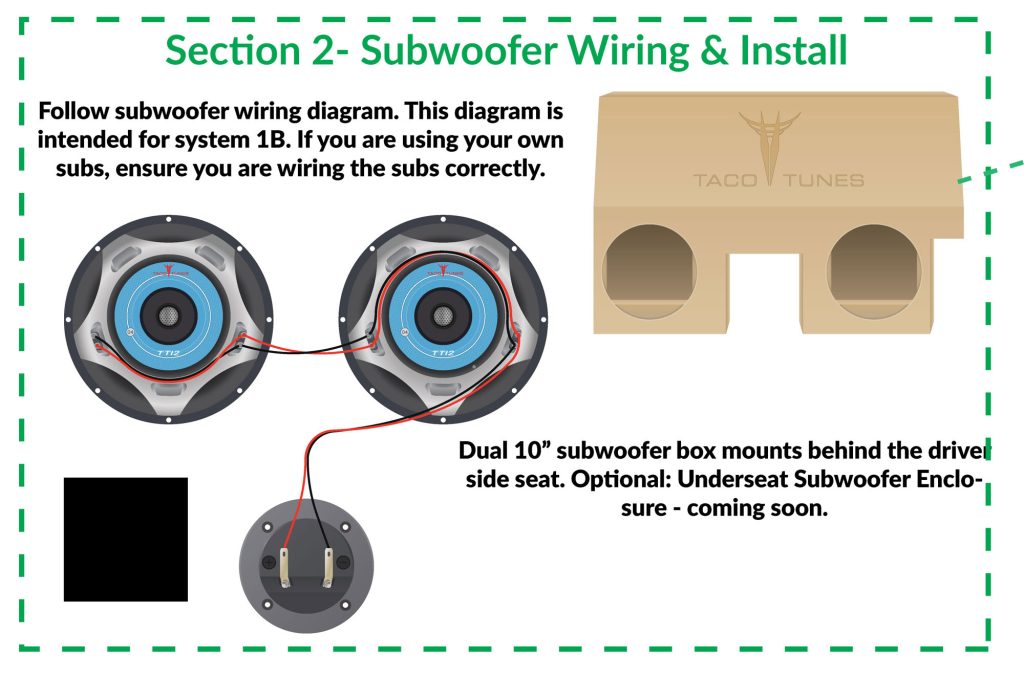
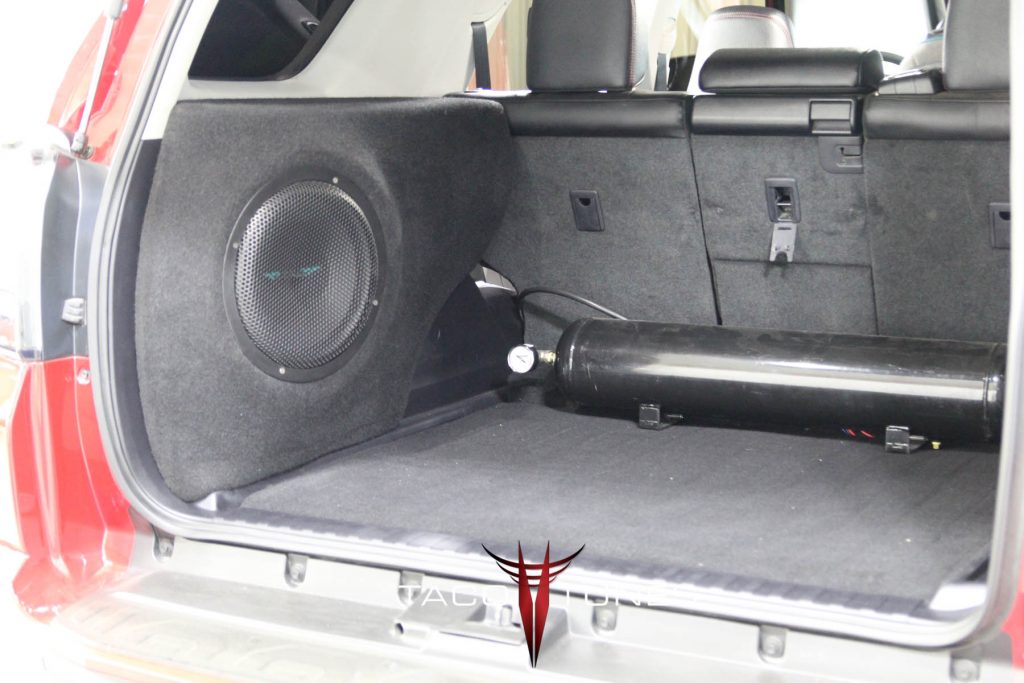
Subwoofer(s):
Subwoofer Box & Subwoofers
Tacotunes.com Dual 10” subwoofers
NOTE: Keep eye out for our under seat fiberglass subwoofer boxes! These are designed for serious bass lovers! Tons of air space and mounting depth!
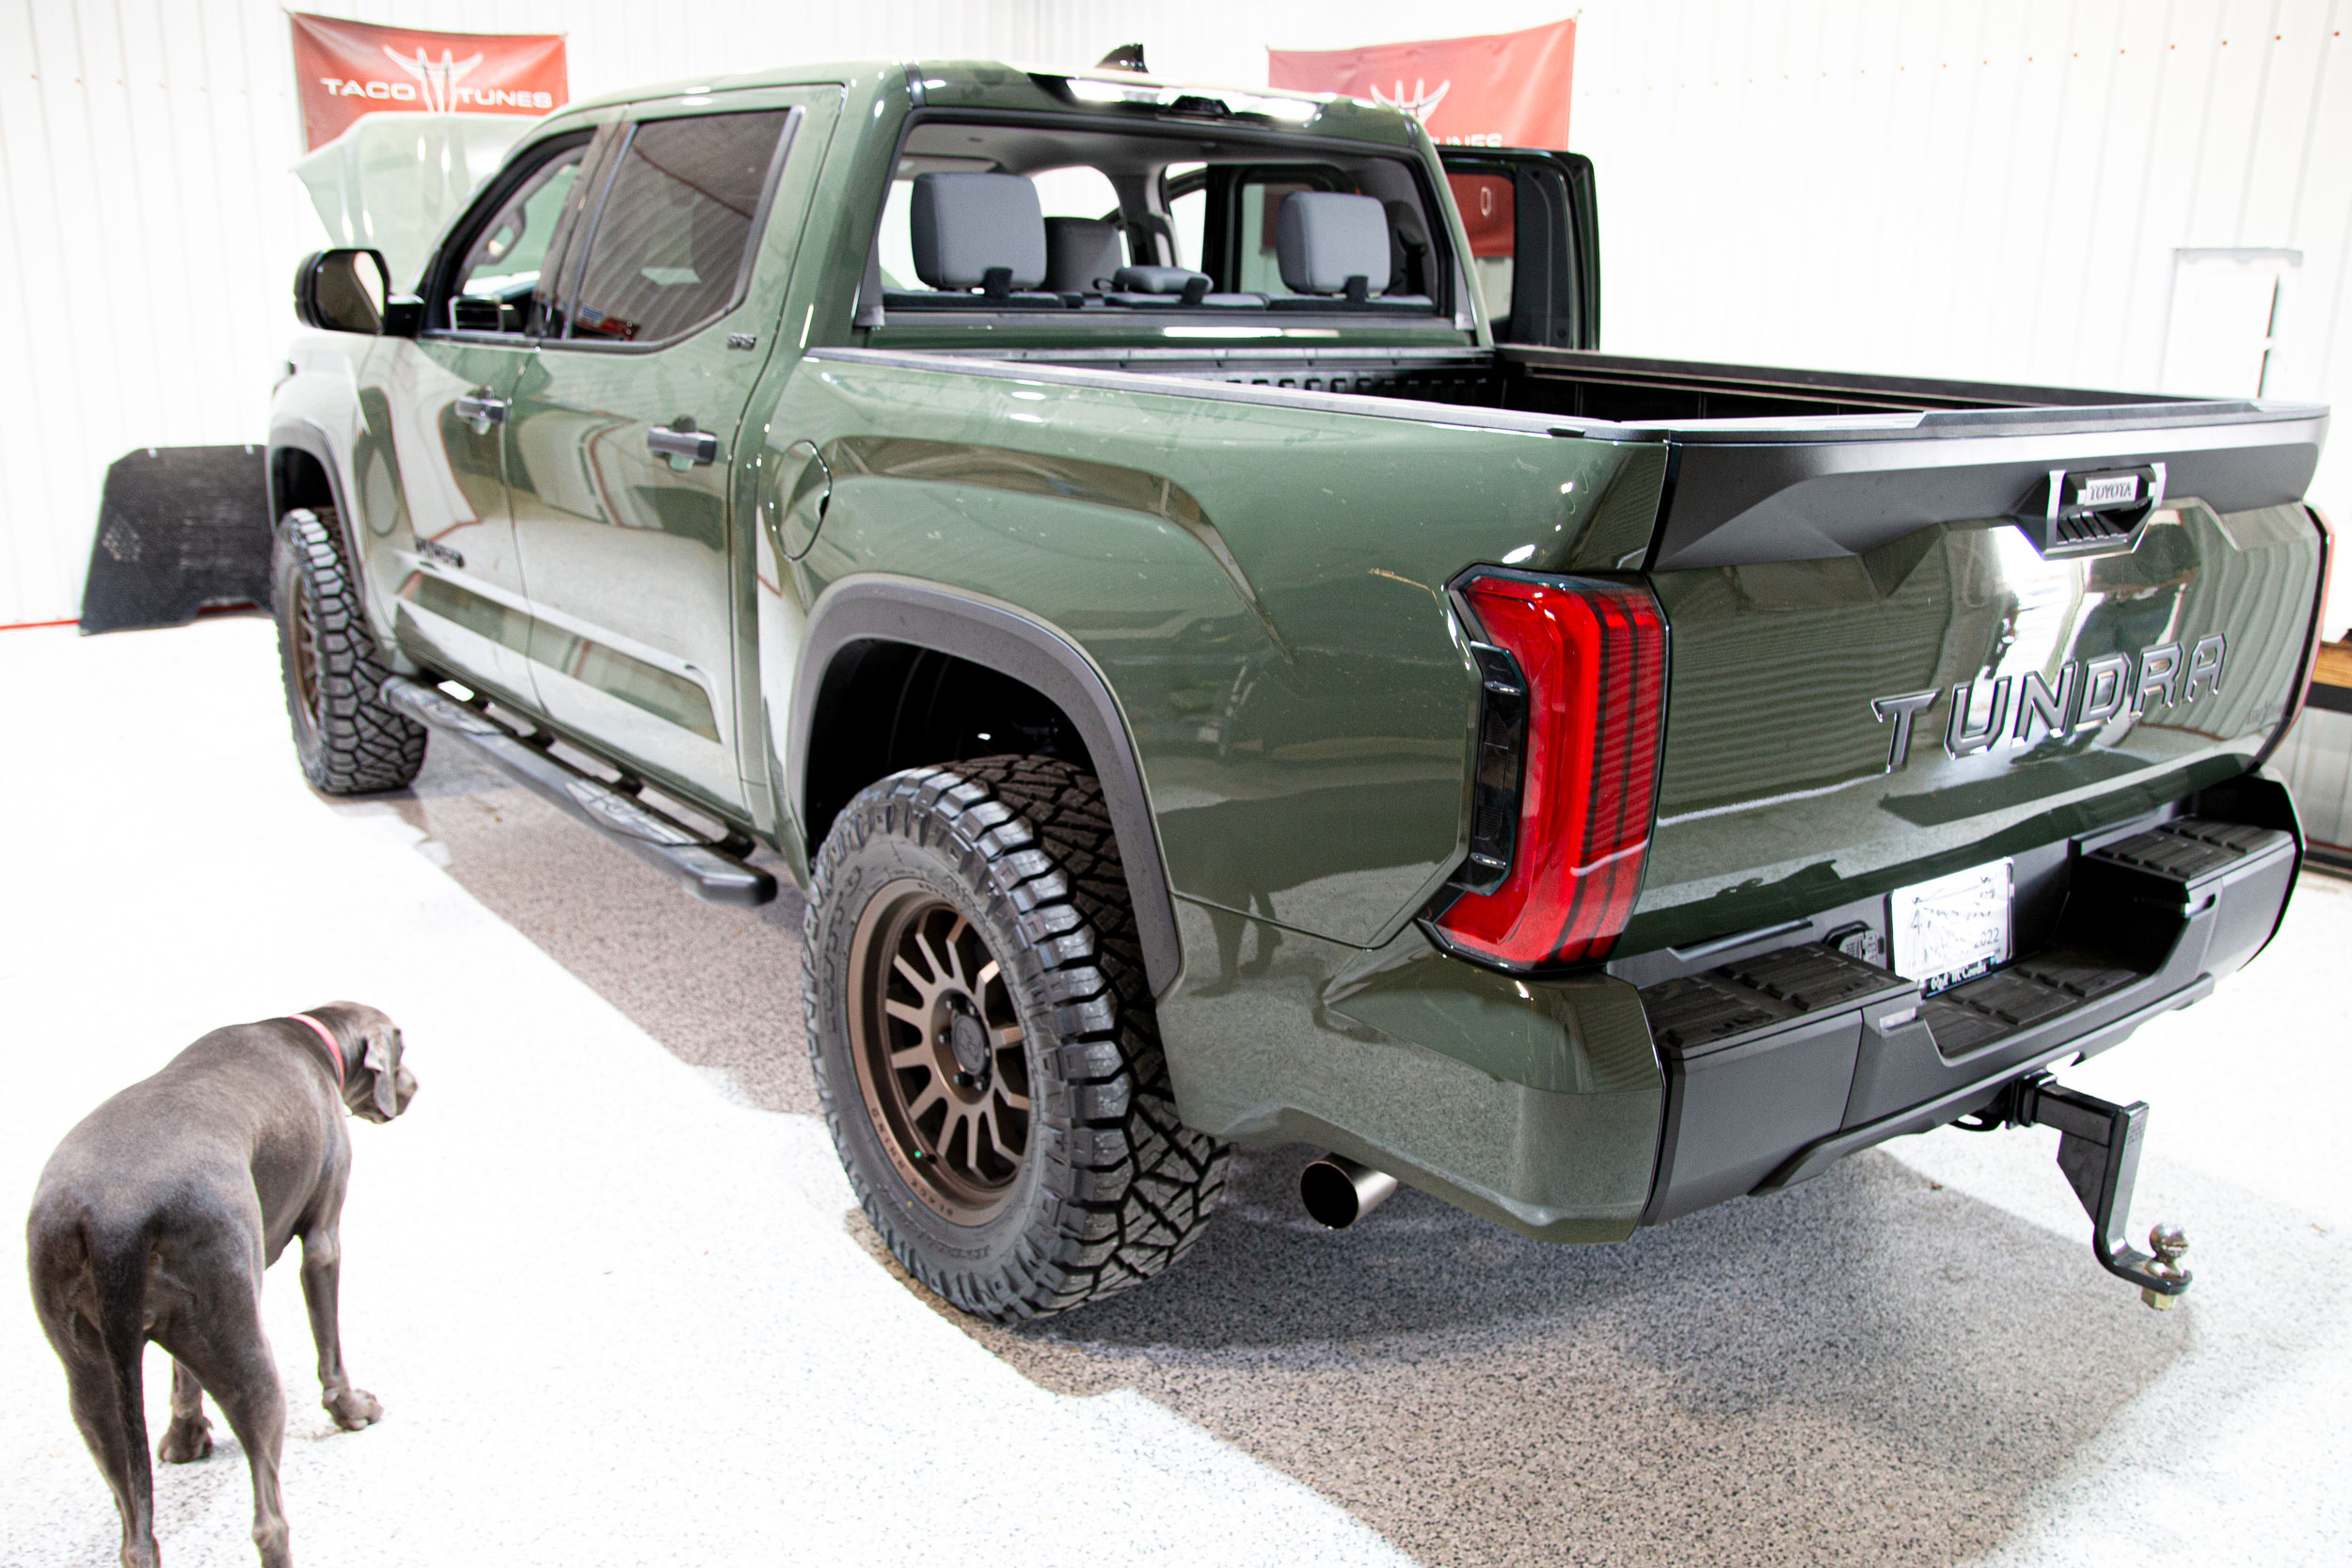
Justice is local here in San Antonio. He had our system 1A installed in his Gen 3 Tundra. He contacted us and asked if we could get him in to replace his stock audio – but keep his stock head unit (radio) – just like we did in his GEN2 Tundra. Of course! Below are a few pictures of his 2022 Army Green Toyota Tundra CrewMax.
Justices’ 2022 Toyota Tundra – in for audio system upgrade.
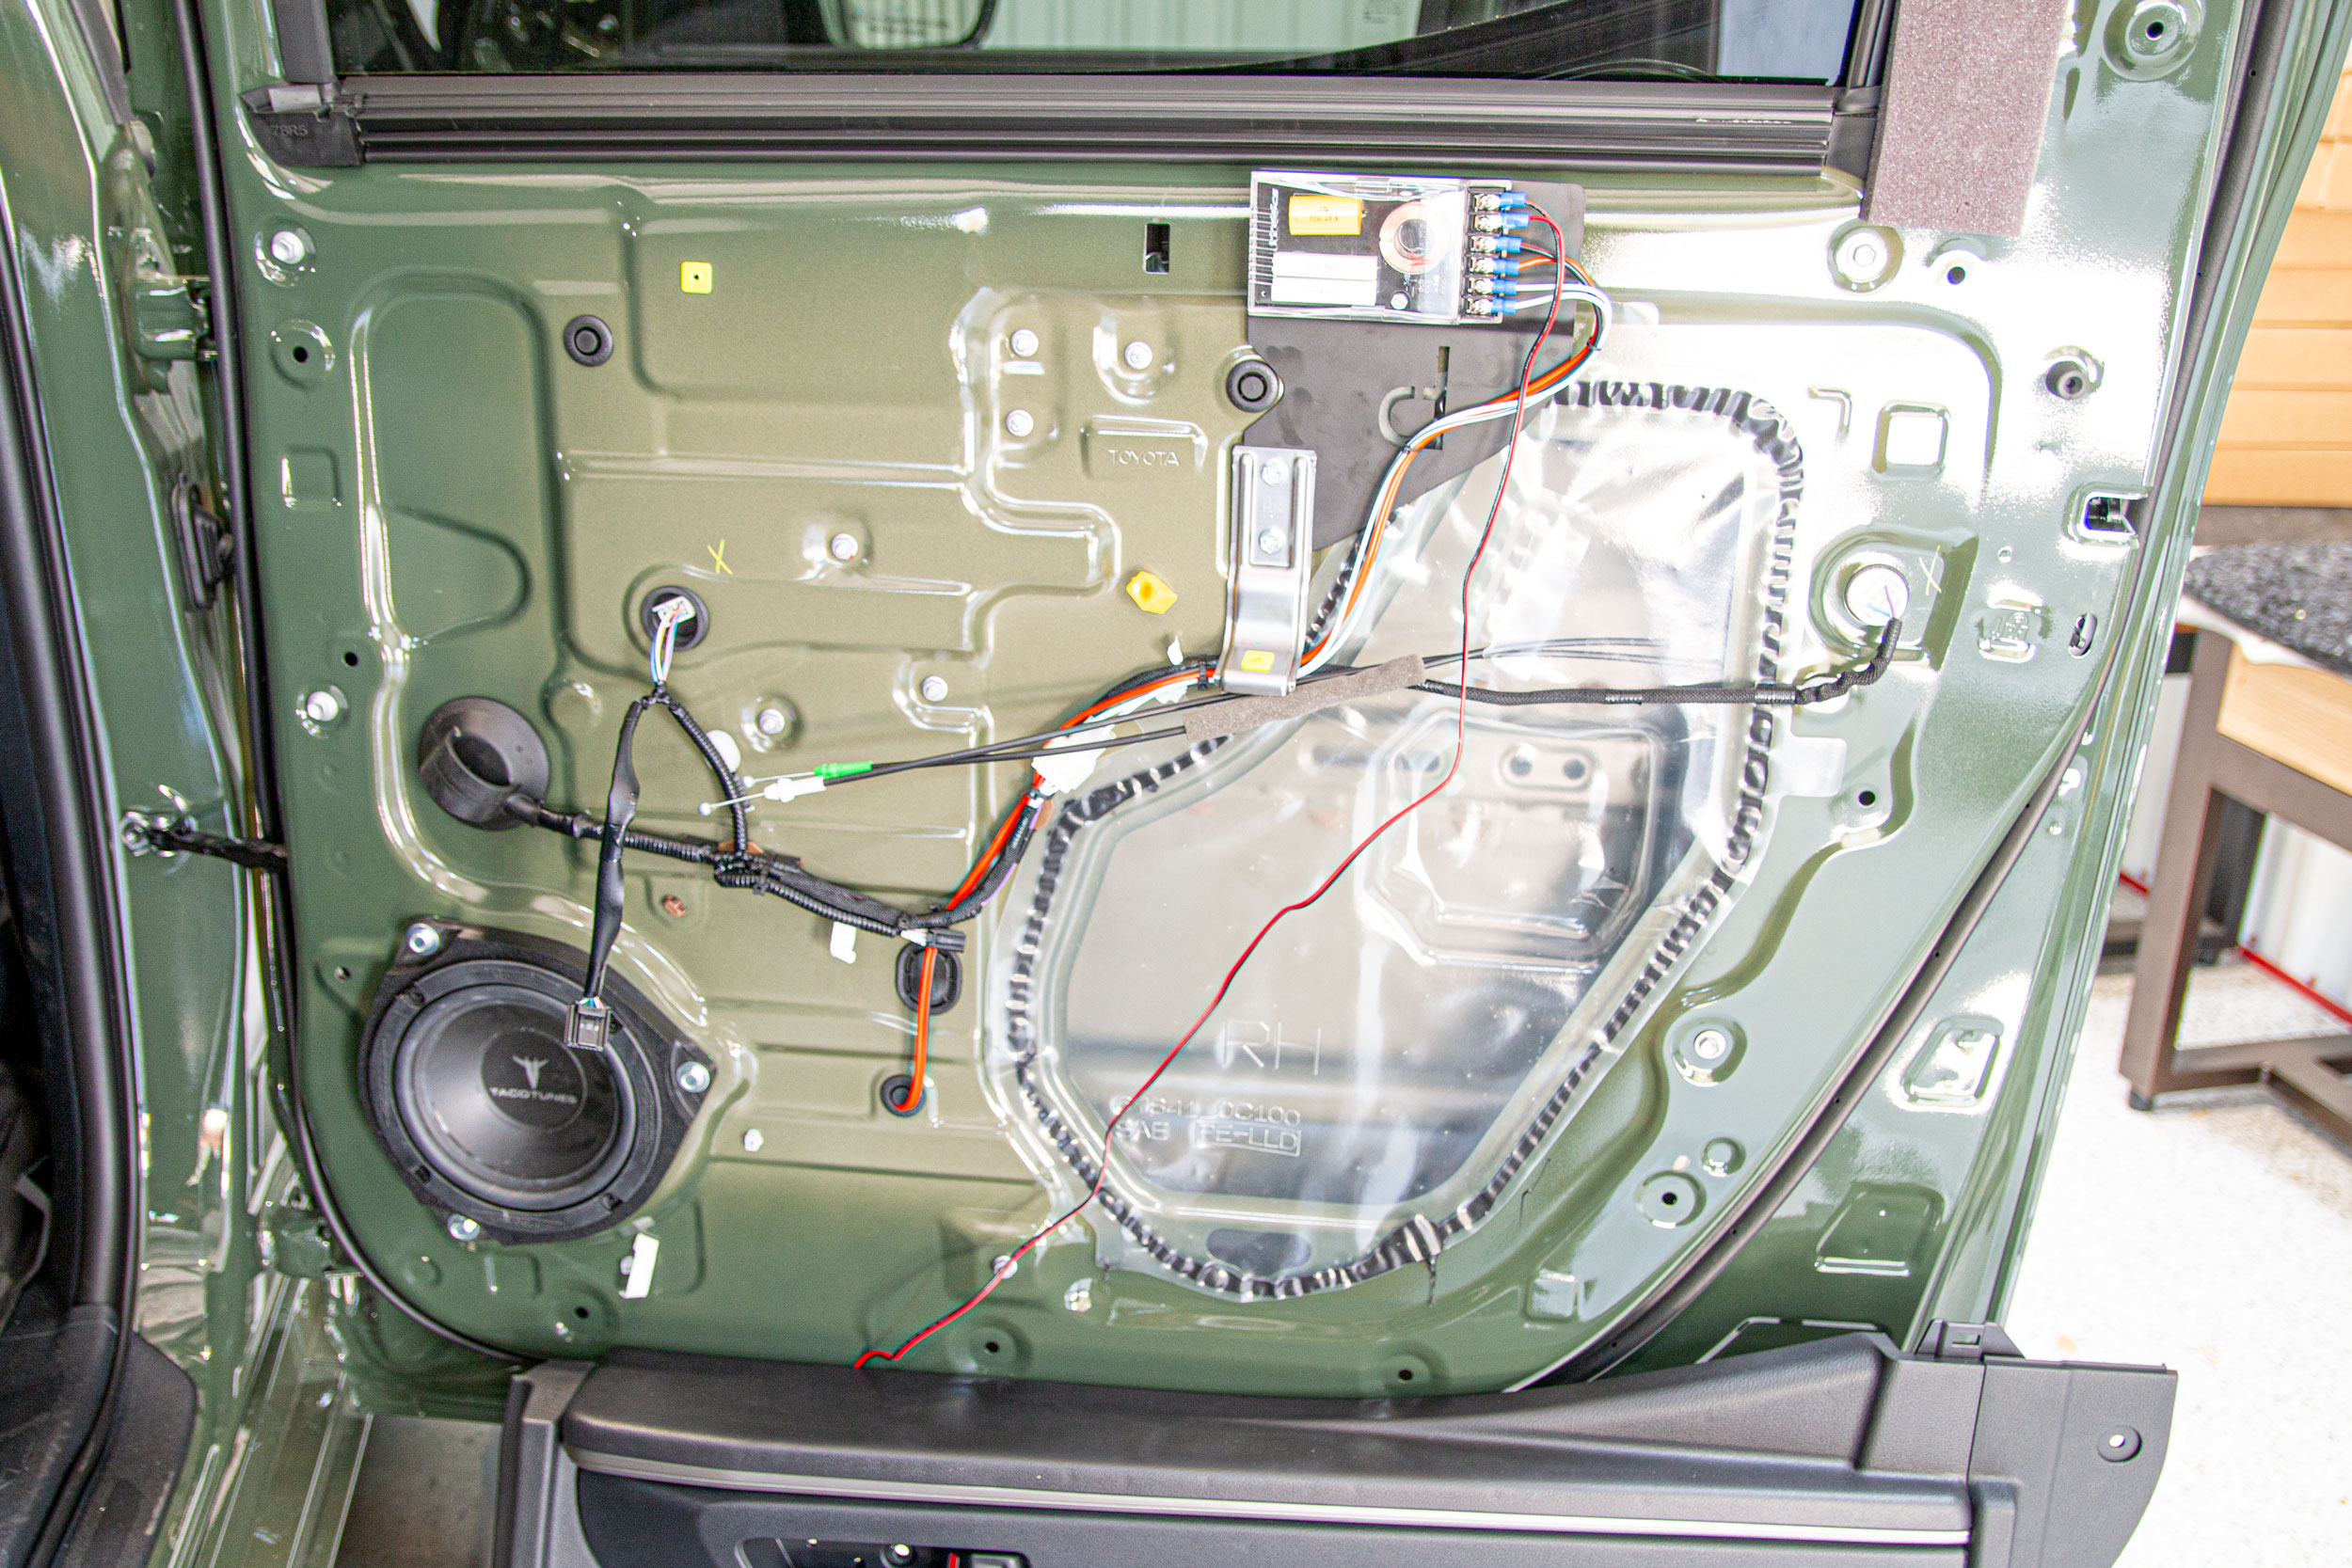
2022 Toyota Tundra Dual Subwoofer box holds 2 inch subwoofers.
2022+ Toyota Tundra Subwoofer Box Installation being installed.
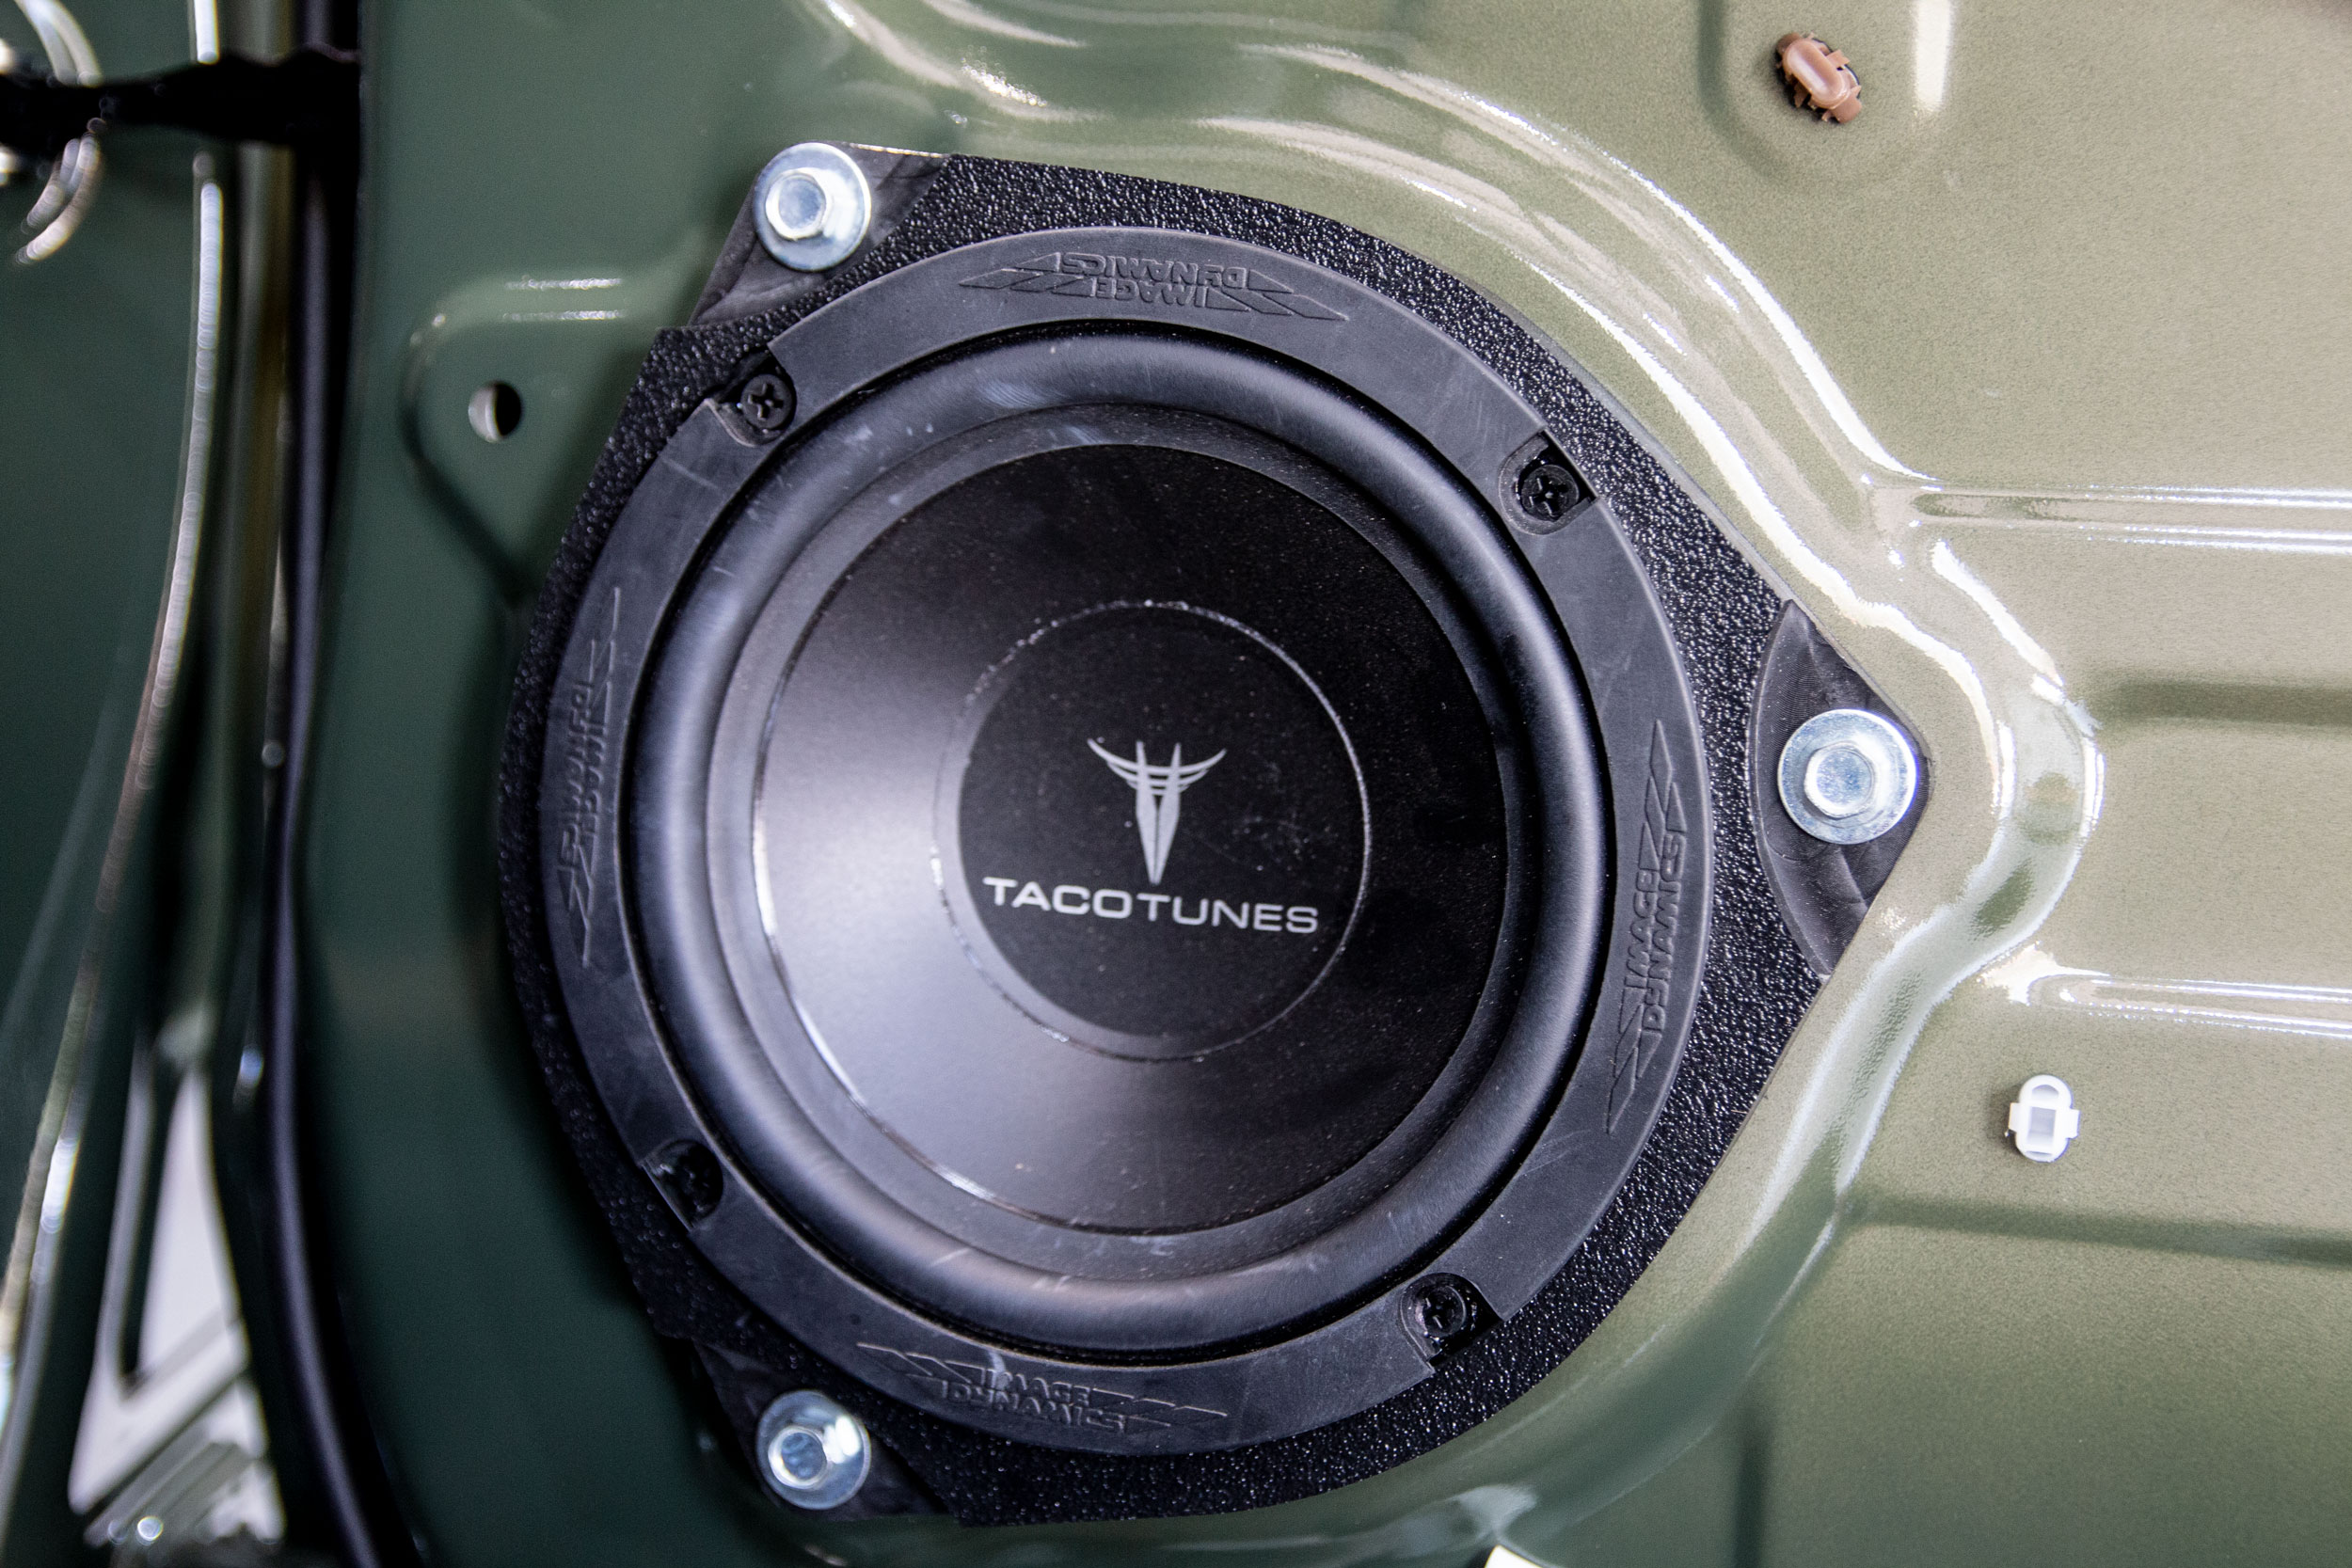
2022 Toyota Tundra Rear Door Component Speakers
2022 Toyota Tundra Rear Door Component Speakers passive crossover and crossover mount
2022 Toyota Tundra Rear Door Component Speakers mid bass driver
2022 Toyota Tundra Laser Cut Amp Rack bolts directly to stock mounting location. Don’t let audio shops drill holes in your Tundra!
2022 Toyota Tundra Amp Rack with seat pushed all the way forward.
2022 Toyota Tundra Amp Rack with seat at about 5 foot 8 driver. Kick plate protects amps and wiring from passengers.
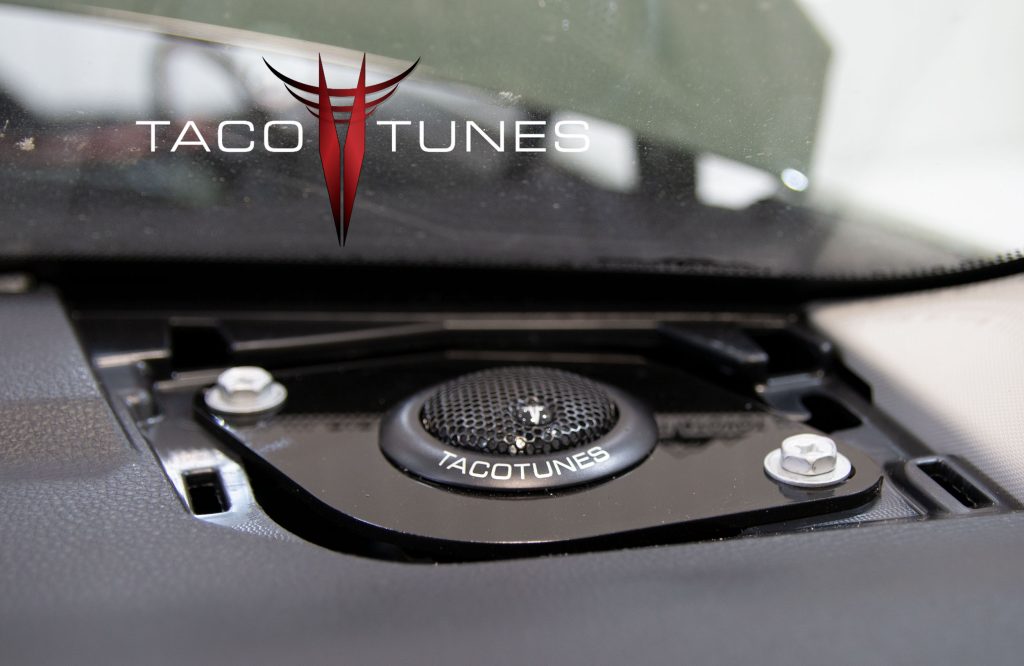
2022+ Toyota Tundra Front Door Component Speakers Dash Tweeters Plug and Play
2022 Toyota Tundra Stereo System Upgrade – Speakers, Subwoofers, Tweeters & Amplifiers
Dual 10″ Subwoofer Box – Ported
tacotunes.com TT65CS Component Speakers
Tundra Direct Integration – no cutting or splicing your factory wires. Amps bolt to stock mounting location.
2022 Toyota Tundra Audio Upgrade & Wiring Diagram
How to connect amp to your stock stereo
How to install subwoofer 2022 Tundra.
Component Speakers – no cutting or splicing uses all factory wiring.
Below you will find a detailed listing of all the parts we used in the installation.
Typical Installation time is 1 day, however if we matt (sound deaden) the front, rear doors and the rear wall behind the subwoofer it adds a day. If we are matting the truck, we keep the truck for two days. One day audio installation and matting jobs are possible, but require at least 12 hours with the truck.
Below is a detailed listing of the audio products installed in Eddie’s Tundra CrewMax
2022 Tundra Factory Integration System:
3 Harness Plug and Play system – no cutting or splicing any of your wires in your new Tundra.
NTUNE6 – LOC / Audio leveler & Bass Enhancement module
Front Door Component Speakers:
Tacotunes.com TT65CS Component Speakers
Tacotunes.com heavy duty speaker mounts cut to 5.6”
TT65 Mid bass Drivers -100 Watts RMS
TT65 Crossover
TT65 Tweeter
Tacotunes.com Front Door Speaker Wire Harness Adapters
Tacotunes.com Dash Speaker Wire Harness Adapters
Tweeters Installed in dash location using tweeter adapters.
Rear Door Components:
Tacotunes.com TT65CS Component Speakers
Tacotunes.com heavy duty speaker mounts cut to 5.6”
TT65 Mid bass drivers Handles -100 watts RMS
TT65 Crossover
TT65 Tweeter
Tacotunes.com Tweeter Harness Adatpers
Tweeters will fit in stock door location
Amps:
tacotunes.com TXD3204v3 – 4 Channel Amp (100×4)
tacotunes.com TXD10001 – Subwoofer Amp
100 x 4 (Speakers)
800 x 1 (Subwoofer)
Subwoofer(s):
Subwoofer Box & Subwoofers
Tacotunes.com Dual 10” subwoofers
NOTE: Keep eye out for our under seat fiberglass subwoofer boxes! These are designed for serious bass lovers! Tons of air space and mounting depth!
Clifford drove up a few hours to have us install our System 1B into his 2022+ Toyota Tundra. Clifford is the first “private” 2022+ Tundra owner we have installed. We install many audio systems for Red McCombs Toyota here in San Antonio, plus a number of other dealers use our products as well . We install many audio systems in brand new Tundras before they hit the dealer lot.
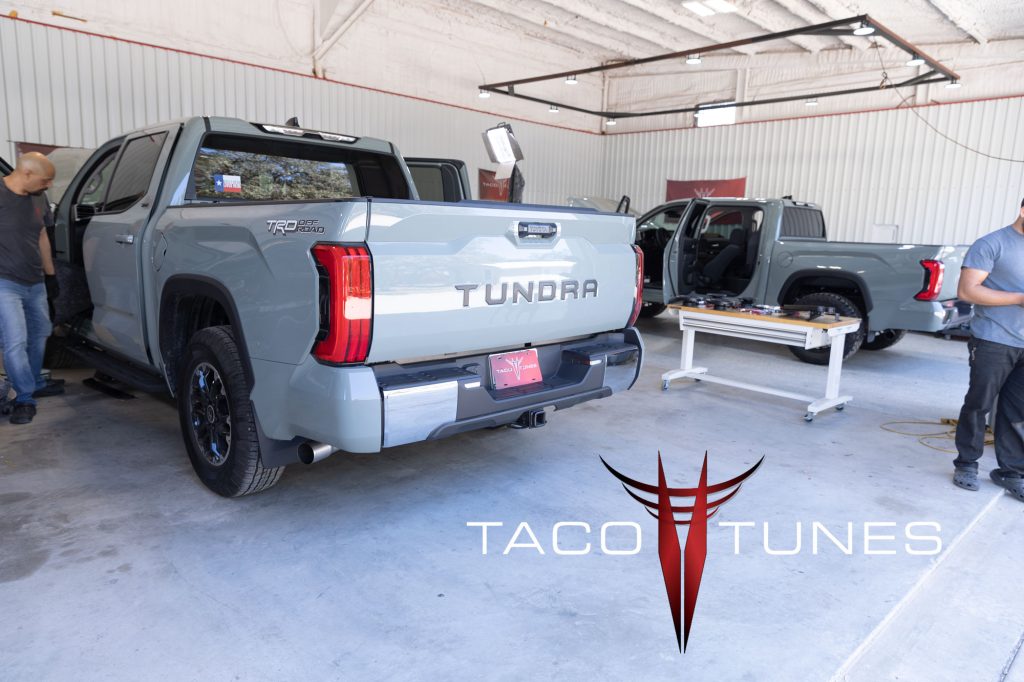
2 – 2022 Toyota Tundra CrewMax – Lunar Rock Audio System Upgrades
Laser Cut Amp Rac & Tacotunes Amplifiers – bolts to stock mounting location. No drilling!
Dual 10″ Subwoofer Box – Ported
tacotunes.com TT65CS Component Speakers
tacotunes.com tt6CS Component Speakers
Tundra Direct Integration – no cutting or splicing your factory wires. Amps bolt to stock mounting location.
2022 Toyota Tundra Audio Upgrade & Wiring Diagram
How to connect amp to your stock stereo
How to install subwoofer 2022 Tundra.
Component Speakers – no cutting or splicing uses all factory wiring.
Below you will find a detailed listing of all the parts we used in the installation.
Typical Installation time is 1 day, however if we matt (sound deaden) the front, rear doors and the rear wall behind the subwoofer it adds a day. If we are matting the truck, we keep the truck for two days. One day audio installation and matting jobs are possible, but require at least 12 hours with the truck.
Below is a detailed listing of the audio products installed in Eddie’s Tundra CrewMax
2022 Tundra Factory Integration System:
3 Harness Plug and Play system – no cutting or splicing any of your wires in your new Tundra.
NTUNE6 – LOC / Audio leveler & Bass Enhancement module
Front Door Component Speakers:
Tacotunes.com TT65CS Component Speakers
Tacotunes.com heavy duty speaker mounts cut to 5.6”
TT65 Mid bass Drivers -100 Watts RMS
TT65 Crossover
TT65 Tweeter
Tacotunes.com Front Door Speaker Wire Harness Adapters
Tacotunes.com Dash Speaker Wire Harness Adapters
Tweeters Installed in dash location using tweeter adapters.
Rear Door Components:
Tacotunes.com TT65CS Component Speakers
Tacotunes.com heavy duty speaker mounts cut to 5.6”
TT65 Mid bass drivers Handles -100 watts RMS
TT65 Crossover
TT65 Tweeter
Tacotunes.com Tweeter Harness Adatpers
Tweeters will fit in stock door location
Amps:
tacotunes.com TXD3204v3 – 4 Channel Amp (100×4)
tacotunes.com TXD10001 – Subwoofer Amp
100 x 4 (Speakers)
800 x 1 (Subwoofer)
Subwoofer(s):
Subwoofer Box & Subwoofers
Tacotunes.com Dual 10” subwoofers
NOTE: Keep eye out for our under seat fiberglass subwoofer boxes! These are designed for serious bass lovers! Tons of air space and mounting depth!
Tacotunes.com TXD 3204 EZAMP – how to properly setup and tune your amplifier.
Now that you have completed the initial installation process, you will want to tune the amp for your vehicle. Each vehicle can vary just a bit and this guide will walk you through tuning your amp.
At this point you have completed the following:
1. All power (positive / ground) connections have been tripled check to ensure they are all tight.
2. The Plug and play wire harness has been connected to your head unit and the leads have been routed to your amp mounting location.
3. The Plug and Play wires are connected to the RCA line adapters.
4. The RCA line adapters are plugged into the amplifier RCA connections.
5. The INPUT wires (RCAs) should be plugged into the amplifier. Double check you are connecting to the INPUT side.
6. Turn key on and ensure the amplifier lights up blue. Turn the ignition off.
7. The Front and Rear OUTPUT wires (go to speakers) should NOT be connected to the speakers at this time.
8. On the amp itself, set the HPF (High Pass Filter), Front SENS (Input Gain / Sensitivity), Subsonic, Boost, LPF and Rear SENS (Input Gain / Sensitivity). Set the LPF / FULL switch to FULL.
9. Ensure your head unit is set to flat signal. You need to check this for all audio sources. Ensure the TREBLE, MID and BASS are all set in the middle Ensure the Front / Rear Fader is set to middle.
10. Insert the CD with the test tones you can download from HERE. AT this time, we do not recommend using a phone to set up the amplifiers.
11. Play the 1khz test tone.
12. Set the volume on your head unit to 50. NOTE: This is assuming 60 is your max volume.
13. AT this point you should hear nothing coming from your speakers. NOTE: You might hear a high pitched sound coming from the amp.
14. Connect your digital multimeter to the front left output of your amplifier. Turn the FRONT SENS knob until your amp reaches 17.5V. Your multi-meters should be set to AC voltage.
15. Change test tone to 80Hz test tone.
16. Enter the AC voltage in the field below. This will calculate the voltage necessary to tune your amplifier. Next turn the HPF clockwise (should have been down at 25Hz to start) until the AC Voltage on your voltmeter matches the field below.
17. Connect your multi-meter to the left rear output and turn the REAR SENS up until you reach 15.5 Volts.
18. Congratulations you have completed tuning your 4 channel amplifier.
NOTE: If you are using our mono (subwoofer) amp. Be sure you do not mix up the connections. The wires appears to be the same, but they are not.
Test Tones – same tones used to set the gain on your amp.
Steps you should have already completed:
Set the head unit to maximum unclipped volume. (Speaker Wires Should NOT be hooked up!)
All internal EQs, adjustments on the head unit should be set flat. Not boosted or lowered.
Set the gain(s) on your amp before you setup the crossovers.
Decide on your crossover point and acquire the test tones you will need. The most common crossover point is 80Hz. – Click here for link to test tones and requirements.
Turn both High Pass Filter (HPF) knobs all the way to 15Hz (as far left as possible)
Turn Low Pass Filter (LPF) knob all the way to 300Hz (as far right as possible)
Setting High Pass Filters (Speakers):
Remove all speaker wiring from the amplifier. (label your speaker wiring)
Set the multi-meter to ACV (Alternating Current Voltage)
Insert the multi-meter leads into channel 1 and screw down gently (See picture below for channel layout and explanation)
Enter the voltage displaying on your multi-meter into field “Voltage 1”
Turn the Front HPF knob to the right until it matches as closely as possible to “Crossover Voltage”.
Repeat the same steps for channel 3 – turn the Rear HPF knob to the right until it matches as closely as possible to “Crossover Voltage”.
Setting Low Pass Filter (Subwoofer)
Connect the multi meter leads to the subwoofer amp output.
Turn on vehicle and play test tone at roughly half of the maximum volume (does not need to be exact)
Enter the voltage displaying on your multi-meter into field “Voltage 1”
Turn the LPF knob to the left until it matches as closely as possible to “Crossover Voltage”.
The crossovers are now set at desired crossover setting. NOTE: It is NOT uncommon for amps to be marked incorrectly there are many factors and most manufactures provide the numbers as a guide.
Most of customers prefer to install our coaxial speakers in the rear doors. However we come across customers that want to provide great sound to their rear seat passengers.
Step 1: Remove door panel. Customers have reported that using a 1 17/8″ hole saw works great. We used a 1 13/16″ and used a razor to enlarge hole a little to ensure a very tight fit.
NOTE: We selected the “flattest” spot on the upper door panel. And double check on the rear of the door panel, that you will not encounter any potential issues.
Toyota Tacoma Double Cab Rear Door Component Speakers
Step 2: Using a Razor clean up the edges.
Toyota Tacoma Double Cab Rear Door Component Speakers
Step 3: Install the midbass driver and crossover mounts as shown. Using our Plug and Play wiring harness system. Connect to your crossover as shown here.
Toyota Tacoma Double Cab Rear Door Component Speakers
Step 4:Install the tweeter in the door panel / place door panel back on the door.
Toyota Tacoma Double Cab Rear Door Component Speakers
Tuning your amp(s) is crucial to proper output and a long healthy life from your amplifier. By following the tuning steps below, your amp will produce maximum CLEAN power, provide the proper frequencies to your speakers / subwoofer(s) and provide many years of great audio!
Before starting the tuning process, you must complete the following steps:
Power Wire (Proper size / Gauge) is connected from battery to TXD10005. ALL Fuses/Connections are installed and tightened per installation instructions.
Ground Wire(s) (Proper Size / Gauge) is connected and tightened correctly.
Plug and Play wiring harness is installed per installation instructions – for your model Toyota.
Ensure that your OUTPUT plugs are NOT connected as shown in the installation diagram.
At this point your TXD10005 is powering on and you are ready to proceed to the tuning process.
Step 1: Obtain the tuning (test) tones for your TXD10005
IMPORTANT: NEVER PLAY TEST / TUNING TONES ON AMPLIFIED SPEAKERS / SUBS, YOU WILL DAMAGE THEM.
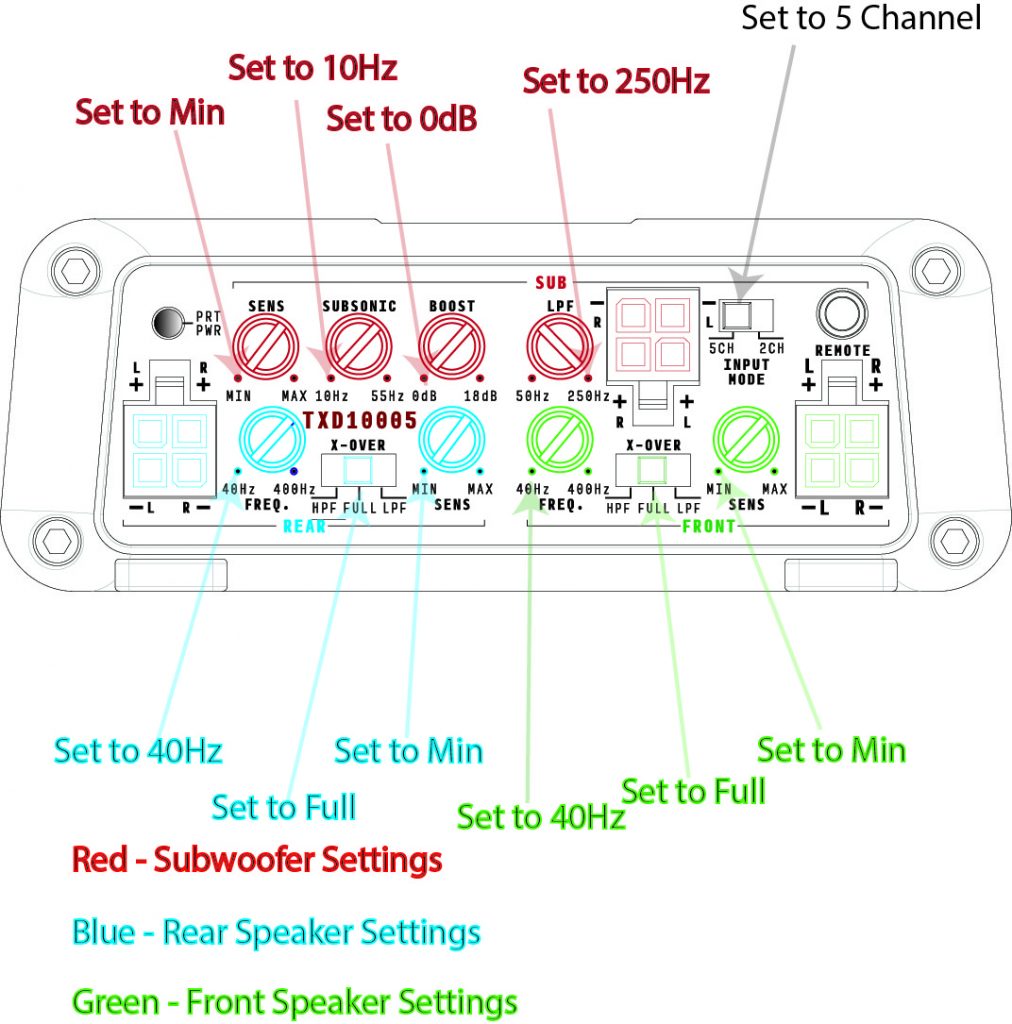
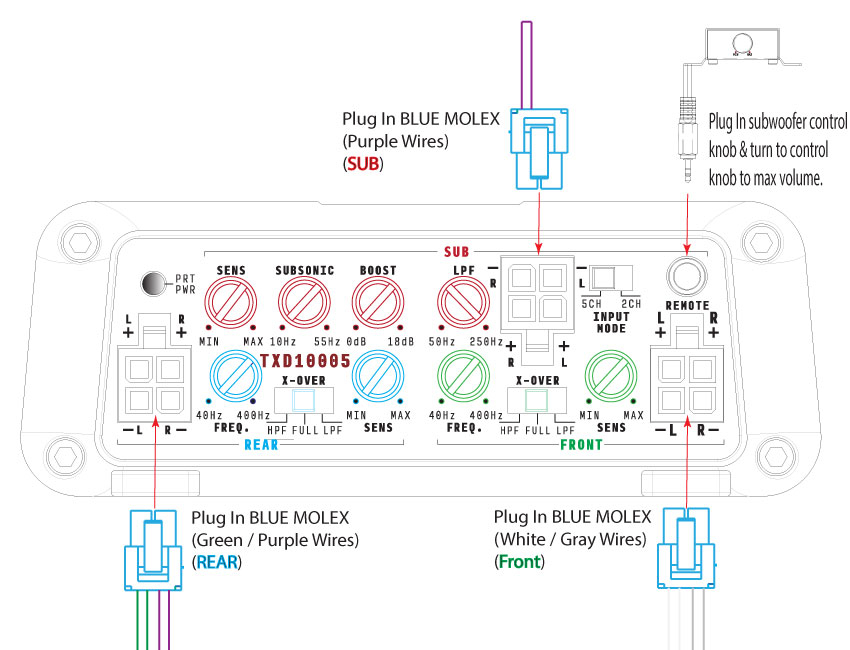
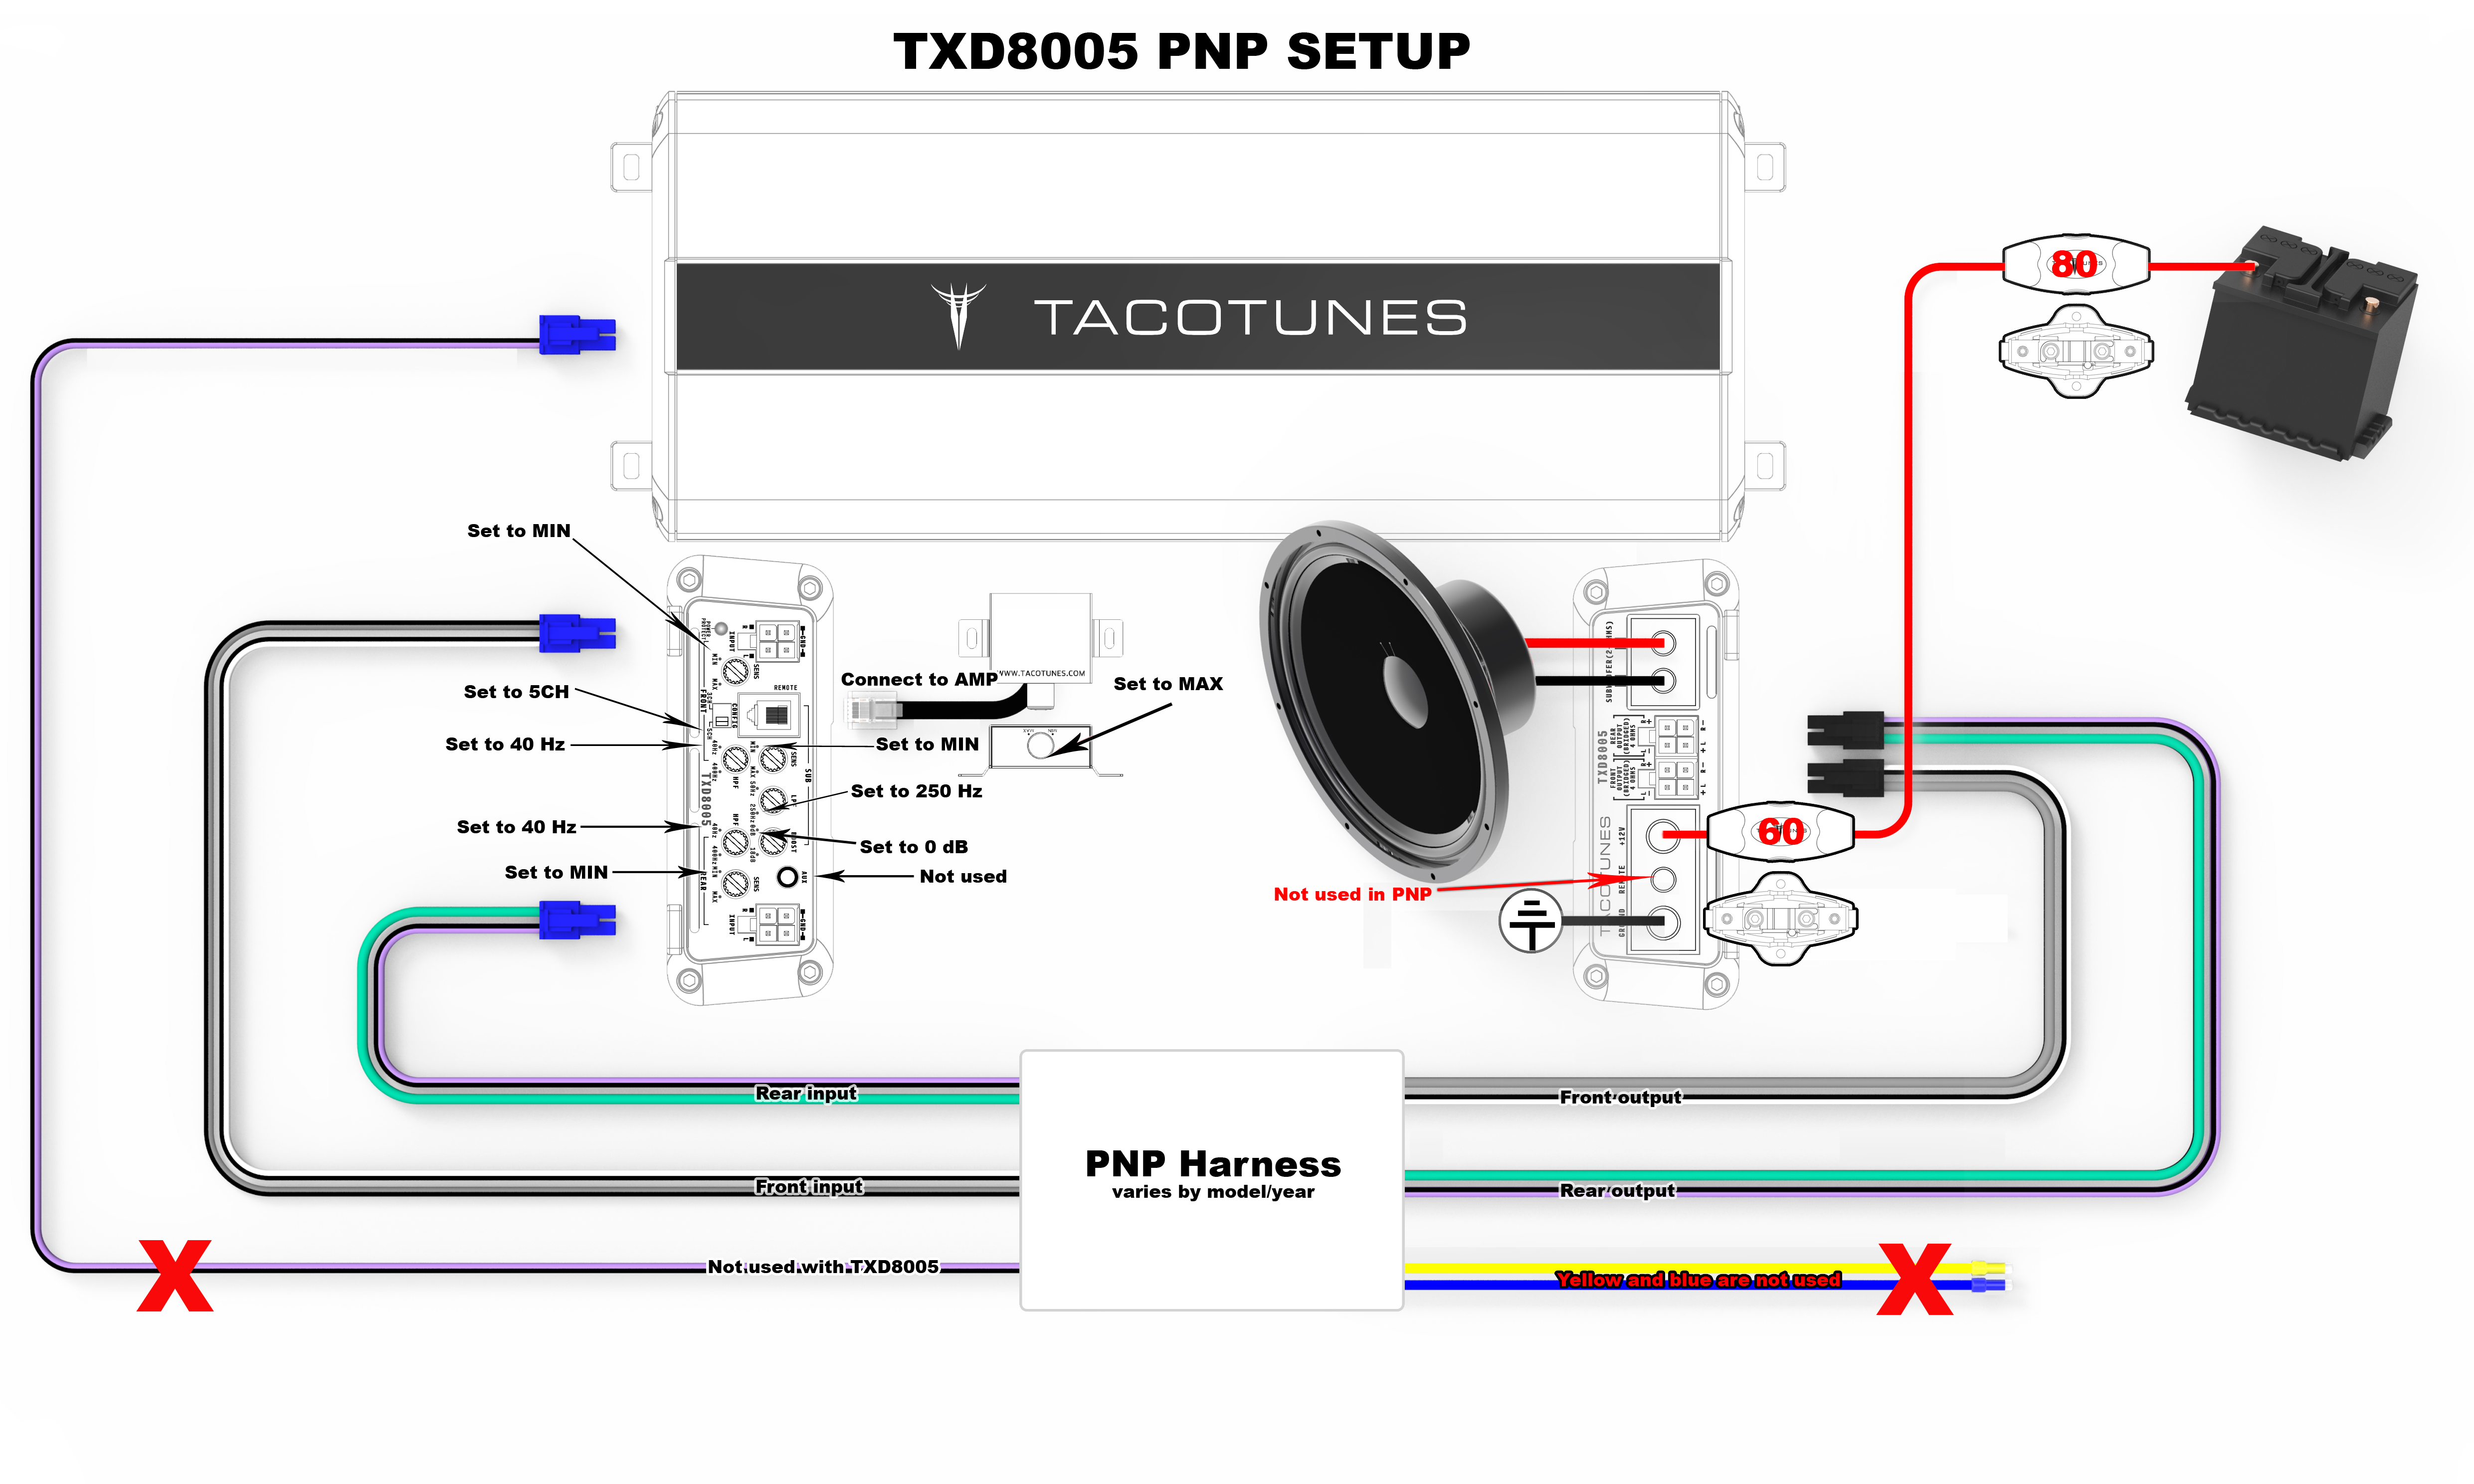
Step 2: Set all the knobs as shown in Pre-Tune Illustration 1
(Pre-Tune Illustration 1)
Adjust Amp Knobs & Switch Configuration
Adjust the knobs and switches as listed below:
Step 3: Insert Blue Molex Plugs Into Front, Rear & Subwoofer Inputs:
NOTE: If using NTUNE6 or Aftermarket Radio Click Here
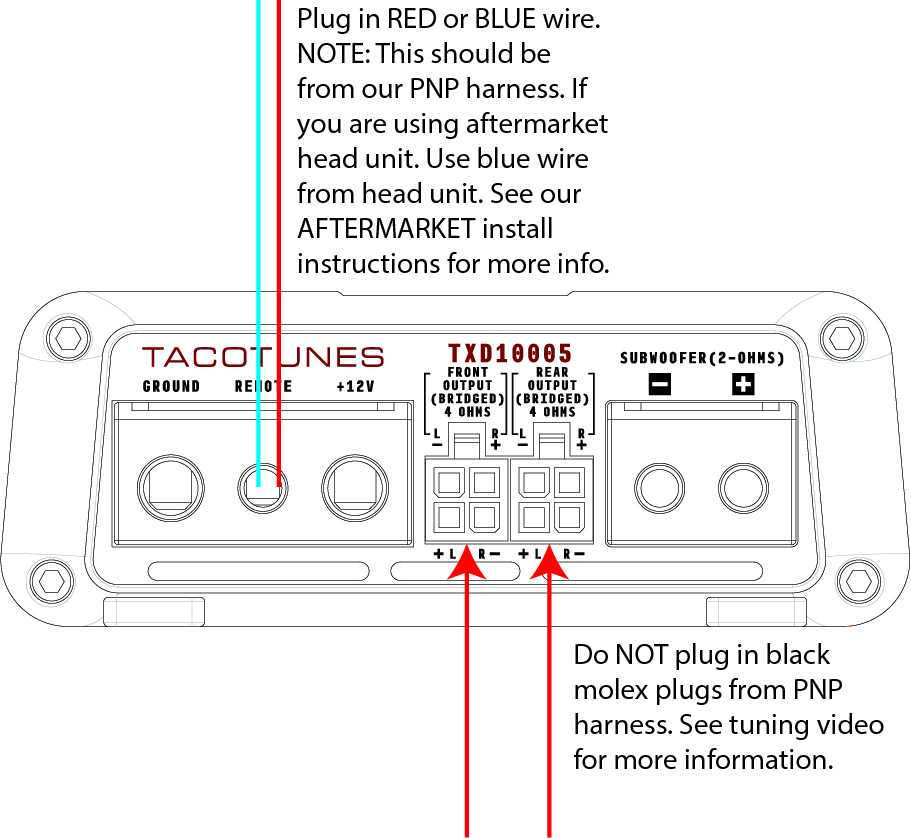
Step 4: Remote turn on wire
Connect the Blue or Red remote turn on wire included in your PNP wiring system. NOTE: If using an aftermarket head unit, use the blue remote wire from your aftermarket head unit. See our Aftermarket installation instructions here:
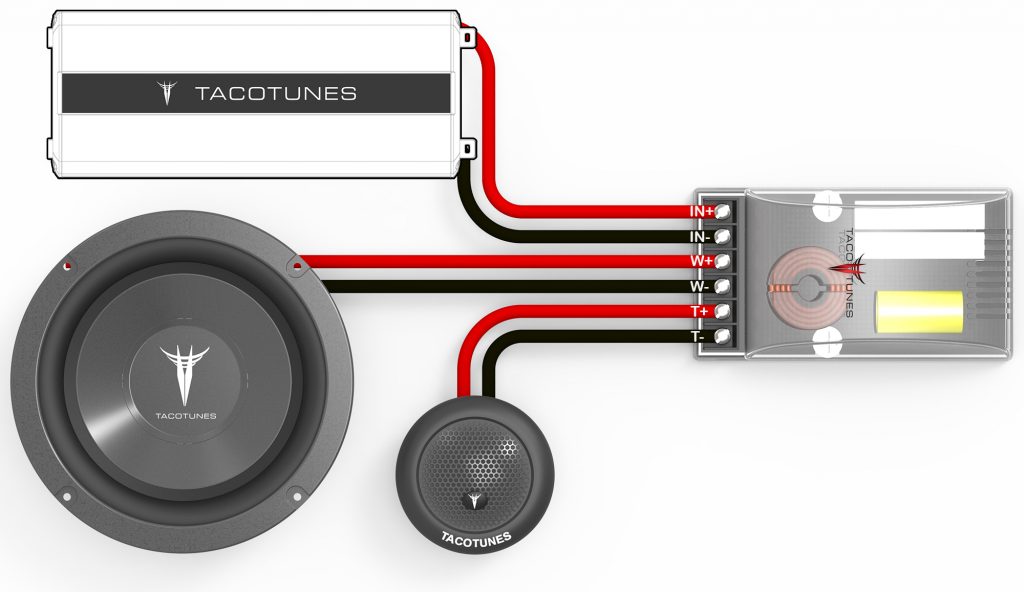
Step 5: Subwoofer wire connection
Connect a short piece of 12G wire to your subwoofer output. Strip the ends and be sure the + and – do not come in contact with each other.
Step 6: Output Wire Connections
DO NOT PLUG IN THE BLACK MOLEX PLUGS FROM YOUR PLUG AND PLAY HARNESS AT THIS TIME! We will plug them in AFTER the tuning process has been completed.
Locate the Black Molex connectors that have the SHORT white / gray & purple/ green wires. They are located in the same bag with the Molex / RCA connectors.
NOTE: If you are using aftermarket head unit, you will want to refer our after market head unit / tuning video.
Step 7: Tuning Video Instructions:
NOTE: The TXD10005 is best suited to work with 4 Ohm Front & Rear Speakers. If you have upgraded your speakers, please be certain you are using a component set for your front speakers to ensure you are providing a 4 Ohm load. Resistance below 4 ohms may cause excessive noise.
High Pass Filter Calculator (Speakers)
Low Pass Filter Calculator (Subwoofer)
Tools you will need to complete the tuning process:
CD with test tones burned in the proper order (download below)
2016 Toyota Tacoma Double Cab TRD Sport 4×4 $45,000.00
Miles: Less than 16,000
Original Color: White (Wrapped) Logos & Wrap Removable
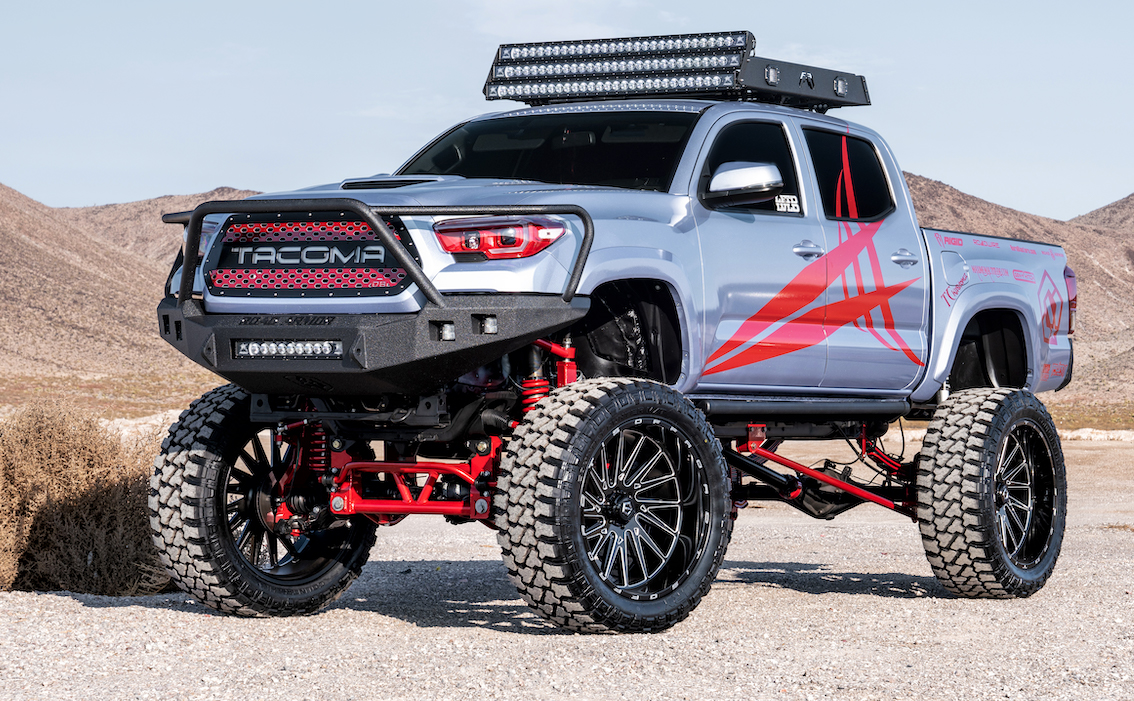
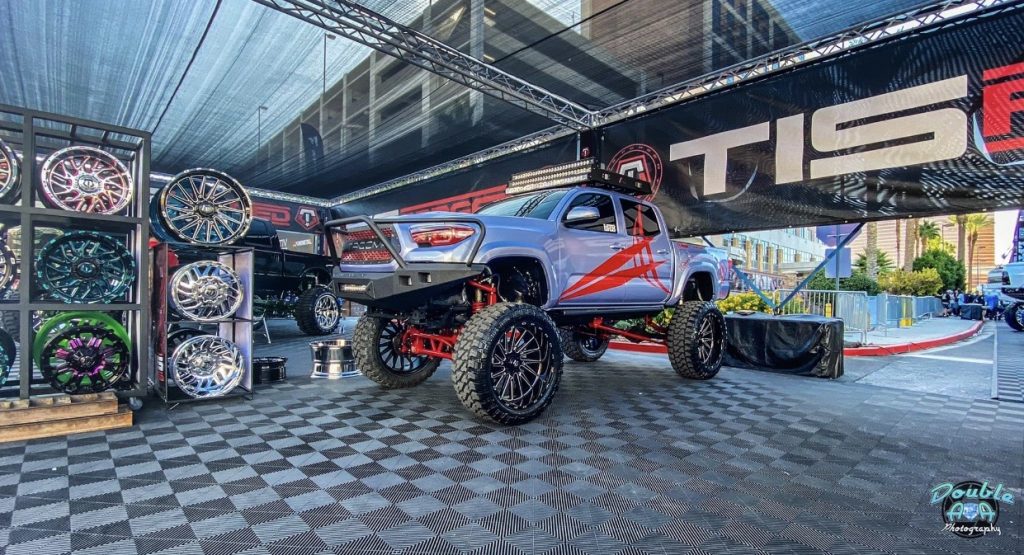
This truck was built by Josh here @ tacotunes.com. The truck was used strictly for sales & marketing. Primarily for the audio products we have developed for Toyota Tacomas, PLUS a number of product partners we have worked with over the last 10 – 15 years . . . it has never been “offroaded” and made an appearance at 2019 SEMA – TIS Wheels Booth.
EXTERIOR MOD LIST:
Fab Fours roof rack 3 Rigid industries 50” radiance LED Bars (white) 2 sets of rigid industries pods.
Avery Dennison Quick Silver wrap (Original truck color is white)
DBCustomz grille Retrofitted
OEMASSIVE headlights (rigid industries pods for brights)
Front and Rear road armor bumpers with rigid industries led lights
Amp Research power steps
3 sets of 544 Nightmare Train horns by hornblasters custom mounted under the bed
Roadwire leather (black and red double diamond stitched)
Sprint booster throttle response module
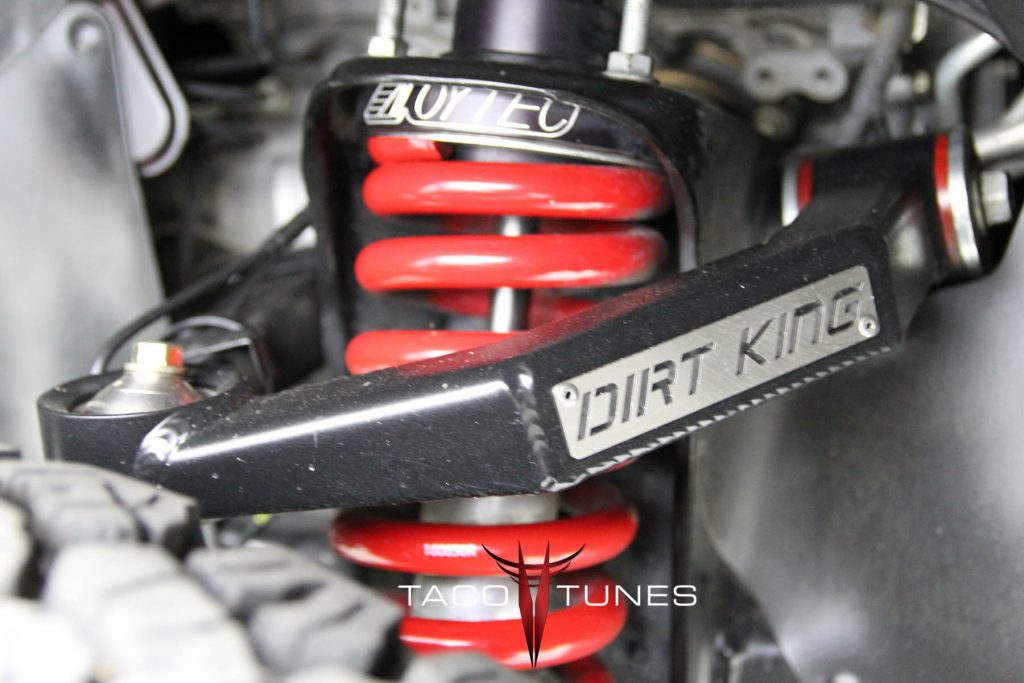
Truck Suspension Build performed @maximum altitidue here in San Antonio TX
We are building a new “marketing” truck so we are NOT interested in trades or parting out. If we don’t get what we are asking, we will part out and sell the mods. We are aware we can get MORE money if we part out and return the truck to stock . . but would rather save the time.
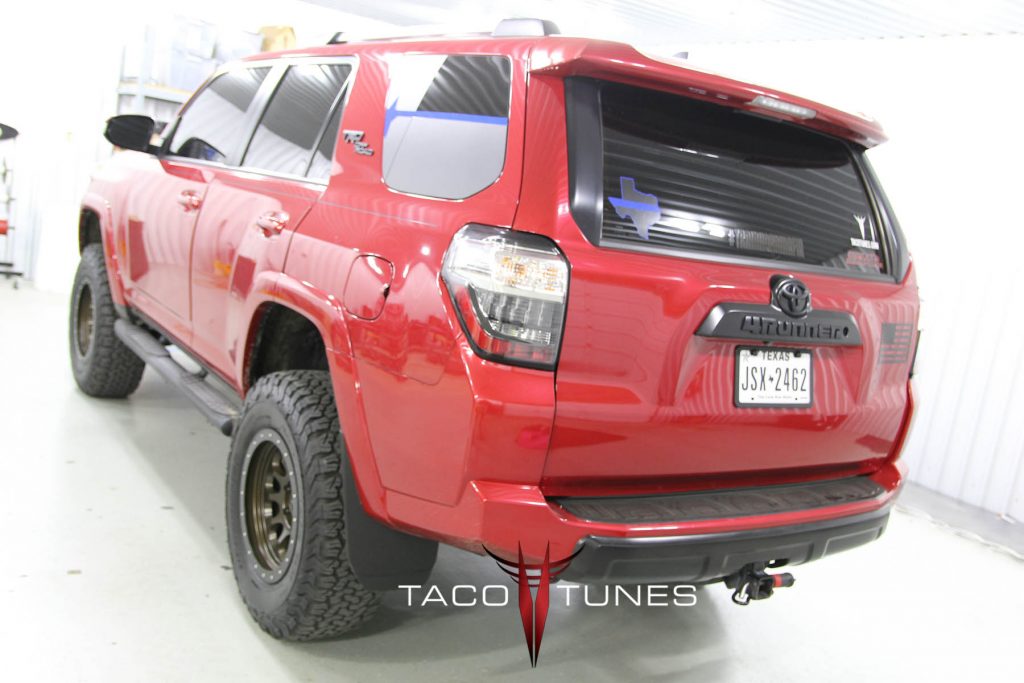
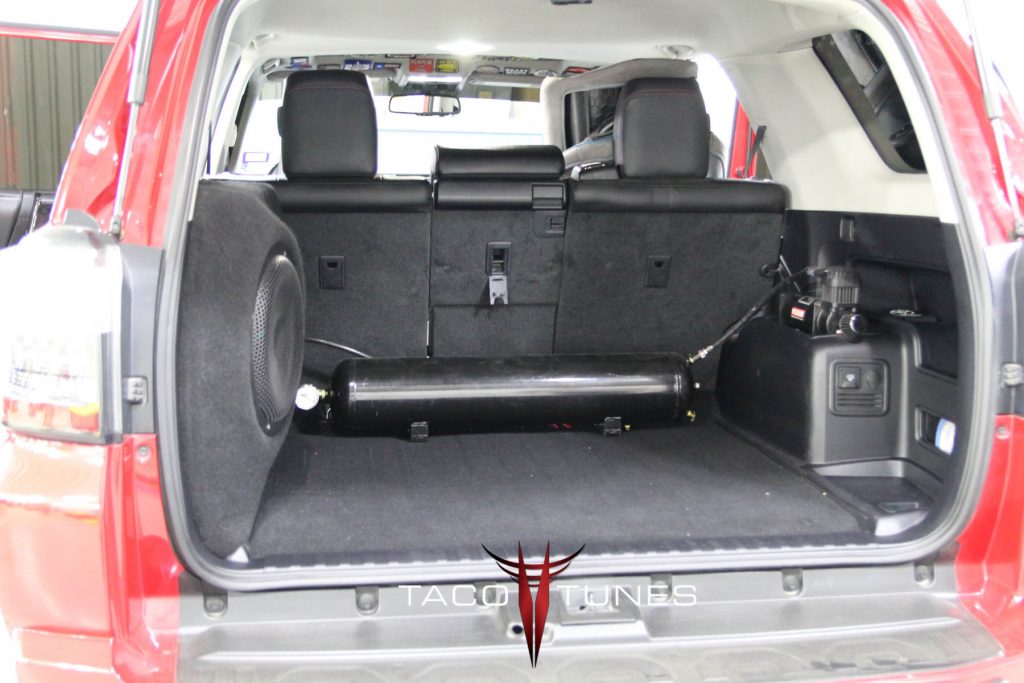
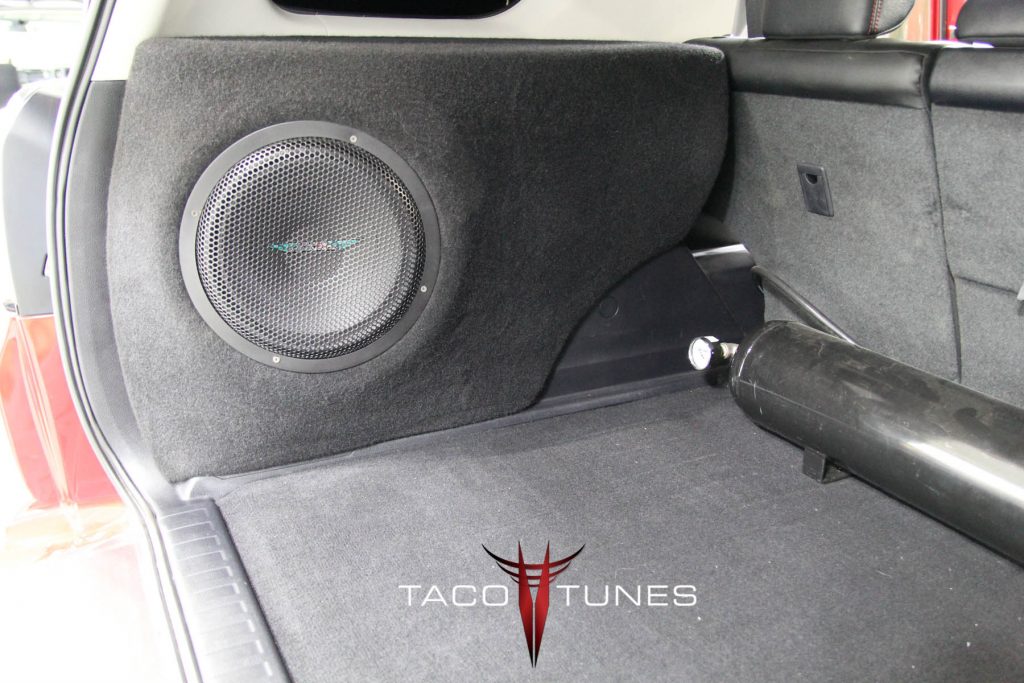
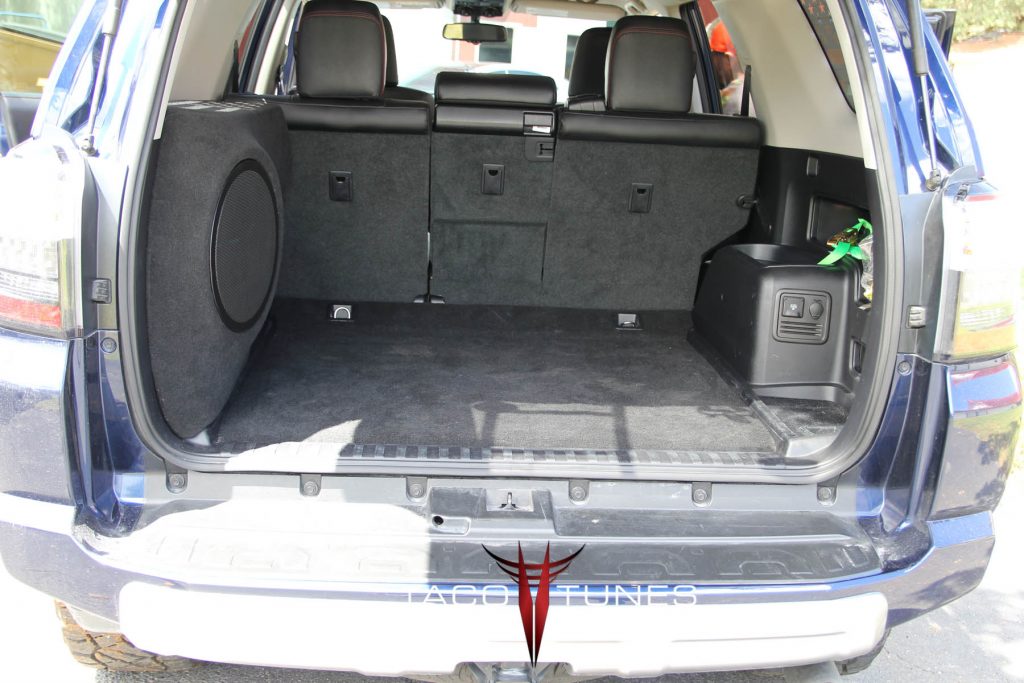
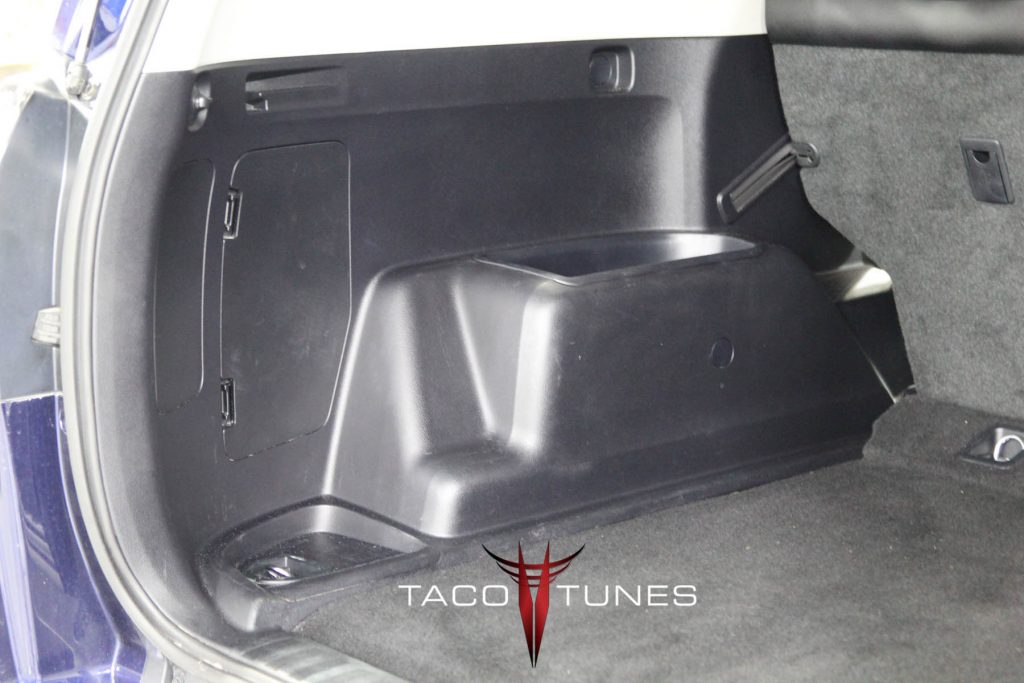
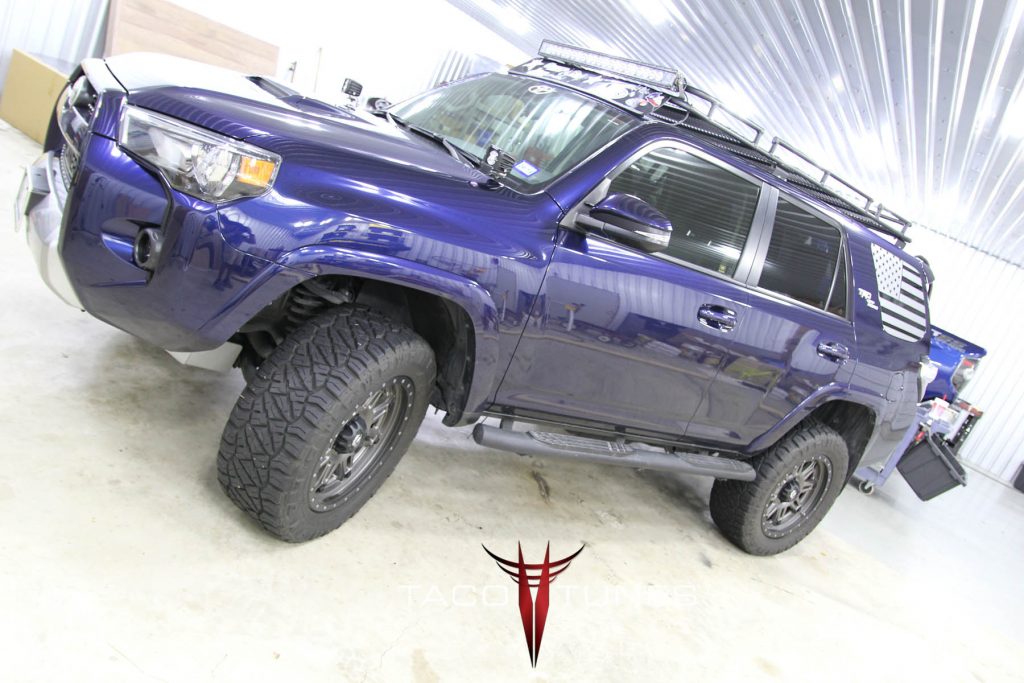
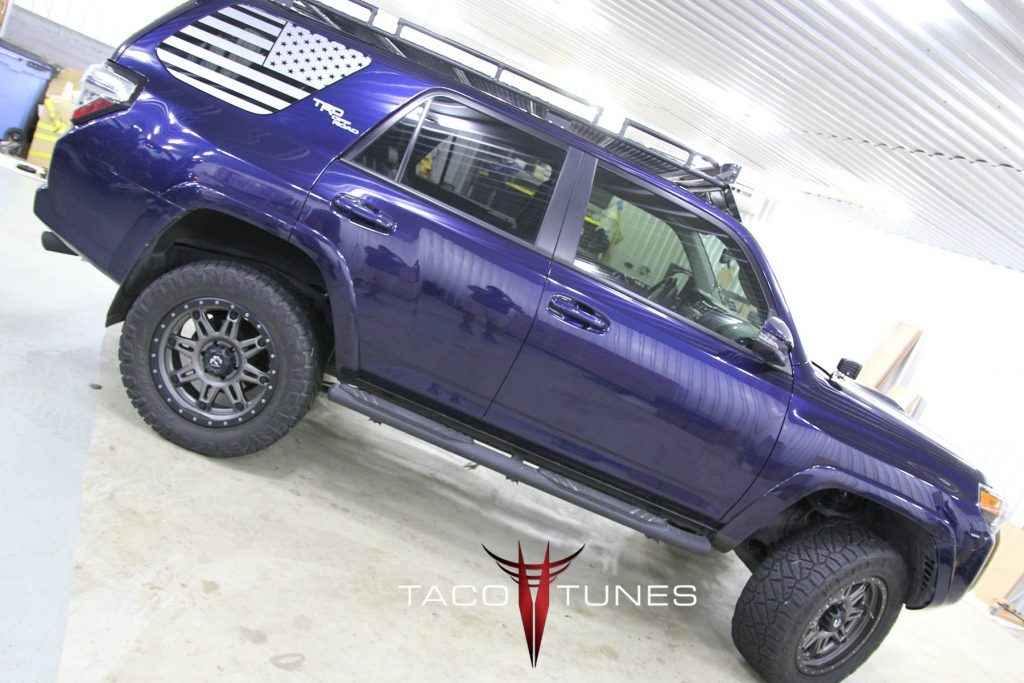
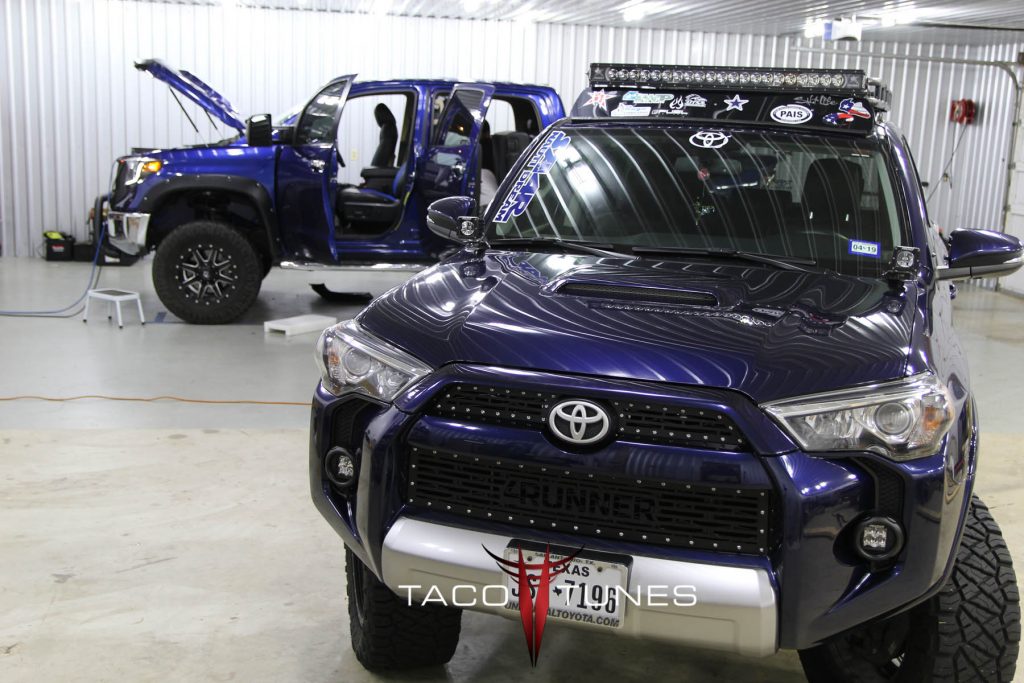
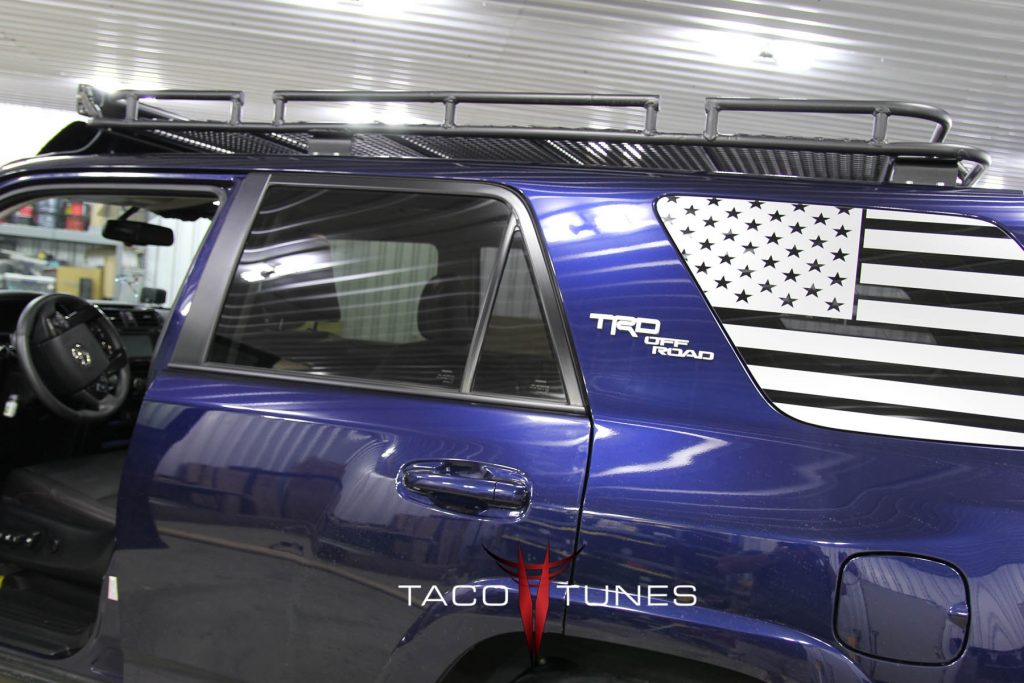
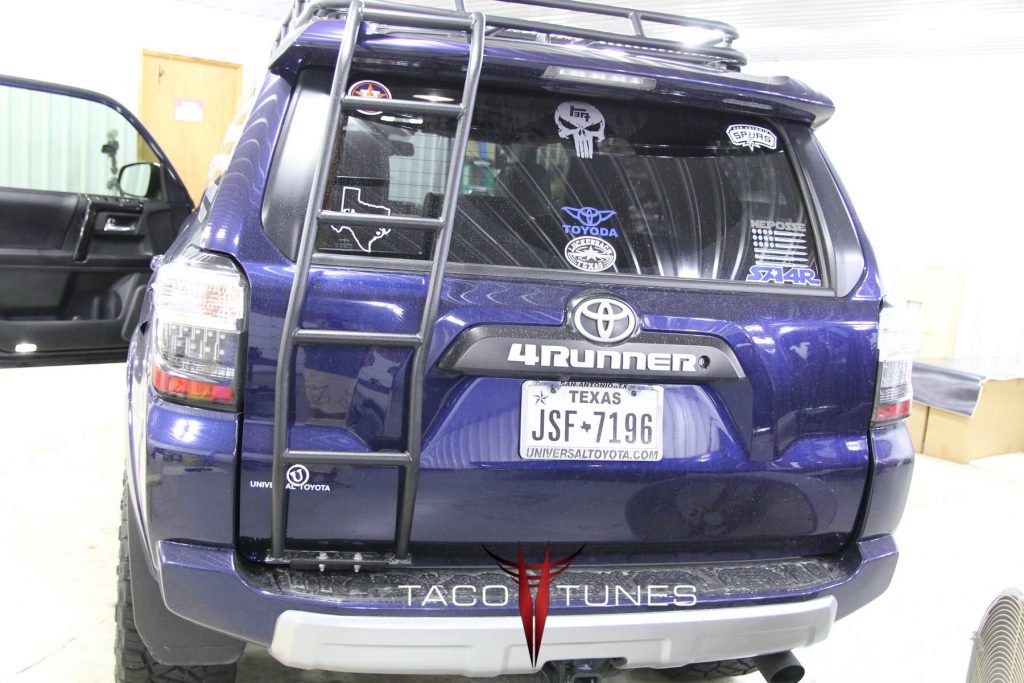
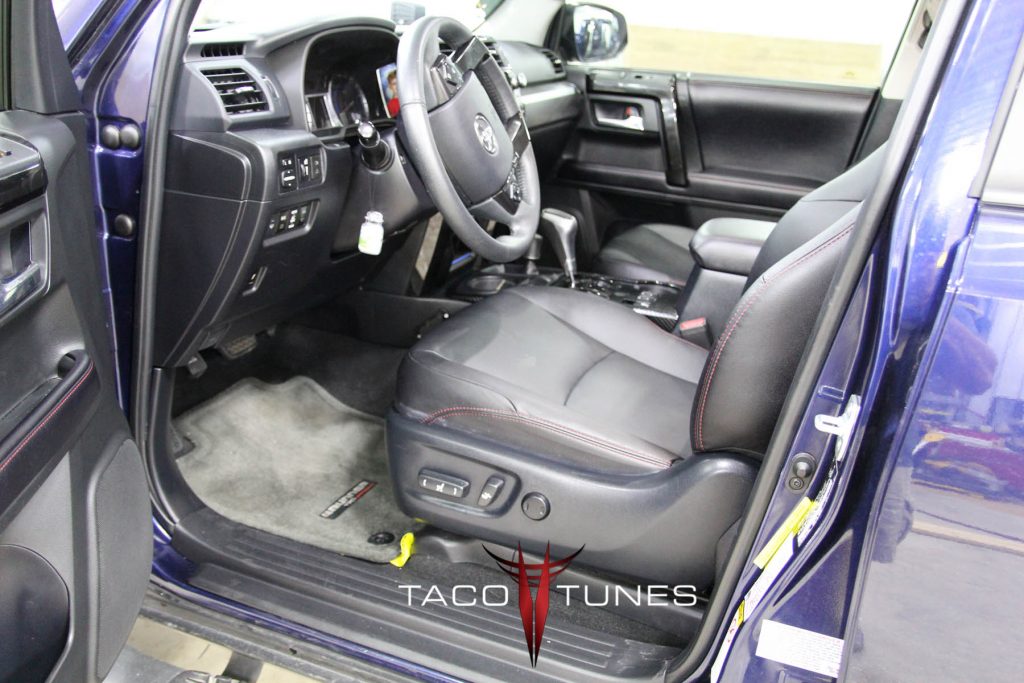
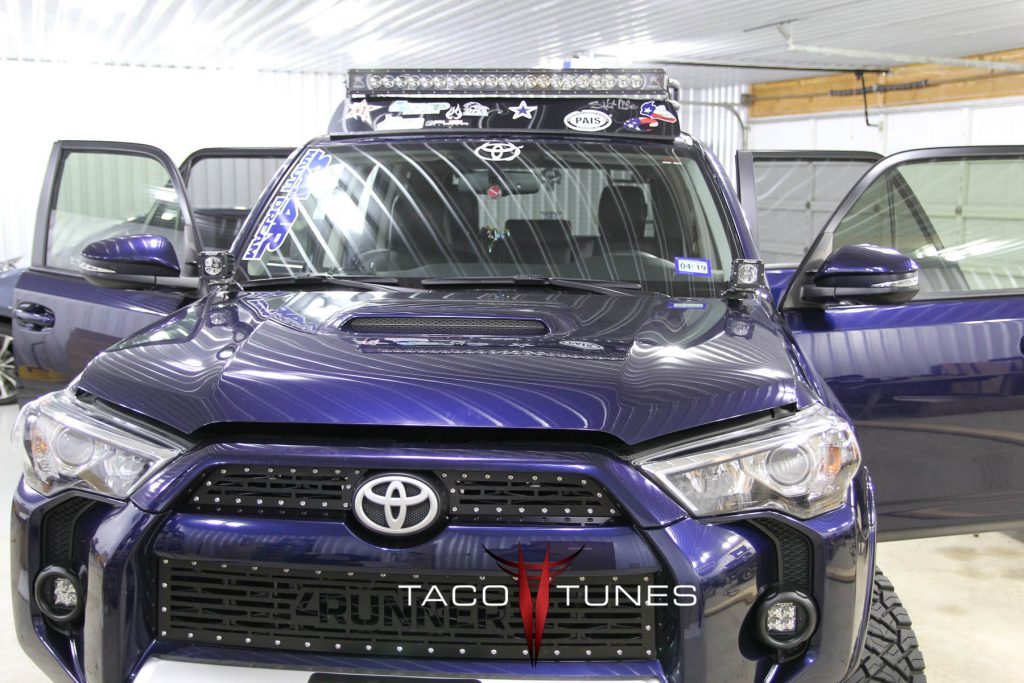
Kelley’s Toyota 4Runner – TRD Off Road Audio System Upgrade!
Installation Summary / History: Kelly is a local Toyota 4Runner owner here in San Antonio. She and her husband Arthur are members of San Antonio 4Runners.
Our plug and play amps provide amazing clarity and tons of power.
Toyota Year / Model: 2017 Toyota 4Runner TRD Off-Road
Following the instructions below is crucial to a successful installation. We recommend prepping the following items the day before you begin your installation. This will ensure all the parts are at your disposal. There are a couple of steps where it will help to have a buddy help you out. Not necessary but makes it easier. Do NOT start drinking your favorite beverage until recommend below. Plus be sure to keep your mind sharp. By getting the installation done right the first time you will enjoy years of quality sound in your Toyota Tundra. Shortcuts and rushing through the install will cause issues down the road. Take your time enjoy the install.
Assemble your amp rack, amplifier, distribution block etc. (see video below)
Watch installation videos to understand the process.
Get your six pack on ice. DO NOT OPEN until instructed! 🙂
Go over checklist and ensure all parts are in the package. We have a checklist that we do on EACH system. But we are human so it is possible a part was missed.
Installation: 3 – 5 hours
Preparation
UNPLUG YOUR BATTERY. Remove the NEGATIVE connection from the battery and secure it AWAY from battery.
Unplug battery – ground connection.
Remove the door panels – if you are installing new speakers Front / Rear.
Remove door sills.
Remove all 4 bolts front driver seat
Remove headunit.
Remove front / rear speakers.
Remove dash speakers speakers.
If you will be matting your doors we suggest doing this before you begin the steps below. Keep in mind matting will add a full day to your install.
Installation Steps:
Run power wire from battery to new amp location. (see video)
Assemble the fuse block and complete under hood details. (Do not connect to battery)
Run subwoofer wire to rear of vehicle per the installation video.
Install amps / amp rack per video. (do not connect speaker output connections)
Connect input side of amp first. (Blue molex plugs from direct connect harness)
Connect battery
Tune amplifiers per tuning video(s).
Install front / rear speakers.
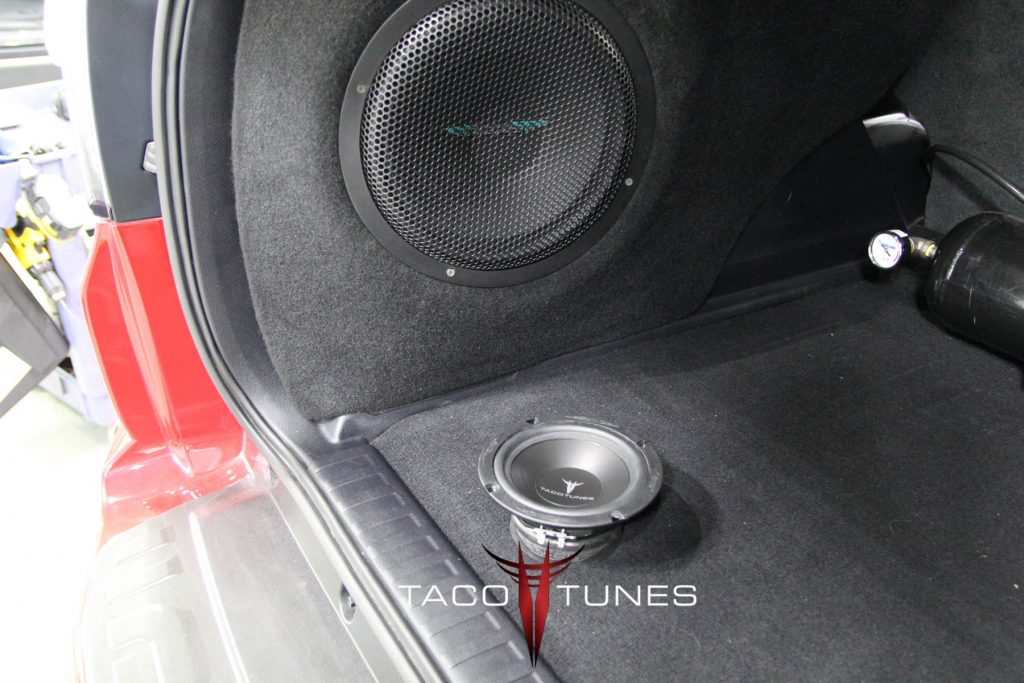
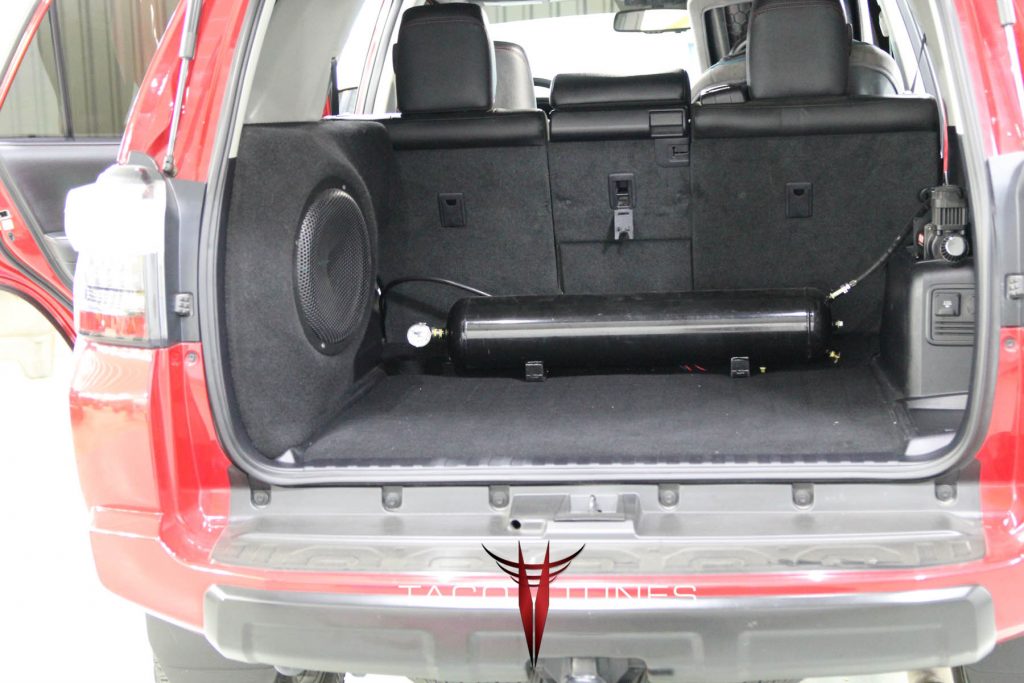
Install subwoofer.
Test system – ensure playing correctly.
disconnect battery.
Install center console.
Install seats BEFORE installing door panels and door sills. (battery should be unplugged)
Install door sills.
Install door panels.
Connect battery.
Test the sound and ensure all playing properly.
Open a single beverage, beat your chest and listen to your tunes for about 10 minutes.
Finish cleaning up odds and ends.
Be sure to save ALL stock parts.
Congratulations you just installed an audio system that would have cost thousands of $ at your local audio shop.
System 1 Install Videos:
Preparing for installation:
Assemble Amp Rack & 5 Channel Amp
How to remove head unit:
How to remove tweeters / dash speakers:
How to remove door panels:
How to remove front driver seat:
NOTE: YOU CAN LEAVE SEAT IN PLACE JUST LEAN IT BACKWARDS
Howdy Parters! We are currently sprucing up our ticket system to better serve you! If you need immediate assistance please text us at 210-472-0000. Dismiss